Tin Foil Constellations

Children love the glow of the stars, and here’s a beautiful way to bring that glow inside! This activity doubles as a quick lesson on constellations and a D.I.Y. nightlight.

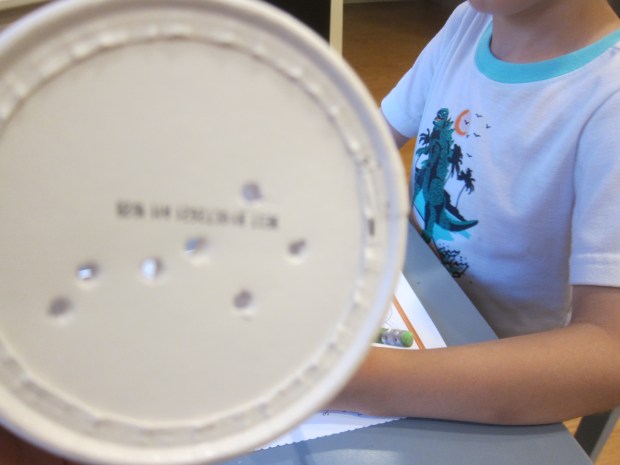
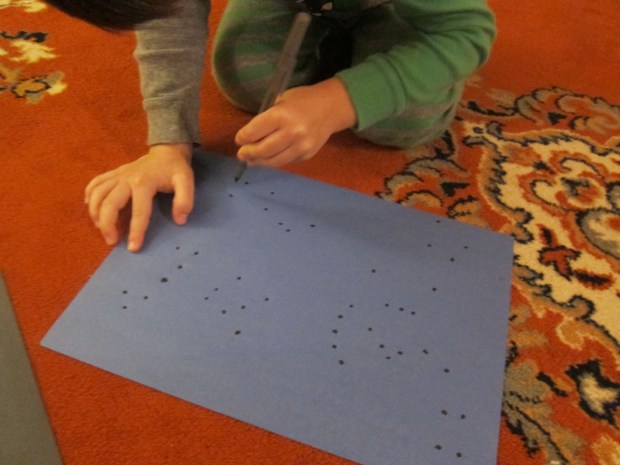
To start, I set out a sheet of tin foil and showed Veronika how to prick it with a toothpick to make dots. We did this step over a yoga mat, so the toothpicks wouldn’t scratch a tabletop or other surface; you could also place a sheet of felt underneath.

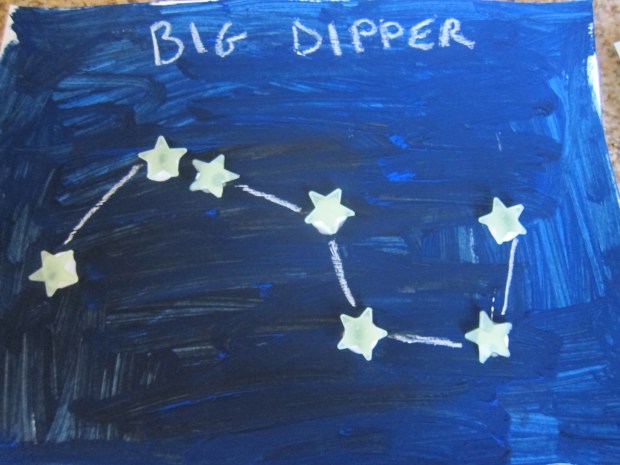
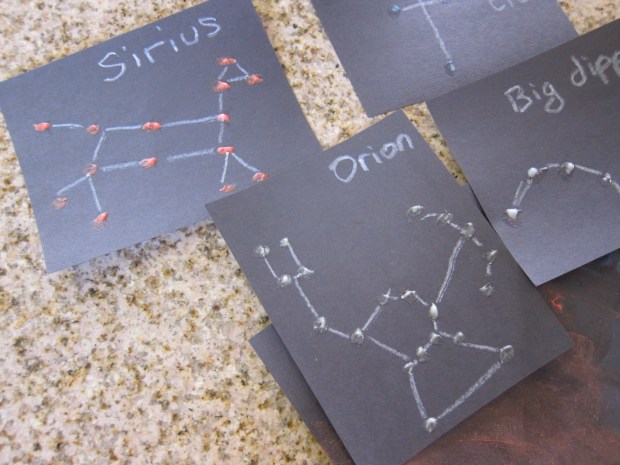
While she made holes at random, I made more deliberate constellation shapes, such as the Big Dipper. Older kids can follow along with pictures of real constellations, too. For a toddler, this was a great first chance to talk with Veronika about how some of the stars make shapes in the sky.

Next, we fit the dotted sheet of foil inside a mason jar. This was trickier than I thought, with the foil crumpling on the first round, so we quickly made a second sheet and inserted it more smoothly. It helps to make the holes a bit wider than the point of the toothpick, too, so they show up better.

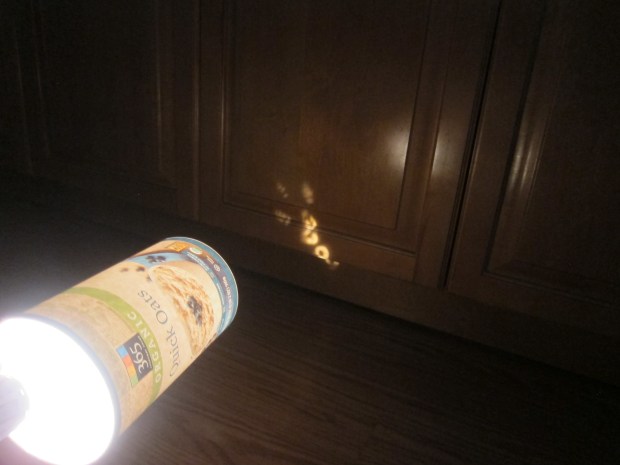
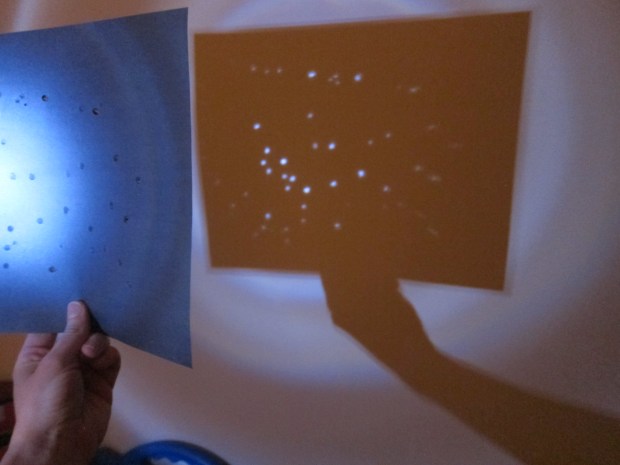
Finally, we needed to light up the night sky! Veronika helped turn on a tea light, which we then inserted into the jar.

She marveled at the twinkle as soon as we were in a darkened room! Even better, the stars will twinkle in her bedroom all night long.

Constellations

Constellations (1)

Who didn’t love staying up late as a kid to see the stars on summer nights? Tonight, Travis got to do just that, and to learn a little about constellations, too!

As night was falling, we fit in a refresher course on constellations, talking about what they are and then projecting a familiar one (The Big Dipper) against the wall. For this, simply poke holes in the constellation’s pattern in the bottom of an empty oatmeal container with a pen or pencil. Shine a flashlight into the container, and your stars appear!

Constellations (2)

Now it was almost dark enough, but still not quite. I challenged Travis to make up his own constellation, to name it, and then to make up a story about it. The idea was to highlight the long tradition of oral folklore that accompanies the patterns in the stars, among so many cultures.

Constellations (3)

After my example of a cat constellation, he drew a dot-to-dot boy and we wove a tale of how the boy had ended up in the stars. Next he drew a smile! I loved this childlike but beautiful idea of what images we can see among the stars.

Constellations (4)

Now it was time to spot the real thing. We headed out to the back patio and waited for final dark to fall. And then it was right to bed!

Constellations (5)

Sidewalk Constellations and Mini-Books

Sidewalk Constellation(5).JPG

It was a beautiful morning for sidewalk chalk art, and to add purpose to Travis’s art, I decided to throw in a little STEM learning, too!

We headed outside with our book of constellations, and I challenged him to lay out shells (rocks would work well, too) to represent each star in the pictures. We started with the Big Dipper.

Sidewalk Constellation (6)

Could he now connect the lines, following along with the picture in our book? This was a bit of a challenge for Travis, who had to consult the picture between each line, but he ended up with a great dipper.

Sidewalk Constellation (7)

The Southern Cross was next. He loved using big shells for two of the stars, and had an a-ha moment when he figured out which way he should draw his chalk lines.

Sidewalk Constellation (8)

Then we got silly and made up new constellations. I let his imagination run wild, and soon we had a snake constellation:

Sidewalk Constellation (1)

And a ninja constellation:

Sidewalk Constellation (9)

Make sure you take pictures of all your artwork before you head inside! I then had these printed so we could put them into a booklet.

Sidewalk Constellation(3)

Add one picture per page, along with a fact or two about that constellation.

Sidewalk Constellation (b)

We left a page blank, for future imaginative additions!

Sidewalk Constellation (c)

These mini-books will serve both as a memory capsule of your day and for storytime down the road.

Sidewalk Constellation (d)

Starry Night Constellations


starry night (4)

Our star-themed fun continues, here in the dark days of winter. January is a great time of year to talk with little ones about stars, because the sky gets dark so early; in the summer, it’s still light when Travis goes to bed, and he hardly ever gets a chance to star gaze!

Tonight, we had flashlight fun with some of our now-familiar constellation forms. Ahead of time, I used permanent marker to make a dot for each star on construction paper, making the shapes of favorites like Orion, Canis Major, the Big Dipper, and the Southern Cross.

starry night (1)

Now it was up to Travis to punch out the holes, using a pen (or a sharp pencil would work).

starry night (2)

I was quite impressed with how exact he managed to be, puncturing the paper only where I’d made dots. He loved the challenge!

starry night (3)

Now stand in a dark room, and shine a flashlight through the holes onto the wall. Voila, you’ll see the starry sky suspended before you! Travis loved being the one to hold the flashlight, and line up the beam so a particular constellation appeared.

starry night (5)

Indeed, he loved it so much he had to punch holes all over a second sheet of paper. Now it looked like the Milky Way was flooding our wall with stars!

starry night (8)


Map the Stars

Map the Sky (3).JPG

Travis has been a bit afraid of the dark lately, and we’re working on making his room feel safe at night. These glowing star pictures were the perfect activity to make the dark less scary!

First, we needed to paint backgrounds for a night sky, on sturdy watercolor paper. I suggested a mix of blue and black, but Travis insisted on using only black for his backdrop. “Because I made it too late, Mom! It’s not twilight, it’s pitch black.” I couldn’t argue with that!

map the sky (1)

We left our backdrops to dry while he was at school. When he returned, I set up a page from Usborne’s Big Book of Stars and Planets showing constellations. We selected Orion, and I had him count the stars in each portion (the belt, the shoulders) as I added a drop of glue for each.

Affix a glow-in-the-dark star to correspond to each point.

map the sky (2)

To finish each picture, we drew lines in white chalk connecting the stars.

map the sky (4)

Now we had beautiful starry pictures for his wall! Make sure to leave a bright light source near the pictures until just before bedtime, then turn them off and watch the room glow.

map the sky (5)

Edible Constellations

Edible Constellations (4)

Travis and I put together this super smart snack on the heels of fun starry night exploration. Your kids get a sweet treat plus an astrology lesson – a win-win!

Using Dandies mini marshmallows and pretzel sticks, we mapped out what the Big Dipper would look like. Attach 1 marshmallow to the end of a pretzel stick for each star.

Edible Constellations (2)

Repeat three times to make a square.

Edible Constellations (3)

Stick a fourth “star” into the marshmallow at the upper right corner to begin the Dipper’s tail.

Break a pretzel stick in half, and add two smaller pieces of pretzel + marshamllow to complete the constellation.

Travis watched as I tested out a couple of others, too, including Cassiopeia (the Queen)…

Edible Constellations (5)

… and Cepheus (the King). These didn’t last long before they were gobbled up!

Edible Constellations (6)

I noticed he wasn’t eating the Big Dipper, and asked if he wanted more of his snack. He said he didn’t want to ruin our constellation!

If your kids want to get even more creative, test out Cygnus (the Swan) or Canis Major, too.

Edible Constellations (7)

Travis wanted to know if we could make Orion (which he calls Bow Hunter), next, and I was so proud he remembered that constellation without any prompting.

Edible Constellations (1)

Happy snacking!

Create Your Own Constellation

Constellations (8)

Late summer nights are the perfect chance to star gaze, look for shooting stars, and teach your kids a little about the constellations (although my own knowledge pretty much ends at the Big Dipper and Orion!).

We took the fun inside the next day with this cute idea from High Five magazine, using some recent rocks from a day of collecting at the beach. Wash and dry your rocks before beginning.

Constellations (2)

Paint the rocks black, and let dry completely.

Constellations (3)

Once dry, we painted on white stars. Although Travis didn’t quite master the shape of a star, it was fun to teach him how to draw one.

Constellations (4)

We let the white paint dry, then added a layer of glow-in-the-dark puffy paint.

Constellations (6)

Leave your rocks in the sun to activate the paint.

Constellations (7)

At night, move your rocks to the darkest spot in your house (that meant our bathroom, away from any windows!) to see them glow. I encouraged Travis to arrange them in fun shapes and make his own constellation.

Constellations (9)

A cute new way to “star gaze.”

Glow-in-the-Dark Constellation Cards

Constellation Cards (6).JPG

This project is such a neat update on simply sticking glow-in-the-dark stars on your child’s wall or ceiling as décor. Turn it into a mini astrology lesson – as well as an art project! – and you have homemade constellations.

First, we needed to find images of constellations as inspiration. I’m no artist, so relied heavily on the ones we found in our Usborne Book Big Book of Stars and Planets.

Constellation Cards (1)

Set out dark paper and glow-in-the-dark paint and recreate the star patterns. Older kids can draw the outlines and stars themselves. Younger kids may be happier filling in the dots if you draw circles where the stars go first.

Constellation Cards (3)

In fact, Travis was happy painting his own invented “constellation” while I did the more meticulous detail of recreating what was in the book – just fine for a three year old!

Constellation Cards (4)

A couple pointers: If you have dark cardstock instead of construction paper, use that. The paint will show up better. If you’re relegated to porous construction paper like we were, make sure your star dots are quite thick, or the paint won’t show up once it’s lights out.

Constellation Cards (2)

We let the paint dry, then I connected the stars with white crayon. I added the name of each constellation in crayon as well.

Constellation Cards (5)

Note: If you prefer, you can also paint the lines between stars with glow-in-the-dark paint, but I liked the idea that Travis would see just the stars in the dark, and the constellation lines by day.

Next up was mounting the cards on the ceiling – uh oh, could mama reach that high? Thanks to a stool, she could! I positioned them directly above the lamp in Travis’s bedroom so they could “charge.”

Constellation Cards (7)

At lights out, we saw the best starry night sky! My camera could barely capture it, but do you see the glow?

Constellation Cards (8)