Christmas Candy Jar

Mason Jar Santa (2).JPG

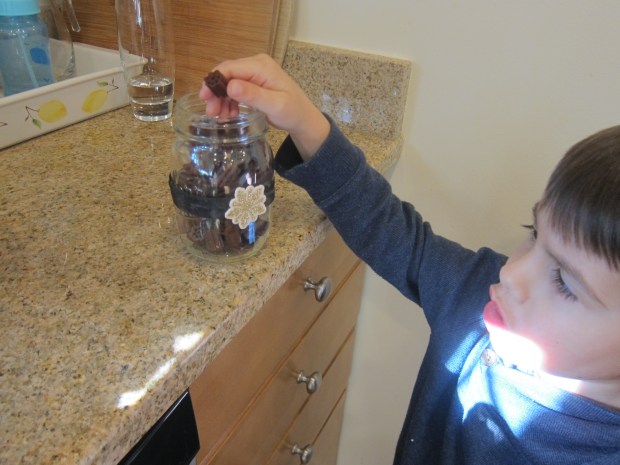
The Christmas countdown has begun! Delight your family with this quick candy jar; guaranteed they’ll be nibbling from it all holiday season.

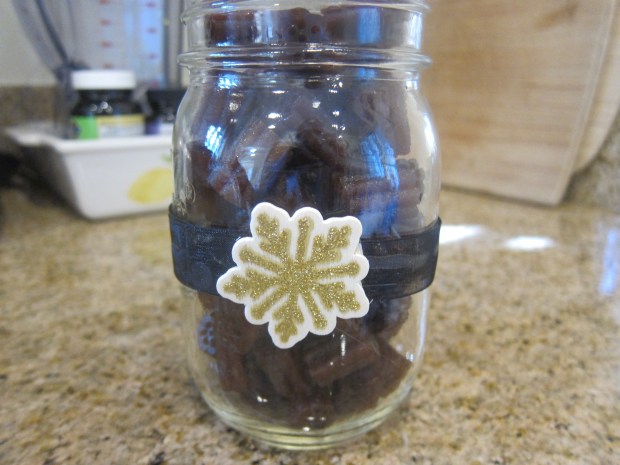
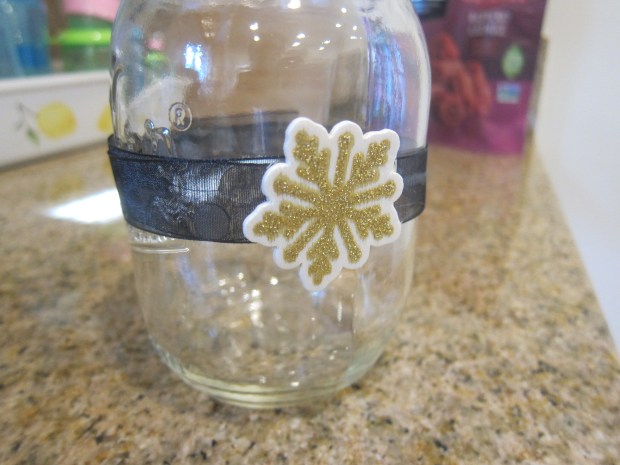
I hot-glued a black ribbon (meant to mimic Santa’s belt) around a mason jar. I added a pretty snowflake decal in the center, but if you want it to look even more like Santa, use a gold buckle!

Mason Jar Santa (1)

Now fill the jar with red or green candies. Red licorice were a dark, Holly berry-colored option.

Mason Jar Santa (3)

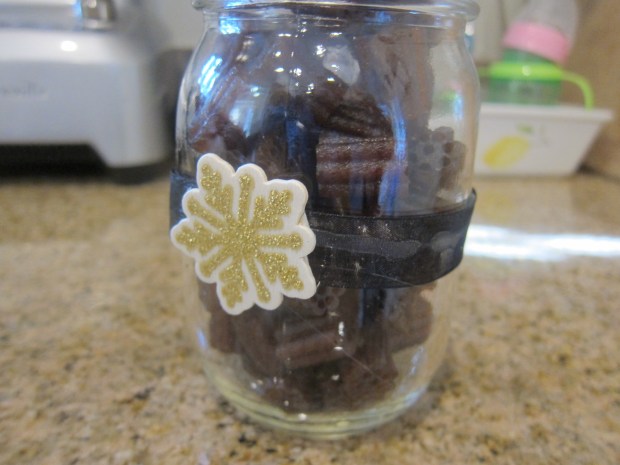
I plan to find brighter red candies later in the month so it looks like Santa’s big coat! But meanwhile there were no complaints from my happy nibblers.

Mason Jar Santa (4)

Advertisement

Write a Letter to Santa

Letter to Santa (5)

Christmas is 25 days away, and if you want to start the holiday off on a magical note for your kids, consider having them write to Santa!

Travis and I sat down with paper and markers (in red and green of course), and talked through his list.

Letter to Santa (2)

I helped him sound out and spell each item, which was great handwriting practice, too.

Letter to Santa (4)

His list included current favorites like Star Wars figures (Boba Fett, Kylo Ren) and a winter vest.

To make the letter truly special requires a little parental trickery. Write back a letter from Santa in response to your child. I used markers to disguise my handwriting.

Letter to Santa (3)

Now seal both letters in an envelope addressed to your child, and mark the return address as “Santa, The North Pole.” Don’t forget a stamp! Place this inside a larger envelope, addressed to the following:

NORTH POLE POSTMARK
POSTMASTER
4141 POSTMARK DR
ANCHORAGE AK 99530-9998

In return, you’ll receive a true North Pole postmark on the return letter from “Santa”. USPS recommends mailing by December 7. So make those lists and check them twice!

Blanket Waves

Bounce Blanket (2)

Looking for instant entertainment with a one-year-old? All you need is one soft blanket and there’s fun to be had. As a bonus: this one-item game is perfect when traveling!

I sat down holding one edge of a small blanket, with Veronika on the other side. At first, she wasn’t holding on, but I demonstrated how to shake the blanket.

Bounce Blanket (1)

Say or sing funny rhymes as you go. First I chanted, “shaaaaaake and… stop!” This got huge laughter.

Bounce Blanket (4)

Then I started saying, “fastfastfastfast and slooow slooow slooow.” Again, I was rewarded with big grins, and now she picked up her edge of the blanket and wanted to join in.

Bounce Blanket (3)

We did lots more shaking, plus waving it up and down as I sang silly song verses. You can also play little games of a peekaboo. So grab a blanket and play along!

Thanksgiving Table Decorations

Decorate Table (4).JPG

Just a quick post tonight on some holiday decor from our table this year! Travis got to help out in a few ways.

For starters, we colored in the place cards that came with his Thanksgiving Table Raddish Kids.

Decorate the Table (1)

These were good practice for writing names of family members, too!

Decorate Table (1)

He also helped with the centerpiece, helping to arrange a few decorative gourds next to a bouquet of flowers.

Decorate Table (2)

You can also show your child how to fold napkins into “turkey feathers”. Accordion-pleat cloth napkins and arrange on every plate.

Decorate Table (3)

Finally, no vegan table is complete without a celebratory roast.

Decorate Table (5)

We named our roast Hank Williams after the turkey we adopted from Farm Sanctuary this year. Here’s wishing everyone a Happy Thanksgiving!

Spinach-Artichoke Dip


Spinach Artichoke Dip (3).JPG

Get your Thanksgiving off to a warm note with this creamy dip!

Ingredients:

  • 12 ounces silken tofu
  • 2 (14-ounce) cans artichoke hearts, drained
  • 10 ounces frozen spinach, thawed
  • 2 tablespoons olive oil
  • 1 yellow onion, chopped
  • 3 garlic cloves, minced
  • 8 ounces non-dairy cream cheese
  1. Combine the tofu, artichokes, and spinach in a blender; process until smooth.
  2. Meanwhile, heat the olive oil in a large skillet over medium heat. Add the onion and garlic and cook for 4 minutes. Stir in the artichoke mixture and the cream cheese, cooking until the cream cheese melts.
  3. Spoon the mixture into a 2-quart baking dish and bake at 350 degrees F for 20 minutes.
  4. Serve with your favorite crackers!

Spinach Artichoke Dip (2)

This one was even toddler-approved!

Spinach Artichoke Dip (4)


Crumb Writing

Crumb Writing (2)

If you have an older child who is practicing their letters or doing homework, it can be tough occupy a baby or toddler at that time. So here’s a solution: Let your little one practice “writing” too… In crumbs!

I ground up cocoa rice crisp cereal for this activity, but you could also make fine crumbs from baby crackers or cookies, or even use leftover baby rice cereal that is already a fine meal. Either way, pour a generous amount onto the high chair tray.

Crumb Writing (1)

I showed Veronika how to make letters first, followed by shapes.

Crumb Writing (3)

Her curious fingers were soon making trails through my marks, and then branching out to make her own squiggles through the crumbs.

Crumb Writing (4)

She loved swishing the crumbs side to side, and of course watching them splatter to the ground. Just have a dust pan ready nearby for a quick clean up!

Crumb Writing (5)

Box of Socks


Box of Socks (4)

“Socks” was one of Veronika’s first words. She not only loves saying it, she loves putting them on (and pulling them off), and so it seemed only natural to turn them into a toy during a morning spent playing at home!

I gathered up a whole bunch of socks, including some of her own, some from big brother, and some of mommy’s.

Box of Socks (6)

First I simply showed her how to toss the socks into a little basket. Then I gathered them all into my arms and let them shower down on her. Whee!

Box of Socks (8)

She immediately tried to imitate the move.

Box of Socks (9)

I wadded up each pair of socks so they formed a ball, and then we had even more fun with them.

Box of Socks (1)

We could bowl towards little plastic animals…

Box of Socks (2)

…or take turns tossing them in the basket.

Box of Socks (7)

She briefly tied to put one on her own foot..

Box of Socks (10)

…but then preferred wearing one of mommy’s long socks as a scarf. She was so proud!

Box of Socks (3)

She returned to the little basket of socks over the course of the whole day, making this toy a big winner in my book.

Mashed Potatoes & Parsnips with Easy Gravy

Mashed Po Gravy (2)

This will be Veronika’s first Thanksgiving eating solid food (last year she was only 1 month old!). This easy mashed potato recipe will be perfect for her holiday table; it’s mild enough for toddlers, but yummy enough to please older kids or grown-ups, too.

Ingredients:

For the potatoes:

  • 4 yellow potatoes
  • 2 parsnips
  • 1 tablespoon olive oil
  • 1/4 teaspoon salt

For the gravy:

  • 1 cup + 2 tablespoons hot water, divided
  • 1 vegetable bouillon cube
  • 2 teaspoons soy sauce
  • 1/4 teaspoon poultry seasoning
  • 1 tablespoon cornstarch
  1. To prepare the potatoes, peel and chop the potatoes and parsnips and place in a saucepan. Cover with water and bring to a boil; continue to cook for 15 minutes, until tender.
  2. Drain, reserving the cooking liquid, and return to the pan. Add the olive oil and salt and mash with a potato masher to desired consistency, adding enough reserved cooking liquid as desired for the consistency your toddler likes.
  3. Meanwhile, prepare the gravy: dissolve the bouillon cube in 1 cup hot water. Whisk in the soy sauce and poultry seasoning.
  4. In a small bowl, whisk together the cornstarch and remaining 2 tablespoons water. Add the cornstarch mixture to the broth mixture, whisking until combined and thickened.
  5. Serve the gravy over the mashed potatoes, and wherever else it would be yummy at your holiday table!

Mashed Po Gravy (1)

Vegan Pumpkin Pie

Pumpkin Pie (3)

Thanksgiving is two days away, and today was baking day. This pumpkin pie is a crowd-pleaser, whether your guests are vegan or not. Kinnikinnick graham crackers are vegan and gluten-free, which helps if you’re juggling a variety of dietary needs over the holidays. If you use another brand, you may need a different number of crackers.

Ingredients:

  • 10 graham crackers
  • 2 tablespoons brown sugar
  • 6 tablespoons melted Earth Balance butter
  • 8 ounces silken tofu
  • 1 (15-ounce) can pumpkin
  • 1/2 cup maple syrup
  • 1 tablespoon cornstarch
  • 1 tablespoon pumpkin pie spice
  • 2 teaspoons vanilla extract
  • 1/4 teaspoon sea salt
  1. To prepare the crust, combine the graham crackers and brown sugar in a blender; process until you have fine crumbs. Add the melted butter and pulse to combine.
  2. Use your fingers to press the mixture into the bottom and up the sides of a 9-inch pie plate.  Bake at 350 degrees F for 8 minutes. Let cool at least 10 minutes.Pumpkin Pie (1)
  3. Meanwhile, prepare the filling: In a blender, combine the silken tofu, pumpkin, maple syrup, cornstarch, pumpkin pie spice, and vanilla. Process until smooth. Spoon into the prepared crust and bake at 350 degrees F for 40 minutes, until set.
  4. Let cool on a wire rack for 2 hours, then transfer to the fridge and chill at least 4 hours.
  5. Serve plain, or topped with your favorite non-dairy whipped cream!

Pumpkin Pie (2)

Travis loved the idea that this pie was made from pumpkins, even though we used canned puree and not a cute little sugar pie pumpkin.  But it led us on a fun harvest vegetable hunt at the grocery store, including all kinds of knobby squashes and root veggies like potatoes and parsnips.

Harvest Scavenger (1).jpg

What’s on your harvest table for Thanksgiving this year? Please share in the comments!

Harvest Scavenger (3)


Spectroscope

Spectroscope (5).JPG

This quick project was a neat follow up to Travis’s exploration with his Rainbow Optics Crate. And to make it, we even got to upcycle the box from Kiwi Co.!

Cut any extra flaps from the box, including those that fold in to the sides and front. Tape a blank CD to the inside of one short end, flush against the back wall. Make sure your box can close!

Spectroscope (1)

Trace around the end of a paper towel tube twice, in overlapping circles, so you have an opening that’s about 1 and 1/2 times as wide as the tube. Insert the tube at an angle, looking towards the CD.

Spectroscope (2)

Also cut a slit on the short edge directly opposite the CD, to let in light. Tape up any other edges where light might slip in.

Spectroscope (3)

Now take a peak inside! We found this worked best when we shined a flashlight directly into our slit. One person can shine the light while the other person makes sure the tube is aimed properly at the CD; you’ll see the spectrum of the rainbow appear.

Spectroscope (4)

You can also try this with other light sources, including sunlight, and see which one works best!