Skin-to-Skin

Skin to Skin (4)

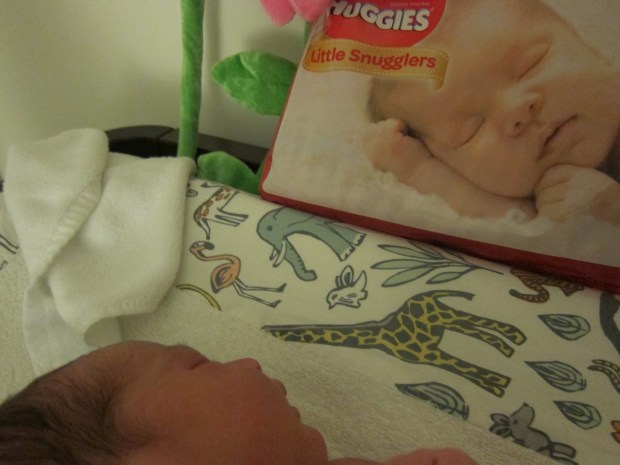
One of the first things I longed to do once home from the hospital with my daughter was nestle somewhere skin-to-skin. Or why wait, as this is an activity you could even do while still in your hospital stay, especially if there for a few days. In fact studies have shown that skin-to-skin contact can reduce hormones that lead to stress, lower a mom’s risk of postpartum mood disorders, improves a baby’s physical well-being, and promote bonding.

At home, find some place comfy and get your baby down to nothing but a diaper. Lay him or her on your bare chest, being sure to cover with a blanket if the room is chilly.

Skin to Skin (2)

You’ll be amazed at every bit of this simple activity – the way a newborn’s skin feels like velvet, the way they instantly nestle into you as if they were born understanding how to do this (hey, I guess they were!), the way both of your heart beat’s slow. Make sure both mom and dad get in on the action!

Skin to Skin (3)

It’s also a fantastic opportunity for tummy time, even before the umbilical stump falls off. Chances are you won’t want the skin-to-skin to end.

Diaper Time Language

DIaper 1 (3)

Introducing to the world… Veronika! Our daughter joined the family just a few days ago, and I’m eager to share our joyful journey together alongside the adventures with my son.

Infant “games” are simpler than those previously posted to Joyful Parenting, but no less important. To wit, don’t be disappointed it, in the first few days home with your baby, you learn that at first they are going to do three things on repeat: Eat, sleep, need a diaper change.

That means lots of time spent at the diaper table, but instead of regarding the task as drudgery (or disgusting – meconium, anyone?), use the time to your advantage.

It’s never too early to introduce language to your child, and more than just vocab words. Of course you can point out items as you use them – diaper, wipes. But even more so, talk in full sentences. Baby’s love “baby-ese” yes, but talking to them with big grown-up syntax helps, too.

Diaper 1 (1)

So as you diaper, become like a film narrator. “This is your new diaper.” “Thank you for holding still, that helps me put on your new one!” “Now we’re using a wipe.”

Infants are likely to fuss during a change, so here’s hoping that this simple “game” calms them down.

Watercolor Resist Painting

Watercolor Resist (8).JPG

Our recent Cityscape crate from Koala Crate reminded me of the beauty of resist painting, which we haven’t done in quite some time. That was the inspiration for this beautiful ocean-themed project!

No need to have strong artistic skills; I printed a template for our sea creatures and traced each one onto contact paper.

Watercolor Resist (1)

Cut out and attach each animal to a piece of watercolor paper.

Watercolor Resist (2)

We talked about ocean colors as we added watercolors, which had Travis proudly concentrating on blues, purples, and greens.

Watercolor Resist (4)

It was an interesting lesson that the watercolor wouldn’t spread across the plastic surface of the contact paper!

Watercolor Resist (3)

If your child tires of painting before the entire paper is covered, that’s fine; just be sure the watercolors reach all the edges of the animal shape.

Watercolor Resist (6)

Let dry, then peel off for the big reveal. Wow!

Watercolor Resist (7)

Snack Cup Jellyfish

Snack Jellyfish (6).JPG

Travis currently adores any animal with lots of long legs, be it the eight-legged octopus or the many tentacles of the jellyfish, so I knew he’d love this simple. fun craft. It’s the perfect way to make use of canned fruit or applesauce cups once your snack cup is empty!

Snack Jellyfish (1)

We rinsed the snack cups, and then covered with a layer of glue.

Snack Jellyfish (2)

I gave him squares of red and orange crepe paper (tissue paper would work, too), and we layered them until our jellyfish bodies were covered. Let dry.

Snack Jellyfish (3)

His favorite part was adding the tentacles, carefully applying a dot of glue on the inside of the cup where each should go, and attaching a long ribbon of crepe paper.

Snack Jellyfish (4)

Add two eyes to the body of the jellyfish, and let dry again.

Snack Jellyfish (5)

Finally – time to play with Mr. Jellyfish! These are wiggly and wonderful to “swim” around your home.

Snack Jellyfish (7)

If you prefer to use them more as decoration, poke a small hole in the top of the snack cup and thread through a string. Hang near an open window or air vent where you can watch them sway.

Building Sticks

Building Sticks (3)

This project is so simple and yet so great for engaging minds and hands. If you like, you could even throw together a travel set to take these on long car rides!

All you need are Velcro dots and craft sticks – plain wood will do, but for added fun, I like the pre-colored craft sticks for this purpose.

When we first set up the game, I only had enough Velcro for one side of each stick. I intended to buy more Velcro in the morning, but this didn’t stop Travis from wanting to build right away.

Building Sticks (2)

Soon he was making “wands” and “books.” He came up with the idea of using tape himself, to put together some more complicated structures (a teepee!)

Building Sticks (5)

Once we actually had enough Velcro the next day, we made sure each stick had a dot on each end. This enabled much more complicated structures.

Building Sticks (7)

It was still hard to build up (for that you’d need Velcro on both back and front of each stick), but we soon had long complicated structures moving across the carpet.

BUilding Sticks (8)

Travis declared these were machines, and enjoyed the challenge of making sure he was attaching the “fluffy” side of the Velcro to the “scratchy” side.

Building Sticks (9)

A simple activity to keep hands busy!

Pretzel Log Cabin

Pretzel Cabin (6)

We’ve been enjoying a great book recently about Abraham Lincoln (from the Ordinary People Change the World series written by Brad Meltzer), which prompted talk about a log cabin. You can introduce your child to this style of architecture through classic toys like Lincoln Logs of course, but even more fun was putting together this edible version!

To construct the cabin, you need thick pretzel rods and your frosting of choice – we like the vegan vanilla from Wholesome Sweeteners.

Start out with a base, using the frosting as “glue” to attach the four corners.

Pretzel Cabin (1)

Travis loved smearing on the frosting with a plastic knife, but your child may find that a makeshift pastry bag (i.e. a zip-top bag with a hole snipped in it) is easier.

Pretzel Cabin (2)

From there, we spread our pretzels with more frosting (“cement”), and built up several layers.

Pretzel Cabin (3)

A little carpenter at work!

Pretzel Cabin (5)

It was tough to make the roof stay in the way we originally planned; if you have chocolate at home, it may be useful to melt some and use that to adhere two pretzel rods diagonally together. We managed to balance ours with generous globs of frosting, though it wasn’t particularly sturdy.

Pretzel Cabin (7)

Luckily, the cabin was meant to be eaten, not saved – what a fun snack!

If you make this craft in the wintertime, your child may want to sprinkle the structure with coconut “snow” before snacking, too.

Chalkboard Painted Block Puzzle

Chalkboard Puzzle (6).JPG

Travis has been home sick from school this week, so we’ve been looking for quiet, indoor games. Puzzles are a fantastic way to keep a child entertained when under the weather, engaging their mind while letting their bodies rest. A little leftover chalkboard paint helped us make up a craft-y version, as well!

While Travis rested, I painted wooden cubes (available at craft stores) with chalkboard paint on all sides. For the least mess while drying, paint 3 sides and let dry, then flip over and paint the remaining 3 sides.

Chalkboard Puzzle (2)

Ideally I would have used larger cubes, but the small ones I had on hand worked just fine. Once the paint dries, take turns with your child making drawings in chalk, and having the other person assemble.

Chalkboard Puzzle (4)

To wit, I designed a car and flower for Travis.

Chalkboard Puzzle (7)

He was briefly into the puzzles, but more intrigued with the idea of chalking all over the squares.

Chalkboard Puzzle (3)

Even more fun was how easily they can erase with just a swipe of a wet paper towel, when you’re ready to change the design.

Chalkboard Puzzle (5)

Here he is making a puzzle for mommy – hope I can figure out the right way to put all those green squares together!

Chalkboard Puzzle (9)

The perfect activity for any time you need to lie low.

Tape City

Tape CIty (8).JPG

Tape + cars is one of those classic games that never goes out of style. Simply grab a roll of painter’s tape, and turn your floor or carpet into roads and cities. I used to make these roads for Travis when he was a toddler, but this was the first time I put him in charge, and the results were fantastic!

For starters, we decided to lay our city out on mommy’s yoga mat, which added a new feel to the game. Travis began with long roads, and loved unrolling the tape.

Tape City (1)

Then he decided the road ended at a restaurant, so we needed a parking lot.

Tape City (6)

From there, his imagination was off and running! Soon we had an airport runway marked by cones…

Tape City (3)

A farm…

Tape City (4)

And he even decided we needed a swamp! Uh oh, hope the cars don’t drive in.

Tape City (5)

He had fun making side streets (venturing boldly off the yoga mat!), which then turned into roads that were blocked off for construction.

Tape City (7)

The tape might not have been as neat or precise as a grown-up’s lay out would be, but I loved seeing his engineering and creativity at work.

Tape City (2)

What will your child add to their tape city? Please share in the comments!

Oatmeal Chocolate Coconut Chewy Cookies

Oatmeal Coconut Cookies (2)

These cookies are absolutely loaded with yummy ingredients, a few of which you can feel good about (rolled oats, shredded coconut), making it a treat you won’t mind giving your kids. You could also add 1 cup walnuts or raisins to the mix, if desired.

Ingredients:

  • 1 cup Earth Balance butter
  • 1 and 1/4 cups brown sugar
  • 1/2 cup sugar
  • 2 Ener-G eggs
  • 2 tablespoons plain non-dairy milk
  • 2 teaspoons vanilla extract
  • 1 and 3/4 cups flour
  • 1 teaspoon baking soda
  • 1/2 teaspoon salt
  • 3 cups rolled oats
  • 2 cups non-dairy chocolate chips
  • 1 cup shredded coconut
  1. In the bowl of a stand mixer, cream together the butter, brown sugar, and sugar. Add the Ener-G eggs, milk, and vanilla; beat until combined.
  2. In a large bowl, combine the flour, baking soda, and salt. Add the flour mixture to the sugar mixture and beat until combined.
  3. Stir in the oats, chocolate chips, and coconut.
  4. Roll the dough into balls of about 1 tablespoon, and bake in batches at 350 degrees F for 12 to 14 minutes, depending on desired crispness. Let cool on the pans for 1 minute before transferring to a wire rack to cool completely.

Oatmeal Coconut Cookies (1)


Paper Bag City

Paper Bag City (7).JPG

Following our fun with Koala’s city-themed crate, we constructed our own city at home, using nothing but extra paper lunch bags!

First, paint the bags to resemble buildings, with one color on the bottom, and black (or another second color) on top for the roof. This turned out to be more of a puzzle for Travis than I imagined, since he just wanted to paint the bags any which way. Providing a guiding line for him helped…

Paper Bag City (4)

…But the point is never perfection!

Paper Bag City (1)

I let him decorate a few houses to his own taste, and made a few others to add to our city. Let the paint dry completely.

Paper Bag City (2)

If your child wants to paint on features (doors, windows), they can do so. Instead, I added those later with permanent marker.

Paper Bag CIty (8)

To finish your town, fill each bag with about 1 cup dried beans to weight it down. Fold the top edge over and tape into place.

Paper Bag City (5)

You can set the buildings up on a car playmat, or just on the floor. Bonus points for toy vehicles in your city!

Paper Bag City (10)

Since this particular city belonged to a four-year old boy, soon we had villains knocking down the houses… He sure does come up with games I never would imagine!

Paper Bag City (11)

What buildings will be in your town? Please share in the comments!