Tofu Strata

Egg and Cheese Strata (1)

This hearty dish works equally well for breakfast or dinner, especially because it needs at least 8 hours in the fridge to chill before you pop it in the oven.

Ingredients:

  • 6 slices whole wheat bread
  • 1/4 cup Earth Balance butter, softened
  • 1 cup shredded vegan cheddar
  • 1 (14-ounce) package silken tofu
  • 1 cup non-dairy milk
  • 1/2 cup butternut squash puree
  • 1/4 teaspoon Dijon mustard
  1. Spread the butter evenly over the bread slices, then cut the bread into 1-inch cubes. Combine the bread in a bowl with the cheddar and transfer to a 2-quart casserole dish.
  2. Meanwhile, combine the tofu, milk, butternut squash, and Dijon in a blender; process until smooth. Pour the tofu mixture over the bread mixture. Cover and refrigerate for 8 hours.
  3. Uncover and bake at 375 degrees F for 30 minutes, until lightly browned on top

Egg and Cheese Strata (2)

The hidden squash puree is nice, but we might try this next time with mushrooms, tomatoes, and spinach mixed in for a veggie boost!

Advertisement

Cat Games, 5 Ways

Cat Games (3)

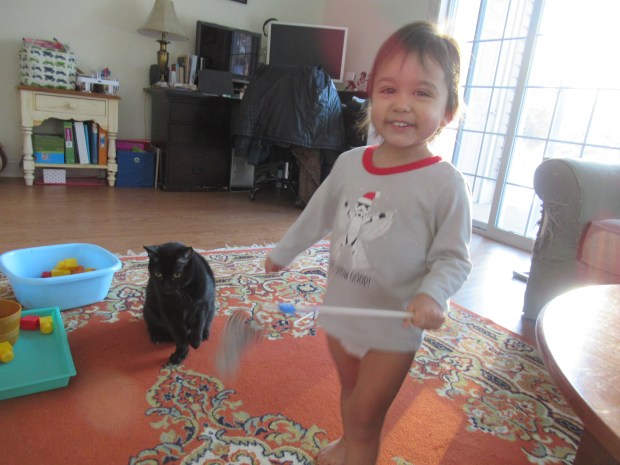
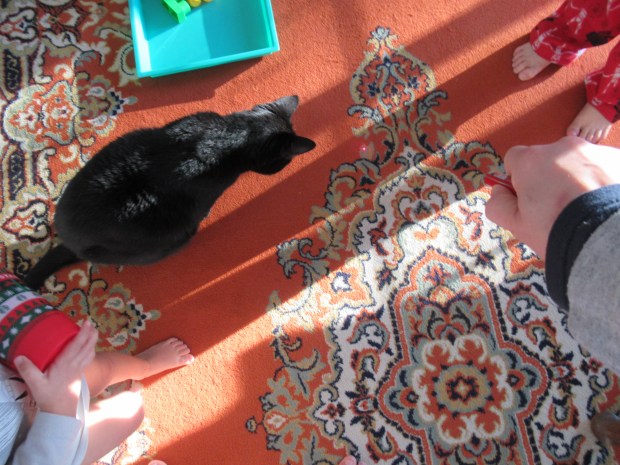
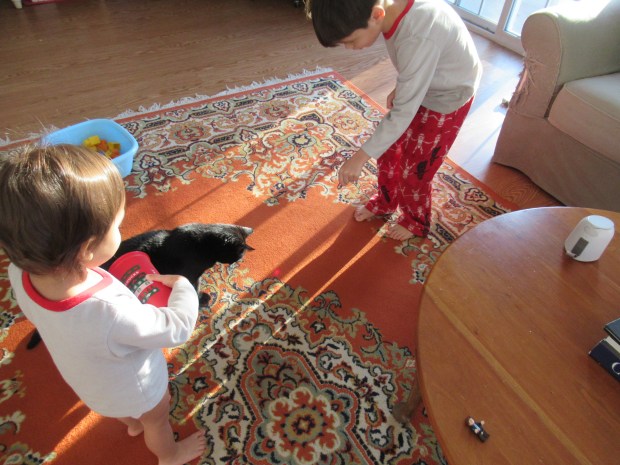
On some cold winter days, it’s not just the human kids who get cabin-fever, but our four-legged kids, too! To wit, we came up with five ways the cat and kids could play together today, meaning everyone was entertained (for a little while at least!)

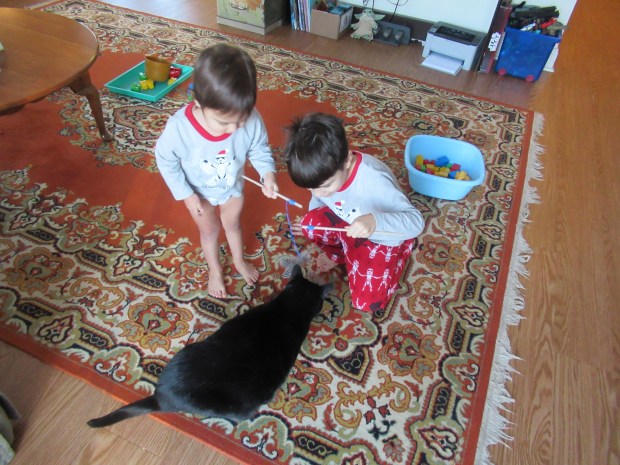
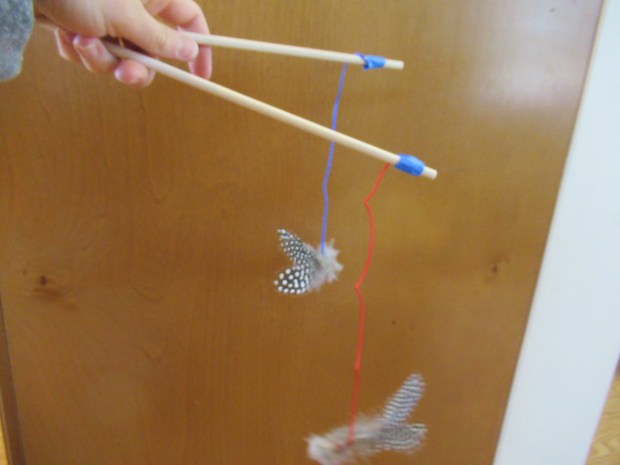
Fishing for Feathers

For this first game, I rigged up a homemade version of a classic cat “fishing rod” using materials from our craft bin. Tie a few craft feathers together with string, then loop the other end of the string around a dowel and secure with tape.

Cat Games (1)

I showed the kids how to dangle these “birds” for the cat.

Cat Games (2)

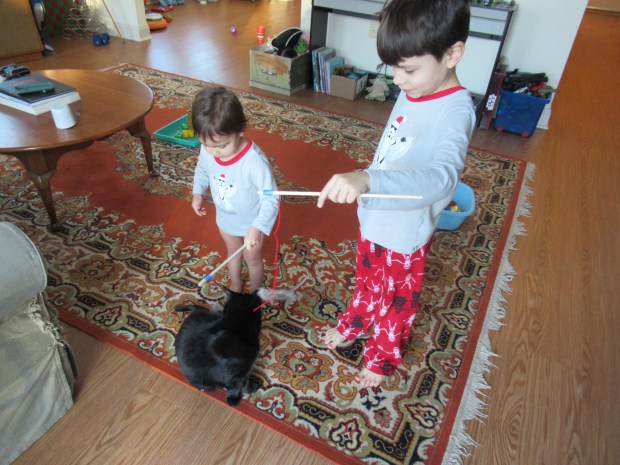
At first he seemed surprised to be the center of attention, but soon he was batting at the feathers with excitement. Clearly the kids thought it was a riot!

Cat Games (4)

Laser Tag

This second game is strictly for kids who are old enough to understand that a laser pointer never gets pointed into anyone’s eyes, whether human or feline. Travis absolutely loved wiggling the dot of our laser pointer for the cat (it makes him go wild!).

Cat Games (5)

Veronika, meanwhile, got to watch and laugh at the show!

Cat Games (6)

Sock It to Me

Forget the cat ball toys you can buy at the store; rolled up socks make instant balls for zero cost! Veronika in particular loved rolling a few homemade sock balls to the cat and back again. “Here’s a sock!” she would say each time.

Cat Games (9)

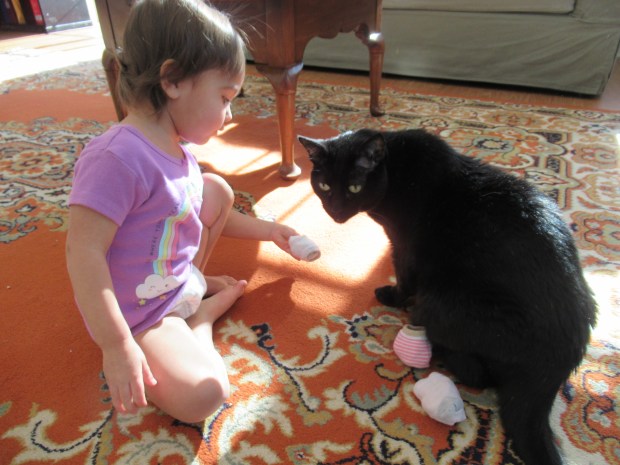
If you have fresh catnip, you could even sprinkle some in the socks, first. Then we tried a variation where I tied a long string around each sock. The cat loved pouncing after these if we dragged them on the floor, or batting at them if they were dangled in the air.
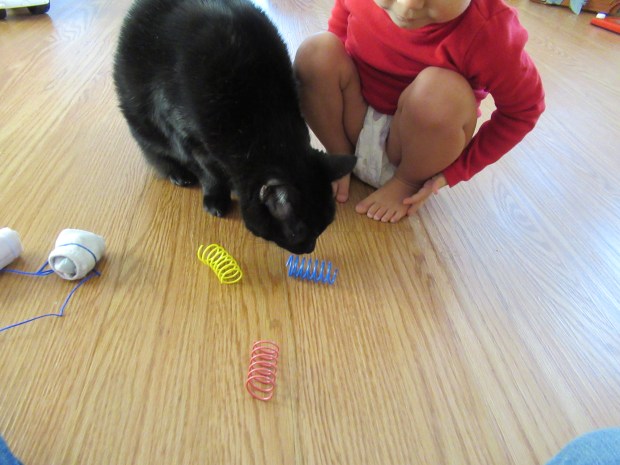
Cat Games (13)

Kitty Soccer

Our cat loves to play “soccer” with crinkly Mylar balls, so today we tested out a few other “soccer” toys. Great options for batting around include spring toys (try the Thin Colorful Springs from Ethical Pet) or even just a ball of crumpled paper. Gooooaaaaal!

Cat Games (12)

Two-Toy Tango

Finally, we got extra silly. I gave the kids one toy cat mouse and had them pretend to be cats, pouncing on it or batting it around with their “paws”.

Cat Games (7)

The cat received a second mouse so he could play right alongside my little humans. It’s highly debatable who had more fun with all these games, the two-legged kids or the four-legged one. Needless to say, the cat took a nice long cat nap after.

Cat Games (8)

Rainbow Sensory Bags

Rainbow Sensory Bag (4)

Mixing paint is such a great way to teach kids about the difference between primary and secondary colors (namely, that you achieve one of the latter by mixing two of the former), and I’m always looking for ways to make the lesson hands on. These hair gel bags make it easy to mix the colors together in a fun and squishy way!

Rainbow Sensory Bag (2)

To start, squirt a little clear hair gel into each of three sandwich-sized zip-top bags. Add the primary colors on either side of the gel, so you have one bag that contains red + yellow, a second that contains yellow+ blue, and a third that contains blue + red.

Rainbow Sensory Bag (1)

Seal tightly and add a strip of duct tape at the top of each for security. Now invite your toddler to squish and mush!

Rainbow Sensory Bag (3)

Veronika was particularly pleased when the red and blue combined to make her favorite color (purple).

Rainbow Sensory Bag (8)

We simply made this about the squishy sensory play today, but see my previous post on primary color storytime for reading suggestions that can go along with it.

Rainbow Sensory Bag (5)

If you have enough paint, you might consider making one bag that contains just red paint + hair gel, one with yellow paint + hair gel, and one with blue paint + hair gel, in which case you’ll wind up with the full rainbow lineup at the end.

All Gone!

Clean Up Dump (2)

In my experience, toddlers love dumping things to and from containers. This game plays right to that interest while introducing (or reinforcing) the notion of “all gone!”.

I set up a tray filled with some of Veronika’s building blocks and then placed an empty bin a little ways away (far enough that she’d have to trot over to it, but not so far away as to be a big journey!). Then I handed her a smaller bucket that she could fill with some of the blocks.

All Gone (1)

“Go and fill the empty bin!” I encouraged with a big smile.

All Gone (2)

She made a few trips back and forth like this, until now the first tray was empty and the bin was the full one. “All gone!” I said in mock delight as I held up the tray.

All Gone (4)

Don’t be surprised if your toddler starts parroting this phrase and wants to go back and forth between the containers several times.

All Gone (3)

When Veronika lost interest in this first version of play, we added in a new element: wheels. More specifically, she has a new dump truck that was perfect for loading and unloading the blocks.

Clean Up Dump (3)

She loved to fill this one up and then zoom it to the tray to tilt back the load.

Clean Up Dump (6)

In fact, a dump truck like this would be a great way to encourage a toddler to clean up, vrooming each load from a messy floor to a bin.

Clean Up Dump (1)

National Puzzle Day

National Puzzle Day (6)

January 29 is National Puzzle Day, and if ever there was a day to stay cozy and warm inside with puzzles, the 10 degree day we had today was it! We played with puzzles in a variety of ways for my big kid and toddler both.

First up, we marked the holiday by learning a few puzzle trivia facts. Travis was wowed to learn that the jigsaw puzzle was invented as long ago as the 1760s, and that the world’s biggest jigsaw puzzle comes in with 54,000 pieces!

National Puzzle Day (1)

Veronika celebrated too, thanks to toddler-friendly Cereal Box Puzzles!

Cereal Box Puzzles (2)

The bright pictures on the front of cereal boxes make perfect puzzles for toddler hands. I cut triangles from a few box covers (making one or two pieces, depending on the picture), and set her to puzzling over how to slot these triangles back in.

Cereal Box Puzzles (5)

You can make this task harder for older kids by increasing the number of pieces to put together. Big brother Travis wanted a turn, too!

National Puzzle Day (4)

Next, I simply set out wooden puzzles for each of the kids. Veronika loves her chunky peg puzzles, or those that feature items like vegetables and shapes.

National Puzzle Day (2)

Travis puzzled over a few classic jigsaws, which is always great to see.

National Puzzle Day (5)

But don’t forget that jigsaw puzzles aren’t the only kind out there! Picture puzzles, word searches, or trivia all fit the bill, too. Even mama stole a moment for a puzzle or two.

National Puzzle Day (3)

Mac and Cheese Mania

Mac Mania (6)

Thanks to Travis’s Highlights magazine, it’s been mac ‘n’ cheese madness around here, trying versions of this kid favorite over the course of the week. If you want true mania, your family could even prepare all 4 of these version in one day; there’s an option below for breakfast, lunch, dinner, and even dessert! Here’s what we tried and what was declared the winner.

The Early Bird:

Mac Mania (5)

The night before, cook a batch of your favorite macaroni and cheese. In the morning, heat the past and add chopped and cooked vegan breakfast sausage (such as Field Roast), your favorite scrambled tofu recipe and a drizzle of ketchup.

Rainbow Pepper Mac:

Mac Mania (3)

Make a bright and colorful version that’s sure to get kids to eat their veggies! Simply prepare a batch of your favorite mac ‘n’ cheese, then dice 1/2 a red bell pepper, 1/2 a green bell pepper, and 1/2 a yellow bell pepper; add to the mac n cheese while the pasta is still hot.

Mac and Meatballs:

Mac Mania (1)

This was the perfect marriage of regular mac ‘n’ cheese and spaghetti-meatball night: simply prepare your favorite mac and cheese, then top each serving with a little marinara sauce, your favorite brand of plant-based meatballs, and a sprinkling of vegan Parmesan. Yum!

Mac and Cheesecake:

Mac Mania (4)

Finally, you can try this sweet version for dessert! In advance, prepare a batch of vanilla pudding and chill until ready to use. Top each portion of cooked elbow macaroni pasta with a dollop of the pudding, crushed graham crackers, and sliced strawberries.

The verdict? “Mac and meatballs” was the hands-down winner. Everyone also loved the Early Bird, too. While the dessert version was novel, the kids deemed it a little strange.

Which mac does your family like best? Please share in the comments!

Snow Painting

Snow Painting (3)

When nature turns the world white with snow, then it becomes one giant canvas for your toddler to paint! To wit, Veronika and I tested two methods to paint the snow today. I recommend using all-natural food coloring for this activity, since the “paint” will be left behind once the snow melts, although technically you can use liquid watercolors.

Snow Painting (2)

First, I filled a spritz bottle with water and a generous amount of purple food coloring (a mix of red and blue). Veronika is still building up the strength to use the spritz bottle, so I helped her out to make neat purple “spray paint” splotches on the snow.

Snow Painting (1)

The second method was easier for her little hands. Fill a container with water and drops of food coloring, then hand over a wide bristle paintbrush.

Snow Painting (4)

All Veronika had to do was dip and paint! Soon we had a patio that was a vibrant mix of purple and green. As a note of caution, you may want to skip yellow for this particular project, since people tend to be leery of yellow snow!

Snow Painting (5)

In sum, this was a novel and fun way to play with the world’s white canvas.

Ice Jewels

Ice Jewels (6)

The next time there’s snow in the forecast, make a batch of “jewels” ahead of time so you can delight your little ones with sparkly ice treasures!

Ice Jewels (2)

To make the jewels, simply freeze water in the compartments of an ice cube tray and add a bit of all-natural food coloring to each. I like to fill the compartments only about half way so the colors stay separate; otherwise you risk having them splash together and result in brown gems.

When Veronika and I headed out to the back patio to explore the recent snowfall, I popped the treasures out of the ice cube tray for her.

Ice Jewels (5)

These are so fun to arrange in pretty patterns, as we did on the rungs of her slide. Your kids might want to make patterns along tree branches, the edge of a walkway or patio, or even just on top of the snow.

Ice Jewels (3)

Veronika also loved that pretty pockets of color appeared in the snow wherever she tossed them in. Then you can dig up your buried gemstones and start all over.

Ice Jewels (7)

Snow Squishy Bag

Snow Squishy Bag (4)

I’ve put together complicated sensory and squishy bags for Veronika before, but sometimes nature supplies you with all the materials you need! To wit, we had fresh puffy snow on the ground outside when we woke up this morning, so I simply dashed out, filled a bag with snow, and then sealed it shut. Instant sensory bag!

Snow Squishy Bag (1)

Of course the first thing your toddler will discover with this particular bag is the temperature. “Brr, that’s cold!” Veronika said with surprise.

Snow Squishy Bag (3)

And then she promptly placed her hands down again.

Snow Squishy Bag (2)

You can squish the snow around in fun ways inside the plastic. Then Veronika requested purple snow. I hadn’t even thought to add color, but why not! We squirted in red and blue food coloring and then tested whether we could mash the snow around enough for the two colors to blend.

Snow Squishy Bag (5)

And then of course the other fantastic thing about snow is that your toddler gets a quick STEM lesson on states of matter. It wasn’t long before the fluffy snow started to change…

Snow Squishy Bag (6)

…into purple water, instead! This sensory bag is by its very nature (heh), short lived, but lots of fun.

Snow Squishy Bag (7)

DIY Cups for Color Sorting

DIY Color Cups (7)

Save up your empty non-dairy yogurt containers for a few days, and then you’ll have all the materials needed to make a color sorting game for your toddler!

I decided to stick with just three colors today (choosing the primary colors of blue, yellow, and red), instead of overwhelming Veronika with the full rainbow. It started out with some messy painting play, first painting each clean empty container with one color. Let dry completely.

DIY Color Cups (2)

Once the containers were dry, they were ready for color sorting! We used a set of colored dominoes for this game, and Veronika could readily fill each one with the corresponding color domino. If you don’t have dominoes, try other small objects like pom poms or beads.

DIY Color Cups (6)

But here’s the twist to this game; after the first round of proper sorting, we made it silly! I mixed up all the dominoes into the wrong colored cups, and challenged her to sort them back to where they belonged.

DIY Color Cups (9)

She caught onto the humor of it, and laughed as she dumped the dominoes back and forth for a while, giggling that they were “trash”.

DIY Color Cups (10)

Your toddler will end up with a big pile and can sort things back into their proper places once more.

DIY Color Cups (4)