Apple and Sweet Potato Mini Muffins

Apple Sweet Potato Mini Muffin (2).JPG

These adorable mini muffins are the exact right fit for your toddler’s hand, and are perfect for snacking on the go.

Ingredients:

  • 2 cups flour
  • 1 and 1/2 teaspoons baking powder, divided
  • 1/2 teaspoon salt
  • 1/2 teaspoon cinnamon
  • 1/2 cup applesauce
  • 1/2 cup flaxseed
  • 1/4 cup canola oil
  • 1/2 teaspoon vanilla extract
  • 1/2 cup almond milk
  • 1 cup frozen apple juice concentrate
  • 1 and 1/2 cups grated sweet potato
  • 1 cup grated apple
  1. In a bowl, combine the flour, 1 teaspoon baking powder, salt, and cinnamon. Set aside.
  2. In a large bowl, combine the applesauce and remaining 1/2 teaspoon baking powder.
  3. Stir in the flaxseed, canola oil, vanilla, almond milk, and apple juice.
  4. Add the dry ingredients to the wet ingredients, then fold in the sweet potato and grated apple.
  5. Divide the batter evenly among 42 mini muffin cups, about 1 tablespoon per muffin. Bake at 350 degrees F for 25 minutes.

These are delicious warm, with just a little pat of Earth Balance butter!

Apple Sweet Potato Mini Muffin (1)

Advertisement

Roll It Out

Roll it Out (1)

One thing I love to do with the kids is find items around the house that aren’t actually toys, but that can easily be used in play. Large exercise balls fit the bill perfectly, and here’s some simple fun Veronika and I had with one today.

First, I tapped on the ball; it made a perfect vibrating drum. Have fun with this, alternating the rhythm fastfastfastfast and slow    slow    slow.

Roll it Out (2)

Then I placed Veronika on her tummy on the ball and rocked it ever so slightly.

Roll it Out (3)

This is a fantastic way to build muscles if our little one is still doing tummy time, but even as a “big kid” Veronika loved it.

What’s your favorite “non toy” toy around the house? Please share in the comments!


Monster Balloon Decorating

Halloween Balloon (8)

Blow up these “monsters” to decorate the house on the eve of Halloween! The LED lights should last about 48 hours.

Halloween Balloon (1)

Travis was thrilled with the little balloon lights (you can find these at party stores). Turn one on and slip into an uninflated balloon, then blow up.

Halloween Balloon (3)

I had pre-cut a few monster features for Travis on sticky-back black craft foam. As an alternative, you can make mouths, eyes, and noses on black cardstock and use a glue stick to attach to the balloons. But we found that the sticky backing made things very easy!

Halloween Balloon (4)

Our monsters were wiggly and wobbly as we decorated them; it was ultimately easier to hold them between my legs than to tape them onto a table, which we had tried first.

Halloween Balloon (7)

The darker it gets, the more your monsters glow!

Halloween Balloon (6)

Travis loved having these creatures around to set the mood for Halloween.

Halloween Balloon (9)

First Birthday Party: Apple of Our Eye

Apple First (11)

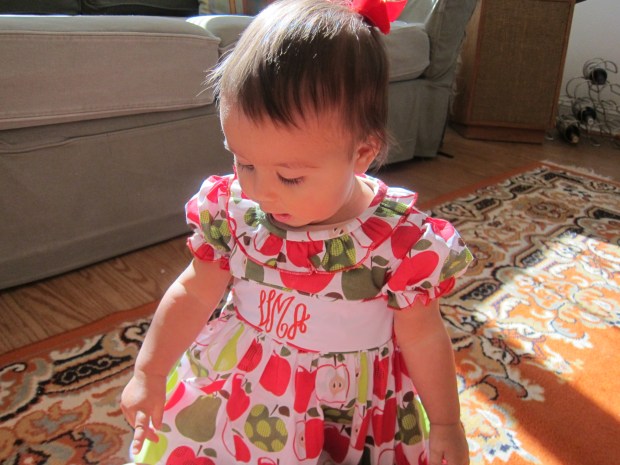
This is the last time I’ll throw a First Birthday Party, and I knew what theme I wanted for Veronika almost from the moment of her birth. With big apple cheeks that were a constant topic of conversation all year, she was instantly the “apple of our eye”. The theme also fits perfectly with my autumn baby’s birth date, with apples and apple picking in the air!

It was so fun to play around with the theme for a first birthday party. Rather than inviting baby friends, it’s nice to keep this celebration partially about the parents, inviting those relatives and close friends who have helped you come through.

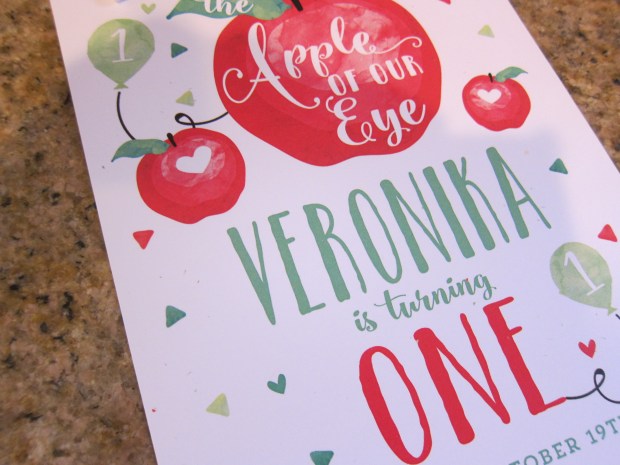
A beautiful Apple of Our Eye template (from Etsy) was personalized for the event to set the stage.

Apple First (13)

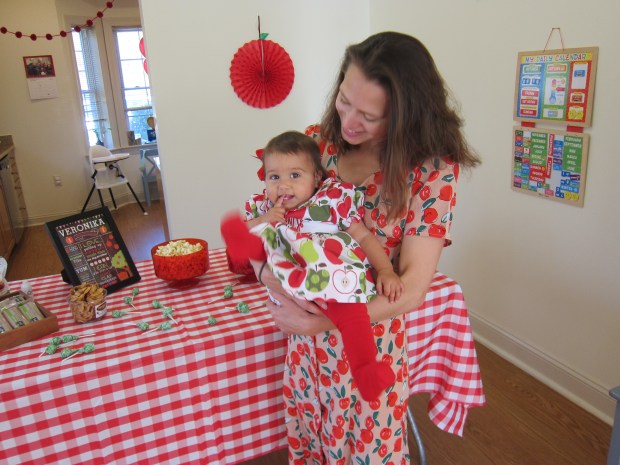
Next up were the outfits, brand new ones for the family!

Apple First (18).JPG

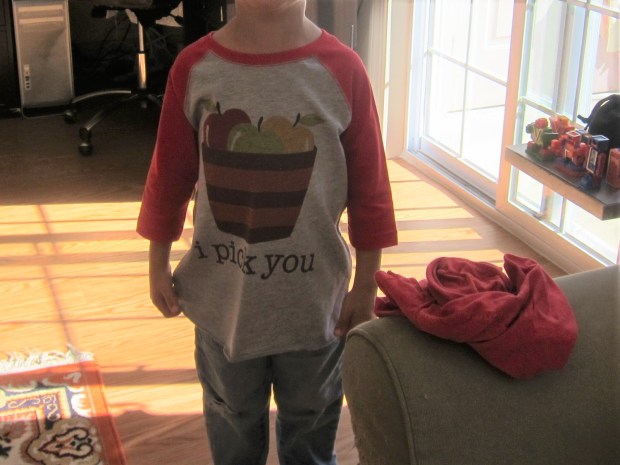
Mama dress from Cotton Rose Boho, baby girl dress from SmockedALotbtq and brother’s shirt from 7ate9apparel.

Apple First (20)

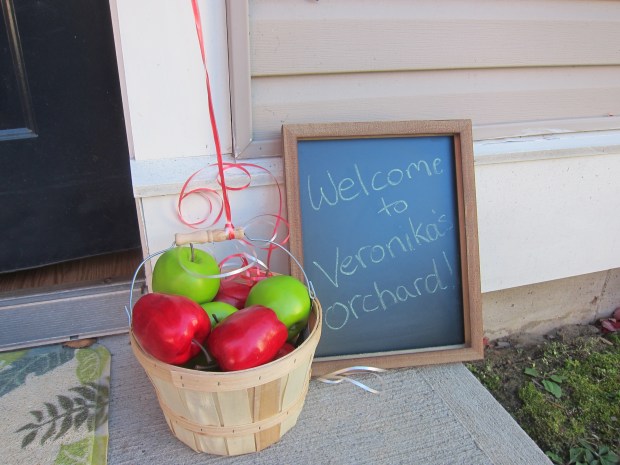
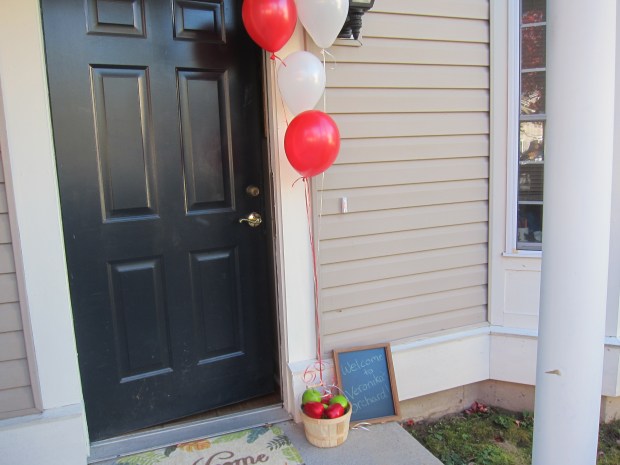
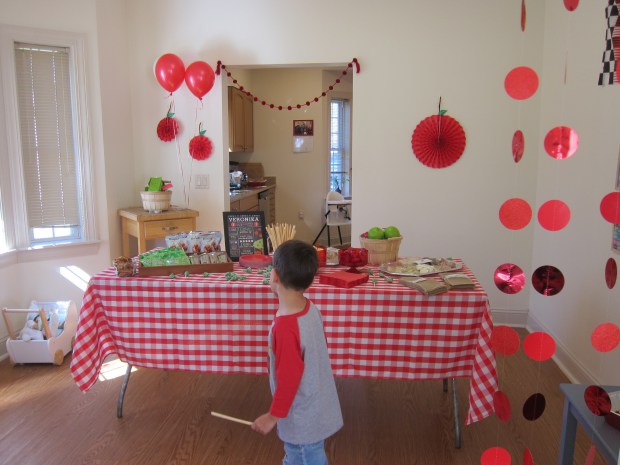
Now it was time to set up Veronika’s orchard! I filled bushels from the craft store (Michaels) with fake apples. Some were set up inside, and another bushels greeted guests next to a cheery chalkboard sign.

Apple First (12)

Inside, the apple colors continued with a red-checked tablecloth, burlap napkins, and red and white balloons.

Apple First (10)

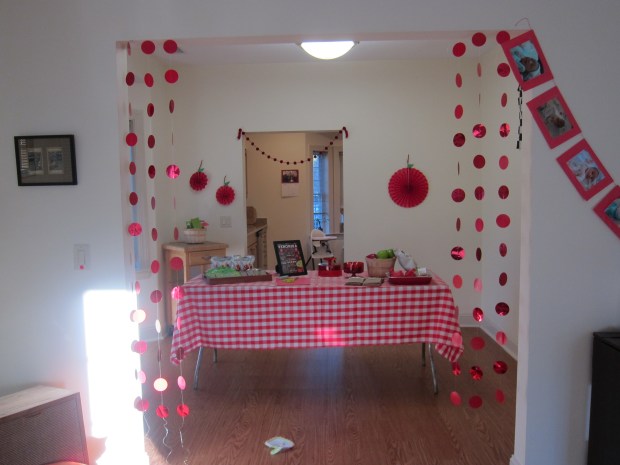
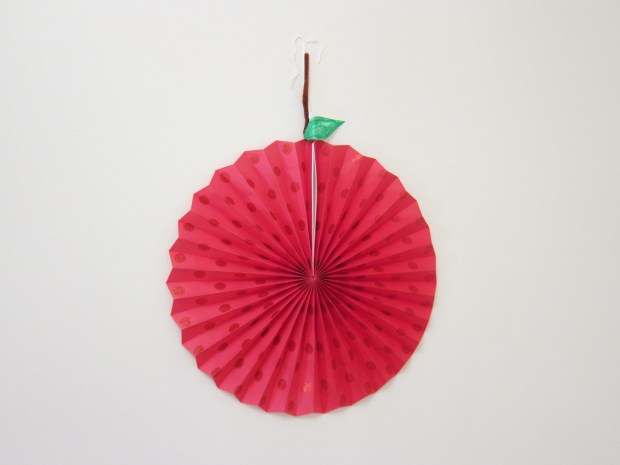
I strung red pom pom garlands and glittering red dot streamers (both Party City), and hung up folding red fans which quickly morphed into giant apples thanks to a pipe cleaner stem and a construction paper leaf.

Apple First (3)

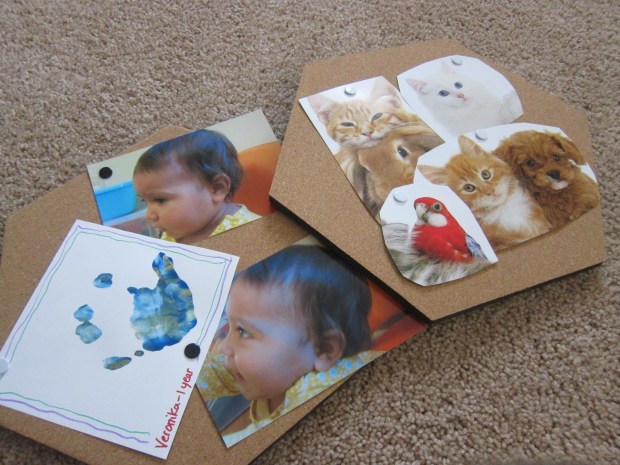
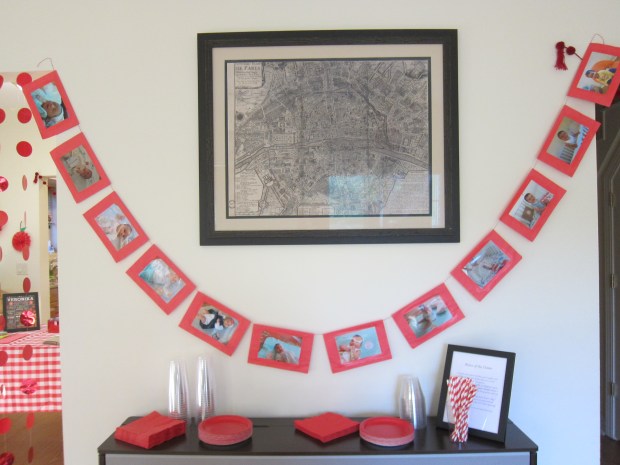
I also strung a banner made of photos adhered to red construction paper (with Mod Podge), featuring one image for each month of her life.

Apple First (8)

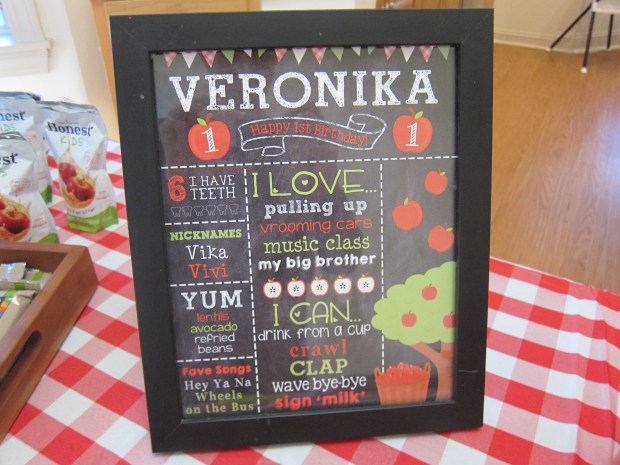
A birthday slate with an apple background was a great centerpiece for the food table.

Apple First (4)

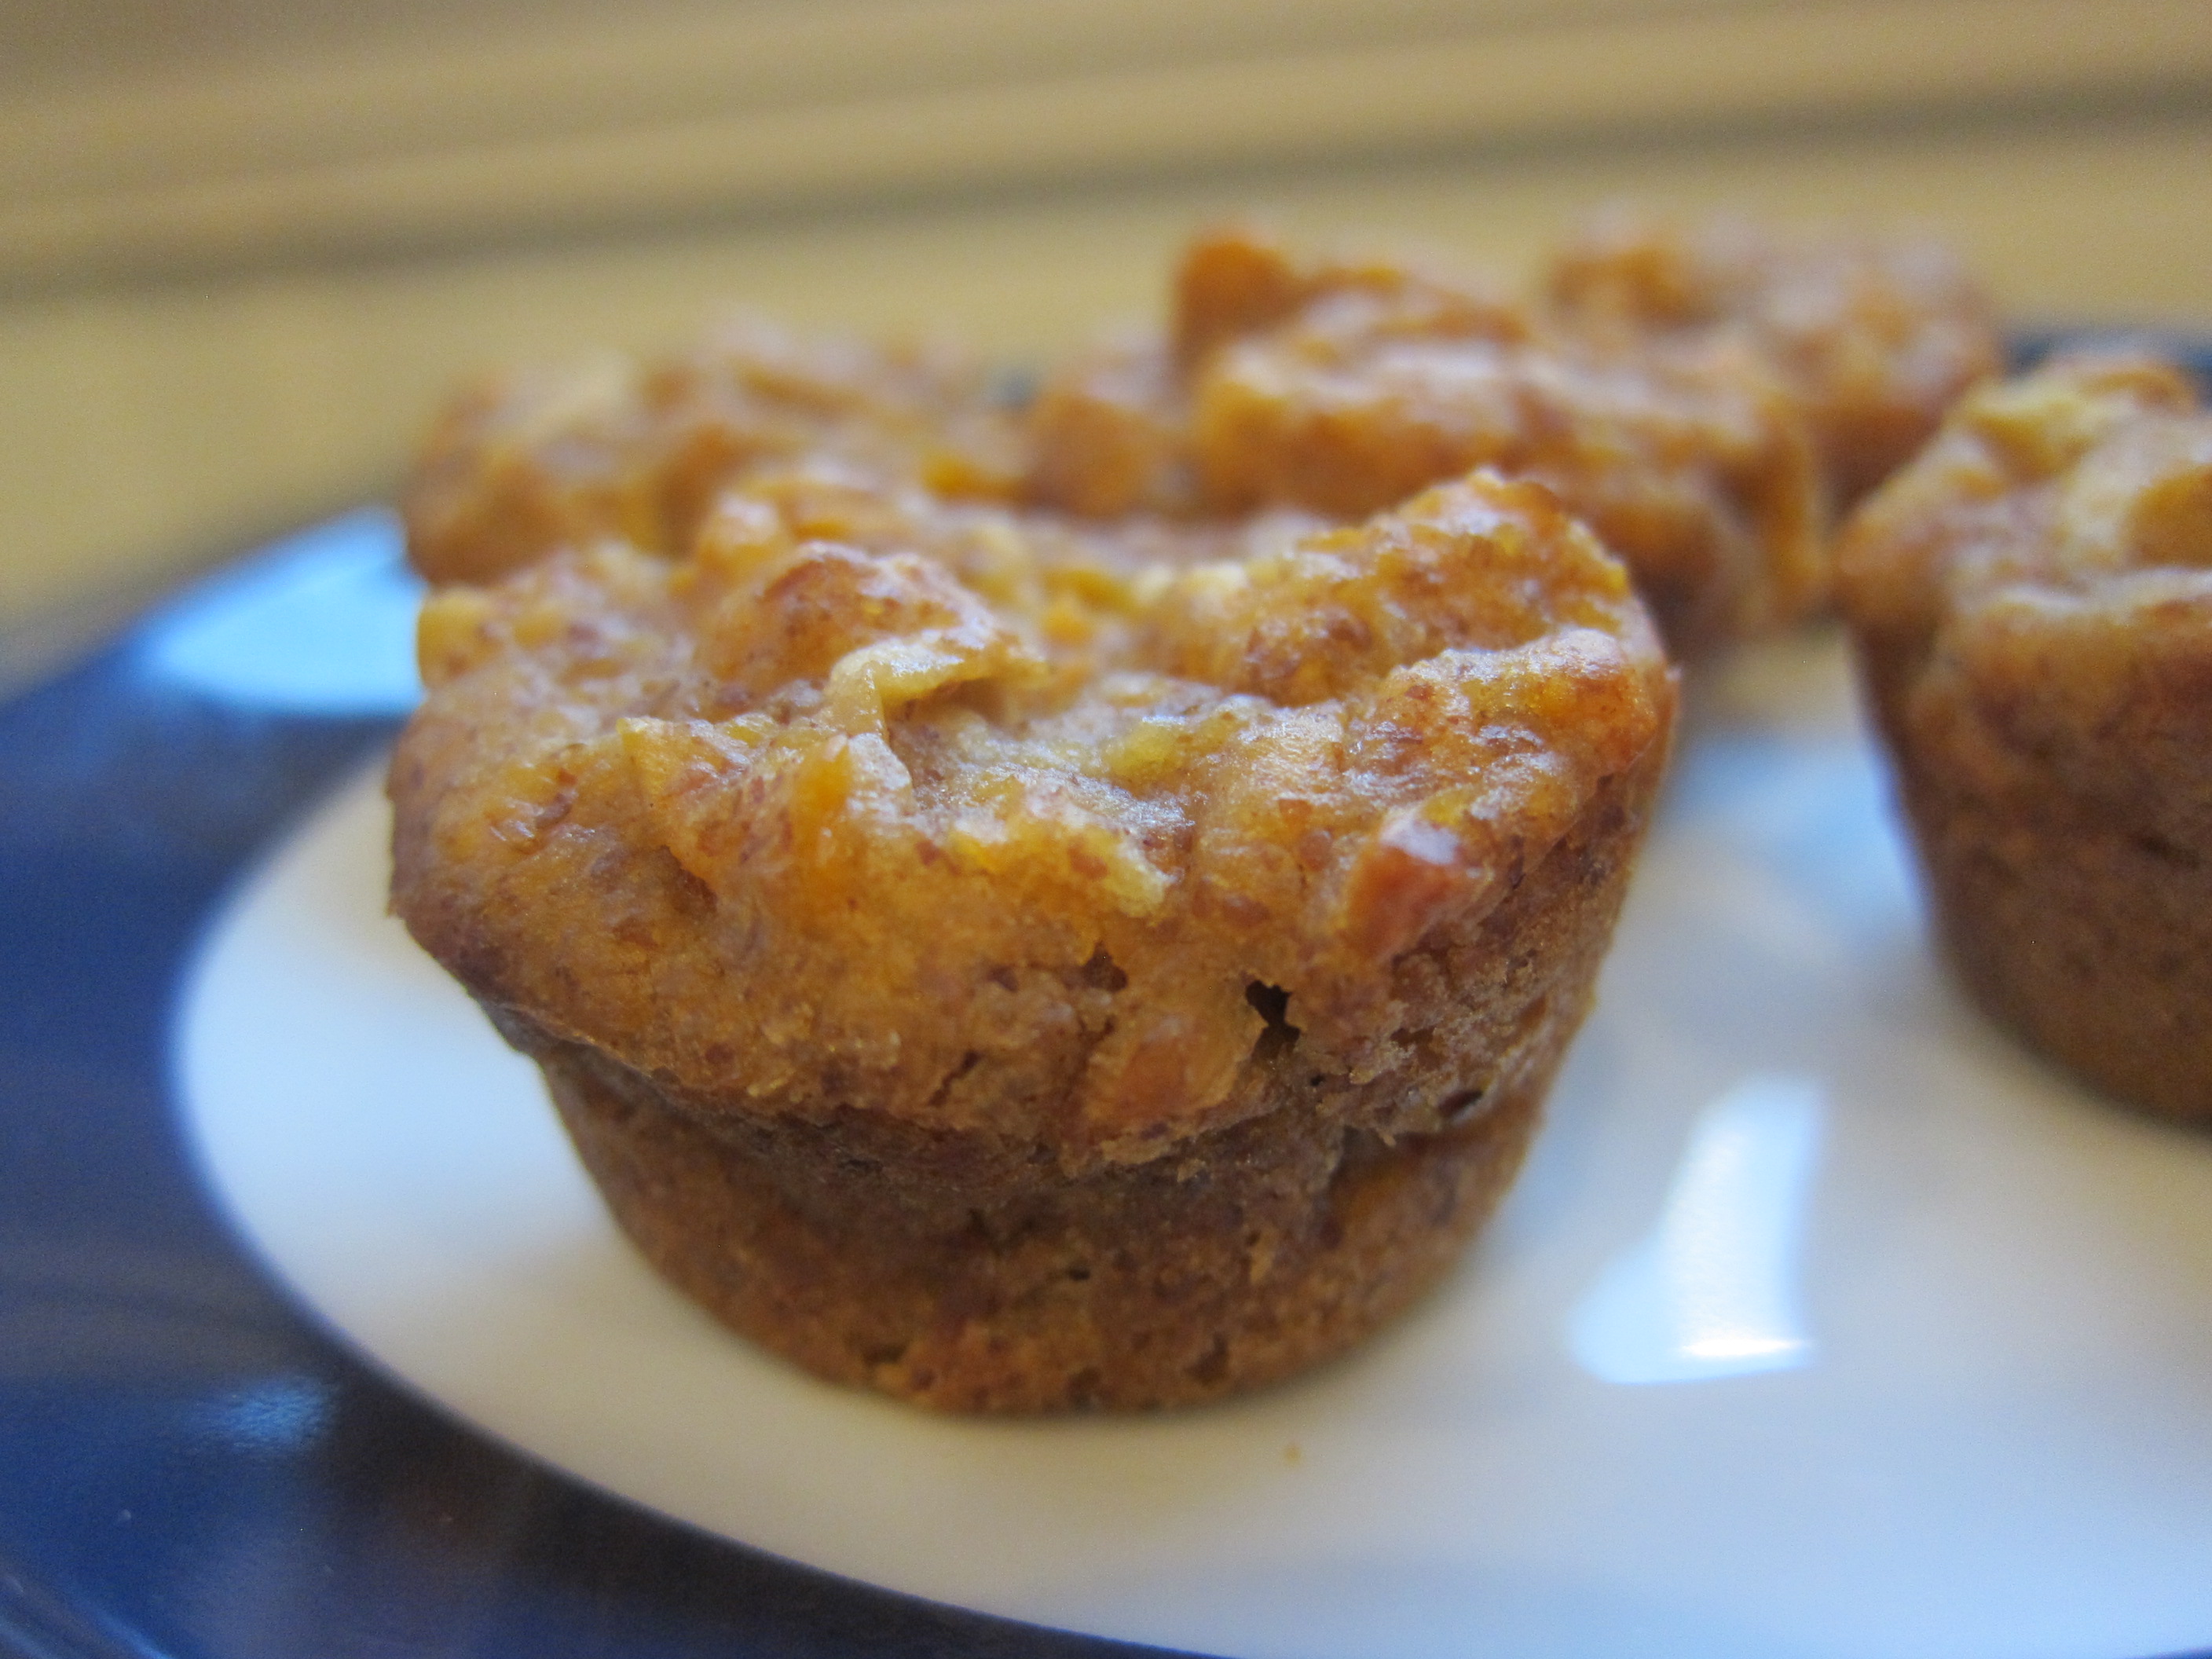
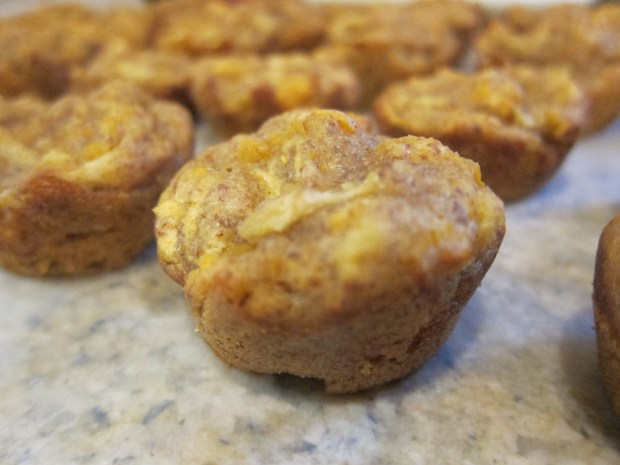
We kept the food to light nibbles for this mid-afternoon gathering. Apples were everywhere, including a kid-friendly serve-yourself station of applesauce pouches, apple cereal bars, and apple juice.

Apple First (14)

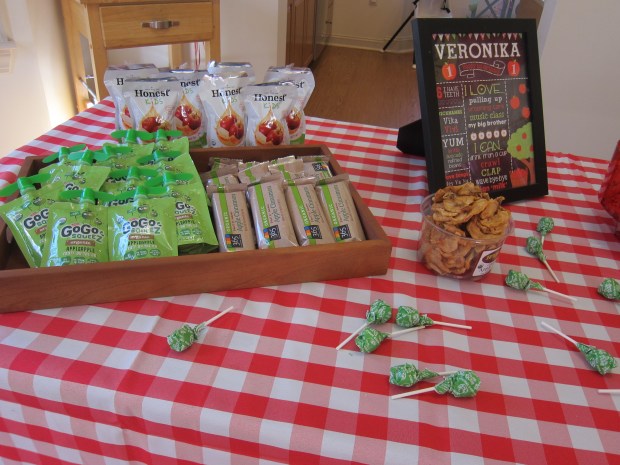
Add Babybell cheeses (round like red apples!), caramel popcorn, a scattering of apple lollipops, and a few platters of antipasti for the grown-ups.

Apple First (15)

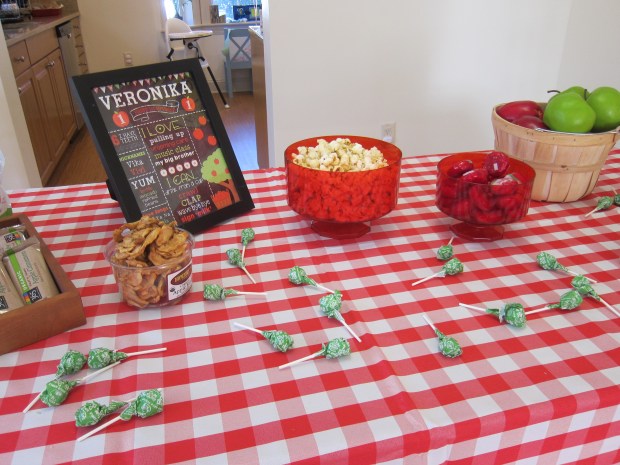
On tap: local cider for the kids, and apple sodas and hard cider for the grownups.

Apple First (28)

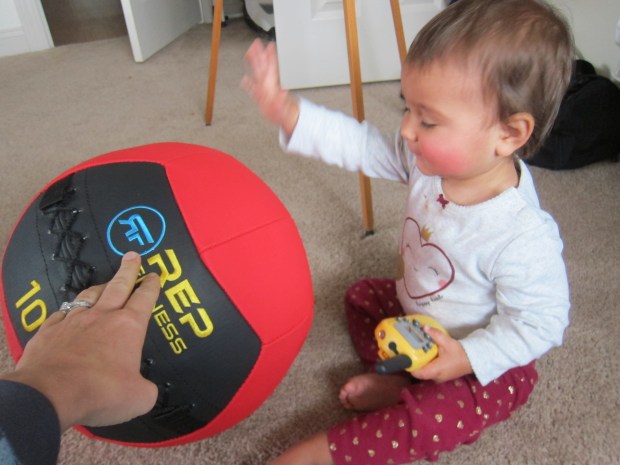
Kids at the party ranged in age from 14 years down to 3 months, so we need a variety of activities!

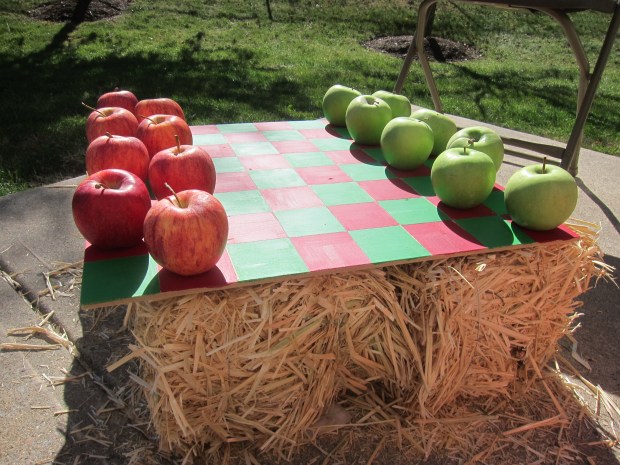
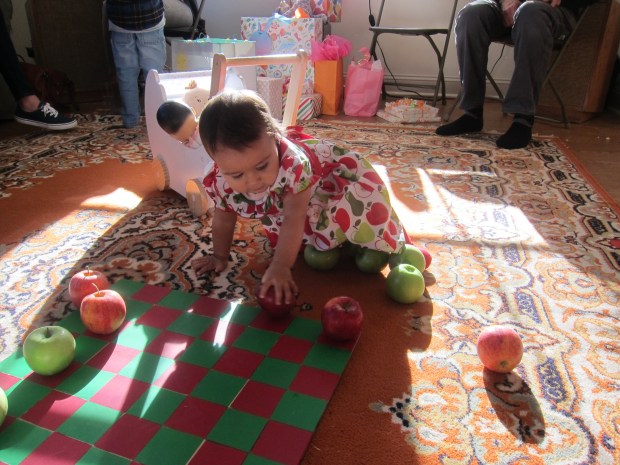
Activity 1: Apple checkers

Apple First (30).JPG

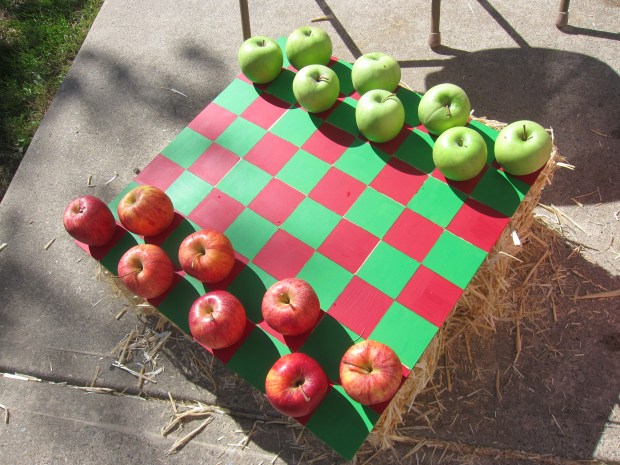
Cut a slab of wood (from Home Depot) into a 20 x 20 inch square. Divide into 8 squares per side, each measuring 2.5 inches, and paint in alternating squares of green and red.

Apple First (33)

Add green apples for one opponent and red apples for the other and place the board atop hay bales (Michaels craft stores).

Apple First (29).JPG

A framed image of the rules served as a quick reminder for anyone who needed it!

Apple First (9)

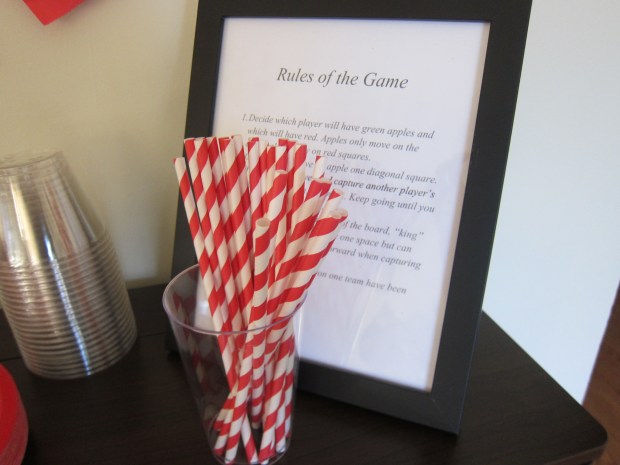
Don’t be surprised if the kids make up their own rules or just play around with the apples, though… And that’s just fine!

Apple First (37).JPG

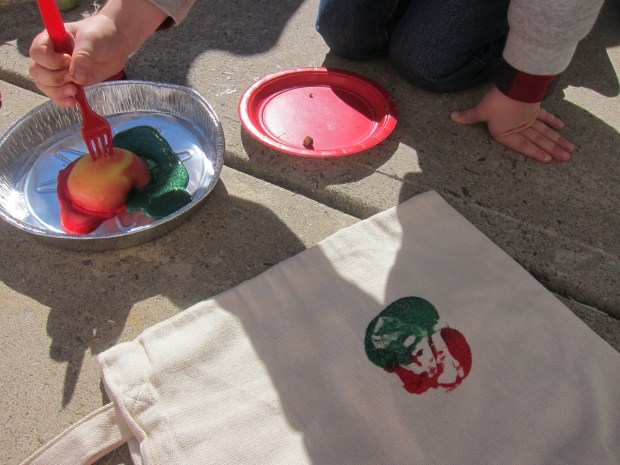
Activity 2: Apple stamping

Set out pie tins, various paint colors, and apples cut in half. Poke a fork firmly into each apple.

Apple First (32)

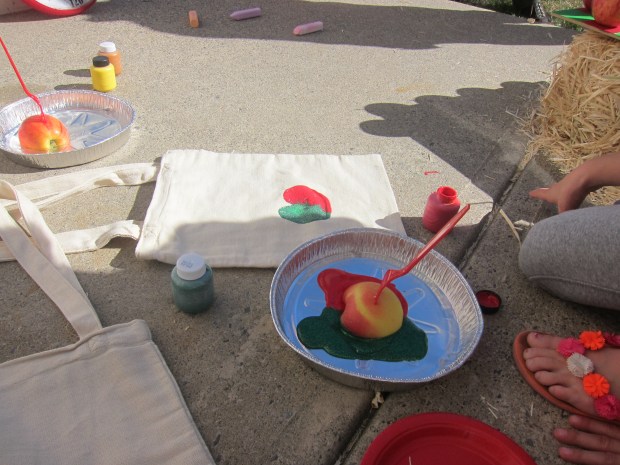
Show kids how to press the cut apples into the paint of their choice and then apply to a blank tote bag. These make great keepsakes to take home; in fact adults might want to stamp one, too!

Apple First (34)

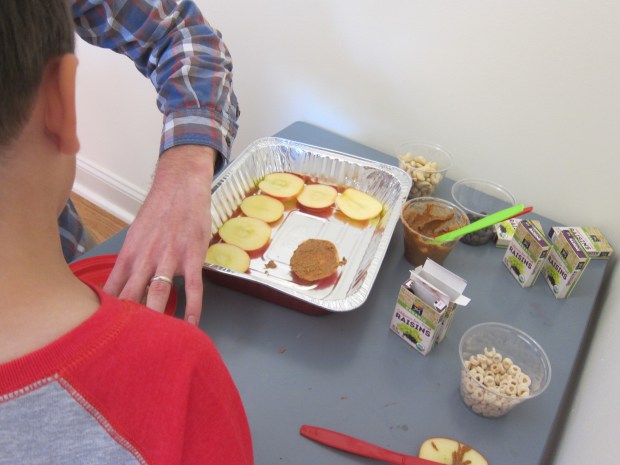
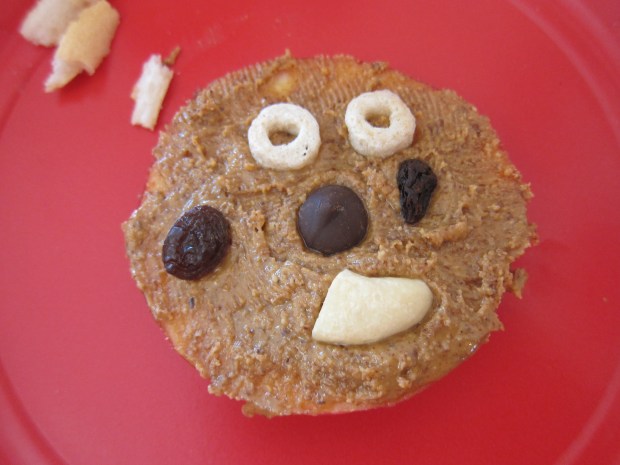
Activity 3: Apple faces

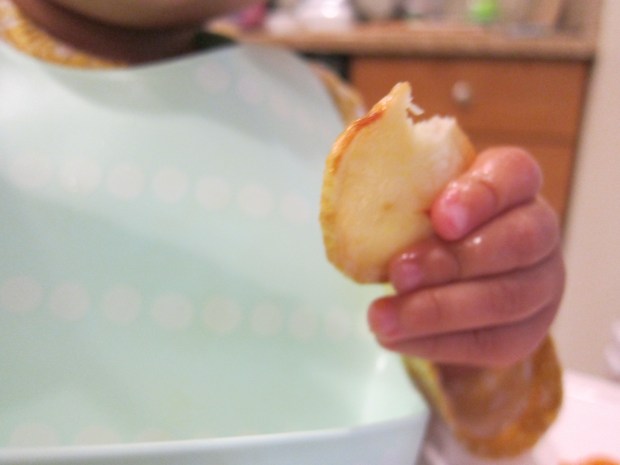
This was the biggest hit with younger children at the party. Cut apples into 1/4-inch thick slices and brush with lemon juice to prevent browning.

Apple First (17)

Set out cups with nut butter for “glue” and decorations like raisins, cashews, chocolate chips, and o-shaped cereal. Now each child can make an adorable little face on their apple slice.

Apple First (31)

The kids will love eating their creations!

Apple First (35)

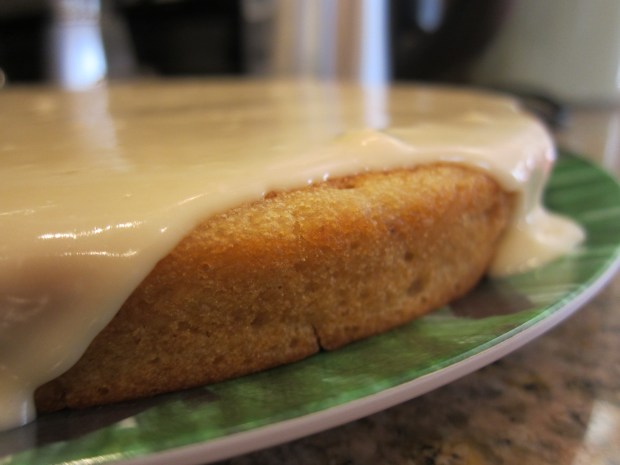
Aside from that, the affair was very laid-back and unstructured. Then came the big moment for her cake. We served Happy Birthday Vanilla Cake with Cider Glaze. Add cider doughnuts for older guests and everyone ends on a sweet note.

Apple First (36)

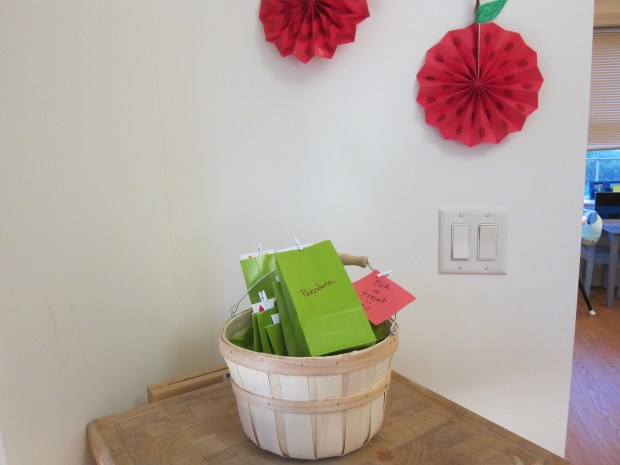
Again accounting for the big age-range in guests, we sent kids home from the party with a simple goodie bag: fall-themed stickers and apple lollipops.

Apple First (6)

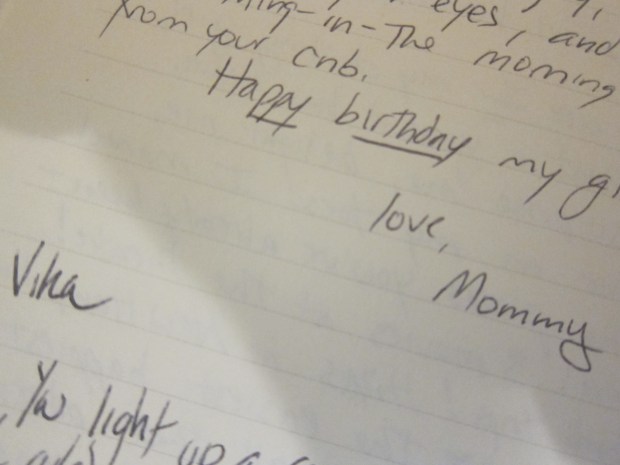
Veronika, you are the apple of our eye!

Apple First (23).JPG

Celebrate Cats Four Ways

Celebrate Cats (2)

In addition to Veronika’s birthday, it’s National Cat Day! So Travis and I took a moment out of the festivities to celebrate these amazing animals in four fun ways.

First up, have you can drew (or color in) pictures of cats. Make up a story to go along with these. Travis is having a bit of a mummy phase, so his story was about a magical mummy cat!

Celebrate Cats (3)

Then of course we dressed up like them: simply twist pipe cleaners around a headband for cat ears. We made a matching mom-and-son pair.

Celebrate Cats (1)

If you think it will work, consider teaching your cat a new trick!

And most important, consider visiting a shelter. Whether you bring treats or food, or make a monetary donation, or just donate your time and snuggles, the cats will thank you for it!

Birthday Celebration

Birthday Celebrate (5)

It’s Veronika’s birthday!

Whether you’re celebrating with lots of family and friends or just a few close loved ones, if you have been following along on this first-year journey, then happy birthday to your little one, too.

Veronika seems to know she’s one now, no longer acting like a baby. She wants to walk, is full of impish personality, and tries out new sounds, words, and ideas daily.

A few ways to make this day special, even though your little one won’t understand the hype:

When big brother and I entered her room this morning, we came bearing balloons and a gift she could open right in the crib. She might not know what a birthday is, but she certainly understood this was different from our usual routine!

Birthday Celebrate (3)

I also took the time to pen Veronika a letter in a journal. Hopefully this is a ritual I will continue to follow each year, for a treasured collection of words she can look back on.

Birthday Celebrate (4)

You might also consider taking a trip to the bank together to open an account in baby’s name. Chances are your baby will receive a gift or two in the form of cash. Whether it’s a regular checking account or something more forward-thinking like a 529 or UTMA, this will be a birthday gift that keeps on giving!

Finally, take a moment, at this milestone, to celebrate yourself as parents. You made it one year!

Birthday Celebration (1)

Here is to treasured memories for the year ahead.

Happy Birthday Vanilla Cake with Cider Glaze

HBD Vanilla Cake (4)

This apple juice and maple syrup sweetened birthday cake is just right for a baby’s first dessert. Line up those cameras for the big smash cake moment, and enjoy!

Ingredients:

For the cake:

  • 1 and 1/4 cups all-purpose flour
  • 1/2 cup oat flour
  • 2 and 1/4 teaspoons baking powder, divided
  • 1/4 teaspoon salt
  • 1/4 cup applesauce
  • 1/2 cup thawed apple juice concentrate
  • 1/2 cup vanilla soy milk
  • 1/4 cup canola oil
  • 1/4 cup maple syrup
  • 1 and 1/2 teaspoons vanilla extract

For the frosting:

  • 6 tablespoons Earth Balance butter, softened
  • 1/8 teaspoon salt
  • 3 tablespoons boiled apple cider
  • 3 cups powdered sugar
  1. To prepare the cake, combine the flour, oat flour, 2 teaspoons baking powder, and 1/4 teaspoon salt in a medium bowl; set aside.
  2. Whisk together the applesauce and remaining 1/4 teaspoon baking powder in a large bowl. Add the apple juice concentrate, soy milk, canola oil, maple syrup, and vanilla, whisking until combined.
  3. Add the flour mixture to the applesauce mixture, stirring until combined. Spoon into a greased 9-inch round cake pan.
  4. Bake at 375 degrees F for 25 minutes; a wooden pick inserted in the center should come out clean. Cool in the pan on a wire rack before turning out onto a cake plate.
  5. Meanwhile, prepare the frosting: Combine the butter, 1/8 teaspoon salt, and cider in a stand mixer; beat until combined.
  6. Add the powdered sugar gradually, beating well after each addition. Spoon onto the cake. Store loosely-covered in the fridge until ready to serve.

HBD Vanilla Cake (3)

Roasted Potato Rounds

Roasted Potato Round (1)

Way healthier than potato chips, but fantastically yummy, this recipe is a great way to get babies to eat potatoes if they don’t like them mashed.

Ingredients:

  • 3 red potatoes
  • 2 tablespoons olive oil
  • Sprinkle of salt
  1. Peel the potatoes and cut into thin slices. Arrange in a single layer on a baking sheet.
  2. Drizzle with the olive oil and sprinkle lightly with salt. Bake at 475 degrees F for 13 minutes.

Veronika loves that she can hold these by hand for delicious nibbling!

Roasted Potato Round (2)

Personalize Your Baby’s Space

Personalize Space (3)

On the eve of Veronika’s first birthday, I wanted to give her room a personal touch. I’m limited because we don’t own our home, otherwise might have considered more permanent decoration like a painted border of her favorite things (school buses, musical instruments, etc.).

Instead, I found easy-to-mount cork boards and simply tacked up pictures. Cats are a clear favorite of hers, so I found a few pictures and included other animals she likes (she says “ca ca” for a duck’s quack and a little “ffff” for a dog’s woof).

Personalize Space (1)

Now she can smile up at these decorations while she plays in her room. I also tacked up recent photos and handprints to add a personal touch to the space.

Personalize Space (4)

She makes her likes and dislikes and personality more known each day! What does your baby love at one year old? Please share in the comments!

Personalize Space (5)

Feely Bags

Feely Bag (9)

It’s been a while since I focused on a texture game with Veronika. To keep a one-year-old intrigued, you need more than just objects with texture: Make them a surprise with a reach-inside feely bag.

Fill a small child’s backpack with a few items, choosing ones that vary considerably in texture. First up, a crumpled piece of newspaper. This was crinkly and soft, I told her as she kneaded it in her hands.

Feely Bag (2)

Next up: a knobby sensory ball. We talked about how it was squishy and bumpy.

Feely Bag (3)

And best of all bouncy!

Feely Bag (5)

Then she pulled out a soft and fluffy stuffed hedgehog.

Feely Bag (6)

This was followed by a jingly set of toy keys.

Feely Bag (7)

Finally, I included a wooden block, using words like “hard” and “smooth” to describe it.

Feely Bag (8)

Meanwhile she had lots of fun simply filling the bag up with items, taking them out again, and repeating… A soon-to-be-toddler favorite activity, as I recall.