Apple Experiment

Apple Experiment (7)

Wondering what to do with any leftover haul of apples from fall apple picking? This experiment introduces kids to several concepts, namely: oxidation (the apple turning brown); PH levels (a quick overview of acids and bases); and of course the fun of making a hypothesis and testing to see if it was correct!

To start, we needed to cut two apples into wedges. Travis insisted on being my helper for this step. Use a butter knife or other child-safe knife.

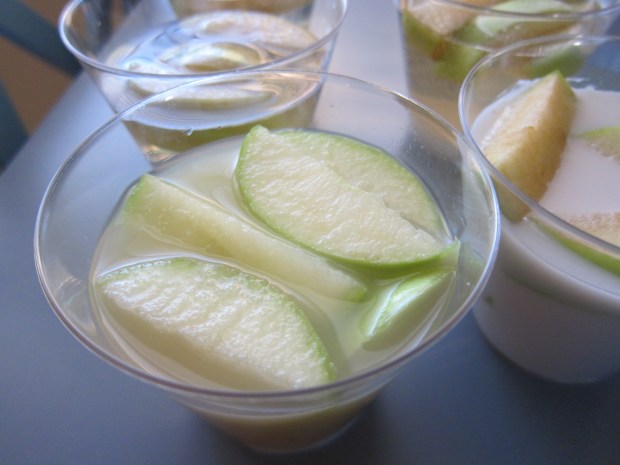
We then divided the apple slices among 5 cups.

Apple Experiment (1)

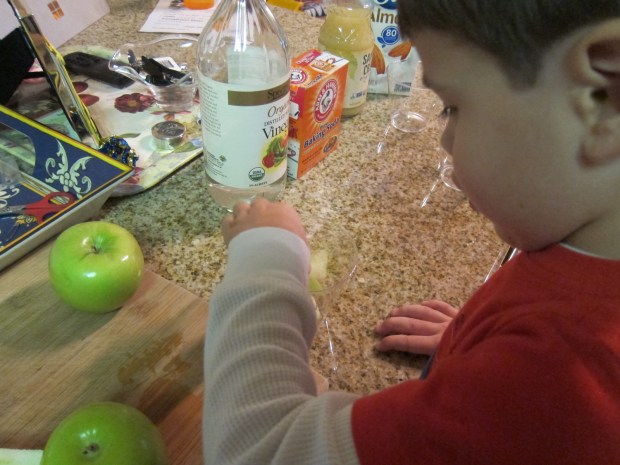
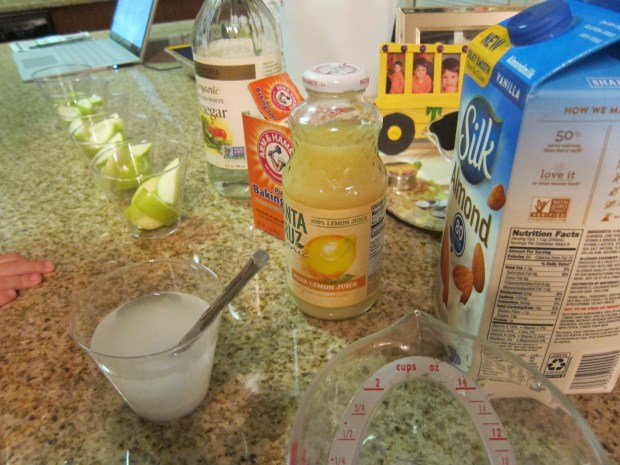
Now it was time to add our 5 solutions. Fill one cup each with the following:

Vinegar

Lemon juice

Non-dairy milk

Water

Baking soda solution

Note: for the baking soda, stir about three spoonfuls of baking soda into water and dissolve first, then pour over the apples.

Apple Experiment (3)

Travis instantly guessed that the vinegar would stop the apple from browning, and ran to share the news with his dad that we had to wait until morning! I loved that he understood a) that we were doing a scientific experiment and b) came up with his own hypothesis with no prompting.

In the morning, it was time to check on our solutions. We discovered that 4 of them had turned quite brown.

Apple Experiment (6)

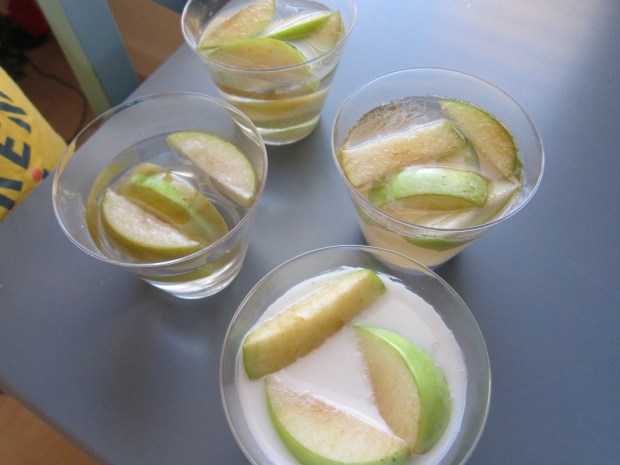
As grown-ups will have guessed, it was the lemon juice that did the trick. Give your child a quick lesson on how the lemon is acidic, and prevents the enzymes in the apple from reacting with the oxygen in the air.

Apple Experiment (8)

Overall, I found this to be an easy and seasonable way to introduce a few scientific concepts.

Apple Experiment (9)


Brown-Sugar Pear Blender Muffins

Blender Muffins.JPG
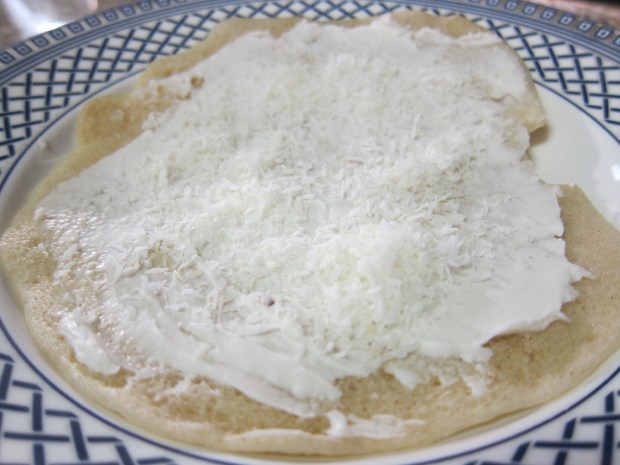
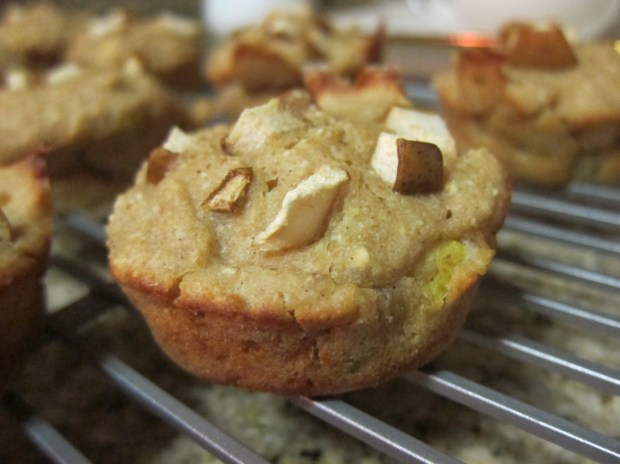
The method behind these muffins was new to me – whip up the batter in a blender instead of in bowls! The muffins come out great, and it makes clean-up a snap.

Ingredients:

  • 2 ripe bananas
  • 1 and 1/4 cups quick oats
  • 1/2 cup all-purpose flour
  • 2 teaspoons baking powder
  • 1/4 cup brown sugar
  • 1/4 teaspoon cinnamon
  • 3/4 cup non-dairy vanilla yogurt
  • 2 Ener-G eggs
  • 1 pear, chopped
  1. Combine all of the ingredients except the pear in a blender; process until smooth.
  2. Stir about half of the pear chunks into the batter, and divide evenly among muffin cups coated with cooking spray.
  3. Sprinkle the tops of the muffins evenly with the remaining pear. Bake at 350 degrees F for 25 minutes. Let cool in the pan for 5 minutes, then transfer to a wire rack and cool completely.

Make these the night before, then refrigerate and grab one for a quick weekday breakfast the next morning!

Lemony Turkey-Corn Soup

Turkey Soup

Here’s the vegan answer to the age-old Thanksgiving query: What to do with all those leftovers! If there are any extra vegan holiday roasts or Tofurky lurking in your fridge, this soup is for you. I like to prepare Gardein’s turkey cutlets ahead of time, then rub off the breading and chop before adding to the pot.

Ingredients:

  • 4 cups low-sodium vegetable broth
  • 1 cup chopped celery
  • 2 cups diced red potato
  • 1 teaspoon garlic powder
  • 1 teaspoon fresh thyme
  • 2 cups cooked meatless turkey
  • 1 (16-ounce) bag frozen corn
  • 1 (15-ounce) can cannellini beans, drained and rinsed
  • 2 tablespoons lemon juice
  1. Combine the broth, celery, potato, garlic powder, and thyme in a large pot. Bring to a boil, then reduce heat and simmer for 10 minutes, uncovered.
  2. Add the turkey, corn, beans, and lemon juice. Cook for a final 5 minutes.

Making Snot!

Snot (8)

It’s that time of year – cold and flu season that is. Travis was recently upset by his stuffed up nose, so we decided to make snot a little less mysterious and miserable, and a little more fun.

To whip up your homemade snot, sprinkle three packets of vegan gelatin substitute (such as Simply Delish) into 1/2 cup warm water.

Snot (1)

Meanwhile, add 1/4 cup light corn syrup to a second bowl.

Snot (2)

Stir the gelatin with a fork to dissolve the lumps, then add to the corn syrup mixture. This should result in a string, snotty mixture, but Travis liked the look of the lumpy gelatin, which he decided was “boogies.” Hey, whatever makes snot seem fun!

Snot (3)

For extra ick factor, add a few drops of green food coloring, then go wild spooning and scooping through your snotty mixture.

Snot (6)

Travis was delighted at first, and soon became a bit of a mad scientist. He wondered what would happen if we added more corn syrup…

Snot (7)

…And then wanted to add more food coloring. As a result, our “snot” was soon pretty much just goop, but we still had fun with it!

Snot (5)

If you like, you can explain to your child that snot is simply a mix of protein, sugar, and water – nothing to be too upset about, when their little noses do inevitably get stuffed up.

Want more flu season fun games? Check out my past posts on how germs spread and blowing your nose!

Craft Stick Dolls

Craft Stick Dolls (12)

Travis attends an art class where one of the free-play toys is a set of fabric swatches and wooden doll figures to dress up in different patterns. It’s a huge hit with kids in the class, so we recreated it at home!

Instead of fabric, I purchased a pad of decorative craft paper, in dozens of different patterns. For the dolls, we simply used wooden craft sticks!

If your child would like to, they can color in the craft sticks first with marker. I colored a few, but Travis decided he wanted the rest left plain.

Craft Dolls (6)

He was way more into applying a layer of mod podge to the craft sticks, proudly squeezing a line of glue down the middle of each.

Craft Dolls (1)

Another option is to brush on the mod podge with a foam brush, which we did a few times, too.

Craft Dolls (9)

Then it was time to dress our dolls! I told Travis he could pick a shirt and skirt for each figure, and he loved selecting “fabric” patterns from the craft paper.

Craft Dolls (4)

My plan was to cut rectangles out for him, but Travis insisted on cutting pieces himself.

Craft Dolls (2)

And proudly glued them on.

Craft Dolls (3)

As a result, we soon had very inventive fashion designs popping up. This one turned out to be the perfect shape for a skirt!

Craft Dolls (5)

Then Travis layered two popsicle sticks together; I thought the resulting doll looked like she was wearing a kimono.

Craft Dolls (11)

And we even had one wearing pants instead, when Travis made an accidental snip down the middle.

Craft Dolls (10)

Once the glue dried, I markered in smiles, hair, and shoes on our dolls as the finishing touch.

Craft Stick Dolls (13)

Overall, I loved watching his creativity with this simple activity. Leftover craft paper soon turned into “leaves” around the apartment, so don’t let the inventiveness stop just because the dolls are done!

Craft Dolls (7)

Pancake Pizzas

Pancake Pizza (1)

This quick breakfast recipe relies on store-bought pancake mix, and puts kids in charge of the final product. If you have older children, keep this in mind for a fun morning activity after a sleepover. Ingredient amounts below are unspecified, since each “pizza” will be different.

Ingredients:

  • Pancake mix
  • Non-dairy cream cheese
  • Jam or Jelly
  • Chopped fresh fruit
  • Shredded coconut
  1. Prepare pancake batter according to package directions. Cook on a skillet or griddle.
  2. Now let kids decorate their pancakes! Begin with a layer of cream cheese or jelly spread on top.
  3. Sprinkle with fresh fruit and coconut to taste.

My son’s favorite is pancakes spread with strawberry jam, and topped with a little coconut and chopped kiwi.

Pancake Pizza (2)

We also like winter wonderland pancakes: spread with cream cheese and sprinkled with coconut.

Pancake Pizza alt.JPG

Veggie Pesto Pitas

Veggie Pesto Pizza

These easy pitas look like individual pizzas, and kids can top ’em with just about any veggies they like. Many brands of pesto contain cheese, but look for the vegan pesto from Meditalia.

Ingredients:

  • 1/2 cup non-dairy cream cheese, softened
  • 1 tablespoon pesto
  • 2 (6-inch) whole wheat pitas
  • Assorted veggies
  1. In a bowl, stir together the cream cheese and pesto until well combined.
  2. Spread about 1/4 cup cream cheese mixture on the top of each pita.
  3. Top with veggies to taste: we used corn, steamed broccoli florets, and finely chopped bell pepper. Refrigerate until ready to serve.

Pipe Cleaner Caterpillar

Pipe Caterpillar (5).JPG

I was delighted to see Travis pretending this morning that he was on a “nature walk” around our apartment, taking along a bucket and finding “treasures.” One of the items we never found on a true nature walk this fall was a wooly bear caterpillar – so we decided to make a few to find around the house!

Wrap pipe cleaners around a pencil tightly, then simply slide off. I only had brown pipe cleaners at home, which served our purpose perfectly, but feel free to be inventive with colors: shiny caterpillars, multi-colored caterpillars, whatever suits your child’s fancy!

Pipe Caterpillar (1)

Travis immediately was wiggling them around the “forest floor.”

Pipe Caterpillar (3)

He then stretched out some of the coils so they could be worms instead – I love when his imagination takes a game in a direction I hadn’t anticipated.

Pipe Caterpillar (6)

He then wanted a turn coiling a pipe cleaner around the pencil, which was tricky for him, but he loved trying it out.

Pipe Caterpillar (7)

We ended up gluing googly eyes on just a couple of the caterpillars, for an extra adorable touch.

Pipe Caterpillar (4)

Hopping Grasshopper

Hopping Grasshopper (5)

After fun bug crafts in our latest Koala Crate, we were ready to take our bug-making up to the next level – with a grasshopper who really hops! I should note that Travis’s patience was very thin when we made this project. We had to wait several times – for paint to dry and then for glue to dry. Make sure to set your child’s expectations that the grasshopper won’t be able to hop right away, and you’ll avoid any disappointment.

To start, cut a recycled egg carton into a piece that is three egg sections long.

Hopping Grasshopper (1)

Paint the carton green and let dry.

Hopping Grasshopper (2)

While the paint dried, I cut wings, antennae, and two legs from green construction paper – older kids might enjoy doing this step themselves! You can of course give the grasshopper a more proper 6 legs, but because of the aforementioned trouble with waiting, Travis only glued on one set of legs.

Hopping Grasshopper (3)

Travis helped decide where each piece should go on the grasshopper, correctly identifying legs on the bottom etc. Then it was more waiting!

Hopping Grasshopper (4)

Finally, attach a small bouncy ball to the middle segment of your grasshopper.

Hopping Grasshopper (7)

The original idea was to attach the ball with two pins, but lacking pins, I used hot glue instead. Unfortunately our grasshopper only lasted through a few hops before the ball came loose, so pins seems like the better way to go.

Hopping Grasshopper (6)

But at last, he’s off!

Hopping Grasshopper (8)

Match ‘Em Tweezer Sort

Tweezer Sort (3)

Here’s a way to trick your kids into practicing their fine motor skills while having fun (and matching up colors, too!). Because the game involves sharp, adult tweezers, I don’t recommend this game for kids younger than 3.

To set up, cut circles from construction paper, and place in the bottom of a muffin tin.

Tweezer Sort (1)

Now gather pom poms in a variety of colors. We had both regular and sparkly pom poms, which added nice variety.

Tweezer Sort (2)

Give your child the tweezers; Travis was instantly thrilled, since normally mommy’s tweezers are off limits! I encouraged him to move the pom poms to the correct colored muffin tin.

Tweezer Sort (4)

Travis thought it was fascinating that the soft regular pom poms were easier to pick up than the sparkly ones. He was so proud when he was able to do the latter.

Tweezer Sort (5)

For a real challenge, I added in colored buttons as well. I briefly worried these might frustrate Travis, but it turns out they were his favorite item to move back and forth.

Tweezer Sort (7)

In all honesty, it wasn’t long before he grew bored and decided the pom poms made great monster eyes.

Tweezer Sort (6)

Then he was on to “baking” pom pom cookies in a muffin tin oven instead – nothing wrong with a little imagination though!