Super Hero Costume

super-hero-2

Need a last minute costume? It only takes a couple of easy items to put together this super hero idea from High Five magazine, and your child can help with most of it!

Draw two eye holes on craft foam, then draw a mask shape around the eyes and cut out. Measure your child’s head and cut two more strips of craft foam to be the straps. Using self-adhesive Velcro, attach the straps to the face of the mask (kids can help with this part!)

Cut two additional strips of craft foam to be the arm bands, attaching the ends of each cuff with self-adhesive Velcro as well.

super-hero-1

Now it’s time to decorate! Add star stickers, or other fun shapes that demonstrate your super powers!

super-hero-4

For the cape, simply attach two ribbons to a towel with safety pins, and drape over your little hero’s shoulders.

Not just for Halloween, this costume will store easily for dress-up play all year long.

Advertisement

Chocolate Pudding Jack o’ Lanterns

pudding-jack-1

The cutest and easiest Halloween snack ever, delight your kiddos with this treat on Halloween or in the days leading up to it.

Cut about 1/4-inch off the top of clementines or tangerines, reserving the tops. Using a paring knife, remove the fruit segments, leaving the peel intact. Draw jack o’ lantern faces on the peels with a permanent marker, then spoon in your favorite chocolate pudding. I used Zen Soy, but you can also use your favorite homemade recipe!

pudding-jack-3

Serve surrounded by spooky decor of course.

R Week!

r-week-24

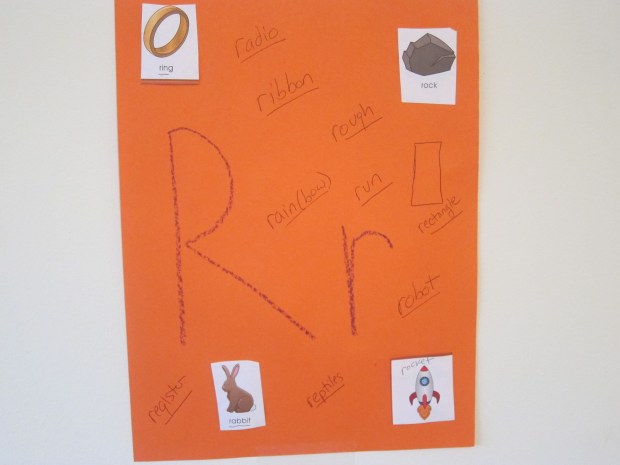
I took a week off from our Letter of the Week theme to focus on fall and Halloween crafts, but here we are in R week, having lots of fun discovering what words fit our letter.

r-week-7

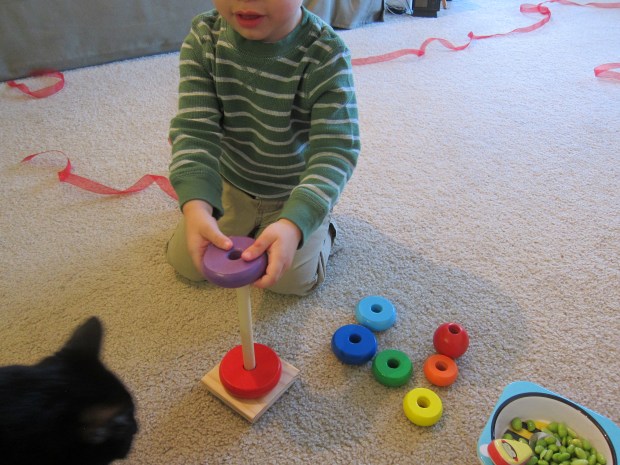
Rings: Stacking rings are an oldie but goodie, and you’ll probably find that your toddler will play with them in novel ways if they’ve been banished to the “baby bin”. We had fun stacking them in reverse-size order, rainbow order etc.

r-week-9

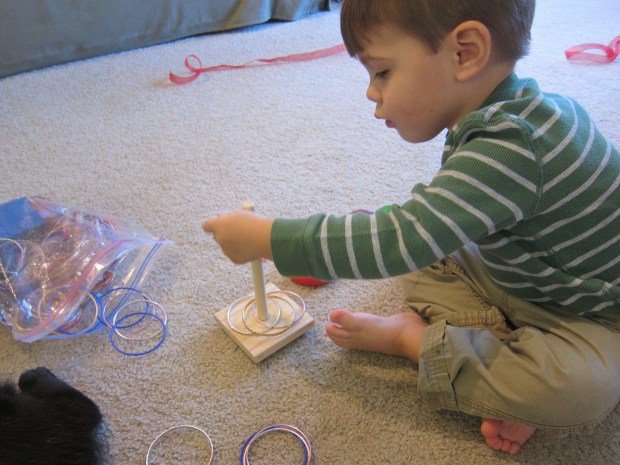
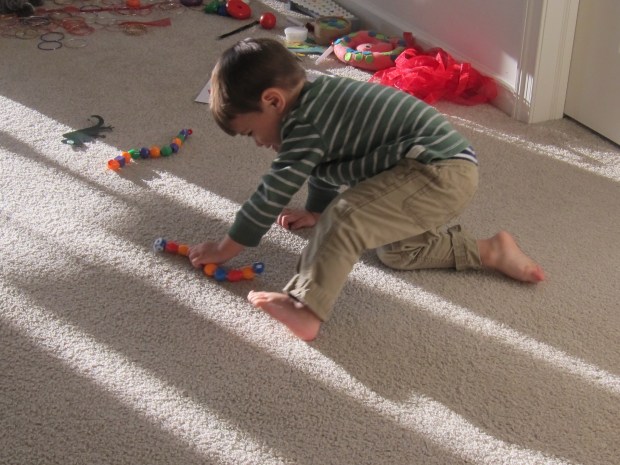
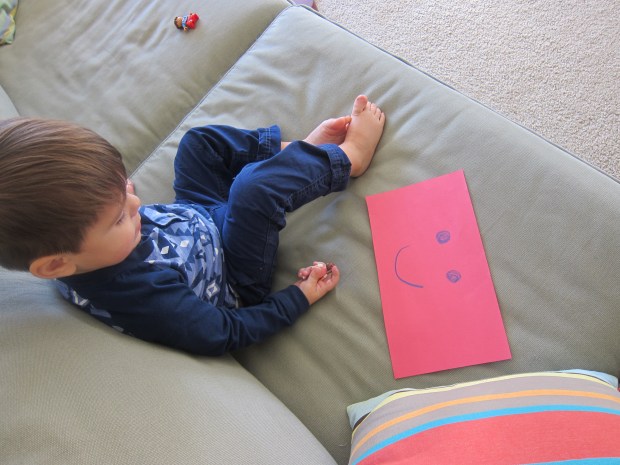
Then we played a version of toddler ring-toss, using all my bangles! Travis loved it so much that I kept the post and bangles out all week so he could play again.

r-week-2

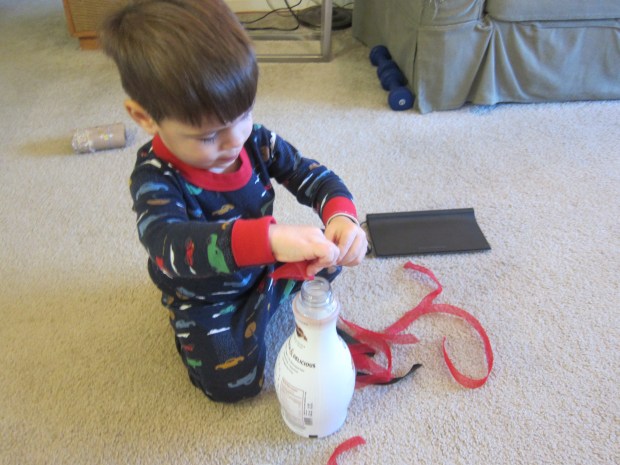
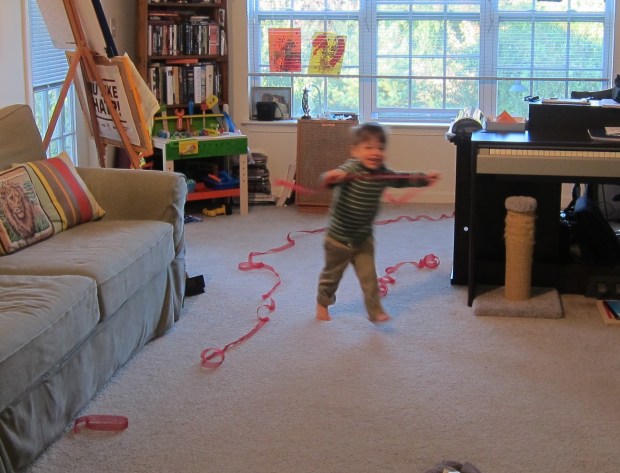
Ribbon: We pulled out another old game, great for fine motor skills, adding varying lengths of ribbon into a bottle. Even more fun, cut strands of ribbon long enough for movement fun, dancing and running around the house. The running is the perfect gross motor activity of the week of course!

r-week-5

Do always be sure to supervise ribbon play closely, if lengths are long enough to wrap around your child’s neck.

r-week-16

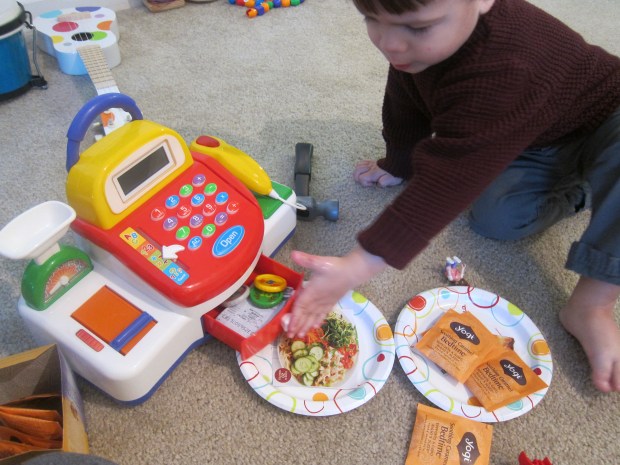
Register/restaurant: One of the joys of this age is watching games become ever-more imaginative, instead of just about manipulating objects or buttons. So while we played with his toy register, we invented games of “restaurant,” with paper-plate meals.

r-week-20

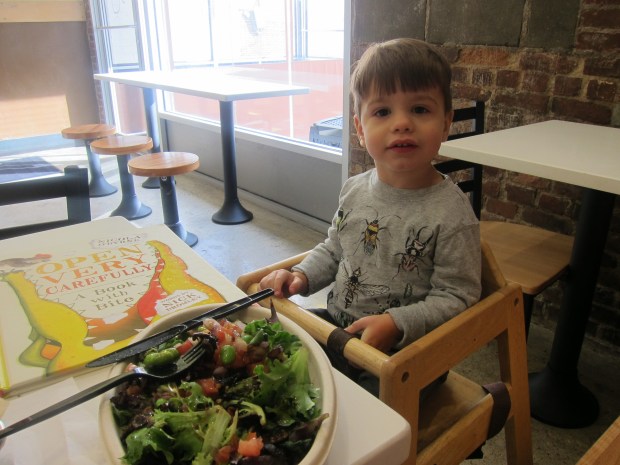
We finished with a real trip to a restaurant for vegan smoothies; Travis was very proud to connect the dots to it as our R week field trip.

r-week-23

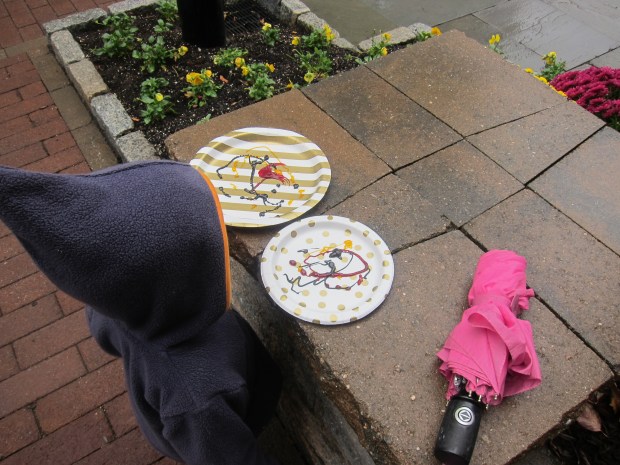
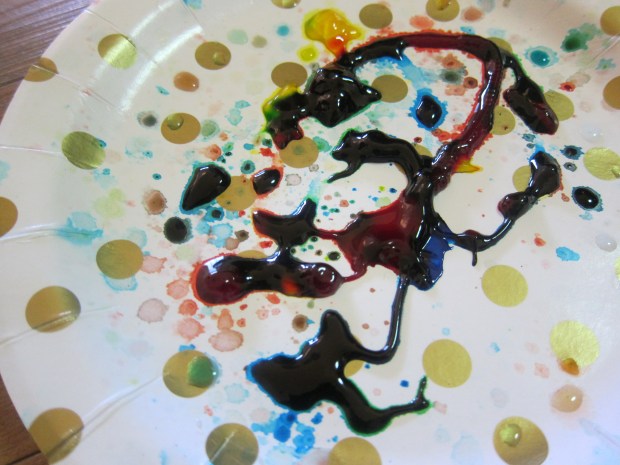
Rain(bow): We’ve done so many rainbow crafts that I more wanted to focus on rain itself. Luckily the weather cooperated! A dreary drizzly day was made much brighter with the help of some “rainy paintings.” Squirt food coloring onto paper plates, then take outside and let the rain finish the painting for you.

R week (27).JPG

Don’t forget to puddle stomp while you’re out in the rain, of course!

r-week-19

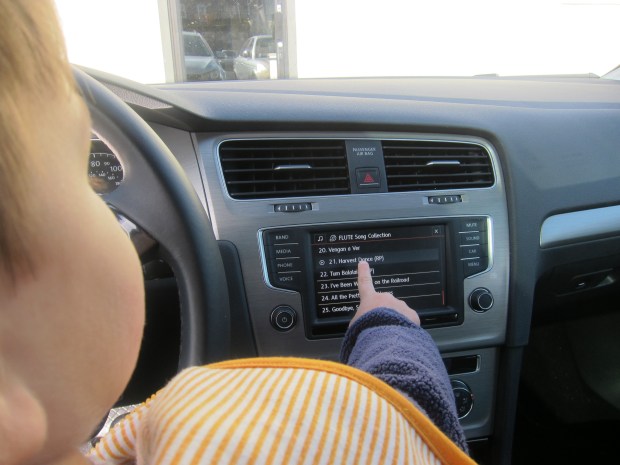
Radio: Here’s a word I would never have turned to if it wasn’t R week, but it was a fantastic prompt! I sat Travis on my lap in the car (parked, of course) and let him explore radio buttons. He was absolutely fascinated, and loved being able to switch between songs and turn dials. If you still have an old radio at home, now is the time to play with it.

r-week-21

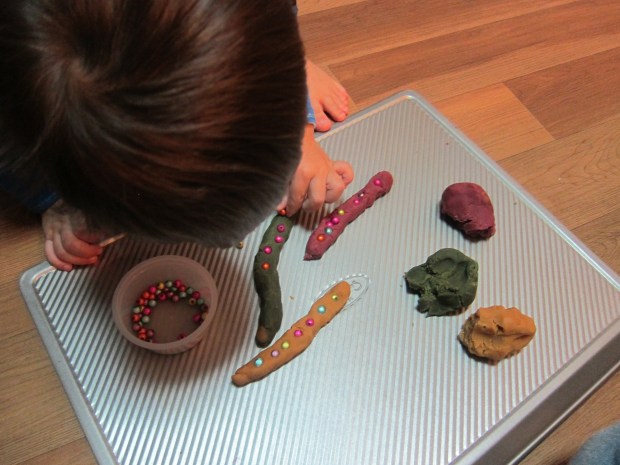
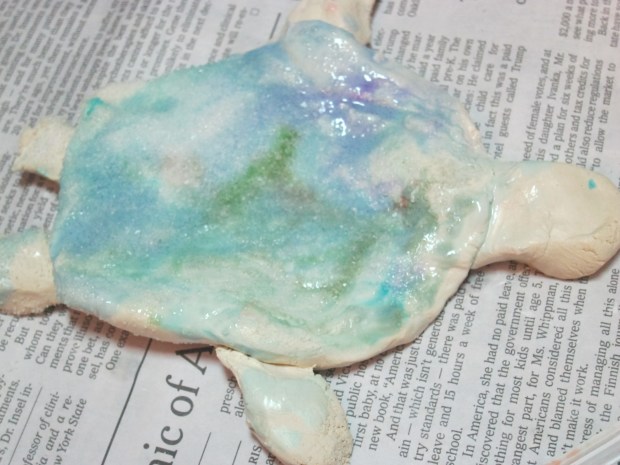
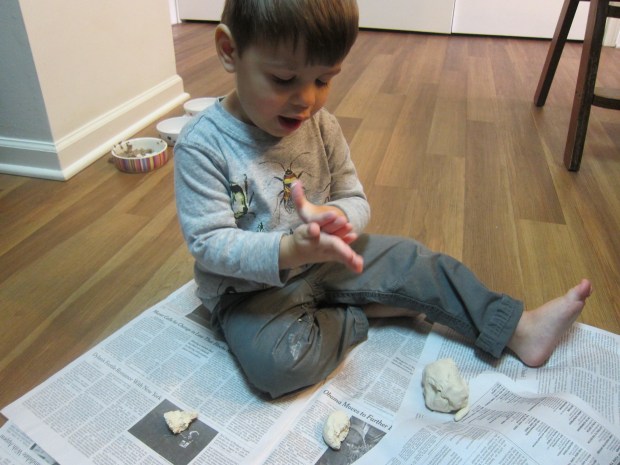
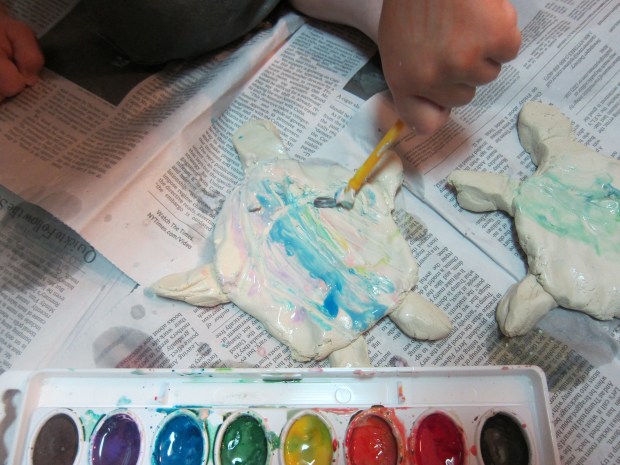
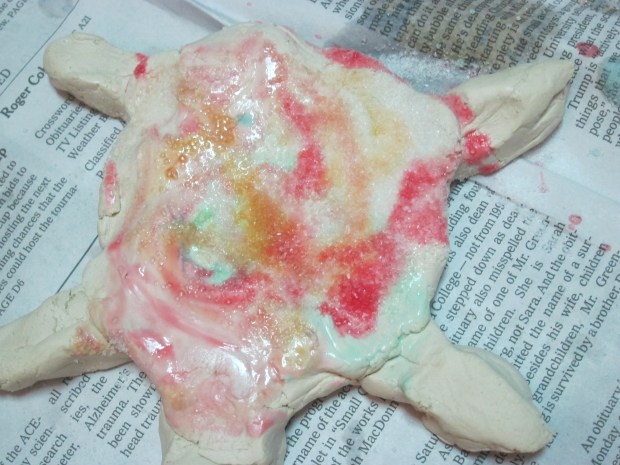
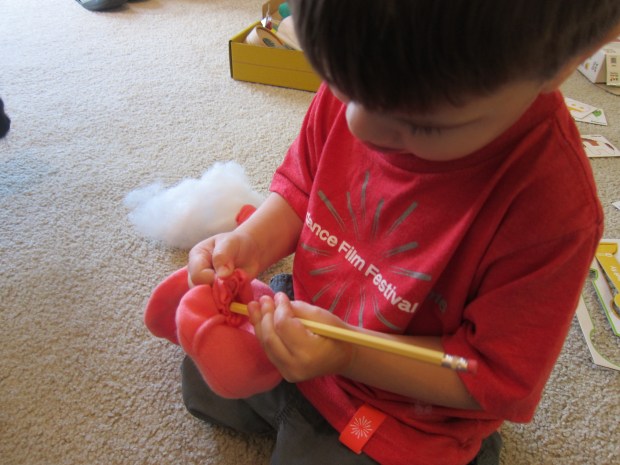
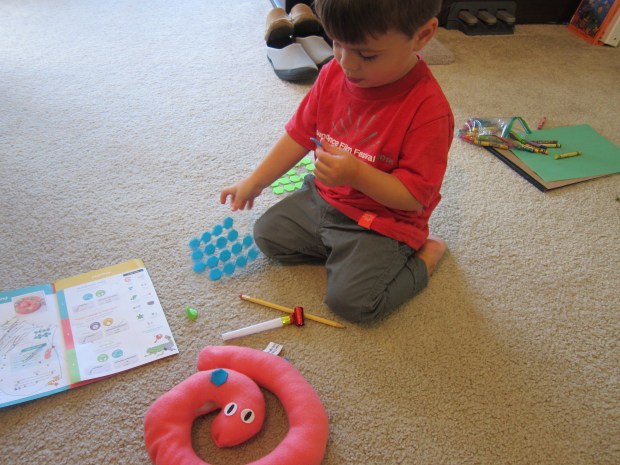
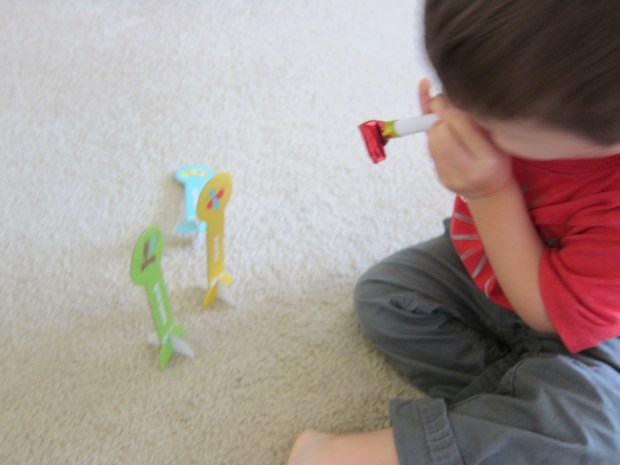
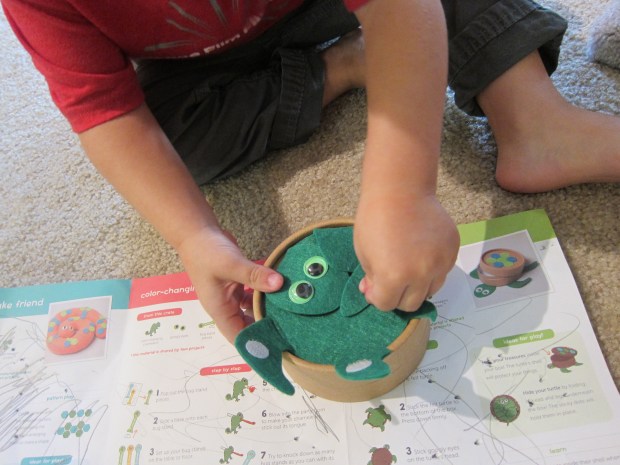
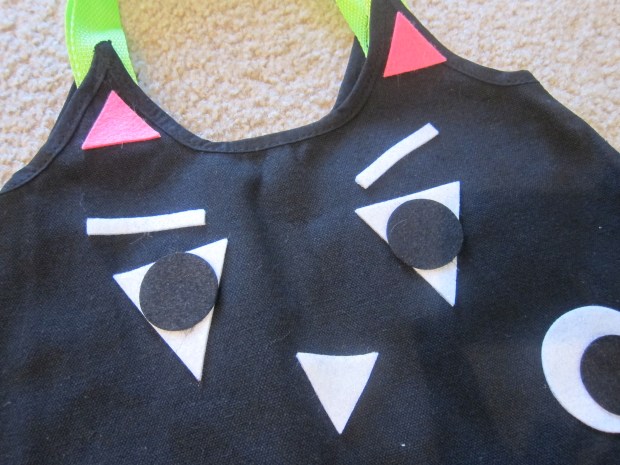
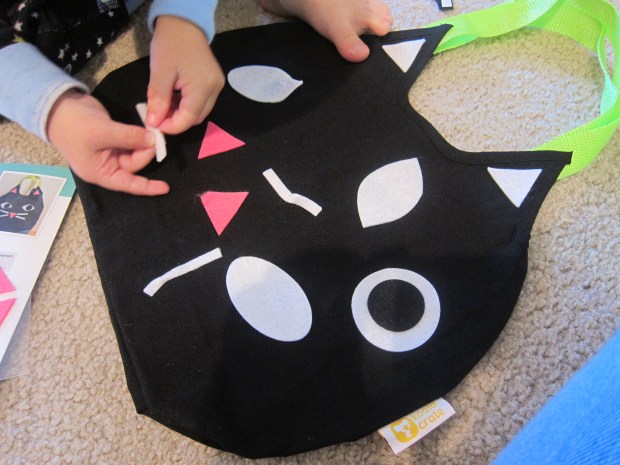
Reptile: What perfect timing for the arrival or our reptile-themed Koala Crate! In addition to the crafts in our crate, we acted our reptile charades, painted clay turtles, and had fun making play dough reptiles, adding craft store beads for the scales.

r-week-17

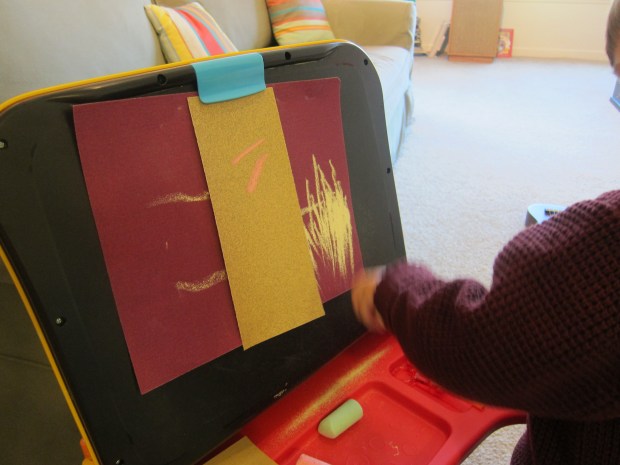
Rough: Not all words need to be nouns; we focused on the adjective “rough,” doing a texture walk around the house to discover what was rough and what was smooth. Then we made “rough art” – seeing how chalk felt on various grades of sandpaper.

And for our weekly extras:

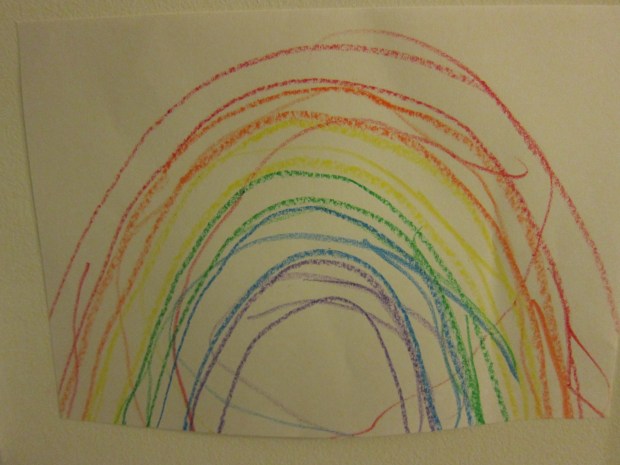
Fine art: A simple task but a real milestone; I wanted to see how well Travis could color inside the lines these days. I outlined a rainbow for him, and then had him fill in each color only in the designated area. Not bad for two and a quarter!

r-week-26

Food: Travis met his first radish!

r-week-12

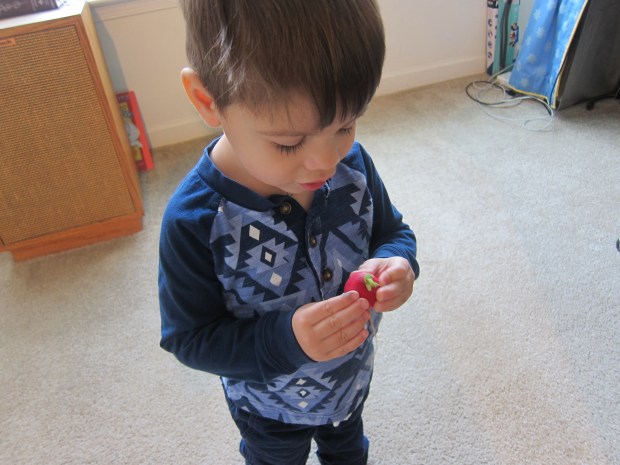
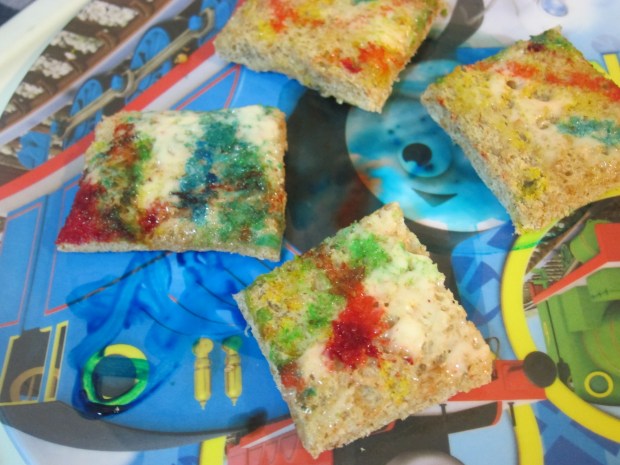
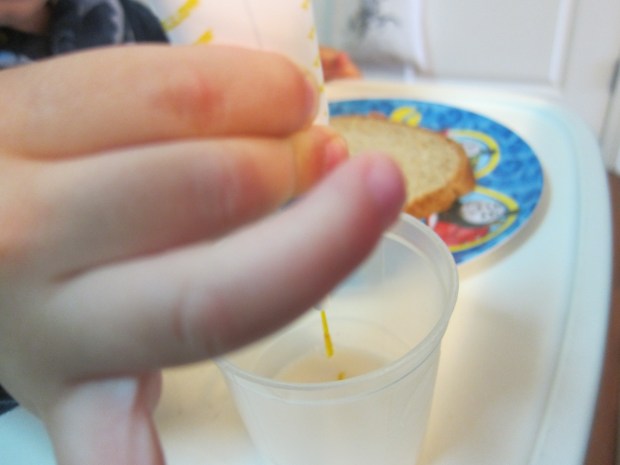
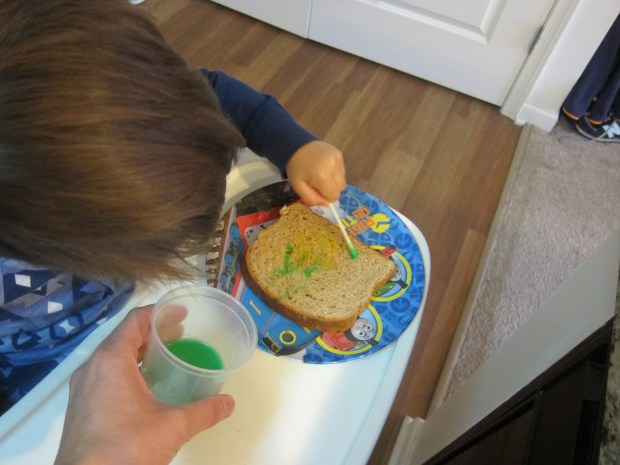
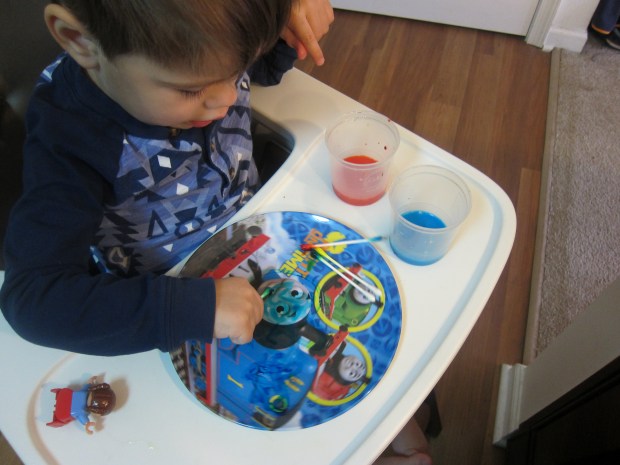
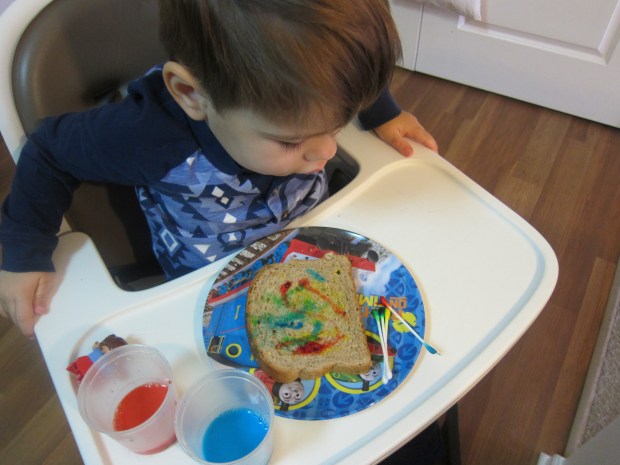
To make this slightly-peppery veggie toddler-friendly, roast in the oven with a little bit of olive oil, salt, and thyme for about 20 minutes. We also snacked on raspberries and raisins. And then of course we had to have rainbow toast.


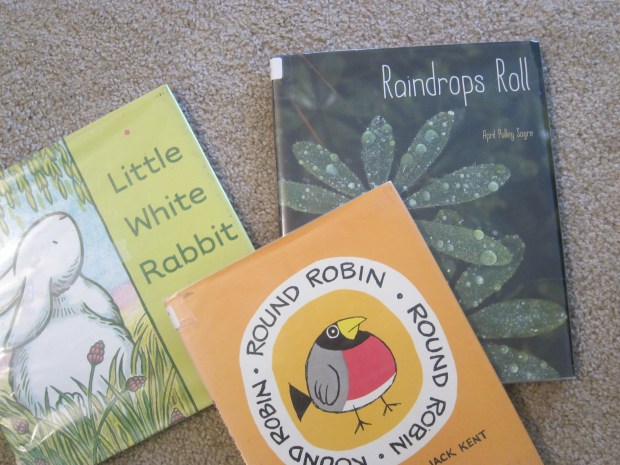
Books: Travis’s stuffed rabbits joined us for a delightful read of Little White Rabbit by Kevin Henkes. Read any other rabbit books you have at home, or try Round Robin by Jack Kent (sure to elicit laughter), or Raindrops Roll, by April Pulley Sayre.

r-week-25

Songs: Row Row Your Boat is an old favorite, with a few cute versions available to watch online. We also sang many a refrain of I’ve Been Working on the Railroad while strumming the guitar here at home!

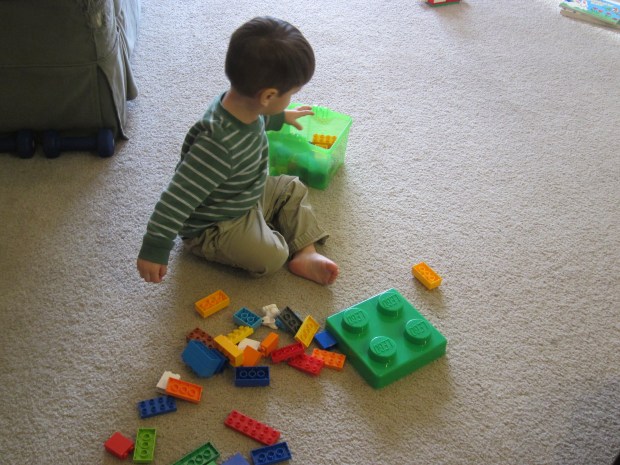
Math: We focused on rectangles this week, of course. Travis knows the shape but it was nice to concentrate on it. First we separated out all his Duplo and only kept the rectangles, to build into houses and cars.

r-week-10

We also had a rectangle hunt around the house before going to bed one night. Travis couldn’t believe how many we found: “The door is a rectangle! The fridge is a rectangle!”

r-week-14

You can also introduce a rectangle “character” like we did recently with Tommy Triangle. Try something like this:

Robbie Rectangle is my name,

I have four sides, but they’re not the same.

Watercolor Clay Turtles

watercolor-turtle-11

This cute project is really the first time Travis has worked with clay, not counting the rubbery feeling air-dry kind, and he dove into it like he’s being modeling clay all his life!

watercolor-turtle-6

Our stated purpose was to make some turtles in order to paint their shells, and Travis liked helping me shape the shells at first.

He then was so busy rolling “snakes” and “worms” that I finished the turtles’ heads and limbs on my own… but I loved watching Travis roll the clay between his hands until he had a little collection!

watercolor-turtle-5

We set aside the “worms” to dry, and turned back to our turtles. Normally, you want your clay to dry out, but we wanted ours to get wet and messy! First use a paintbrush or your hands to cover the surface of the turtle shells with water.

Next, paint or drip on watercolor paints, and watch the colors run and swirl over the shells!

watercolor-turtle-9

The result is gorgeous and fun. You can also sprinkle on little patches of salt, which makes the color bleed or intensify in places.

watercolor-turtle-10

A very cool project, the first of many clay games to follow I’m sure.


Reptile Crate

koala-reptile-5

This month’s theme from Koala Crate was reptiles, and it was by far our favorite crate in a long time! The projects and games were quite varied, and helped to inspire creative play and learning.

As always, you can replicate many of the crafts below with items from a craft store. the exception being the color-changing chameleon… see details below.

First, we made our stuffed snake. The craftiest item in the crate, this involved stuffing fluffy roving into a felt snake. Your child will definitely need help – even I had trouble stuffing the very center of the snake! – but Travis loved the fluffy filling, and was a big helper pushing it as far as we could with a pencil.

koala-reptile-2

As you decorate the snake with the provided hexagon stickers, you can discuss how all reptiles have scales, or talk about shapes and patterns. Travis sort of lost interest though, and preferred to pretend the stickers were band-aids on his fingers. #toddler

koala-reptile-3

But then came the real fun: the snake comes with slits to insert a party blower “tongue.” Travis was so proud that he could use the party blower all by himself.

koala-repitle-1

We used the blower for the next crate activity as well: a chameleon and three “bugs” for him to catch with his long tongue. Take turns with your child and see who can knock down all three bugs first. Sure to produce giggles!

koala-reptile-7

Even cooler, the chameleon changed colors when exposed to heat. Travis was at first astonished and then delighted at the effect when he held the green animal in his hands.

koala-reptile-10

Finally, we assembled our turtle box, adhering a felt turtle body to a cardboard base, and covering with the lid with more hexagon stickers. Attach Velcro points to the turtle’s limbs and head, and he can fold under to “hide” just like turtles do in their shells!

koala-reptile-9

A really cute way to introduce this element of the animal. Travis loved hiding treasures inside the turtle’s shell.

koala-reptile-8

We continued the reptile play with charades: chomping like a crocodile, slithering like a snake, and “hiding” like a chameleon, to name a few. Travis’s favorite was the slithering!

koala-reptile-14

To make one more fun snake, I had Travis practice threading, adding large beads to a pipe cleaner (bent slightly at the end to keep the beads on). It was by far his best threading yet.

koala-reptile-11

Once the pipe cleaner is full, bend up the other tip and add stickers for eyes, then slither your snake all over the house!

koala-reptile-16

Overall, great fun, a nice dose of science, and adorable crafts that we’ll be able to use again and again. Thanks Koala Crate!

Koala reptile (15).JPG

Rainbow Toast

Rainbow Toast (5).JPG

This is an adorable food art project for kids… and when finished, they can eat the results! For all-natural and vegan food coloring without chemical dyes, I recommend Color Kitchen.

Set your child up at a workspace with a slice of bread and small cups filled with a bit of non-dairy milk, then help them add food coloring to achieve the desired shade.

rainbow-toast-1

Using q-tips, brush the “paint” onto the bread “canvas” – here’s Travis hard at work!

rainbow-toast-2

While I toasted the bread quickly under the broiler, Travis continued the artistic fun on his plate.

rainbow-toast-4

Then snack time!

rainbow-toast-3


Halloween Tote

koala halloween (4).JPG

Instead of purchasing a bag for all the upcoming Halloween loot, engage your child’s creativity and have them decorate their own tote! We got ours care of Koala Crate, but you can easily buy a blank canvas bag and cut shapes from felt to adhere.

Although our kit came with suggestions for animal faces, Travis had other plans. He dove right in, telling me which shape he was holding and assembling into an ever-intricate design.

koala-halloween-1

He had so much fun that I simply sat back and let him decorate. On the reverse side, I added a face with the leftover stickers, something sort of resembling an owl!

koala-halloween-3

It will be Travis’ first Halloween going door-to-door, so I hope this tote helps create special memories.

koala-halloween-2

Squirrel It Away

Squirrel Away (2).JPG

Here’s another cute idea from 365 Toddler Activities That Inspire Creativity; this silly game will engage your child’s imagination and get them running around to burn off some energy!

Of course we’ve been having fun watching the very busy squirrels outside this time of year. To set the stage for the game, we first sang the song Gray Squirrel:

Gray squirrel, gray squirrel, sway your bushy tail.

Put a nut between your toes,

Wrinkle up your tiny nose.

Gray squirrel gray squirrel, sway your bushy tail.

Then it was time to be a squirrel! Hide any nuts in the shell around the house – walnuts, pistachios, or even real acorns from outside will work great! Hide them in little batches and invite your “squirrel” to find them all.

squirrel-away-1

No sooner did he find them than Travis was asking if we could do it again – a sign of a hit!


Leaf Color Experiment

leaf-color-4

Our autumnal fun continues! Although the science behind this experiment is advanced for toddlers, even little kids will delight in seeing how the water changes colors. For preschoolers and older kids, you can go into more detail about chlorophyll and why leaves change color in the fall.

As with our leaf glitter project, half the beauty of this activity is going out to collect your leaves. Get outside and have fun!

leaf-color-1

Choose a variety of autumn-hued leaves, and return home to cook in boiling water for 5 minutes. Carefully use tongs (adults only!) to transfer the leaves to clear glasses or test tubes filled with rubbing alcohol.

leaf-color-3

Let sit for at least an hour, and you’ll see the alcohol “magically” change color to match each leaf. The results will only get better after time – at the 8 hour mark, Travis was really excited to note the changes. Leave over night for the most vibrant result.

leaf-color-6

Interestingly, our green performed the best, and our most vibrant fall orange leaf barely tinted the liquid. Even adults can be surprised by experiments!

Pumpkin Peepers

pumpkin-peepers-2

It wouldn’t be Halloween without pumpkins of course, but toddlers are too young for carving… So what to do?

This cute idea, adapted from Parents magazine, couldn’t be easier, and allows toddlers to make a silly face, no knife required.

pumpkin-peepers-1

Simply cut various-sized circles from craft foam, and use glue dots or sticky Velcro dots to attach the eyes and a pupil to each pumpkin. We used goofy colors, but you could also stick with a more traditional black and white palate.

To finish the faces, simply use a sharpie for noses and mouths.