Sweet Sunflower Seed Butter Dip

Sunflower Dip (1)

This creamy sunflower-based spread is a healthy alternative to butter or jelly on toast slices. And it’s school-safe, too! You can also use it for dipping veggies like very tender cooked carrots or steamed broccoli florets.

Sunflower Dip (2)

Ingredients:

  • 3 tablespoons sunflower seed butter
  • 3 tablespoons non-dairy vanilla yogurt
  • 1 tablespoon agave nectar
  1. Whisk together all the ingredients in a small bowl, and chill until ready to serve.

Sunflower Dip (3)

Quinoa Bean Salad

Quinoa Bean Salad

This vibrant salad has so many beautiful colors, beans for extra protein, and a lemony dressing that kids will love!

Ingredients:

  • 1 cup quinoa
  • 2 cups water
  • 1 (12-ounce) box kidney beans
  • 1 cup canned corn
  • 1 finely chopped red bell pepper
  • 1/3 cup minced fresh cilantro
  • 1 lemon
  • 3 tablespoons balsamic vinegar
  • 1/2 cup olive oil
  • 2 tablespoons cumin
  1. Combine the quinoa and water in a saucepan; cook over medium heat for 20 minutes, until the liquid is absorbed
  2. Fluff the quinoa with a fork and transfer to a large bowl. Add the beans, corn, bell pepper, and cilantro.
  3. Squeeze the lemon juice over the quinoa mixture, then add the balsamic, olive oil, and cumin, stirring to coat.

Food Exploration Station

Food Explore Station (3)

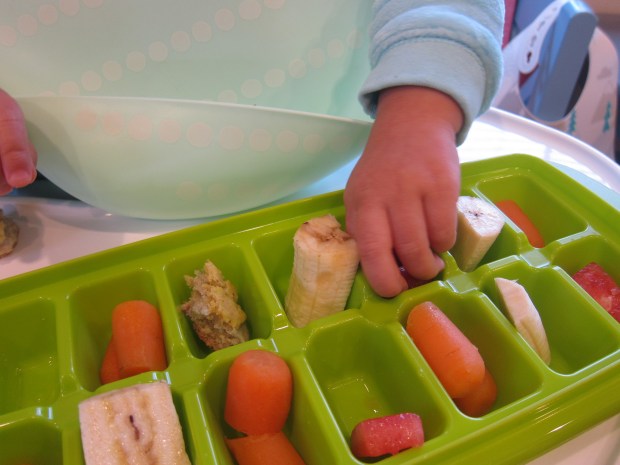
The compartments of an ice cube tray are just the right size for setting up a station that allows your toddler to touch, taste, poke at, and other wise explore food! This game is great for soon after a meal so that the emphasis is on all the senses, not just on eating.

I wanted to fill the tray with a variety, but not an overwhelming amount of different objects for Veronika. I included warm cooked carrots, chilled slices of watermelon just out of the fridge, soft chunks of room temperature banana, and a crumbly cookie.

Food Explore Station (2)

Veronika wasted no time getting her hands in there! “Hot!” she said to me, feeling the carrot, quickly follow by a surprised, “Cold!” to the watermelon. She smooshed one of the banana pieces in her hand, but mostly passed that over in favor of the watermelon.

Food Explore Station (4)

The cookie certainly got a few nibbles, too. You can use any fruits or veggies (or cookies!) for this activity, or play multiple times with seasonal fruits at different times of the year. Because all of the foods were about the same size, they are fun for stacking, too.

For some slipperier tactile play, I cooked up green linguine noodles. These were great both for the texture (somewhat slimy, which can take toddlers a while to get used to) and for the color.

Food Explore Station (5)

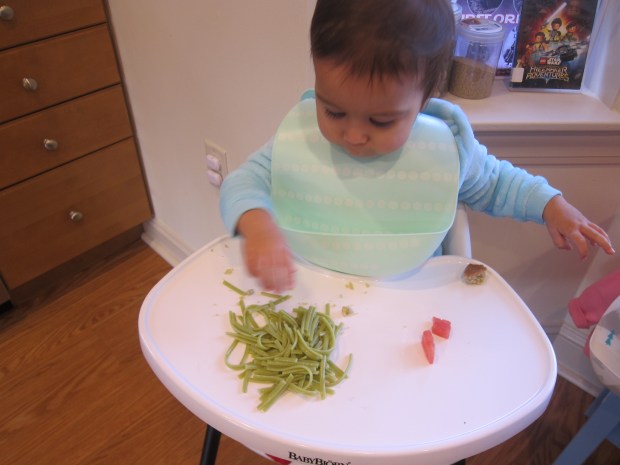
I thought she might hesitate, but she loved mushing through the noodles with her fingers. Once she took a nibble, she looked at me with recognition. “Pasta!” she said.

Food Explore Station (6)

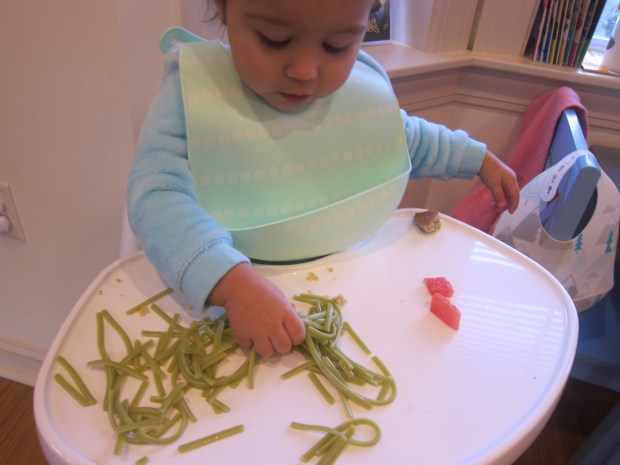
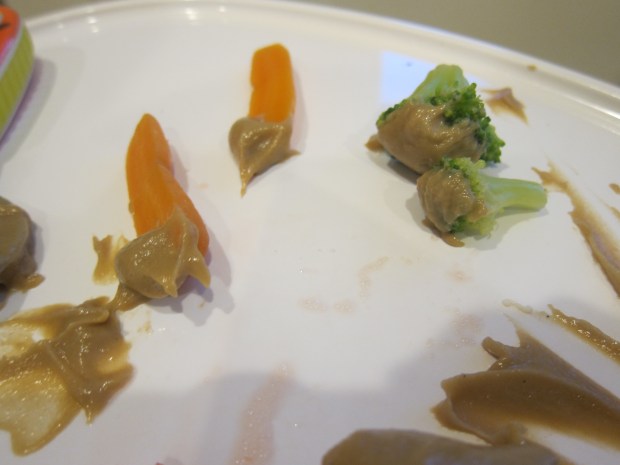
Don’t forget, toddlers learn about food when exploring like this. So the next time this happens…

Food Explore Station (1)

…don’t scold. It’s all about the process! And kind of like an art project, too.

Continent Cookies and Pen Pals

Passports World (1)

Travis has a new subscription to the World Edition of Little Passports, having graduated from Early Explorers. With this big kid subscription, he’ll now get to explore a specific country each month instead of a worldwide theme.

The starter kit contained everything he’ll need moving forward, including: a suitcase; a letter from our guides “Sam and Sofia”; a first luggage tag; a passport; a world map; and a coin chart that he’ll fill in each month.

Passports World (2)

The activities in his first booklet are great for early elementary school age, including simple addition, mazes, and word scrambles.

As an activity to kick start things, we made the suggested Continent Cookies. Prepare sugar cookies according to your favorite recipe (full disclosure: we used a mix!).

Divide the dough into thirds. Tint one third with about 10 drops of green food coloring; this will be your land. Tint the remaining two-thirds dough with about 10 drops of blue food coloring; this will be your ocean.

World Passports (4)

Pull off about 2 tablespoons of the blue dough and press into a disk. We followed along with Little Passport’s handy instruction sheet and tried to shape pinches of the green dough into the shapes of the continents. Travis enjoyed this challenge, and also made up his own pretend continents.

World Passports (5)

Our full world didn’t turn out too badly!

World Passports (6)

Bake according to recipe instructions, then enjoy a taste of the world – literally!

For some final fun, we checked out extras online like how to say hello in multiple languages.

World Passports (8)

We also printed out a pen pal template and decided to start a correspondence with his cousin, who lives a few states away.

World Passports (9)

Your kids might even have friends or relatives in another country to write to! We’re excited to see what arrives in the first country kit next month.

Pom Pom Push

Pom Pom Push (4)

This game is sort of like a DIY shape sorter, only all the shapes are circles and it’s more about dexterity than exact shape matching. Regardless, it was a huge hit with Veronika at just shy of fifteen months old.

Make holes in the lid of a large (empty and clean) yogurt container. You can use a drill for this, but I found it worked just fine to poke the initial hole with an Xacto knife and then use scissors to snip into an even circle. Just make sure you have no jagged edges, as cut plastic lids can be sharp. Return the lid to the top of the container.

Pom Pom Push (1)

I then presented Veronika with the container and pom poms. Since the pom poms were on the smaller side, you’ll definitely want to supervise this activity closely and make sure none find their way to your child’s mouth.

Pom Pom Push (3)

We had two sizes: tiny green ones that slipped right into the holes and slightly bigger red ones that needed a push with the thumb. She loved them both! I loved watching her dexterity as she plucked the small green ones from my palm and inserted into a hole.

Pom Pom Push (2)

Of course once the container is filled, the lid can be taken off, the pom poms dumped out, and the fun begun again!

Pom Pom Push (5)

And don’t be surprised if your toddler finds other uses for that empty yogurt container. Apparently it made the perfect seat for Veronika’s “baby”!

Pom Pom Push (7)


Muffin Tin Color Sort

Matching Muffin Tin (3)

Although a toddler at Veronika’s age (14 months old) probably won’t be able to sort colors yet, this activity introduces the idea of color matching, plus includes all sorts of fun elements to play with.

I lined the bottoms of a 6-cup muffin tin with circles of colored paper. Use colored construction paper for this (or in a pinch, you can use marker on white paper for any colors you are missing).

Matching Muffin Tin (1)

Next, I set out a rainbow assortment of colored sensory balls. I couldn’t find our purple ball (which is course turned up right after!) so substituted a small purple toy.

Finally, I handed Veronika an ice cream scoop with an eye towards teaching her to transfer the balls from the bucket to the muffin tins. She loved this element of the game…

Matching Muffin Tin (2)

…though needless to say her colors weren’t always right.

Matching Muffin Tin (5)

She also wanted to move the balls from cup to cup, which left ample opportunity to talk about the pieces of colored paper she revealed and where each ball “should” go.

Matching Muffin Tin (4)

Again, this was not meant to be an activity for Veronika to get correct, but rather a great chance to introduce color matching as a concept.

Indoor Hopscotch

Indoor Hopscotch (3)

Do your kids need to jump jump jump their jiggles out first thing in the morning? This quick hopscotch game is great any time it’s too early/cold/rainy to go outside but you already have bundles of energy on your hands.

I also secretly hoped to put Travis’s design skills to work as we put our “hopscotch” course together. So first I asked him how many pieces of tape we would need for each square, and he quickly answered 4.

Indoor Hopscotch (1)

He helped set up the first few squares, and my hope was that he’d continue a course all over the room. But tearing the tape grew tedious quickly so we kept it smaller. That said, there’s no reason your kids can’t cover the whole house with this game!

Using bean bags as our playing pieces, we took turns tossing and hopping to the square the bean bag landed in. This is great for gross motor skills, especially for Travis who still struggles with hopping on one foot.

Indoor Hopscotch (5)

Stuffed animal friends wanted to hop along, too!

Indoor Hopscotch (4)

This game will definitely get everybody moving. Prefer games that work fine motor skills instead? Try our Can Toss Tumble. Prefer games that are more cerebral? Flashlight Word Game is for you!

Build Science Skills

Build Up Science (4)

The title of this post is meant quite literally; to build your child’s science and engineering skills, help them… Build! For a long time, Travis has enjoyed playing with Lego figures, but preferred to leave the actual building to me. I’ve been thrilled then to see a difference in his Lego play lately, insisting he do each step himself and learning to read and follow the diagrams in each instruction booklet.

Build Science (2)

Yet while there’s nothing wrong with building a Lego exactly according to plan, you can give things a STEM twist by building off-book. I set out a bunch of Travis’s Lego pieces and challenged him to make a bridge. How wide could he make it go?

At first he wanted it to span from a stool to a side table, but he quickly realized that the distance was too great.

Build Up Science (1)

Dialing back expectations, he moved them closer together an next puzzled out how to build up supports, then started laying the longest pieces across the gap. Black rectangles helped piece it all together.

Build Up Science (2)

We encountered a glitch when the table was lower than the stool. Thinking quickly, I helped him build up a base for extra height on that end. Success!

Build Up Science (3)

He was so proud of this construction, and continued to build a structure around the base of the bridge. When it tumbled to the ground at one point, I was so proud that he didn’t grow frustrated and used it as a chance for improvements.

Build Up Science (5)

Any Lego engineering challenge like this will work those STEM skills. Consider asking your child to build the tallest tower he or she can, or seeing if a bridge or roof can support a weight like a toy ball. Happy building!


Popsicle Stick Drop

Popsicle Drop (1)

Coordination, learning colors, and the endless surprise of watching a stick disappear and then reappear; this game has it all for toddlers!

As prep, simply use masking tape to attach an empty paper towel tube to a wall. I recommend using multiple strips of tape for extra security. I then provided Veronika with craft sticks to drop into it and placed a bucket at the bottom to catch them. That’s it!

Popsicle Drop (3)

The game will have the most visual appeal if you use a rainbow assortment of craft sticks (which you can purchase already colored at the craft store).

Popsicle Drop (6)

It took Veronika a few tries watching me release a stick into the tube before she realized she needed to release her grip to achieve the same affect. And then she was hooked!

Popsicle Drop (2)

Of course toddlers will also just love playing around with the sticks in the bucket at the bottom.

Popsicle Drop (4)

For a touch of color learning, I sorted the sticks for her into different colored piles. Needless to say, they didn’t stay sorted for long!

Popsicle Drop (5)

Creamy Pasta Salad

Creamy Pasta Salad a

A creamy dressing is a nice way to dress up pasta, making this one appeal to the whole family!

Ingredients:

  • 1/2 cup vegan mayonnaise
  • 1/4 cup non-dairy ranch or goddess dressing
  • 3 tablespoons unsweetened almond milk
  • 2 tablespoons red wine vinegar
  • 1/4 teaspoon mustard
  • 1 and 1/2 cups rotini pasta
  • 1/2 cup chopped carrot
  • 1 cup chopped cucumber
  • 1/2 cup quarter cherry tomatoes
  1. In a bowl, whisk together the mayonnaise, dressing, milk, vinegar, and mustard. Set aside.
  2. Meanwhile, cook the pasta and carrots in boiling water for about 7 minutes, or until the pasta is al dente and the carrots are tender. Drain.
  3. Add the pasta mixture to the bowl with the dressing, along with the cucumber and tomatoes.

Creamy Pasta Salad b