Make a Story Time Fort

Story Fort (8)

It’s hard to get Veronika to sit still with a book, especially at bedtime when we try to fit in a story between dinner and bath.

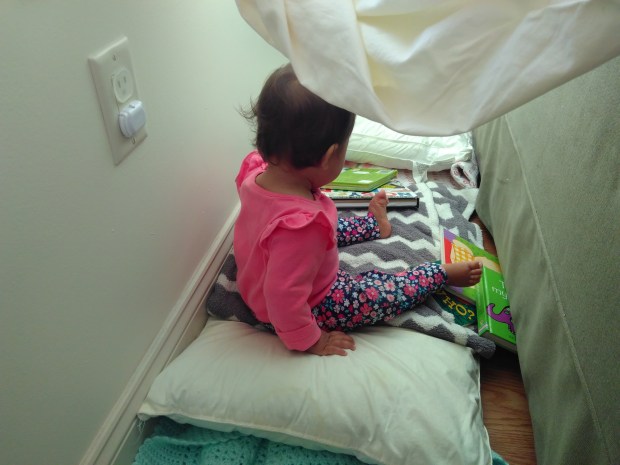
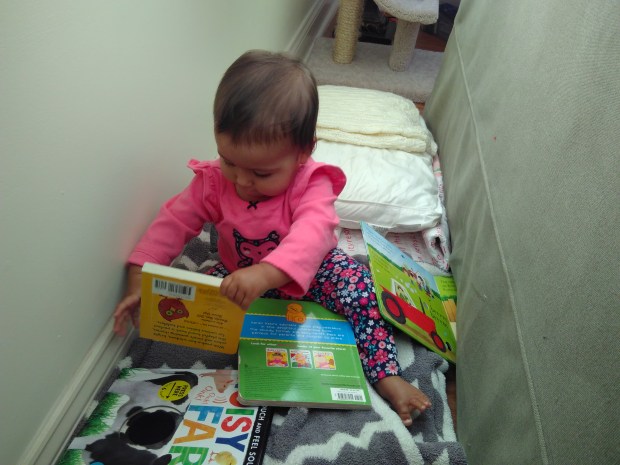
But not so when I made this fort! She was content inside for ages with a pile of books.

To make the fort, move your sofa from the wall to create a space large enough for you and your little one (alternatively, you can make the fort under a dining room table). I layered the floor with cozy blankets and pillows.

Story Fort (1)

Drape a sheet over the back of the couch and secure with shoes or books. Then head inside!

Veronika scooted it in and was immediately delighted.

Story Fort (2)

I gave her a pile of books, and soon she was thumbing through them and “reading” to herself.

Story Fort (4)

Of course then it was time to join her and read a few books for real.

Story Fort (3).jpg

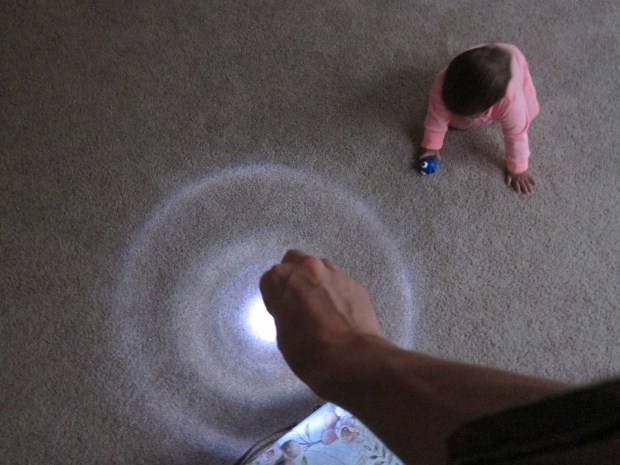
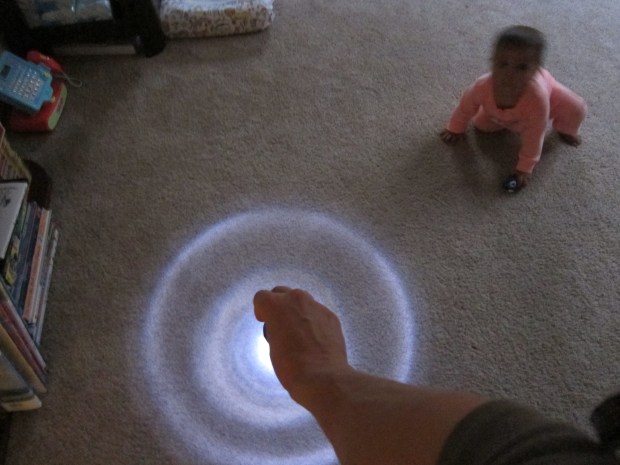
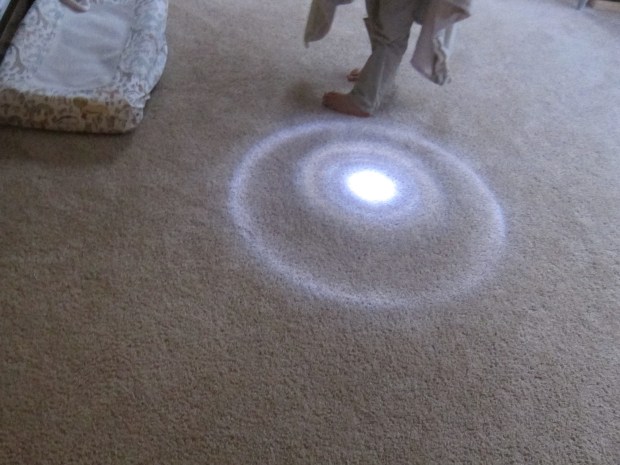
You can even add a flashlight to highlight pages or words. Once the book was through, I retreated to the side of the fort and let her take over, crawling on the pillows, enjoying her books, and reaching up for the beautifully draped ceiling.

Story Fort (7)

We probably would have stayed in longer except the cat eventually ruined the “roof”!

Story Fort (6)

Light Chaser

Light Chaser (2)

Here’s a final cute game I’ve found to play with Veronika using a flashlight, just before bed.

After her bath tonight, I simple shined a flashlight on the floor. Veronika was instantly intrigued with the spot of light on the floor.

Light Chaser (1)

Now drag the flashlight in a line or zig zag around the room. This game will be great for encouraging early crawlers, plus amusing for any already-fast crawlers! I shined the light in a path along the floor, and Veronika had to go chase it.

Light Chaser (3)

Almost there…

Light Chaser (4)

Caught ya! Babies will marvel that they are touchign the light but not feeling anything in their hands. The game is also a great way to engage older siblings in baby’s bedtime. Travis loved running the light around the room for her, admittedly sometimes too fast.

Light Chaser (5)

Create a Photo Scrapbook

Photo Scrapbook (11).JPG

Veronika is old enough now that she definitely has favorite places to go in our week together, especially as we settle into a routine while big brother is at school.

Some top picks? The library, the coffee shop, her music class, the playground, and toddler play time. Throughout the week, I snapped pictures of Veronika as we were out and about. Here’s music about to begin!

Photo Scrapbook (1)

I also added a few pictures from home, places like her high chair and crib.

Photo Scrapbook (10)

You can use a digital camera and have the pictures printed, but I love the charm of our instant camera.

Photo Scrapbook (3)

Arrange the photos in a little album or scrapbook, ideally small enough for your child to manipulate the pages.

Photo Scrapbook (8)

Veronika and I can go through and “read” about her week, or talk what we’ll be doing that day.

Photo Scrapbook (9)

Because she has no baby book chronicling her first year (second child syndrome!), I made the pictures special with the addition of scrapbook-quality stickers: look for sheets of stickers with playground themes, nursery room themes, music class themes, and other applicable subjects. These will hopefully make it special to flip through as she gets older.

Photo Scrapbook (12)

Another hope is that she can learn to point to where she wants to go, easing frustration for both parent and child in those awkward months between understanding language and the spoken word. In the meantime, she loves simply looking through her little book!


Wheat Germ Breakfast

Wheat Germ Breakfast.JPG

This little breakfast is easy to whip up, and packed with nutrition for growing babies and toddlers.

Ingredients:

  • 1/4 cup plain non-dairy yogurt
  • 2 tablespoons wheat germ
  • 2 tablespoons mashed ripe banana
  • 2 teaspoons maple syrup
  1. Stir all ingredients together and serve.

Note: If you baby doesn’t like banana, use apple puree instead.

Food Faces

Foodie Faces (1)

If you find that your 10-month-old is still playing with food more than eating it, you’re not alone; pediatricians point out that until age 1, any solids count as practice, with the main source of calories still coming from breast milk or formula. So practice away!

Now is the time for food to be fun, and today, I gave Veronika two “faces”, one at breakfast and one for a snack.

The breakfast face had a banana smile, strawberry nose, grape eyes, and raisin pupils (soak the raisins in water first, so they are less of a choking hazard). I pointed out each feature to her before she began smearing and picking up portions.

Foodie Faces (2)

At snacktime, I laid out another silly face: cooked noodles for the mouth, cooked carrot for the nose, cherry tomatoes as eyes, corn as pupils, and shredded Daiya cheese as the hair.

Foodie Faces (3)

Again I pointed and named each feature, but soon her brother wanted to eat the cheese, which Veronika thought was hilarious. I added a pile of extra noodles and it turned into sensory play. Now that’s foodie fun!

Foodie Faces (4)

Unpoppable Bubbles

Unpobbable Bubbles (4)

There’s some serious “wow” factor to this little bubble experiment, the perfect way to turn a ho-hum morning into something special!

To make the bubble solution, pour 1/4 cup water into a container. Add a little blue food coloring just so it’s easier to see.

Unpobbable Bubbles (1)

Stir in 1 tablespoon dish soap and 2 tablespoons corn syrup.

Unpobbable Bubbles (2)

A straw will be your bubble blower, but the secret now is that you also need a pencil.Travis dipped the pencil tip in the solution, as I dipped in the straw and blew a bubble.

Unpobbable Bubbles (3)

He poked the saturated pencil tip into the bubble… and the bubble doesn’t break!

If you want a quick run-down of what’s happening here, basically the “skin” of the bubble merges with the soapy surface of the pencil tip, so that no air gets in and makes the bubble pop. If you try it with a dry pencil, you’ll get a pop right away! We had fun seeing how far in we could poke the pencil.

Unpobbable Bubbles (5)

And then had lots of extra bubble solution to blow out on the back patio!

Finger-Paint Art

Finger-Paint Art (9)

I’m getting braver when it comes to Veronika and art, but as a safety measure, it’s still a good idea to keep art materials contained or edible at this age. This edible finger-paint is a cinch to whip up!

To make the paint, combine 4 tablespoons boiling water and 4 tablespoons cornstarch, mixing well with a whisk.

Finger-Paint Art (1)

Continue to add boiling water just until the paint looks like heavy cream. Divide among 4 cups and add food coloring. Let cool completely.

I stripped Veronika down to her diaper and taped a large piece of craft paper to the table (precautions are still necessary to avoid a huge mess) and sat down with Veronika on my lap.

Finger-Paint Art (2)

I showed her how to dip her fingers or whole hand into the cups of paint, and then press onto the paper. She seemed hesitant at first…

Finger-Paint Art (4)

…but soon was smearing away!

Finger-Paint Art (3)

My hope had been to get some nice finger- or handprints that could be transformed into little pictures. Alas, most of hers were too messy, so I made a mommy handprint and turned it into a little turkey with markers.

Finger-Paint Art (8)

Drawing flowers or bugs or any other creation would be cute, too! Another fun idea was dipping some fabric into the paint, and then smearing this all over our paper.

Finger-Paint Art (5)

Once we had lots of nice blobs, I folded the paper in half and then opened back up again to introduce the notion of symmetry.

Finger-Paint Art (11)

And then the art lesson was done and it was time for clean up and new clothes!

Finger-Paint Art (7)

Seasons in the Hemispheres

Hemispheres (4).JPG

This very simply lesson from Raddish Kids was informative, though it lacked the “wow” factor of other lessons from the company. Still, Travis was intrigued and stuck with it from start to finish.

First, I asked him to name the four seasons. Chart your child’s answers, and then make a list of different aspects of the seasons. Travis came up with things like: cold versus hot; snow versus sun; and different colors, like white versus green.

Now time for a little lesson; the world is divided into northern and southern hemispheres, separated by an imaginary line called the Equator. When it it is summer in the north, it is winter in the south, and vice versa.

Hemispheres (1)

To illustrate this point in a tangible way, draw a line around an orange. We labeled the top N and the bottom S. I had him point out where we lived, and we drew a simple outline for North America. An outline of Argentina, where our recipes came from, went into the south.

Hemispheres (2)

Spear the orange with a chopstick from “north pole to south pole” to show Earth’s axis. Now hold up a soccer ball as your sun. As you rotate the “Earth” around at a slight tilt (fun fact, Earth’s axis is tilted 23.5 degrees), your child will start to see why sometimes it is summer and sometimes winter.

Hemispheres (3)

We watched two suggested videos for a slightly more in depth explanation.

Hemispheres (5)

Now it was time for Travis to plan his winter birthday party! As a summer baby, I had him imagine what it would be like to live in a southern continent. He decided it would be an ice party, where everyone drank hot cocoa and came in snow boots.

Hemispheres (7)

If you really wanted to go all out for this lesson plan, you could recreate a mini birthday celebration of opposite seasons for your kids! At the very least, celebrate with some dulce de leche cookies.

Finally, we checked out the difference in temperature in the hemispheres today. Because it is fall/spring, the difference wasn’t thrillingly obvious. Older kids may want to pick a city in the opposite hemisphere and chart the differences in temp over a whole week.

Hemispheres (8)

Classic Beating on Pots & Pans

Classic Pots (8)

Today I needed to keep Veronika occupied while baking banana bread, so I pulled out an old classic: a kitchen percussion set made from pots and pans.

For novelty, though, I made today’s focus less about the musical element and more about sensory play. I provided her with several different types of baking ware: a saucepan, a muffin tin, and a loaf pan. We started out drumming with bare hands, and I drew her attention to the sound this made.

Classic Pots (3)

Then I set out a variety of implements to be drum sticks, everything from spatulas to wooden spoons to cookie scoops.

Classic Pots (5)

Look for a variety of materials in your kitchen; we had soft silicone, wood, metal, and more. I sat with Veronika and asked her about the different sounds she was hearing. She grinned up at me and tested them all!

Classic Pots (4)

When I showed her how to swirl the whisk in a muffin cup or saucepan, she was an eager mimic.

Classic Pots (7)

You can also make piles and see how this changes the sounds around. If the loaf pan was on top of the muffin pan, it sounded different (more metallic) than when it sat alone on the floor.

Classic Pots (6)

Once our little sensory lesson was done, Veronika kept busy by herself as mommy finished up the banana bread. A win-win!

Classic Pots (2)

Cruise Control

Cruise Control (7)

Veronika loves pulling upĀ these days, anywhere and everywhere, and is making those first moves towards walking. To safely encourage those first few steps, one great practice area is a cruising station!

I lined up a few child-sized chair in our kitchen, with the backs securely against a cabinet so they couldn’t tip. I started Veronika at one end and placed a tantalizing toy on the other end, hoping to encourage her to side-step.

Cruise Control (1)

It turned out she was way more interested in the circular back of the chair where I had started her than in the toy!

Cruise Control (2)

So thinking quickly, I reversed her and started her on the other end. Now she had incentive…

Cruise Control (3)

She moved her hands…

Cruise Control (4)

…and then her little feet followed. Soon she had the gist of it, and arrived at her goal so proudly.

Cruise Control (5)

Success!

Cruise Control (6)

Eventually, I did put the toy back on the other chair, and this time she knew how to side-step on over.

Cruise Control (8)

This game was a fantastic success for gross motor development, and enjoyable to boot.

Cruise Control (9)