Toddler’s Stew

Toddler Stew

This stew recipe cooks quickly, requires little fuss, and is easily adaptable to suit your toddler’s tastes and finicky preferences – hence the recipe title!

Ingredients:

  • 2 tablespoons olive oil, divided
  • 1 package Gardein beefless tips
  • 1 peeled and chopped onion
  • 1 peeled and chopped sweet potato
  • 6 ounces chopped baby carrots
  • 1 (15-ounce) can diced tomatoes
  • 1/2 cup water
  • 2 rosemary sprigs
  1. Heat 1 tablespoon olive oil in a saucepan and add the beefless tips; cook for about 8 minutes, until warmed and browned; remove from the pan and set aside.
  2. Heat the remaining tablespoon olive oil in the pan and add the onions, sweet potatoes, carrots, diced tomatoes, water, and rosemary. Bring to a boil; cover, reduce heat, and simmer for 20 to 30 minutes, until the vegetables are tender. In the last 10 minutes of cooking, return the beef to the pan. Remove the rosemary sprigs before serving.
  3. Ladle into bowls and serve alongside your favorite crusty bread.

Note: For toddlers who don’t like foods mixed together, I drain the excess liquid off and plate this with the beefless tips on one side of a plate and the vegetables on the other.

Advertisement

Stamps and Watercolors

stamp watercolor (11)

This mixed media project was perfect for a lazy Sunday morning – no special equipment required, very hands on, and with a neat little twist that kids will love.

It started when Travis requested his set of stamps, so first we simply dotted them all over a piece of watercolor paper.

stamp watercolor (1)

Our ink is running out just a tad, but this almost made it more interesting – Travis was quite intrigued that some stamps came out “full” and some only “half” if the ink had faded.

stamp watercolor (3)

Then I asked him if he wanted to use watercolors over the stamps, which received an enthusiastic yes! He’s very deliberate about choosing colors lately, and loved selecting which watercolor to use before applying to the paper.

stamp watercolor (6)

The twist is that the watercolor will run off the stamped areas quite quickly – the same effect as when you paint over waxy crayon – which had him so excited he was nearly shaking with enjoyment.

stamp watercolor (7)

He proceeded to choose which color should go over which stamp for some time.

stamp watercolor (8)

The end result is a bit messy and haphazard, but still a delight!

stamp watercolor (9)

Overnight French Toast

Overnight French Toast (4)

I adapted this recipe slightly from High Five magazine to veganize it. It’s a great recipe that will have kids whisking, mixing, arranging, and pouring batter – so many great steps, and Travis wanted to do them all!

First, adults should cut a 16-ounce loaf of day-old French bread into 1-inch thick slices; set aside.

In a bowl, have your child whisk together: 2 Ener-G eggs, 2 tablespoons chia seeds, 1 and 1/2 cups hemp milk, 1/2 cup non-dairy creamer, and 1/3 cup maple syrup.

Overnight French Toast (2)

Now it’s time to arrange the bread slices in a baking dish. Travis placed his slices in very importantly; I did a little tidying up once he had finished just so the slices were in an even layer.

Overnight French Toast (3)

Help your child hold the bowl to pour the batter evenly over the bread slices. Cover with foil and refrigerate overnight.

In the morning, remove the dish from the fridge at least one hour before baking. Bake at 375 degrees F for 35 minutes.

To serve, combine 2 tablespoons melted Earth Balance butter with 2 tablespoons maple syrup and drizzle evenly over the slices.

Overnight French Toast (5)

Phoneme Week 2: EE

EE.JPG

As with the OW sound, we started off two weeks of focus on the EE sound by tracing the letter E on our Usborne wipe-clean alphabet cards. This week wasn’t as exciting for Travis, since E+E rather obviously just says eeeee, but the double-e is so common I thought it was worth highlighting early in our phoneme journey.

EE (4)
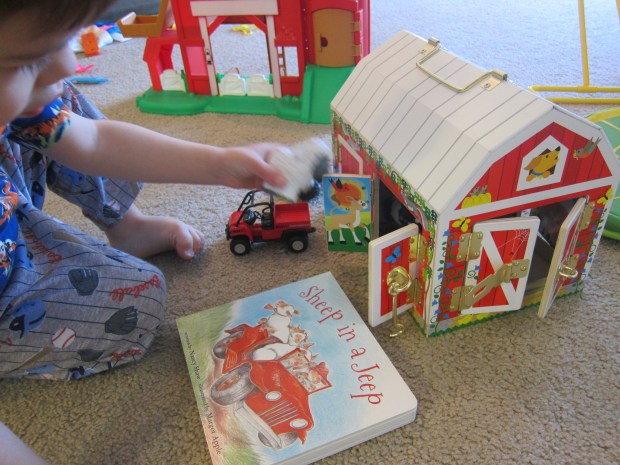
Phonics Book of the Week: Bee Makes Tea We started off with a read of this book. Because it plays with all variants on the “ee” sound (as in tea, sea, me), it wasn’t packed with words to highlight, but you’ll still have great ones to point out like quEEN, chEEse, glEE, nEEd, thrEE, and spEEd.

Guiding Theme: trEE

Sandy (7).JPG

To introduce the theme, we started off with a gorgeous family walk in the woods to see trees. It was a beautiful chance to feel tree bark, to point out the difference between big trees and little trees, and to see the spring buds popping out!

  • We Read:
  • We Made:
    • A Sound Tree. This poster served as a guiding image for our entire two weeks on EE, adding words as we went. Travis loved the enormous roll of butcher paper I pulled out to draw the tree; as a neat bonus, because we colored it in over floorboards, the wooden boards gave our tree the image of bark!EE (7)
    • Painted Bark: We took a cue from Aboriginal bark painting and used a collection of found bark for this fantastic art project, painting in traditional colors of black, brown, white, and yellow. I showed Travis a video first of Aboriginal artists at work, which got him so excited! Dots were hard to replicate!EE science (4)
    • Four Seasons Tree PicturesTissue Paper Tree (6)
  •     We Learned:
    • For science of the week, we set out to explore trees, and specifically tree bark! Visit any place near you where you can take a gorgeous walk in the woods, and test out tree rubbings of the bark. Talk to your child about how bark is the skin of the tree, and find as many different varieties as you can.EE science (5)
    • For math of the week, we didn’t use trees but another EE word – fEEt! Measure with feet, and by that I mean both kinds. We had fun not only using rulers (teaching that 1 foot equals 12 inches), but also our real feet. For example, how many Travis feet did it take to measure something, versus a mommy foot, versus feet on a ruler.EE (19)
  • We Visited:
    • An Arbor Day festival to plant a trEE! I specifically chose these two weeks for EE just for this purpose. Travis got help Smokey the Bear shovel dirt around a new tree planting.arbor (1)
  • We Ate:

Other Words of the Week:

  • Bee: In addition to our phonics book, we had a very bzzzy week, making a Beehive Card, a Bubble Wrap Bee Hive, and a Buzzing Bee Noisemaker!Beehive (5)
  • Seed: We had a few seed adventures gone awry, notably an attempt to grow grass seed on a sponge that only ended in mold, and an exploring seeds game that alas didn’t work out quite right. But Travis still learned about seeds! We planted a seed at an Earth Day festival, where I also pointed out the word wEEd since so many (lovely!) dandelions were growing in the field.crossroads (12).JPG
  • Knee: Have a super silly rolling pin race using just your knees! Then you’ll have to sing Head, Shoulders, Knees and Toes, of course. We just happened to find a very adorable version of the song for trees, which worked out nicely for our guiding theme!EE (16)
  • Green: We colored and painted all in green; made a collection of all the green toys we could find around the house, ate Green Guacamole, and read an abridged version of the classic Anne of Green Gables.EE (9)
  • Sleep: Children seem to love games of putting stuffed animals or dolls to sleep, then waking them up, so play any variant of that (waking up mommy and daddy is fun too!). Or read Sleeping Beauty, which helpfully features other EE words like needle and queen.
  • Deep: My best recommendation for this word is to read How Deep is the Sea – your child will go bananas when they see the included poster stretching ever deeper deeper deeper, until it’s taller than they are!EE (1)
  • Keep: This word inspired our good deed of the week: I made a collection of old toys and books, and let Travis pick which he might want to keep before we donated the rest to a local charity. Many places schedule pick ups, but I think it’s worthwhile to donate in person if you can, so your child understands where the items s/he didn’t keep are going.EE (22)
  • Sweep: Well, since Travis loves to sweep, this word was a no-brainer. Play with a toy dustpan and broom set as much as your child desires!EE (17)
  • Feed: I’m still trying to convince Travis to self-feed, so it was the perfect week to read How to Feed your Cheeky Monkey, in hopes of persuading him to pick up his own fork. He’s got the cup down anyway, cheeky boy…EE (3)
  • Geese: How perfect that when we detoured to a nearby playground this week, the field next to it was filled with geese! We sat on a bench to eat a snack and talk about the geese, what sounds they make, and migratory flying.EE (20)
  • Jeep: Read Sheep in a Jeep, which features lots of great EE words… Then you can go on a jeep scavenger hunt (or look for sheep, depending where you live!) every time you drive around town.EE (10)
  • Beep: After you read about those sheep in a jeep, have fun with the word beep. We made a race car with a wheel/horn so Travis could make-believe beep!EE (5)
  • Feet: Why should hands have all the fun? First we got good and messy with sensory bin play. Then we talked about what we wear on our feet – shoes of course! – and set up a home shoe store, a cute idea from High Five magazine. We also read Dr. Seuss’s The Foot Book (don’t worry, feet as opposed to foot is inside the book plenty) And finally, we needed to paint with our feet!EE (11)
  • Teeth: This is your week to talk about how to keep teeth healthy. Try a fun project like a Happy Tooth/Sad Tooth Collage.Happy Tooth (5)

Exploring Seeds

Exploring Seeds (6)

My goal with this project was to show Travis the life cycle of a seed, from dried and hard, to sprouting its first green shoot. Alas, it didn’t entirely work out, but we still had fun!

We started out simple, feeling the bean seeds both before and after we soaked them in water for about an hour.

Exploring Seeds (2)

It was very cool how quickly the skins become wrinkly.

Exploring Seeds (1)

The next morning, the beans were soft enough to split apart with a finger. Travis was really interested in how the soaked beans looked compared to a new set of dried ones – much softer and nearly twice the size.

Exploring Seeds (4)

Select several of your soaked seeds to sprout (not any of the ones you have split in half). Line a mason jar with a paper towel on the bottom, and add about 1 inch of water, swirling to soak the paper towel. Repeat until the paper towel is completely wet and you have about 1 inch of water above it. Add your seeds, placing them between the wet paper towel and the side of the jar.

Exploring Seeds (5)

Now place it some place sunny and wait!

Whether because we’ve had very gray weather and little direct sunlight or because I have no green thumb and drowned our beans, I can’t say… but one way or another, our beans disintegrated instead of sprouting. I will try a different method next time, but this was still a neat nature lesson for a toddler!

Exploring Seeds (7)


Salt Dough Dinosaur Fossils

Salt Dough Fossil (4)

Ok, this is our last dinosaur project for a while, I promise! But I’ve become a big fan of salt dough lately, and Travis never tires of mixing flour and water, so we gave this project a quick go!

In a bowl or basin, have your child combine the following:

1 cup flour

1/2 cup salt

1/2 cup water

Mix with your hands, and add more flour if it seems too sticky. Show your child how to knead the dough – a neat little lesson if you ever intend to bake bread with them later on!

Salt Dough Fossil (1)

Then it was time to roll our dough out. We rolled ours a bit too thin – aim for 1/2-inch thick for the best dinosaur imprints.

Salt Dough Fossil (2)

Cut circles from the dough with a cookie cutter, and then press toy plastic dinosaurs into the dough to leave an imprint. Travis loved using the cookie cutter to make circles within circles, while I set aside our finished “fossil” imprints.

Salt Dough Fossil (3)

We let our fossils air-dry this time around, although you can speed up the process in the oven.

Salt Dough Fossil (6)

Now your budding archaeologist can dig up dino fossils any time he or she likes!

Chocolate Chip Cookie Fossil Dig!

Chocolate Chip Dig (1)

Digging for dinosaurs might be fun… but digging for chocolate? Even better!

We had some purely indulgent fun with this game, having talked a lot this week about digging for fossils and archaeology. I presented Travis with two chocolate chip cookies (one thin, one thick, for nice variation) and invited him to excavate the chocolate chips.

Chocolate Chip Dig (6)

Possible tools include toothpicks, forks, or toddler-safe knives.

The fork turned out to be the fast favorite.

Chocolate Chip Dig (4)

Although hands were a close second place!

Chocolate Chip Dig (3)

Did we eat our discoveries? But of course.

Chocolate Chip Dig (5)

Buzzing Bee Noisemaker

Bee Noise (5)

Parents, I need your hive mind to solve a mystery here – pun intended!

We wanted to make a delightful buzzy bee at home, and I copied instructions online (and quite similar to the New Year’s Eve Noisemaker we concocted back in January). But try as we might, our little bee wouldn’t buzz. Now, arguably this failure was Travis’s favorite part of the entire project; he got a kick out of me trying to make our bee buzz over and over. So, I’ll still consider the project a “success”! Needless to say, I’d love to hear if your buzzing bees work properly, or if you see the mistake I made in the steps below.

First, we trimmed an index card slightly, and decorated as a bee. I made one with alternating yellow and black stripes as an example, and Travis had fun trying to replicate my stripes on a second index card.

Bee Noise (4)

We did momentarily glue on yellow googly eyes to complete our happy bee’s face, but the glue barely had time to dry before the eyes fell victim to a toddler.

Bee Noise (6)

Eyes or no, we attached our bee to a wooden craft stick with a piece of sticky-back foam. Place a second craft stick on top.

Bee Noise (2)

Now secure the two craft sticks together at the edges using additional pieces of cut sticky-back foam.

Bee Noise (3)

Finally, stretch a rubber band around the craft sticks – and then try to make your bee buzz!

Bubble Wrap Bee Hive

Bubble Wrap Bee (4)

Travis loved when we painted with bubble wrap a few weeks back, so we did it again this morning – but with more precision!

Having recently seen a colony of bees buzzing at a local preserve, I thought that would make a good theme. I cut plastic wrap roughly into the shape of a domed beehive. Travis helped cover it with orange and yellow paint.

Bubble Wrap Bee (1)

We flipped the bubble wrap over to press the bubbles onto paper – leaving behind what look so much like honeycombs! Travis particularly loved that the back of the bubble wrap was dry during this step, knowing the front had been so wet.

Bubble Wrap Bee (3)

My original intent was for him to dip his thumb in yellow paint to make bees around the hive, but Travis balked at the idea (he doesn’t want to get messy, these days!) Instead, we used a yellow dot marker.

Bubble Wrap Bee (5)

Once the paint dried, I colored in the bees stripes, wings, and smiles. Bzzz!

Dinosaur Crate

Koala dino (3)

With the arrival of our latest Koala Crate, I’m struck yet again by the ways in which Travis’s brain has changed since we started this subscription. He was so eager to get started on the first project in our box that I had to let him dive in before I’d even seen the theme and instructions!

Luckily, I could catch up quickly as he peeled off the stickers for the first craft – Dinosaur Dress-Up! Apply the felt stickers to the provided visor and dino feet to make your fearsome T-rex.

Koala dino (2)

You can talk about shapes (triangles, circles) as your child works, as well as what elements of the dinosaur they represent, like teeth, spots, or claws.

Koala dino (1)

Travis had the eyes stuck on the visor in the right spot before I even had a chance to ask him where he thought they should go!

Koala dino (4)

Rar!

Koala dino (5)

No sooner had he paraded around in the costume for a bit than he wanted to see what was next, so I pulled out the materials for Clay Fossils. This craft required first matching up puffy bone stickers to a template, great practice for getting stickers precisely in the right spot.

Koala dino (6)

He was so proud of his work, and then thrilled when I showed him the imprint of a dinosaur skeleton that was left behind when we pressed the provided air-dry clay on top.

Koala dino (8)

We had fun talking about what fossils are and the clues they leave behind, i.e. a dinosaur with short arm bones likely walked on only two feet, versus one whose arms and legs were the same length.

Koala dino (10)

And then like a whirlwind he was already moving on to project three, the Dino Match Game, with two provided game boards, a spinner, and pop-out tokens to match up with the proper dinosaur footprint.

Koala dino (12)

Travis loved playing several rounds in a row.

Koala dino (13)

He wanted to know the names of all the dinosaurs on the card, so luckily our included Imagine magazine had a helpful name and pronunciation guide. This mama had never heard of the Spinosaurus before!

We continued the fun with at-home crafts like Dino Eggs, and pulled out some of our favorite Usborne dino books like The Big Book of Big Dinosaurs, Lift the Flap Dinosaurs, I’m a Dirty Dinosaur, and Dinosaur Activity Book.

As always, you can replicate much of this crate with materials from your local craft store, though you’ll need to pull out your artistic skills to draw those game boards!