Verb Race

Get in your sunshine, gross motor skills, and grammar reviewwith this fun game, which aims to mitigate the “summer slide”.

It started with a quick review for Travis: what kind of word is a verb? Once he remembered that a verb is an action word, we used chalk to draw a Start and Finish line on our driveway. Line your kids up at the start, select a verb, and then do that motion all the way to the finish. First up: Jump!

Note: It doesn’t have to be a true competition, especially if your kids have a wide age gap like mine. The fun is just to move and Veronika eagerly “jumped” after little brother as best she could, while he cheered her on from the finish.

From here, we had rounds with tip-toeing…

…running…

…and flying!

Encourage your kids to be as creative as possible with their verbs and as big as possible with their motions, and everyone’s a winner in this race!

Icy Summer Favorites

This summer we’re recycling a few old summer favorites, but with a fresh spin on each!

The first repeat was ice pop painting, which Veronika loved last year… but she also was tempted to eat the paint popsicles! This year we solved the problem with one key twist: using food coloring (phew, edible!) instead of paint. I filled popsicle molds with water and generous amounts of food coloring, then left them to freeze overnight.

In the morning, we headed out to the patio with the pops and thick white paper. Sure enough, the food coloring made beautiful swirls of color, and the hot sun meant our efforts were quickly rewarded with smudges of “paint” on the paper.

Equally sure enough, Veronika soon requested to eat one. This year, I could tell her to go ahead! Green was her particular favorite.

Our second repeat was freeing dinosaurs, but this time from ice instead of jell-o or sand. This time, I set up an excavation site in layers, first placing a few plastic dinos in a loaf pan and then filling it halfway with water. Let freeze.

I then added a few plastic Egyptian mummies and filled the loaf pan the rest of the way with water. My little archaeologists would be able to dig down through history!

When I set this out the next morning, both kids were ecstatic. Spoons, salt, and warm water to pour helped them unearth the buried treasures. Paintbrushes, chisels, or spritz bottles would be fun, too!

Travis and Veronika ended up flipping the block of ice over, which meant we freed the dinosaurs first.

They were so proud to “discover” their first species!

The Egyptian mummies were uncovered at the end. I was impressed with the kids’ diligence and patience, sticking with the task until the last sarcophagus came free.

What are your favorite icy summer games? Please share in the comments!

Banana Nice-Cream Sundae

A base of frozen bananas makes this decadent “ice cream” sundae almost healthy. The same can’t necessarily be said of the toppings, though!

To start, peel and chop 4 bananas and freeze. Transfer the banana pieces to a blender and puree until smooth, along with 2 to 3 tablespoons water.

We spooned the banana “ice cream” into bowls, then set up a buffet bar of toppings! Travis and Veronika chose from a mix of: chocolate rice cereal, non-dairy whipped cream, chocolate sauce, sprinkles, and maraschino cherries. Kids can pile on the works, or just pick their favorites.

If you want to stick with healthier toppings and the fresh fruit theme, try adding raspberries or other berries instead. Thanks to High Five magazine for this delicious idea!

Wading Pool Boat Race

Race Boats (6)

We’ve had so much fun finding ways to use our wading pool this summer, but one thing we had yet to do was put any boats in it! These little cork boats come together in moments, and are just the right size for a mini pool.

Save up a few wine corks (or purchase corks at a craft store), and hot glue two or three together into little rafts. If you don’t have hot glue, you can wrap them together with a rubber band in a pinch. Insert a toothpick into each raft, and tape on a triangle cut from a post-it or construction paper as the sail.

Race Boats (1)

Let the regatta begin!

Race Boats (2)

Veronika loved setting these little boats afloat in the pool, whether she was standing ashore or standing right in the water. In fact her legs made a little drawbridge!

Race Boats (3)

You can use the boats for a real race (try blowing at them like you’re the wind!), but Veronika just loved chugging them through the water by hand.

Race Boats (4)

Make one, two, or a whole fleet, and your toddler is sure to have fun!

Race Boats (7)

Bath Time Alfresco

No doubt you’ve taken advantage of summer to dine alfresco, but have you ever used it to bathe alfresco? This is the perfect treat to end a scorching hot summer day!

Early in the day, I filled the kids’ wading pool with a layer of cold water, knowing that by bath time the sun would have made that water just the right temp for an outdoor soak.

The kids could hardly believe it when I announced that bathtime was going to be outside! Hop into swimsuits if you’re worried about neighbors’ eyes and then jump right in. We brought out all the bells and whistles including favorite tub toys like ninja rubber duckies

…and bubbles!

The biggest hit, though, was adding bath bombs.

The kids absolutely adored the way these foamed and dissolved in the water.

All this fun meant bathtime was much longer than usual, but that’s no problem at all when you’re sitting on the patio and watching the setting sun and the glee on their faces. Just remember to have fluffy towels at the ready for when they climb out!

Balloon Kites

We always have just a little helium left in a tank after blowing up balloons for parties. Take advantage of the chance to inflate a few extra balloons and make your kids these quick “kites”!

To decorate, simply tie a few streamers to the tail of each balloon. Veronika chose green!

There’s a balancing act here, because if the streamers add too much weight, the balloon won’t fly any more.

Trim the streamers until the weight is right so that the balloon floats up, but not all the way to the ceiling. Pretty soon Veronika’s perfect kite caught the wind.

Note: In case kids do let go of the string, I recommend playing this game indoors to avoid helium balloons that pose a hazard to wildlife.

Seventh Birthday Party: Ninjago Lego

It has been all things Ninjago in our house this year, so it was a no-brainer when it came time to plan Travis’s seventh birthday: Ninjago it was!

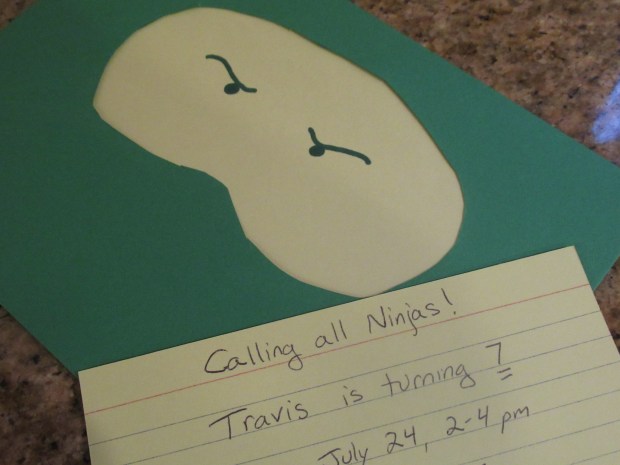
As always, a party starts with the invitation, and this year we went with a homemade card. Cut an upside-down kidney bean shape from the front of green envelopes, then insert a yellow index card to cover the opening, taping to secure on the inside. Draw the trademark Ninjago eyes with a sharpie for an instant ninja face!

I then inserted an additional yellow index card into each envelope with the party deets. Thanks to babyccinokids.com for the idea!

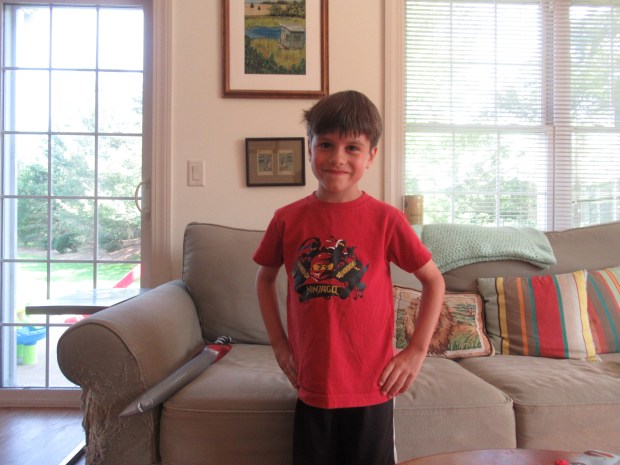
The birthday boy sported a Ninjago t-shirt of course.

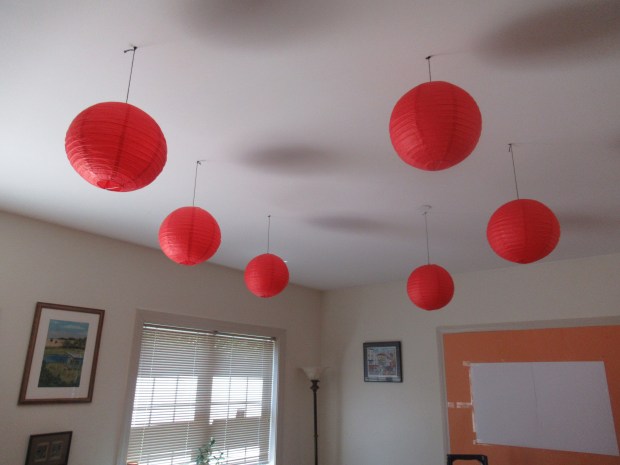
For decoration, we turned our living room into Master Wu’s dojo. I ordered plain red pillowcases which slipped over pillows in our house for seating, and arranged these around a low coffee table. Red lanterns on the ceiling, red streamers, and red and black balloons added pops of color to the room (all from Oriental Trading).

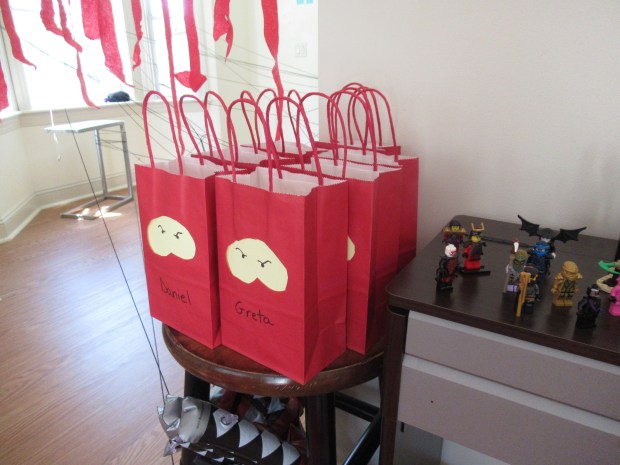
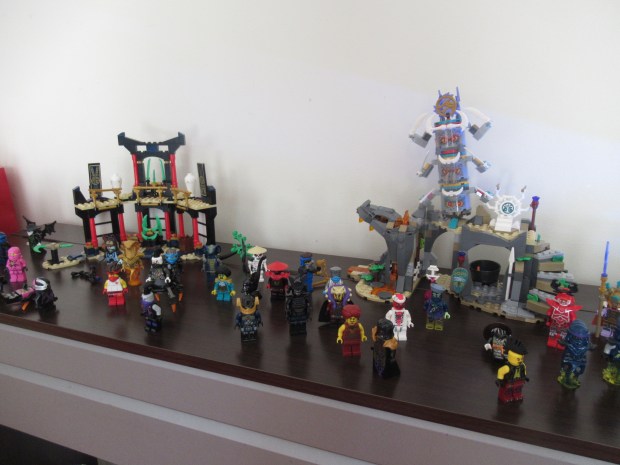
Travis has an army’s worth of Lego Ninjago figures, which easily became decor arranged around the room.

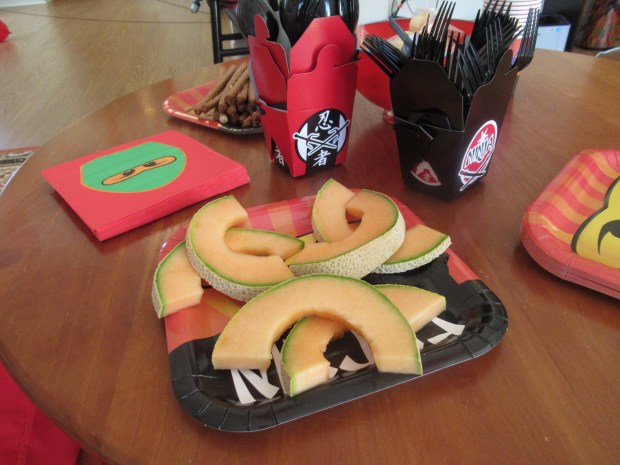
Ninja plates, cups, and napkins came from Amazon. For food, fill clear mini Chinese takeout containers (also Oriental Trading) with green jelly beans to look like edamame!

I then added a few lollipops into each container. If you have time, you can draw the Ninjago face mask on the lollipop wrappers, too, to mimic the invitations, although I skipped that step. We rounded out the party noshes with pretzel rod “nunchucks”, cantaloupe “throwing stars”, and slices of pizza (both vegan and dairy). Use extra takeout containers as the holders for plastic forks and spoons.

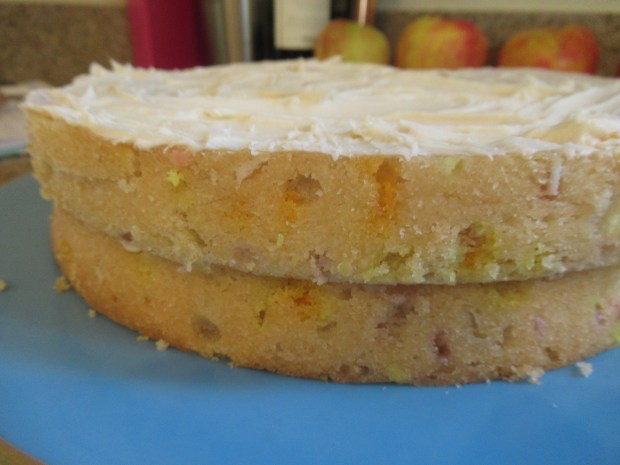
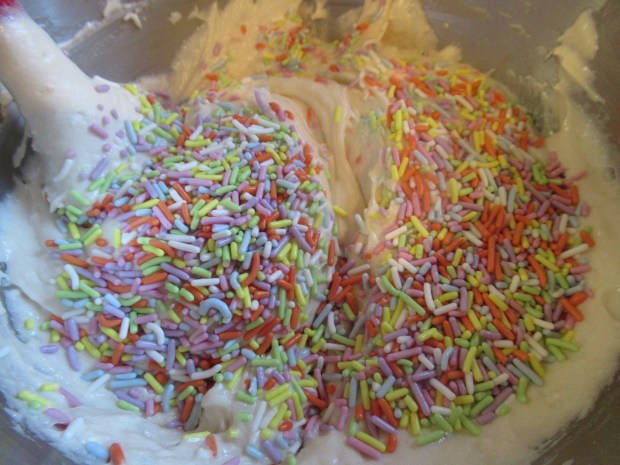
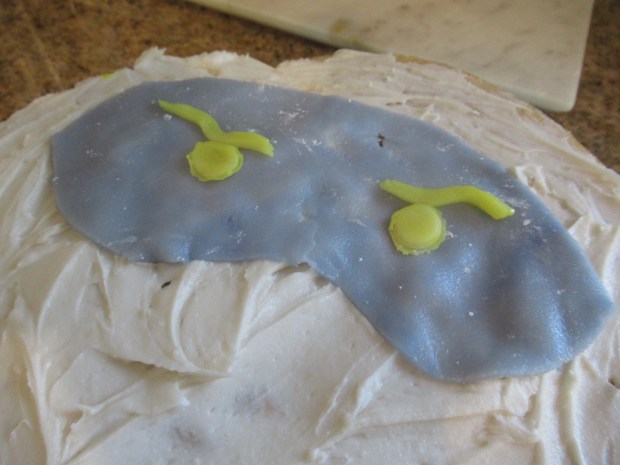
Don’t forget the perfect drink for your little ninjas: fruit punch. The homemade sprinkle party cake featured a marzipan Ninjago face mask.

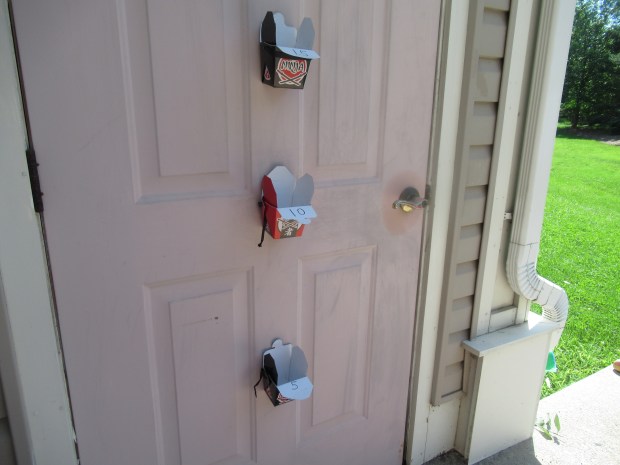
The guests arrived and it was time to let the activities begin! The first test for the aspiring ninjas was a round of Fortune Cookie Toss. Tape large Chinese takeout containers in a vertical row and label each for 5, 10, or 15 points. Take aim with fortune cookies!

Inside, the ninjas tackled a laser maze (to set up, simply run black yarn through a room in your house, or an area outside, until it forms a tricky web). Then each ninja was presented with an inflatable sword for target practice against half-deflated helium balloons. (Hint: fill them the night before and they’ll be perfectly hovering by party time).

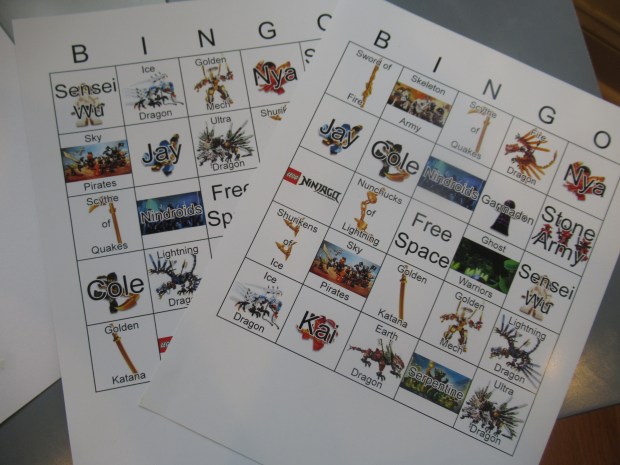
Time for a round of Ninjago bingo! The kids used their jelly bean “edamame” as playing pieces on a template I found online.

The capstone of the party was watching The Lego Ninjago Movie on a projector screen.

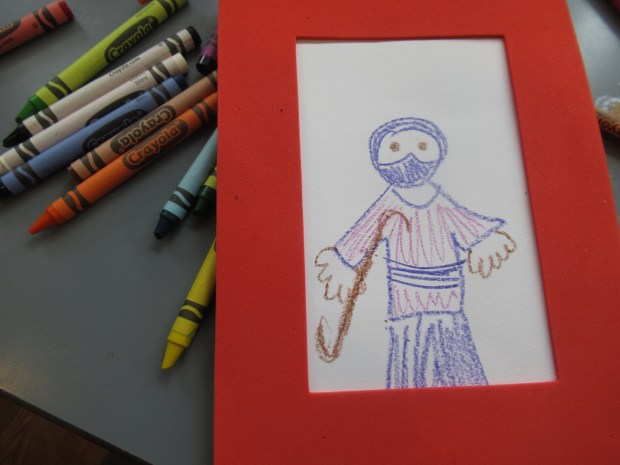
I also provided a quieter art activity, where guests could draw themselves as a Ninja. Foam picture frames (Oriental Trading) made this the perfect keepsake to take home.

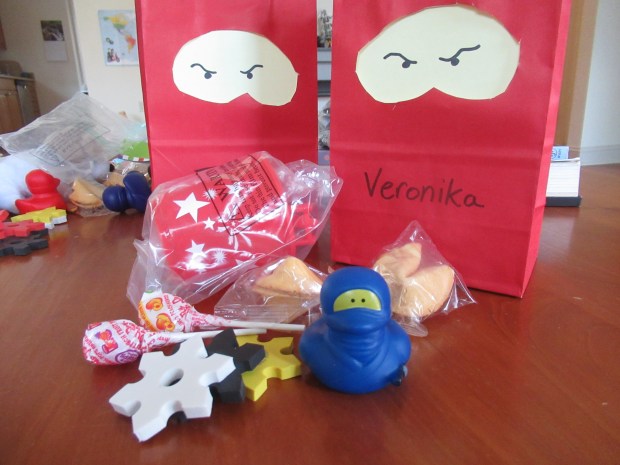
Goodie bags repeated the face mask cutout from the invitations, this time with a yellow index card taped inside red bags. Each ninja received: a ninja rubber duckie, throwing star erases, extra fortune cookies and lollipops, and a mini beach bucket, that last one because it’s summer after all!

Sprinkle Party Cake

Sprinkle Cake (2)

This cake is adapted from one of Molly Yeh’s recipes and her ingenious idea to use marzipan for cake “stickers”,  which lets you transform a regular cake into a Ninjago party cake! I found that the rainbow sprinkles from Whole Foods worked perfectly, without the colors bleeding.

Sprinkle Cake (1)

Ingredients:

  • 2 and 1/2 cups all-purpose flour
  • 1/4 cup cornstarch
  • 2 teaspoons baking powder
  • 1 teaspoon salt
  • 2 sticks Earth Balance butter (1 cup)
  • 1 and 1/2 cups sugar
  • 4 Ener-G eggs
  • 1/4 cup canola oil
  • 1 teaspoon vanilla extract
  • 1/2 teaspoon almond extract
  • 3/4 cup plain almond milk
  • 1/2 cup rainbow sprinkles
  • 1 (7-ounce) tube marzipan
  • Food coloring
  • Powdered sugar
  1. In a bowl, combine the flour, cornstarch, baking powder, and salt; set aside.
  2. Beat the butter and sugar together in the bowl of a stand mixer at medium speed for about 3 minutes, until fluffy.
  3. Add the Ener-G eggs, followed by the canola oil, vanilla, and almond extract, beating for an additional 2 minutes or so.
  4. Alternate adding the flour mixture and almond milk, beating at low speed after each addition. Gently fold in the sprinkles.
  5. Divide the batter evenly among 2 (9-inch) cake pans. Bake at 350 degrees for 35 minutes. Let cool for 10 minutes in the pans, then transfer to a wire rack to cool completely.
  6. Once cool, frost with the vanilla frosting of choice, whether homemade or store-bought.
  7. To prepare the “sticker”, separate out a portion of marzipan and tint with food coloring for the Ninjago mask of choice. We used blue! Knead until the color is incorporated. Dust a work surface with a little powdered sugar and roll out the marzipan. Cut out the shape of an upside-down kidney bean as the mask and place on the cake.
  8. Tint an additional portion of marzipan yellow. Cut out thin slits for eyebrows and two small circles for eyes and place over the mask.

Sprinkle Cake (4)

Tree Texture

I love working natural science into everyday outings. To wit, a walk in the park today was the perfect chance to review all the different parts of a tree, with a little art thrown in, too!

The tree in question was our family tree, for Travis’s tree journal, and we stopped by to see how it was looking in midsummer.

Then Travis went on a search to identify all the tree’s parts. For each one, he held a piece of paper to the tree and rubbed with the side of a crayon. How neat to see the different prints that emerged for each, including bark:

Roots:

And leaves:

You can have your child point out features they can’t reach, too, including branches, flowers, or fruit if any.

Don’t forget to give that tree a hug before you go!

Box Bowling

If heavy bowling balls at the alley or giant pins at home are too big for your toddler, try out this cute suggestion from High Five magazine. Upcycled tissue boxes are just the right size for tot-sized bowling fun.

To start, I saved up old tissue boxes until we had three. You’ll need at least three, but continue saving boxes until you have five, seven, or even more for extra fun!

I initially thought we might stick with a red-white-and-blue patriotic palate for our box bowling, first wrapping the boxes in blue paper and intending to add red dot stickers. Veronika had other plans, though! I loved the multi-colored crazy dot stickers that she ended up plastering all over the boxes.

We then set the boxes up in a pyramid, and I handed her a large ball. Take aim and bowl!

Veronika squealed with delight every time she knocked the boxes over.

And of course immediately wanted to stack them up again.

In sum, this is the perfect toddler-sized bowling game, no heavy balls required.