Jasmine Rice and Red Lentil Bowls with Tahini Sauce

Rice Red Lentil Bowl.JPG

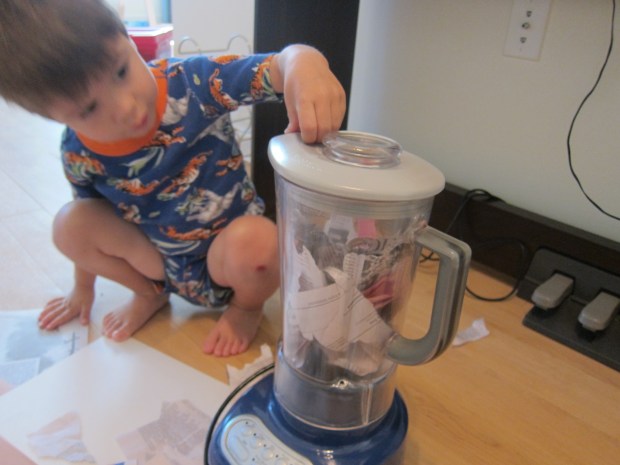
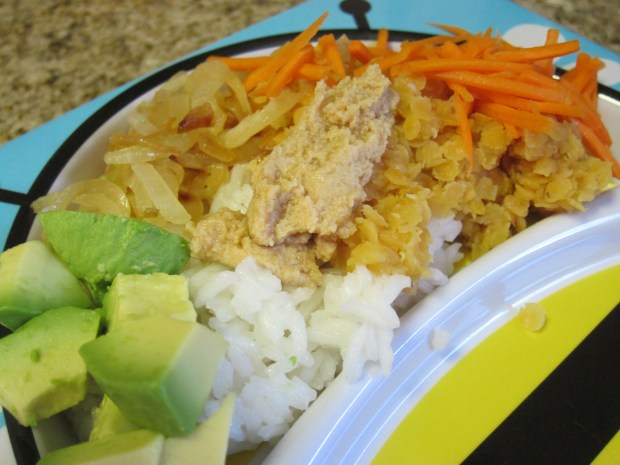
This recipe was my son’s first mix-and-match rice bowl! Hopefully the first of many to come in his vegan culinary adventures.

Ingredients:

  • 2 and 1/4 teaspoons olive oil
  • 2 yellow onions
  • 1 cup jasmine rice
  • 1 and 1/4 cups red lentils
  • 1/4 cup tahini
  • 1 minced garlic clove
  • 2 tablespoons fresh-squeezed lemon juice
  • 1/2 teaspoon cumin
  • 1/4 teaspoon salt
  • 1 avocado, cubed
  • 1 cup shredded carrot
  1. Heat the oil in a large skillet over medium-low heat. Thinly slice the onions and add to the pan; cook for 30 minutes, until browned; set aside.
  2. Meanwhile, cook the rice according to package directions. Although not necessary, I stir in a little Earth Balance butter after the rice cooks to suit my son’s taste.
  3. While the rice cooks, bring 4 cups water to a boil. Add the lentils and cook for 10 minutes; drain off the excess water.
  4. In a food processor, combine the tahini, garlic, lemon juice, cumin, and salt. Process until creamy and thick.
  5. Divide the rice and lentils evenly among 6 child-sized portions (or 3 adults servings). Top evenly with the onions, avocado, carrots, and tahini sauce.

PB&J Smoothie Pops

Smoothie Pops (4).JPG

So many schools are peanut butter-free these days, and I can’t slip this vegan staple into Travis’s snack bag any time soon. So we’re sneaking peanut butter and jelly into other times of the day! These smoothie pops are perfect for an afternoon snack – or even breakfast on a hot morning.

Ingredients:

  • 1 cup strawberries
  • 1 cup sliced banana
  • 1 cup almond milk
  • 2 tablespoons peanut butter
  • 1 tablespoon strawberry jelly
  1. Combine all the ingredients in a blender and process until smooth.
  2. Pour the mixture evenly into 6 popsicle molds; freeze for 8 hours, or until set.

Smoothie Pops (2)

Unmold and enjoy!


Phoneme Week 8: NT

NT week (9)

We’re still moving slowly through our phoneme pairs (my original iNTent to spend two weeks on each phoneme was ambitious, at best!), but I’ve decided it’s nice to have a poster with a specific letter pair up on the wall for closer to a month. Travis truly gets used to the sight of each pair and can identify the sound. Start off your lesson by tracing N and T (we like Usborne’s wipe-clean alphabet cards), and then dive iNTo the rest of these ideas.

NT week (4)

Phonics Book of the Week: We kicked things off with a read of Underpants for Ants, before realizing – whoops! – we already read this one for ND week. It doesn’t feature NT words other than paNTs and aNTs, but how could we not enjoy such a silly story a second time around?

Guiding Theme: PriNT

Don’t get hung up on one definition of this word; think of its multiple uses (the printed word, prints you make on paper, the printing press, printing as in handwriting), and play around. If you’re lucky enough to live near a newspaper printing plant that gives tours, by all means go! We started out simply by testing all the different ways we could print Travis’s name on paper, including felt-tip pens, crayons, pencils, and alphabet stamps.

NT week (2)

We Read:

We Made:

  • Sun Prints. Although an activity we’ve done before, Travis is nearly a year older and sun prints were infinitely cooler this time. We gathered colored paper and a variety of objects, such as toy tools and Duplo, then left them to sit in the sun for a few hours.Sun Prints (6)
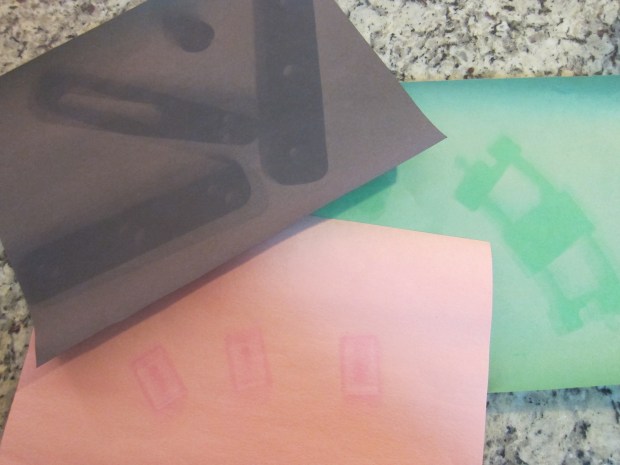
We were most curious to see how the bugs would come out – was the sun strong enough? Sun Prints (4)Travis loved lifting the toys for each reveal.Sun Prints (3)
  • Potato Prints. Cut potatoes in half (I find that Yukon golds or red potatoes work better for small hands than large russets). Potato Prints (3)
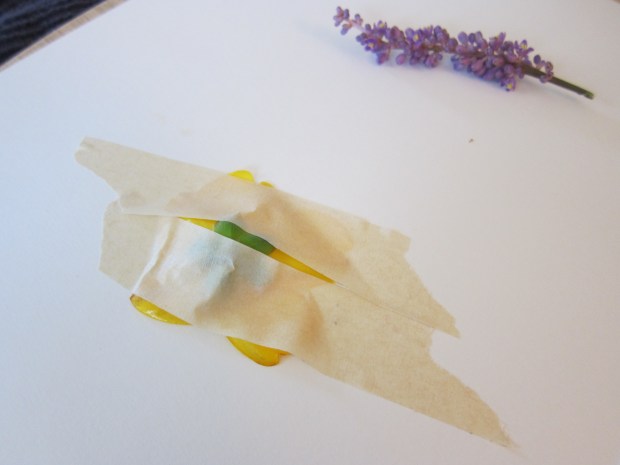
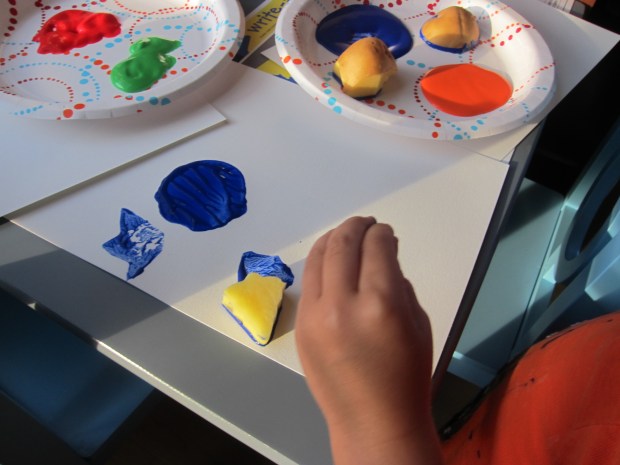
Either whittle a shape using a knife, or press out a shape with a cookie cutter. Potato Prints (4)
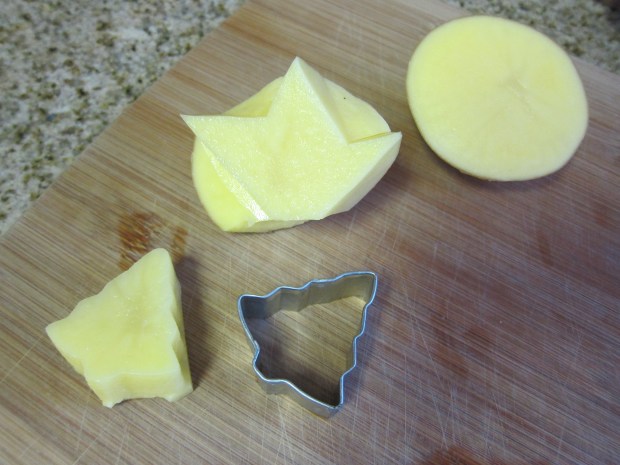
Present your child with trays of different colored paiNTs, then dip and priNT away!Potato Prints (2)
  • String Roller Prints String Print (7)
  • Shaving Cream Prints Shaving Print (7)
  • Flower Prints Flower Prints (6)

We learned:

  • For science of the week, we focused on elephaNTs. First, I staged a huNT for the foods these big tall animals eat – fruits and peanuts placed up high… NT science (3)
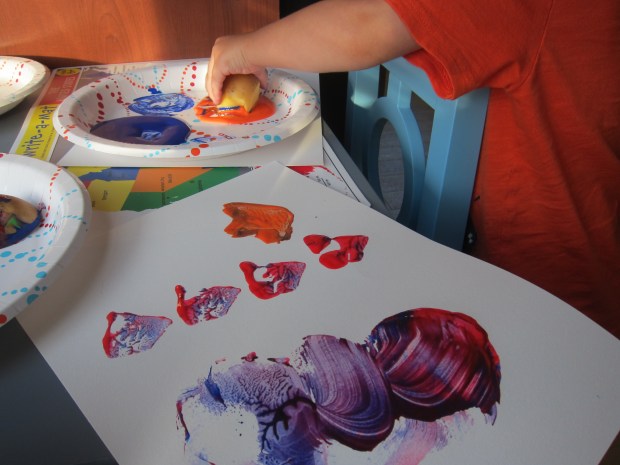
…and “hay” and “grass” (uncooked noodles) hidden down low. NT science (2)Travis loved cracking open whole-shell peanuts! NT science (4)We finished with an informative read of Usborne’s Beginner non-fiction book on Elephants, including mind-boggling facts about how much they weigh.
  • For math of the week, I simply pulled out all our couNTing books. 1, 2, 3 Make a S’more with Me by Elizabeth Gauthier lined up perfectly with another NT word (teNT). We also enjoyed Counting Dogs by Eric Barclay, Let’s Count from Sterling Children’s, and Usborne’s Count to 100. NT week (20)
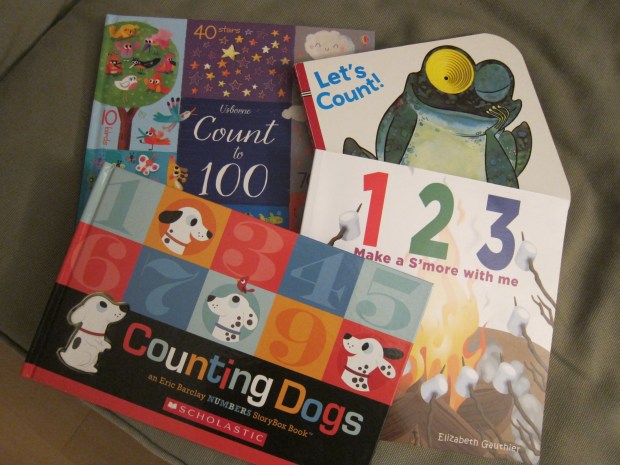
These are all great books for having your child count along on each page.NT week (21)

We Ate:

  • aNTs on a log NT week (26)

Other Words of the Week:

  • Ant: Well, I guess I can consider it appropriate timing that we had real ant visitors waiting for us in our new home! I much prefer my ants virtual though, and we had fun listening to an old favorite – The Ants go Marching.NT week (3)We read up on ants in National Geographic’s slim volume for beginner readers, and then we hiked like ants in our new backyard. Ant Trail (2)Finally – for super-cool mom points – we headed to an ant hill well away from home, sprinkled sugar on the ground, and watched the ants go to town. NT week (11)
  • Aunt: Thanks to timely visits from relatives, Travis got to see several aunts during our NT lessons, which was a nice prompt to discuss all the aunties in the family. One nice idea is to make a family tree and highlight the aunts this time.
  • Plant: First we read Planting a Rainbow by Lois Ehlert, then we made plantable paper, which we’re still waiting to see bloom! We also had fun performing simple science with plants. A stalk of celery in a jar of blue-tinted water let us easily see how water creeps up a plant stalk. NT week (29)
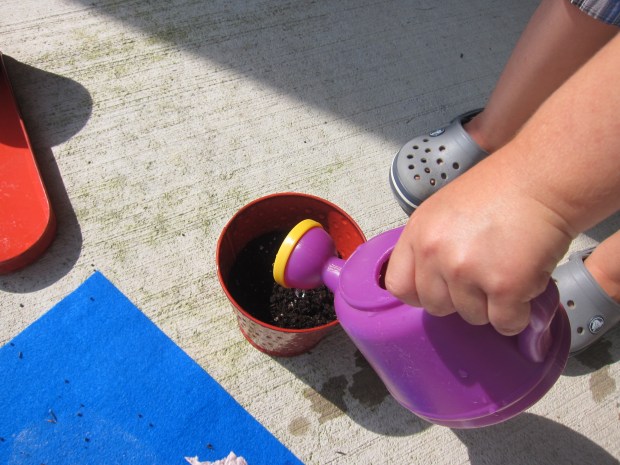
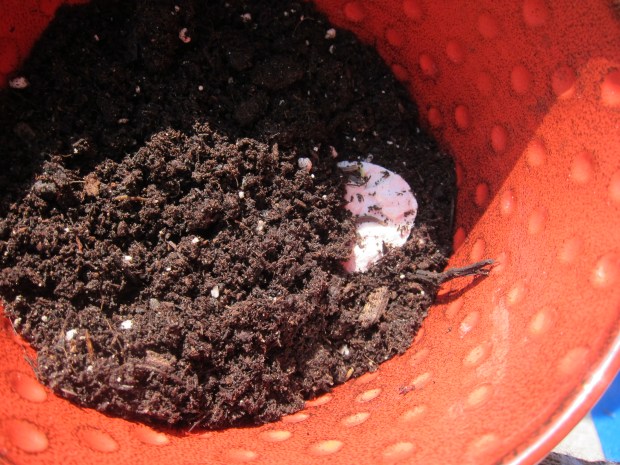
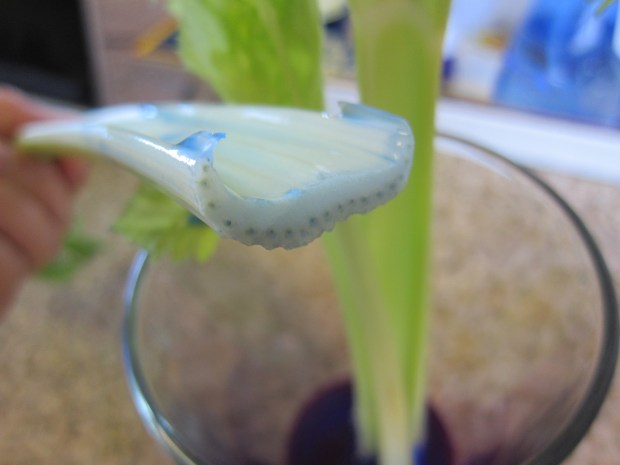
Next we covered a potted plant with a paper bag and observed it four hours later, shaking the bag a little. Water had condensed on the inside of the bag, allowing Travis to see how some water evaporates off a plant!NT week (30)
  • Mint: Aside from peppermint sticks at Christmas, Travis isn’t used to this flavor. Have a taste test and introduce your child to fresh mint leaves compared to a mint candy, and see which they prefer!NT week (8)
  • Elephant: In addition to our science on elephants, we needed a little art! My intent was for Travis to make a mosaic elephant using foam squares as the “tiles.” (Buy the kind with the sticky backing and you won’t even need glue). I drew an elephant shape free-hand on construction paper, but Travis quickly tired of the task with the foam squares. Mosaic Elephant (4).JPG
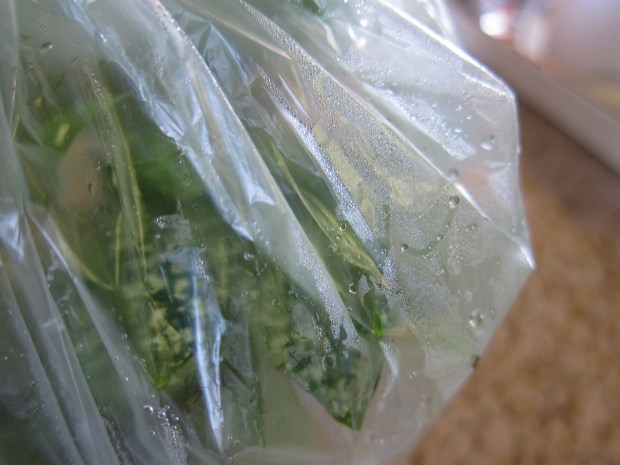
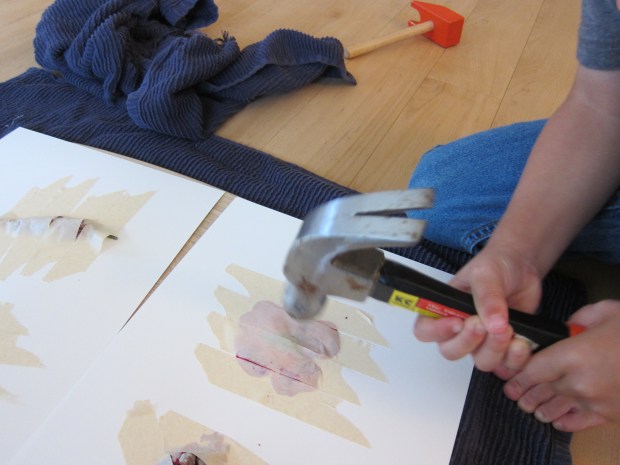
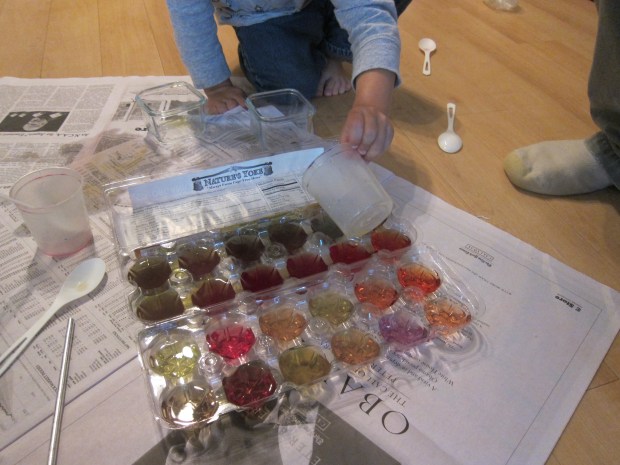
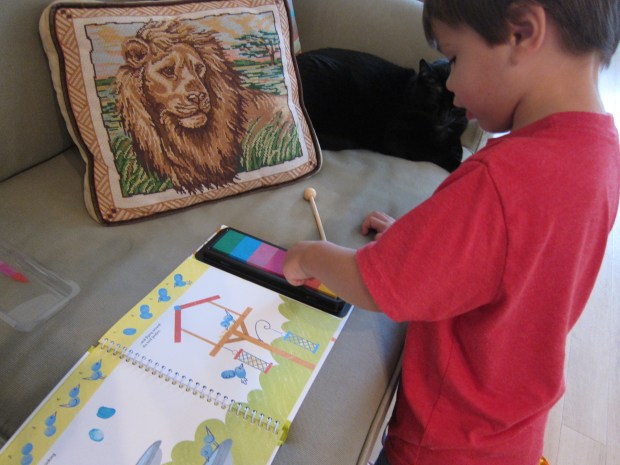
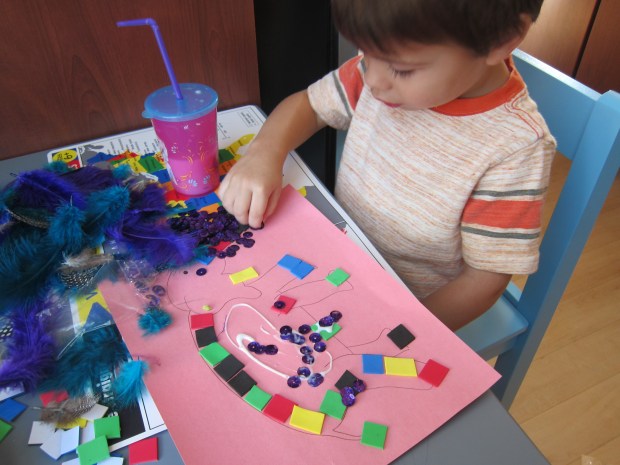
As a result, our elephant turned out more spangled and feathered than mosaicked. Either way, it was quite beautiful. Mosaic Elephant (5)For a final dose of fun, we listened to the Elephant Song and did our best to shake down the jungle.NT science (5)
  • Cent: We played with the coins in Travis’s piggy bank, which always leads to inventive games of shop keeper or grocery store, and is a great way to gently introduce cent denominations.NT week (5)For older kids, you can also make a basic chart of the different coins and their values, and turn it into a matching game.NT week (6)
  • Tent: This word gave us the biggest laugh of the unit – we tested the strength of paper by comparing a paper tent to a paper cylinder. Strong Paper (9)
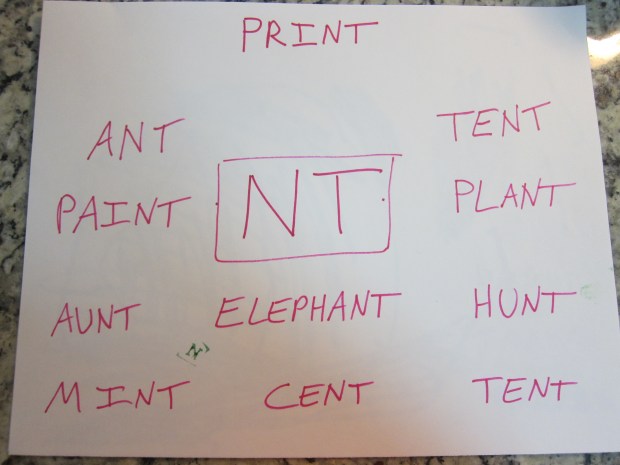
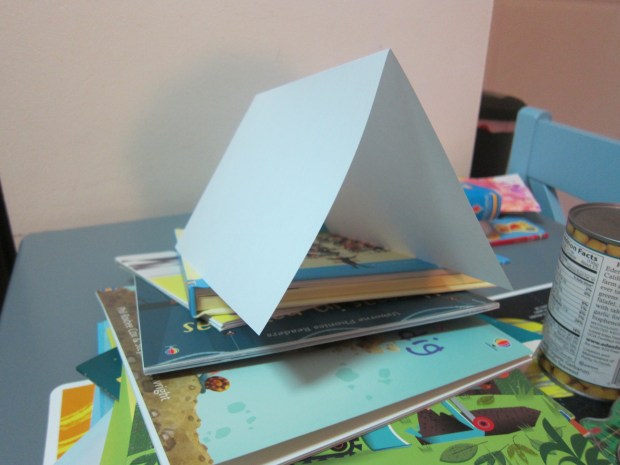
Then we set up his play tent for many a game. NT week (15)Perfect for storytime throughout the weeks that NT was on our wall. NT week (19)
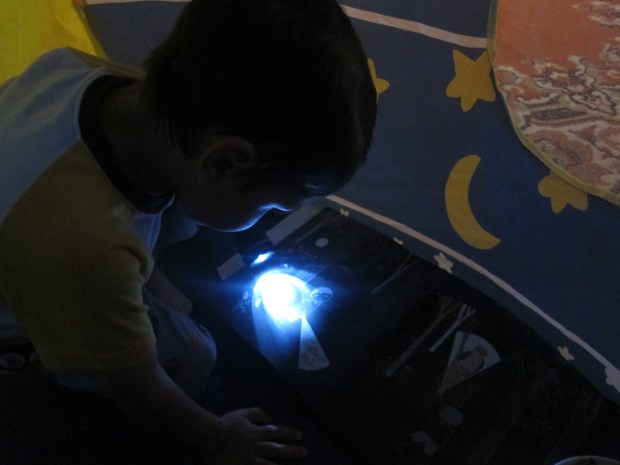
Finally, a field trip to a local state park let Travis see real camping tents set up for the first time!NT week (14)
  • Hunt: Be sure to stage a treasure hunt before your NT unit is over. I drew pictures of furniture (with negligible skill, ha) and rolled each up like a map. NT week (12)Place a small toy in each spot, along with the map clue for the next prize! NT week (13)
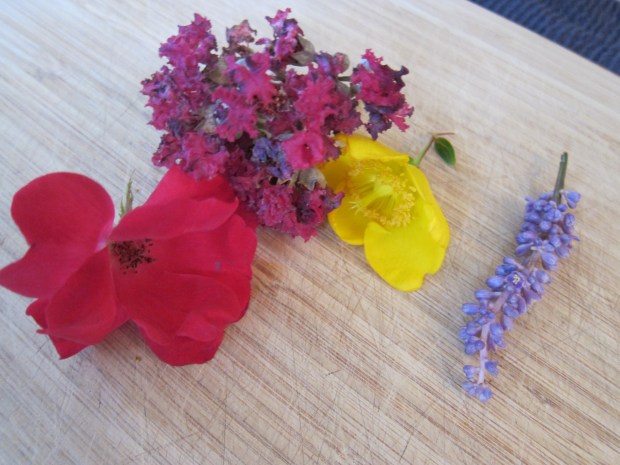
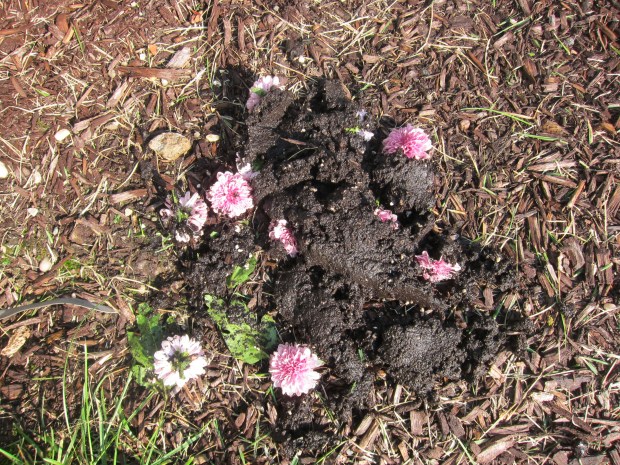
You can also go on a rainbow hunt in any garden. Rainbow Hunt (2).JPGSimply bring along a bucket of paint chips and see if you can match up all the colors of the rainbow on a pretty walk.
  • Paint: No doubt you already do enough ordinary painting with your child, so make it novel this week. Need inspiration? First paint with a balloon.Balloon Paint (3)Then try painting over salt!Salt Painting (7)
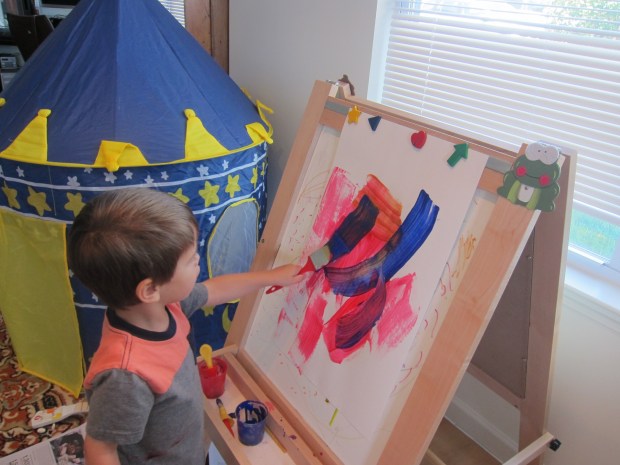
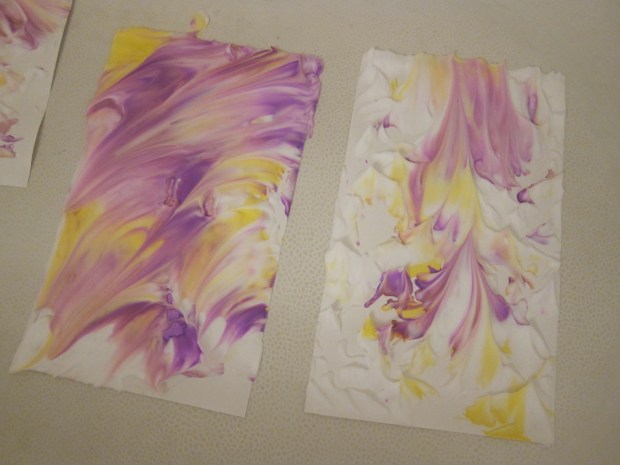
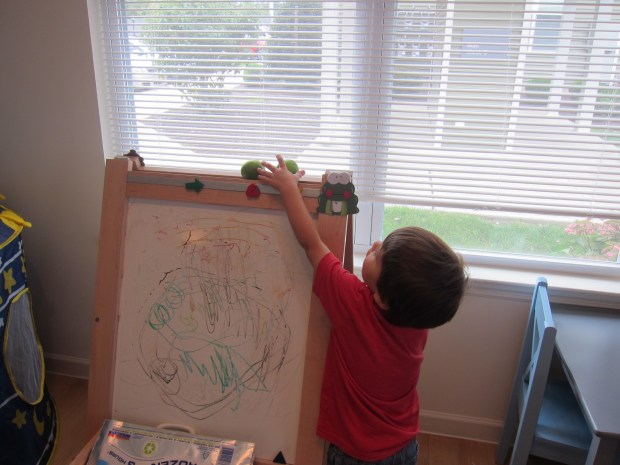
Of course, you can’t go wrong painting at a regular easel; Travis said this picture was of dragon’s teeth. NT week (17)
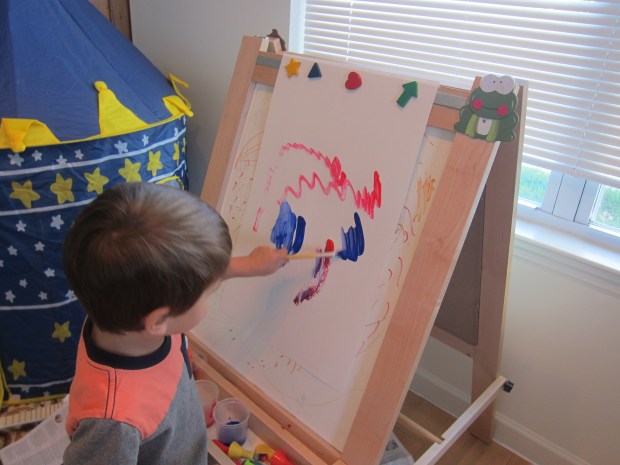
And he had fun exploring the thickness of different brushes.NT week (18)

Flower Prints

Flower Prints (6)

As summer draws to a close, I’m working through a bucket list of warm weather projects before we move on to fall and autumnal activities! This fun idea from Barefoot Books Kids’ Garden kit lets you bring flowers indoors as a keepsake that will last all winter!

The first step of course was to gather our flowers. If you don’t have your own garden, find any pretty blossoms on a stroll through your neighborhood or a local park. Flowers that lie flat will work best, but we picked a variety just to test the results.

Flower Prints (1)

Travis was very intrigued by the set up when we returned home. On the floor, place an old dish towel for traction, followed by a cutting board and then watercolor paper.  Place your flowers, petals down, on the watercolor paper after removing as much of the stems and leaves as possible. Finally, cover your petals with painter’s tape, being sure to cover the flower completely, but trying not to let pieces of tape overlap.

Flower Prints (2)

And now for the fun part! Although adults will need to do most of the hammering, Travis got to take a few swings at the flowers under careful supervision.

Flower Prints (3)

He then played along with his toy hammer while I finished the real work. You may want to peel back your painters tape a few times to make sure the color of the flower has transferred over to the paper, before removing the tape completely.

Flower Prints (5)

Peeling off the tape was great fun, too, of course.

Flower Prints (4)

Once the hammering was complete, Travis lost interest fairly quickly, but I loved the old-fashioned Victorian feel to the result. In a whimsical nod to the method by which we had obtained our prints, I “framed” them in additional painter’s tape in Travis’s room – a beautiful reminder of the fleeting beauty of summer’s blooms!

Flower Prints (7)

PB&J Stuffed French Toast

stuffed french toast alt

It’s hard to believe it, but already cool fall mornings are upon us, a little nip to the air as we’ve been rising! Make breakfast extra-special with this simple twist on French toast, and you’ll send the littles off to school with an extra spring in their step.

Ingredients:

  • 1 banana
  • 1/3 cup cashew milk
  • 1/2 teaspoon ground cinnamon
  • 1 tablespoon Earth Balance butter
  • 4 slices whole wheat bread
  • Peanut Butter
  • Jelly
  • 4 tablespoons maple syrup
  1. In a blender, combine the banana, cashew milk, and cinnamon; process until smooth. Set aside.
  2. Melt the butter in a large skillet over medium-high heat. While it melts, prepare two peanut butter and jelly sandwiches to taste – we like ours with strawberry jam best!
  3. Dip the sandwiches in the banana mixture, then add to the hot skillet. Cook for about 2 minutes on each side, until the bread is golden.
  4. Cut the sandwiches in half, and drizzle each half with 1 tablespoon warm maple syrup to serve.

stuffed french toast

Color Mixing

Color Mixing (5)

I’ve recently discovered the all-natural, all vegetable-based food coloring from Watkins, which I am loving for their consistency and ease of use (no mixing required, as is the case with many natural pigments).

To have fun with the colors, we pulled out this simple game – it’s also a great way to discuss primary (yellow, red, blue) versus secondary (green, purple, orange) colors.

First we mixed our colors in 4 clear cups, one each of red, yellow, green, and blue. Add a pipette or spoon to each. Either one is good fine-motor skills practice.

Color Mixing (1)

We used an upcycled egg carton for the color mixing, giving ample opportunity to make new colors in the multiple compartments of this one container. Place a little clear water in each compartment, then begin adding your colors and see what happens.

Color Mixing (2)

I thought Travis might consider the game a little old-hat (we did something similar back in the spring) but he was so into his creations.

Color Mixing (7)

Watching purple and orange form were big hits.

Color Mixing (6)

He also was very interested in how he could make brown (which he says is his favorite color!), and intrigued when I said he could create it just by mixing all the colors together.

Color Mixing (4)

An easy and fun diversion for a rainy afternoon.

Chilled Peanut Noodles with Tofu

Peanut Noodles with Tofu (1)

Here’s the third in a series of recipes I featured with a simple tofu-and-bell-pepper preparation. We gave it an Asian spin for a final night of leftovers!

Ingredients:

  • 2 tablespoons olive oil, divided
  • 1 medium yellow onion, thinly sliced
  • 1/2 teaspoon cumin
  • 1/2 teaspoon chili powder
  • 2 red bell peppers, thinly sliced
  • 1 (14-ounce) package firm tofu, cubed
  • 1/2 lime
  • 2 tablespoons low-sodium soy sauce
  • Rice noodles
  • Chopped peanuts
  • Cilantro (optional)
  1. Heat 1 tablespoon olive oil in a large skillet over medium-high heat. Add the onion, cumin, and chili powder; saute for 5 minutes. Add the bell pepper and saute for an additional 6 minutes, until the peppers are soft; transfer the mixture to a bowl.
  2. Heat the remaining tablespoon oil in the pan. Add the tofu and cook for a final 6 minutes. Return the bell pepper mixture to the pan, along with the juice from 1/2 a lime, and the soy sauce.
  3. Meanwhile, cook rice noodles according to package directions. Rinse under cold water and set aside.

For each preschooler-sized portion, I served 1/2 cup rice noodles with 1/2 cup tofu mixture. Sprinkle with chopped peanuts and cilantro to taste for serving.

Peanut Noodles with Tofu (2)

Mud Pies

Mud Pies (7).JPG

Kids usually don’t need any excuse to play with dirt, but at least with this project you get a lovely result! This game was yet another beautiful suggestion from our Barefoot Books Kids’ Garden kit.

To start, fill a pie plate or paper plate with soil using a hand trowel, leaving room on top. We’re new to having a backyard of our own, so Travis is loving all the play with shovels and dirt lately!

Mud Pies (1)

Slowly add water to the soil, stirring until you have a wonderful goopy mud. Travis loved this step of course.

Mud Pies (2)

Now we needed to decorate our “pies.” Add any pretty flower clippings, leaves, or petals, and let your “baker” decorate to his or her heart’s content. I placed a few flowers facing up, but Travis preferred his facing down – a whimsical little element.

Mud Pies (4)

Leave your mud pie to bake in a sunny spot. We checked it again after 4 hours, but since the day had clouded over, it was mostly set, but still a bit mushy.

Mud Pies (6)

Continue checking on your mud pie for about a week to observe any changes. It might turn to mud again if you get a rainy day!

Mud Pies alt

At the end of the week, simply tip it into your garden as compost. How’s that for easy clean up?

Mud Pies (9).JPG


Rainbow Kebabs

Rainbow Kebabs (3)

As fun as it is to draw the rainbow or craft with the rainbow, it’s even more fun to eat it! Make these simple kebabs for a healthy and educational snack.

Start off with some fine-motor skills practice by letting your child use a kid-friendly knife on some of the larger fruit pieces, like pineapple and melon. Smaller items (blueberries, grapes), don’t need to be cut.

Rainbow Kebabs (1)

Now assemble all of your fruits on a plate, making sure you have something in every color of the rainbow. Suggestions are as follows:

Red: strawberries, raspberries

Orange: oranges

Yellow: pineapple

Green: kiwi, honeydew

Blue: blueberries

Purple: grapes

Encourage your child to thread the fruits onto their skewer in rainbow order. Travis was so busy stealing nibbles of fruit that he let me assemble most of them, though! He was most excited by the pineapple, which I don’t buy very often: “I want a yellow one!”

Rainbow Kebabs (2)

If you want to add whimsy to your skewers, consider a marshmallow “cloud” or two!

Overall, this snack ranks high for being both healthy and fun.

Rainbow Kebabs (4)


Plantable Paper

Plantable Paper (9).JPG

There’s a little bit of magic to this craft, the idea that flowers can sprout from paper. It’s a multi-day project, but you only need a little time each day to make the magic bloom.

The instructions I had found online for making the paper mush were a bit vague, but worked just fine, so here’s all you do: Fill a blender about halfway with torn newspaper and scrap paper (we used pink construction paper scraps, which gave our final product a nice pink hue). Cover the paper mixture with hot water, then process until you have a mush. Travis loved the novelty of paper in a blender instead of food!

Plantable Paper (1)

Caution: Make sure to remove the center piece of your blender’s lid and cover with a paper towel while blending so steam can escape, otherwise you’ll end up with hot water splatters. Let the mixture stand for about 15 minutes.

Plantable Paper (2)

The next step is messy, so cover your work surface (I used a large shopping bag). Place two pieces of felt on top of the bag. Scoop the mush onto the felt, and have your child help you smoosh it into a very thin layer.

Plantable Paper (3)

Then it was time to sprinkle on our flower seeds! We had two very different kinds – cosmos which looked almost like large cumin seeds, and larkspur, which looked more like hard black poppy seeds. I don’t do much gardening, so examining the seeds was fun for Travis and me both!

Plantable Paper (4)

Leave the mixture to dry on the felt. After the first day, I carefully flipped each piece over, then left them to dry some more. By now I could consolidate onto one piece of felt.

After two days, the mushy paper will be completely dry. Remove it from the felt and cut into shapes if desired – hearts felt just right!

Plantable Paper (8)

We headed outside with pots and soil, and planted our paper. Travis loved watering them!

Plantable Paper (12)

Now we just need to sit back and wait for the flowers to grow.

Plantable Paper (11)

Update: It worked! Here are some beautiful shoots at day 5.

Plantable Paper (12)

Here is the growth after a couple of weeks:

Plantable Paper alt.JPG