Baseball Explored

Baseball Explored (7)

The final lesson to go with Travis’s Game Day recipes from Raddish Kids was an in-depth look at baseball… with a little art and drama thrown in!

First, I read Travis some facts about the game and we watched a quick video of the rules. Bedtime stories like Pete the Cat Play Ball! by James Dean, I Got It! by David Wiesner, and F is for Fenway by Jerry Pallotta all introduced the imagery and lingo of baseball and its stadiums.

Baseball Explored (2)

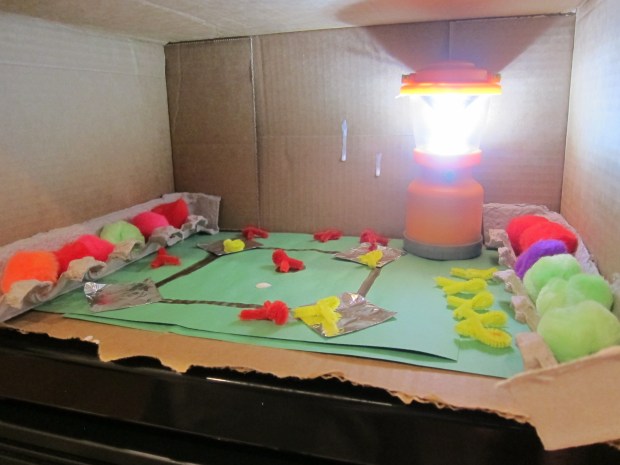
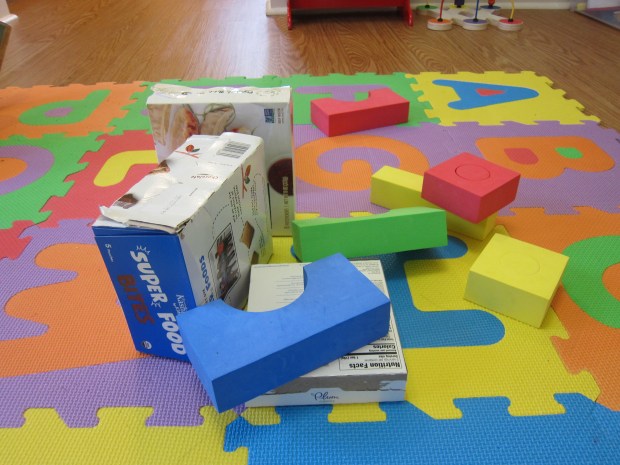
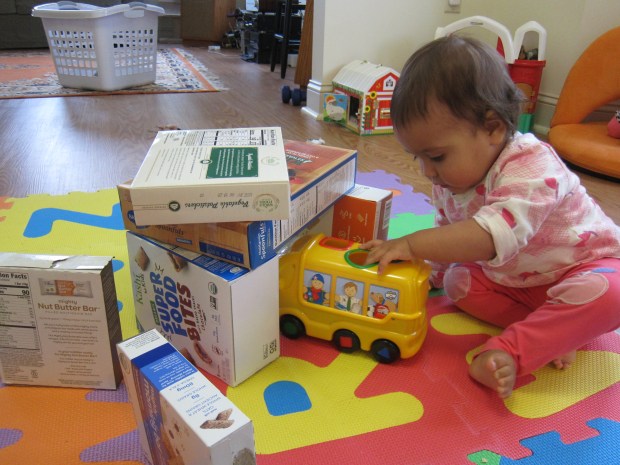
Even more fun was making a diorama of a stadium! I pulled together supplies, including a large box, construction paper, craft sticks, glue, markers, an egg carton, and tin foil.

We looked at images of Fenway and other baseball fields and I asked Travis what we’d need. Raddish included a full worksheet to fill out before beginning the diorama, but with an eager kindergartner and a one-year-old getting into all the supplies, we had to work a bit more quickly than that!

Baseball Explored (3)

Travis noticed what I hoped he would right away: We needed green on the bottom for the field. We glued down green construction paper, then I drew on the baseball diamond dirt with brown marker.

Baseball Explored (4)

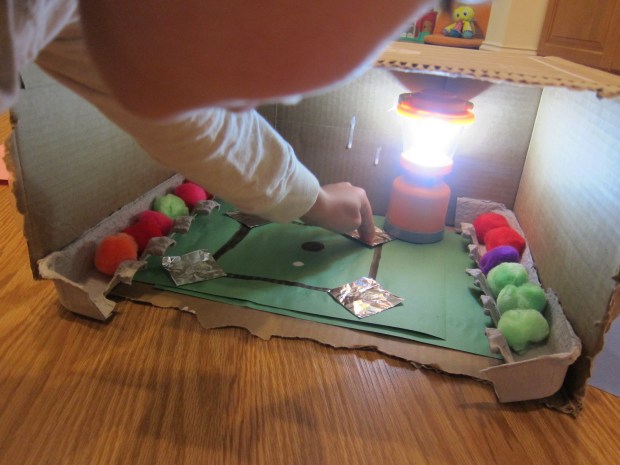
The baseball field is a great chance to talk about shapes, in general. The dirt lanes form a diamond, the pitcher’s mound is a circle, and the bases needed to be squares. Travis chose shiny tin foil for the bases, a nice touch!

Baseball Explored (5)

I helped him think about what else his stadium needed. Soon we had an old egg carton glued on the sides as the bleachers with little pom pom “spectators”. Pipe cleaners were our players.

Baseball Explored (6)

Travis’s proudest contribution was adding a mini lantern to be the stadium spotlight.

The worksheet suggested adding food or drinks, which older kids can carefully craft. Travis was quite proud to glue together two craft sticks, crossed to look like soft pretzels.

Baseball Explored (8)

Next up: the drama portion! We watched a few suggested clips of movement in baseball, ranging from the best catches of all time, to how to slide into base, to how to throw peanuts in the stands. Travis then put on his acting shoes. Here is his baseball movie, in three parts:

Batting!

Sliding!

Tossing peanuts!

What a fantastic way to get kids up and moving on a rainy evening. There’s lots more that older children can do with this lesson, whether making a painting or collage representing baseball or reading biographies of famous players.

We intend to finish the lesson with a baseball movie (Angels in the Outfield is a great pick for younger kids) and a game on TV once the World Series starts!

Advertisement

Oatmeal with Sauteed Plantains

Oatmeal Plantain (2).JPG

Put a tropical spin on your kids’ morning oatmeal and everyone is sure to wake up on the right side of the bed!

Ingredients:

  • 1 yellow ripe plantain
  • 1 tablespoon brown sugar
  • 1 teaspoon Earth Balance butter
  • 1/2 cup water
  • 1/2 cup apple juice
  • 2/3 cup quick oats
  • 1 teaspoon cinnamon
  1. Peel and slice the plantain into 2-inch pieces. Transfer to a plastic bag and add the brown sugar; seal and shake to coat.
  2. Melt the butter in a small skillet over medium heat. Add the plantain and cook for about 4 minutes, until browned on all sides.
  3. Meanwhile, combine the water and apple juice in a saucepan and bring to a boil. Add the oats and cinnamon and continue to cook for 1 minute, until thickened.

Top the oatmeal with the plantain slices to serve!

Oatmeal Plantain (1)

Toppling Tower

Toppling Towers (8)

Chances are you have lots of empty snack boxes if you have kids. Instead of recycling, set them aside and build up a collection. Now you have all you need for building towers with your baby!

For about a week, I saved every empty snack box and cereal boxes. Tape the tops closed, if needed, so no edges stick out. First, I dumped out the bag in front of Veronika. Instant fun!

Toppling Towers (1)

Then we got building. You can encourage your baby to place one box on top of another, but don’t be surprised if the preferred activity is knocking down! This post is called toppling tower, after all.

Toppling Towers (2)

We even got into some pretend play and made a garage for her vehicles.

Toppling Towers (4)

Add in real building blocks to make the structure more complicated (soft foam ones are my favorite for this age).

Toppling Towers (5)

This tower, too, needed to be toppled of course.

Toppling Towers (6)

This kind of early STEM activity will help build new connections in your baby’s brain, plus provide lots of enjoyment!

Toppling Towers (7)

Kaboom!

Toppling Towers (3)

Picture This, Sing That

Picture This Sing That (4)

At just-shy of one year old, Veronika has very firm opinions about her favorite songs, and your little one no doubt does, too. Make it easy for pre-verbal kids to pick a song with visual clues!

For this activity, I went to the print shop to get brightly-colored high-quality images of a few favorite tunes. There was a cute spider for Itsy Bitsy Spider, a bright yellow bus for Wheels on the Bus, and a farm scene for Old Macdonald Had a Farm. I showed her one image and then sang that song.

Picture This Sing That (1)

Pretty soon, she made the connection between image and song.

Picture This Sing That (6)

Her big smiles made it clear she was having fun.

Picture This Sing That (5)

Wheels on the Bus is her hands-down favorite. She saw the yellow bus and immediately began swishing her “wipers”.

Picture This Sing That (2)

Later, I gave her the choice of all three pictures in the playroom. Sure enough, she selected the bus right away, so we sang that one.

Picture This Sing That (7)

To add to the visuals, you can even add props! Soon she was scooting a bus back and forth as we sang Wheels.

Picture This Sing That (8)

And playing with animals as we sang Old Macdonald.

Picture This Sing That (9)

What’s your baby’s favorite song? Please share in the comments!

Picture This Sing That (3)

Glow-in-the-Dark Croquet

Glow Croquet (9).JPG
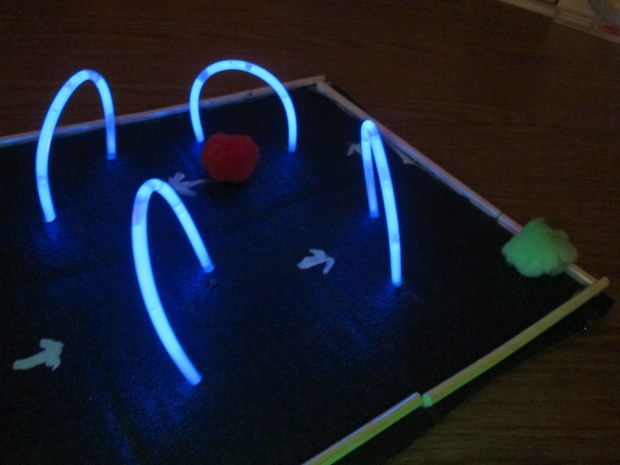
Nights are getting longer, which means finally the sun sets before Travis goes to bed. That opens up whole realms of possibility for games we can play! To wit, put those glow-in-the-dark-sticks and bracelets (ubiquitous this close to Halloween!) to novel use with this game of mini croquet.

First, we painted a piece of large cardboard. Travis chose a sparkly blue, thinking that would look like a starry night sky against our glowing wickets. Paint two coats and let dry.

Glow Croquet (1)

Glue on paper straws around the entire rim of the cardboard as bumpers; let dry.

Glow Croquet (2)

At first, we made straw mallets by cutting a 2-inch piece of straw and gluing crosswise on a second straw to form a T. These didn’t hold up well, so read on for our quick fix.

Glow Croquet (3)

To make the wickets, poke holes in the cardboard. Activate 4 glow bracelets (or up to 8 if you want more wickets!) and insert into the holes, bending each one into an upside-down U.

Glow Croquet (4)

Add arrows with white-out or white paint showing the direction of play.

Glow Croquet (5)

Have each player select a different color pom pom for their ball. Now take turns whacking through the wickets and see who reaches the end first!

Glow Croquet (6)

As mentioned, our straw mallets didn’t hold up well. No problem! We snapped a few regular glow sticks to activate them, and used these as the mallets.

Glow Croquet (7)

Needless to say, Travis was smitten with the game. Anything that glows is always a hit!

Glow Croquet (8)