Eerie Eyeball Cups

Eerie Eyeball (5)

With Halloween a week away, Travis is starting to demand spooky decor around the house. We put together these eerie snack cups, perfect for holding candy or portions of little snacks or dry cereal.

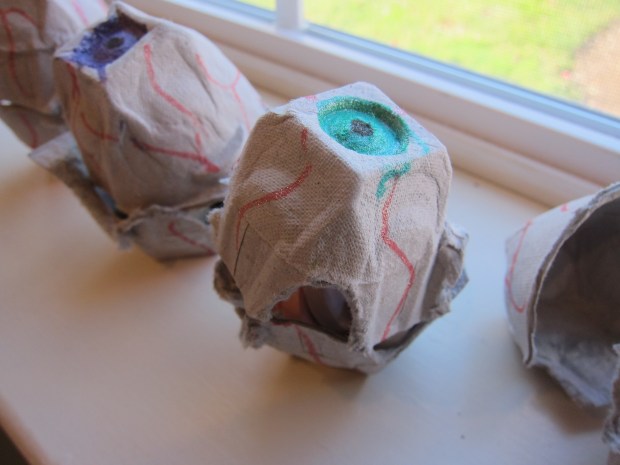
Cut an upcycled egg carton into separate compartments. Decorate half of them as the top of the eyes, with a circle right in the center.

Eerie Eyeball (1)

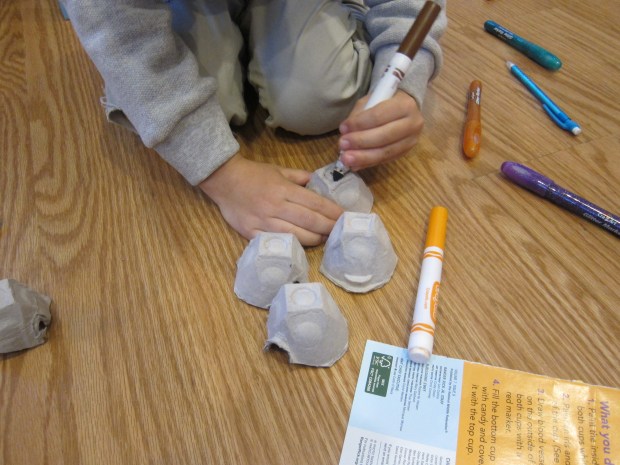
Add wiggly lines of red marker for the bloodshot veins. (Note: You can use paint, but we preferred marker since there was no drying time).

Eerie Eyeball (2)

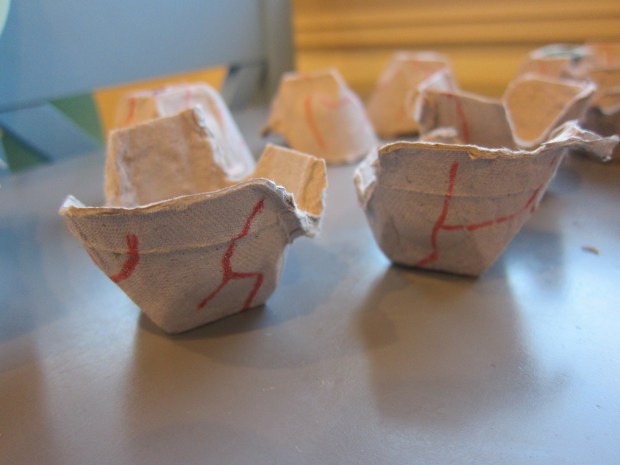
For the other half of the cups, omit the iris and just make wiggly veins.

Eerie Eyeball (3)

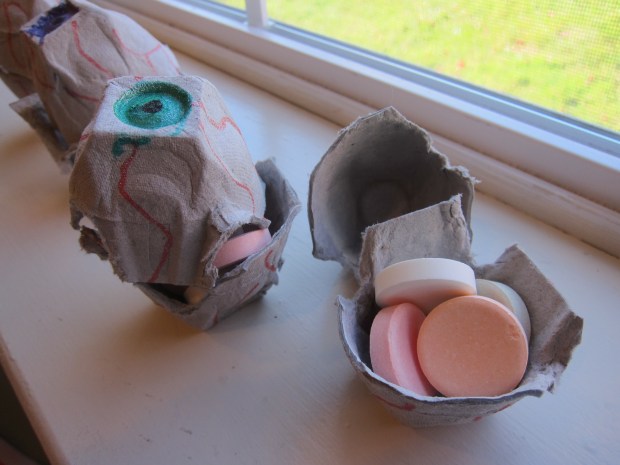
Fill the bottoms with treats, then stack an eyeball cup on top.

Eerie Eyeball (4)

Spooky!

Advertisement

Sweet Potato Spread

Sweet Potato Spread a.JPG

This sweet potato-based spread is so versatile. Serve it smeared on slices of toast for breakfast, or over graham crackers for a snack. Babies might just enjoy spoonfuls of it plain, too!

Sweet Potato Spread c

Ingredients:

  • 1 cup grated sweet potato
  • 3/4 cup water
  • 1 teaspoon maple syrup
  • 1/4 teaspoon cinnamon
  • 2 tablespoons non-dairy cream cheese
  1. Combine the sweet potato and water in a saucepan; bring to a boil. Continue to cook for 5 minutes.
  2. Reduce the heat to low and stir in the remaining ingredients.

If you like, add a little pinch of nutmeg, too!

Sweet Potato Spread b

Squish Bags

Squish Bags (2)

I made a floor sensory bagĀ for Veronika some time back; today I added two twists for a new version of the game!

In the first, I added 1/2 cup water and then various small items from our craft bin: translucent pony beads, buttons, and wiggle eyes all fit the bill. I got the idea after noticing how much she loved a drum with floating beads under the plastic at music class.

Squish Bags (1)

I taped the bag firmly to the floor on all four sides, almost like framing it. Now she could squish the items inside, but not move the whole bag.

Squish Bags (3)

The second version was even squishier! This time, instead of water, I squirted in a generous dose of shaving cream. I sprinkled in even more beads and buttons, using lots so they showed up through the thick cream. This one, too, I taped firmly down on all four sides.

Squish Bags (5)

Veronika loved pressing her fingers in! Or scooching her whole body across.

Squish Bags (7)

She could move beads and buttons with one little finger or a whole hand pressed down, and the visual effect was dazzling.

Squish Bags (4)

If you make these while your baby is still young enough to need tummy time, it’s a sure way to keep them entertained!

Learn to Blow

Learn to Blow (5).JPG

Blowing is such a gentle and fun sensation for babies, both to feel it from you and to learn! Today, Veronika and I had some fun with this idea in a few ways.

First, I simply took a deep breath in and then blew gently on her cheeks and forehead (you’ll probably want to avoid the eyes). Veronika giggled and thought this was a delight.

You can see she tried to imitate me with her tongue out, so making more of a raspberry sound. But I love that she instantly tried to copy me!

Learn to Blow (1)

Try blowing on palms or fingers, too.

Learn to Blow (2)

Then I pulled out our pinwheel for more demonstration. She loved watching it go around in the “wind”.

Learn to Blow (6)

I hoped she would try blowing on it, too, but her hands proved too tempting to make it spin.

Learn to Blow (7)

Then of course we needed the perfect story for learning to blow: we huffed and puffed to the Three Little Pigs!

I set up a Three Little Pigs toyset that’s been around since big brother Travis was a baby, and hung up tissue paper over the houses.

Learn to Blow (3)

As I narrated the story, I huffed and puffed on the tissue each time we came to that part of the tale. She loved watching the tissue paper sway back and forth!

Learn to Blow (4)

Do you have a fairy tale that you like to narrate in a hands-on way? Please share in the comments!