Shining-Bright Advent Wreath

Shining Advent (10).JPG

One of my favorite holiday traditions as a girl was lighting the advent wreath, a new candle each week of December leading up until Christmas,. But I had forgotten all about it until I spotted this craft in Travis’s Highlights magazine. So we were eager to continue the tradition and light up our home!

Cut two empty paper towel tubes in half, so that now you have four “candles”. Wrap three of them in purple cardstock, and one in pink cardstock. Secure with tape.

Shining Advent (2)

Wrap a length of similar colored ribbon around the top and secure with tape. (Note: The tape was Highlight’s suggestion, but for more elegance I would secure the ribbon and cardstock with glue next time).

Shining Advent (3)

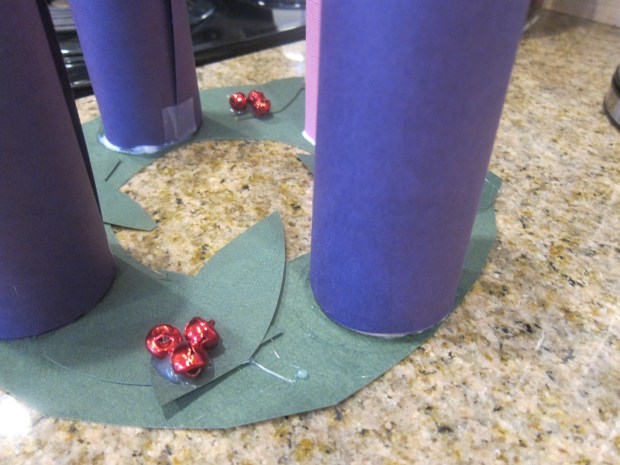
Cut a wreath shape from green cardstock, and glue down onto cardboard for extra stability. Glue on the pillars, and add decorations.

Shining Advent (5)

We included green leaves cut from more cardstock as well as a few tiny red bells. Originally I planned to use small red pom poms as the “berries”, but the bells turned out to be lovely!

Shining Advent (6)

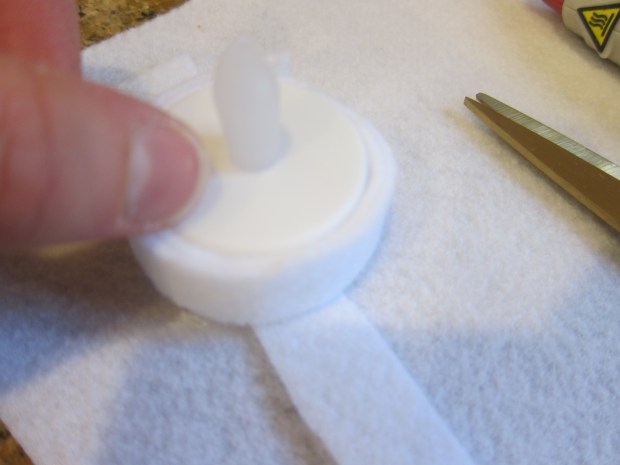
For the candle flames, wrap tea lights in several layers of white felt (otherwise they will be too small and will slip inside the tubes).

Shining Advent (4)

Place on top of the pillars. Each Sunday, a new candle is lit, and the pink one will join in on Christmas Eve!

Shining Advent (9)

How are you counting down to Christmas? Please share in the comments!

Advent Candles var

Make a Night Sky Mobile

Night Mobile (7)

Talking about the moon and stars with Veronika prompted me to follow up with this cute mobile craft. There are two ways to make it, mine decidedly more of a hack, but it worked in a pinch!

For the easy version, I wanted to purchase a mobile frame with predrilled holes from the craft store. You’ll notice that the closest thing I could find was actually twisted in the shape of a soft pretzel, but Veronika didn’t know the difference!

With that on hand, I made a few simple night sky decorations to dangle from it. I traced a moon, star, and cloud onto cardboard.

Night Mobile (1)

Cut out the shapes and gave them a few coats of gold and silver paint. Let dry completely.

Night Mobile (2)

Once dry, hole punch the cardboard and thread from your frame with yarn or twine.

Night Mobile (3)

If you’re far craftier than me, you can instead trace your shapes onto tracing paper as templates, pin to colored felt, and cut two for each shape. Sew the felt together with a blanket stitch, leaving a hole to stuff in roving. Sew up and then attach to the mobile frame with thread.

But like I said, my baby girl didn’t mind my quick version; if anything she was entranced!

Night Mobile (5)

She loved grabbing onto the dangling pieces in the playroom.

Night Mobile (4)

For a true mobile, you’ll need to suspend it where your baby can’t reach it, not prop it up like I did.

Night Mobile (8)

Since we were just playing, I let Veronika grab at the tips of the moon and star.

Night Mobile (11)

Her expression was full of wonder at these glowing night objects.

Night Mobile (9)