Grow a Science Garden

Grow Garden alt.JPG

This indoor way to show your kids how vegetables grow is almost trippy! All you need is a head of romaine and a small glass jar. Then watch the magic happen.

Cut the leaves from the base of the romaine. Use the leaves for a big salad of course. I also gave my budding chef some of the leaves to play with in his set of pots and pans.

Grow Garden (4)

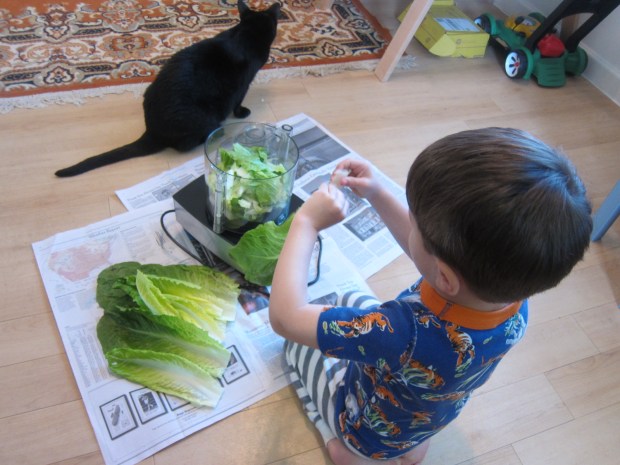
Meanwhile, trim the very bottom of the romaine head off thinly – this will help it absorb more water.

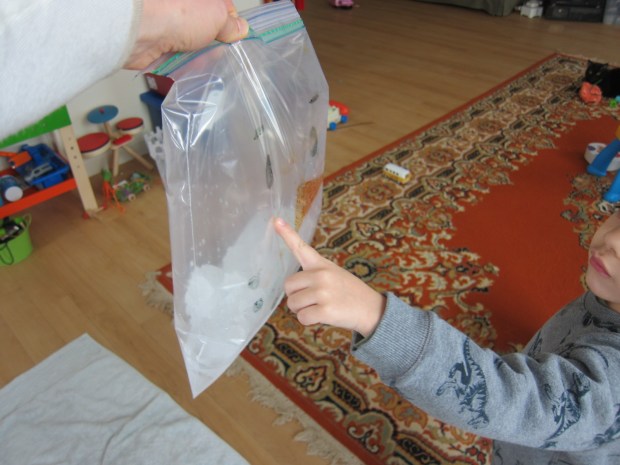
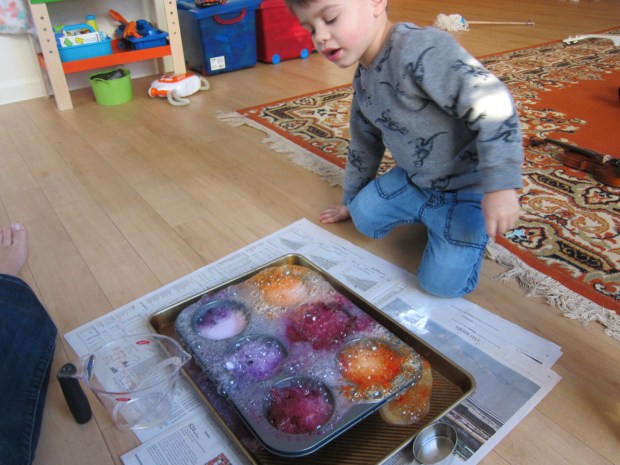
Here is a slightly skeptical Travis checking out the early stage of our experiment.

Grow Garden (2)

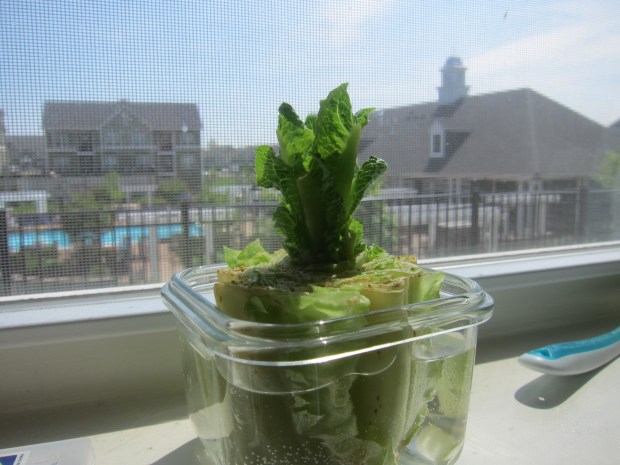
Place in a glass of water, making sure the base is completely covered, and place somewhere sunny. Change the water every day and watch your romaine sprout!

Grow Garden (3)

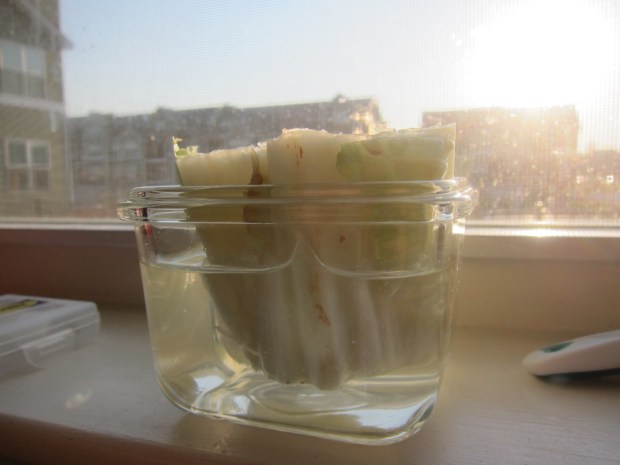
Within a day we had a few little leaves.

Grow Garden (6)

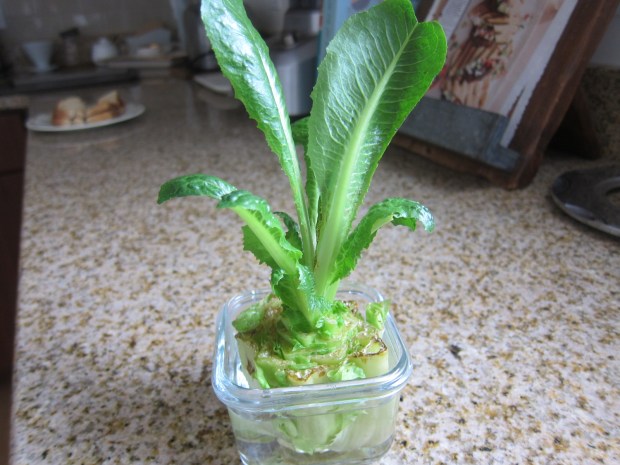
The picture at the top of this post shows growth after about 4 days. We can’t wait until we have enough for a fresh salad!

If you want to continue the fun, try the same experiment with a fennel bulb. You can also save the tops of carrots or radishes, place in a shallow dish with water, and watch for fresh greens to emerge. Thanks to Parents magazine for the idea!

Update: Here’s the lettuce about a week in, as tall as we let it grow. Honestly it was beginning to brown slightly around the edges, so I’m not sure I’d recommend growing it longer.

Grow Garden alt

But needless to say, Travis was thrilled!

Grow Garden var


Juice-Pouch Stomp Rocket

Juice Rocket (5).JPG

Don’t toss that juice pouch from your child’s next snack time. With just a few embellishments, your kid will have him- or herself their very own rocket launcher!

First, make sure the juice pouch is completely empty and rinse any juice from the straw. Reinsert the straw into the pouch; this is your launcher.

Cut a regular straw in half; discard half and keep the rest as your rocket.

Trace 3 trapezoids onto colored paper – littlest kids might need help with this one. The shapes should measure 3 inches on the bottom, 1 inch on the sides and 3/4-inch on the top. Cut out, and cut one of them in half vertically, leaving the other two full.

Tape the 2 full trapezoids to each side of the straw as the rocket fins. Add the half pieces of trapezoid at the bottom with more tape.

Juice Rocket (2)

Travis decided that he wanted to add a few strips of washi tape as embellishment, too.

Juice Rocket (1)

Seal the end of the straw with a little ball of clay. Now your rocket is ready to soar!

Blow into the straw of the juice pouch to make sure it is full of air.

Juice Rocket (3)

Slide the “rocket” onto the straw of the juice pouch. Now stomp (or press) on the pouch and watch your rocket soar!

Juice Rocket (4)

You can teach your little scientist that this project works thanks to compressed air from the pouch, otherwise known as pneumatics!


Surprise “Juice” Cups

Surprise Juice (2)

The jell-o surprise waiting in these clear plastic cups is sure to delight your kids! It’s a fun way to discuss the difference between liquids and solids, and of course they also get to eat a tasty treat. My favorite vegan “gelatin” dessert is the jel dessert from Simply Delish.

First, I prepared one package of the dessert according to package directions – in this case, dissolving the powder in 1/3 cup cold water, then adding 1 and 1/4 cups boiling water. Make sure you use a flavor with the color of juice! I used raspberry.

Surprise Juice (1)

Pour the mixture into clear plastic cups and refrigerate for 1 hour, or until firm.

I called Travis over for a juice snack; that’s a special treat in this household, so he immediately trotted over. Just as he arrived, I pretended to spill one of the cups – oops Except nothing poured out.

Surprise Juice (3)

He was instantly delighted and intrigued, and had to test for himself if he could pour out the “juice.” He also wanted to know what it felt like (squishy)…

Surprise Juice (5)

…and if he could turn the cups completely upside down.

Surprise Juice (7)

He tried drinking through a straw next.

Surprise Juice (6)

But of course I had a spoon on hand, knowing the straw wouldn’t work.

Surprise Juice (8)

In sum, this game is sure to elicit giggles and delight.

Surprise Juice (4)

Moving Dollar Trick

Moving Dollar (2)

We always love to find new spins on our magnet play, so I thought Travis would enjoy the humor behind this little trick. It’s fun on any random afternoon… or file this one away for April Fools!

To set up, you’ll need two neodymium magnets, the small metal silver ones. I have no idea if our fridge magnets are actually neodymium, but they worked just fine! Tape one magnet onto a dollar bill.

Moving Dollar (1)

Tape the other to a piece of string; make sure to tape securely, as these magnets are strong.

Moving Dollar (5)

Now place your dollar on a table, and clip the magnets together underneath the tabletop. To fool any passer-by, ask them to pick up the dollar, then gently tug on the string to move it away from the other person’s hand. The key here is to tug gently or the magnets may pull apart from each other.

Moving Dollar (4)

Travis loved the trick! He had to move our dollar around the table in all directions and loved snapping the two magnets together again from underneath the table.

Moving Dollar (3)

We weren’t truly trying to trick anyone, so a piece of blue twine worked just fine. If you’re in it for the trick, make sure you use a clear-colored thread that will be nearly invisible, and act as casual as possible.

Either way, this is a neat method to show how strong magnetic attraction can be, even through a tabletop!

How Much Water Is in Snow?

Water in Snow (4)

Here’s a super-simple experiment for the next time it snows. It combines a whole host of scientific ideas, from talking about liquid vs. frozen states of matter to making a hypothesis.

First, we needed to fill a clear glass jar with snow. For the best results, make sure to tamp the snow down so your jar is truly filled all the way.

Water in Snow (1)

We took the jar inside and measured the snow (15 cm) and made guesses as to how much water would be left once it melted, keeping in mind past lessons on how ice takes up more space than water.

Water in Snow (2)

Travis guessed really low, at 2 cm! I chose 5 cm to keep things interesting. I tried marking our guesses directly on the jar, but since it was still a little wet, we found that masking tape worked better.

Water in Snow (3)

Next we needed to be scientific and record our results. We took measurements at one hour intervals over the next three hours with the following results:

3.27 pm – 15 cm

4.27 pm – 12 cm

5.27 pm – 7 cm

6.27 pm – 4 cm – all water!

Water in Snow (5)

It was neat to see that it took a full 3 hours, as well. Next time, we’d make hypotheses about the timing as well, and record that at the start.

Expanding Snowman

Expanding Snowman (12).JPG

We’ve been waiting for a snowy day around here, because snow always lends itself to exciting winter games and science experiments. With leftover Alka-Seltzer tablets on hand, I had plans for exactly how we could use the snow this time around.

First, I drew a snowman’s face for Travis on a plastic bag. Note to self: next time use a sharpie! We had some inky orange and black hands later on…

Expanding Snowman (1)

Next we needed to collect fresh-fallen snow into our bag. Make sure you fill your bag almost to capacity with snow, or this experiment won’t work. We learned by trial and error!

Expanding Snowman (2)

Now drop in two Alka-seltzer tablets and seal the bag. You may want to place it on a towel, just in case the bag bursts…

Expanding Snowman (10)

Over the course of about an hour, we checked on the bag. The tablets slowly release gas that will make your snowman puff up more and more and more.

Expanding Snowman (11)

Here’s Travis poking a bag filled mostly with gas and leftover slush by the end.

Expanding Snowman (13)

I think the process would be even better if I had left the bag outside, so the snow didn’t melt simultaneously as the gas expanded – whoops!

The whole thing takes a while, of course, because the tablets react very slowly with freezing cold water. Because he grew impatient as we waited, I filled a second bag with hot water from the tap and we dropped in a few Alka-Seltzer.

Expanding Snowman (6)

They immediately fizzed and the bag puffed up with gas, and we talked about why the reaction happened so much faster in the heat.

Expanding Snowman (7)

Can’t wait for the next snowfall and the chance for more snowy games! What do you do with your kiddos to take advantage of a snow day? Please share in the comments!

Hot Chocolate Science

Hot Chocolate (7)

Well now here’s a tasty way to bring some science into your winter afternoon. Or to add a sweet twist to your science. Whichever way you spin it to your kids, who can possibly protest a science experiment that ends a cup of hot chocolate?

I started out by posing a hypothetical to Travis. If we made him hot cocoa for a snack, which would dissolve fastest: cocoa in a cup of cold water, one of medium (room temperature) water, or one with hot water. He picked hot (great!), so I guessed cold to play devil’s advocate. Now it was time to test our hypotheses.

Set out three heat-proof cups and fill each with 6 ounces of water.

Hot Chocolate (2)

Travis proudly helped fill the first two cups. Use caution when pouring the hot water, a step best left to grownups.

Hot Chocolate (1)

We then added 1 tablespoon of hot cocoa mix to each cup, one at a time, starting with the cold water. We tried to be scientific by timing our results with a handy stopwatch, although I confess our scientific method was spotty.

Hot Chocolate (4)

The chocolate in the cold water didn’t go anywhere, remaining powdery and clumpy even after lots of stirring. Truth be told, we have no idea how long it would have taken to dissolve, but far past our attention span on the stopwatch.

Hot Chocolate (5)

The hot water dissolved the cocoa in 10 seconds flat – a neat comparison that grabbed Travis’s attention.

Hot Chocolate (6)

Results for our medium water were a little fuzzy because it was probably hotter than it should have been. I had hoped to have water exactly at room temperature, but it was warm from sitting in the tea kettle. So that only took about 16 seconds to dissolve.

Hot Chocolate (8)

Either way, Travis got to enjoy a cup of cocoa at the end (from the hot cup, of course), and picked up a little science about how heat breaks apart molecules along the way.

Magnetic Ice Science

Ice Magnet (2)

This easy game is such a neat winter-time twist on magnet play!

To prepare, simply place small magnetic items in the compartments of an ice tray, and cover with water. Think small pieces of pipe cleaner, paper clips, metal rings, and similar small items. Freeze overnight.

Ice Magnet (1)

The next morning, I popped the ice cubes out into a baking dish, and invited Travis to see if he could pick up the frozen ice cubes with strong magnets from our magnet set.

Ice Magnet (3)

The results turned out to be so interesting, and lasted us the better part of a half hour! A few items, where the metal poked through the ice already, worked right away. The paper clips were remarkably strong even through a layer of ice.

Ice Magnet (4)

Travis loved discovering what would stick to his magnet already and what needed a wait, for the ice to melt somewhat.

Ice Magnet (7)

For some additional fun – under close supervision! – prop the baking dish between two stools and run your magnet wands underneath; Travis loved watching the magnets slide as if by magic from his wand under the tray.

Ice Magnet (8)

As we played, it became clear that the pipe cleaners were the real puzzle. The slightest bit of water was enough to get in the way of the thin metal strip inside the fuzzy layer.

Travis was the one who suggested we chisel away at our ice cubes to get to them – the perfect idea!

Ice Magnet (9)

We really had to work for that pipe cleaner; the pieces wouldn’t stick to our wand until only the tiniest shards of ice remained.

Ice Magnet (10)

Success at last! Overall, great icy and scientific fun, and Travis enjoyed playing with the magnetic items and wands even once the ice had melted.

Ice Magnet (11)

Glow-in-the-Dark Constellation Cards

Constellation Cards (6).JPG

This project is such a neat update on simply sticking glow-in-the-dark stars on your child’s wall or ceiling as décor. Turn it into a mini astrology lesson – as well as an art project! – and you have homemade constellations.

First, we needed to find images of constellations as inspiration. I’m no artist, so relied heavily on the ones we found in our Usborne Book Big Book of Stars and Planets.

Constellation Cards (1)

Set out dark paper and glow-in-the-dark paint and recreate the star patterns. Older kids can draw the outlines and stars themselves. Younger kids may be happier filling in the dots if you draw circles where the stars go first.

Constellation Cards (3)

In fact, Travis was happy painting his own invented “constellation” while I did the more meticulous detail of recreating what was in the book – just fine for a three year old!

Constellation Cards (4)

A couple pointers: If you have dark cardstock instead of construction paper, use that. The paint will show up better. If you’re relegated to porous construction paper like we were, make sure your star dots are quite thick, or the paint won’t show up once it’s lights out.

Constellation Cards (2)

We let the paint dry, then I connected the stars with white crayon. I added the name of each constellation in crayon as well.

Constellation Cards (5)

Note: If you prefer, you can also paint the lines between stars with glow-in-the-dark paint, but I liked the idea that Travis would see just the stars in the dark, and the constellation lines by day.

Next up was mounting the cards on the ceiling – uh oh, could mama reach that high? Thanks to a stool, she could! I positioned them directly above the lamp in Travis’s bedroom so they could “charge.”

Constellation Cards (7)

At lights out, we saw the best starry night sky! My camera could barely capture it, but do you see the glow?

Constellation Cards (8)


Science… Meets Art

Science Meets Art (3)

This project (from our latest High Five issue) exemplifies the STEAM acronym: a little bit of scientific discovery paired with a nifty art creation at the end. You can do both components of the project, or just the science part, or just the art part… but I recommend the whole thing because we enjoyed it from start to finish!

First up, use some science (the S part of STEAM) to make at-home paints. Fill 6 large muffin cups with 1/4 cup baking soda each.

Science Meets Art (1)

Next, add about 15 drops of food coloring to each muffin cup. We only had powdered food coloring at home (from Color Kitchen), so sprinkled about a 1/2 packet of powder per compartment.

Science Meets Art (2)

Now you’re going to quickly pour vinegar into each muffin cup, and watch the colorful explosion!

Science Meets Art (4)

Of course this is similar to many baking soda and vinegar projects we’ve done in the past, talking about how the gas created when the two substances touch makes all that foam and bubbles. But this time, we were left with a new product… paint!

Science Meets Art (5)

Now it was time to use the paint for the A part of STEAM. We painted white coffee filters, and Travis had a blast, mixing colors and stirring each paint very carefully – a petit artiste!

Science Meets Art (7)

Set the filters aside to dry; these are going to be your flower blossoms.

Science Meets Art (8)

As a small gripe, you’re going to have undissolved baking soda left in each paint mixture, which leaves the coffee filters a bit grainy after they dry. I found it helpful to rub off the excess baking soda over the trash can before Travis and I moved on to the final steps of the project.

Meanwhile, make the flower stems by painting jumbo craft sticks green. The only green paint we had in the house was a dot marker, but this worked in a pinch. Let dry.

Science Meets Art (9)

To finish the flowers, wrap each painted filter around a medium-sized Styrofoam ball. Poke one of the green “stems” up through the filter and into the Styrofoam.

Science Meets Art (12)

Glue the tips of the filter together so the ball inside is no longer visible and voila – flowers!

Science Meets Art (11)

We set them in a vase, where we got to enjoy the fruits of our labor: beautiful flowers in the middle of a snowy winter.

Science Meets Art (13)

Thanks High Five!

Science Meets Art (6)