When I considered whether or not to play this game, I thought it might be too simple for Travis at this stage… but he adored it!
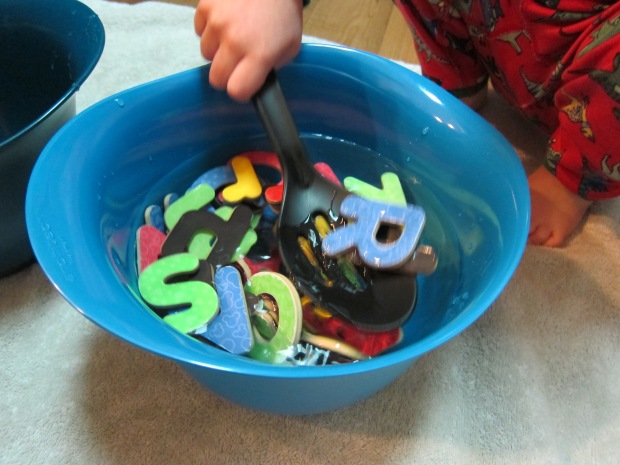
To set up, I put all of our magnetic alphabets in a bowl. You could also use foam puzzle letters. He instantly wanted to know what I was doing, and followed me around the apartment while I gathered the rest of the supplies – a towel to cover the floor, a second bowl, and a slotted spoon.

I added water to the bowl with the magnets, and this bowl and the empty bowl in front of Travis and asked him if he could transfer the letters with the slotted spoon. He didn’t hesitate a moment.

At first, he was simply so excited with the mechanics of the slotted spoon (i.e. that the water trickled out but the alphabet letters stayed on) that he couldn’t concentrate on the letters at all. The letters went back and forth several times this way.

Then he wanted to move the letters with his hands (have a dry shirt ready and waiting for when the game is done, because sleeves are likely to get wet!).
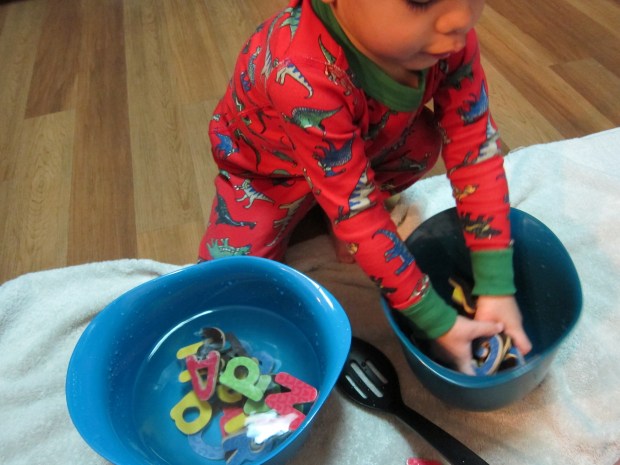
Eventually, the initial excitement wore off and he began transferring the letters more deliberately and slowly, telling me which one he was holding, which had been my ultimate goal for this project.
Perhaps because of our Letter of the Week play, I haven’t concentrated on the full alphabet in a long time, so this was a great refresher course to make sure Travis remembers all his letters, whether in order or out of order. I was ultimately so glad I selected this as a project for our morning.
Once he tired of transferring letters, Travis asked if he could have the buckets without water, so we drained what was left, and he proudly carried his bucket of letters into the living room and continued to play with them for some time, making alphabet soup and telling me he was setting up a bakery.

In sum, this was a great morning game that involved almost no forethought or special equipment, provided both tactile and educational learning, and couldn’t be easier to set up or clean up.