Photo Time Capsule

Photo Time Capsule (5).JPG

First, I have some proud-mama news: Travis has graduated from High Five magazine (which we’ve subscribed to since he was two years old) to Highlights magazine! I noticed he’d grown bored of High Five’s crafts and recipes, and sensed it was time for a change. When his Welcome issue arrived, he had to dive in right away, and we couldn’t wait to read the comics, puzzles, and stories. The magazine is billed for ages 6 to 12, so we’re starting young, but Travis is so proud to be reading the “big boy” version.

One project we needed to try right away: a photo time capsule.

I set Travis up with the instant camera, as well as cute photo frames to slot the prints into, and challenged him to find things he loved around the house that represent this time period.

Photo Time Capsule (1)

Some ideas include favorite books, favorite games, and favorite foods.

Photo Time Capsule (3)

Here his superhero figures pose for a pic!

Photo Time Capsule (4)

Highlights also suggested capturing family meals, pets, or school tests in a picture, although we skipped those. Some of his choices were not what I would have spent ten instant photos on, but it’s his capsule, and turned out adorable. When I questioned why he snapped the bread loaf from his toy food set, he said, “Because I like to eat bread in restaurants!”

Photo Time Capsule (7)

And of course we captured bigger things, like baby sister Veronika, and his bedroom at this age.

Photo Time Capsule (2)

Make sure to label the photos, then seal in an envelope. Travis wanted to decorate the envelope all yellow so it was “happy”.

Photo Time Capsule (8)

We taped it shut, and wrote this directive: “Do not open until 2029!” We’ll see you in 10 years, time capsule!

Photo Time Capsule (9)

Banana Messages

Banana Message (3).JPG

Here’s an adorable way to leave a message for your kids – and to teach them a tiny science lesson in the process!

Use a toothpick to score a message (whether words or a picture) into the peel of a banana. Thanks to the way this bruises the banana peel, your message will darken over time –  the longer it sits, the more visible it will be!

Note that you barely need to puncture the peel at all. The first time, I figured I needed to etch all the way down to the banana flesh, but this turned brown almost instantly.

Banana Message (1)

A more subtle, gentle scoring of the peel reveals itself slowly.

Banana Message (2)

Regardless, Travis was thrilled when I told him his banana had a secret message for him. He was so surprised!

Banana Message (4)

He then needed to try his own hand at it of course. These would be fun for a kid to put together and slip into mom or dad’s lunch for work!

Banana Message (5)

Food as Medicine

Garlic Bread (8).JPG

Travis was very frustrated by a late winter cold, and wanted to know how best to feel better. It was a great way to talk about certain foods and their medicinal qualities!

First, I asked him how he was feeling – finally better! But he thought back to how he had felt in the past, and about a time he’d had a tummy bug – no fun.

Garlic Medicine (1)

I asked him what foods he’d craved at the time, and he recalled wanting watermelon. I then gave him a little background on how past civilizations have used food as medicine, including Ancient Greece, China, and India. I thought all this info might be too dry, but he loved reading the numbers of how long ago these civilizations existed. 2000 years ago? 4000 years ago? Whoa.

Garlic Medicine (2)

Now it was time to see if there was any truth to the claims that some foods are medicinal. We picked garlic for our research. Could it really help? Online sources seemed to back up the claim.

We tested it out with a garlic tonic: Mince 2 tablespoons garlic. Combine the garlic in a mug with hot water, a little lemon juice, and agave syrup to taste.

Garlic Medicine (5)

Then we set out to cure his cold with a garlic bread recipe (our Bonus Bite in this month’s Raddish Kids).

Ingredients:

  • 2 garlic cloves
  • 4 tablespoons Earth Balance butter
  • 2 tablespoons olive oil
  • 1/2 loaf French bread baguette
  • 1/2 teaspoon dried parsley
  • 1/4 teaspoon salt
  • 1 tablespoon vegan Parmesan sprinkles
  1. Smash two garlic cloves; remove the papery skins and mince.Garlic Bread (3)
  2. Transfer the garlic to a bowl, along with the butter and olive oil. Microwave for about 45 seconds, or until the butter is melted.
  3. Meanwhile, slice the baguette into thick slices and arrange in a single layer on a baking sheet.Garlic Bread (4)
  4. Brush evenly with the butter mixture. Sprinkle evenly with the parsley, salt, and Parmesan.Garlic Bread (5)Note: this gets a bit messy! Next time I’d line the baking sheet with foil.Garlic Bread (6)
  5. Bake at 425 degrees F for 6 minutes.

Did we feel better after eating the garlic bread slices? Hard to say they actually made his sniffles less, but his face sure had a big smile!

Garlic Bread (7)

Finally, we have relatives who have also felt unwell most of the winter, and decided to send along a care package of flu fighter cookies. Even better, if you have a nearby friend or neighbor who has been unwell, perhaps you can visit them with a cold-busting superfood.

Garlic Medicine (6)

What do your kids crave when they’re sick? Please share in the comments!

Garlic Medicine (3)

Heart Pump

Heart Pump (5)

For kids interested in the body and how it works, this visual representation of the heart is fantastic! It’s obviously simplified, but serves as a nice illustration of how this vital body part works.

First, we cut a red balloon in half. Discard the narrow tail, and set aside the other half.

Heart Pump (1)

Fill a mason jar with water until about half full, and add 3 or 4 drops of red food coloring; Travis was thrilled we’d made “blood.”

Heart Pump (2)

Stretch the top part of the balloon over the jar, making sure it lies flat.

Heart Pump (3)

Cut two small slits in the balloon, about 1 inch apart. Insert straws into each, one red and one blue (Note: the color doesn’t really matter, but helps to differentiate). Tape the blue straw shut.

Heart Pump (4)

Now press down on the balloon and your heart will “squeeze” the blood out through the straw “arteries”. Make sure you place the jar on a plate or tray, because the squeezing gets messy!

Heart Pump (7)

Travis absolutely loved this, and had to pump the heart until our jar was all out of “blood.”

Heart Pump (8)

You can wow your kids with quick facts, like how their heart really pumps in a similar way about 70 times per minute.

Here’s a quick clip of the action:

Bird-Nest Salad

Bird-Nest Salad (1)

Tweet your way into spring with this cute little salad!

Ingredients:

  • 4 lettuce leaves
  • 1/4 cup shredded carrots
  • 2 tablespoons bean sprouts
  • 3 yellow tomatoes
  • Salad dressing of choice
  1. Arrange the lettuce leaves on a plate.
  2. Arrange the carrots and sprouts in the middle of the plate, so they look like a nest shape.
  3. Nest the tomatoes in the carrot bed as little eggs, and drizzle with your favorite dressing. We like this with a simple balsamic vinaigrette!

Happy spring!

Bird-Nest Salad (2)

Secret Agent Kiwi Crate

Kiwi Agent (11).JPG

Travis’s current favorite show (Odd Squad), is about a team of kids who solve odd cases. So he couldn’t have been more thrilled than when he discovered his latest Kiwi Crate was all about being a secret agent. Needless to say, I barely had time to glance at the parent manual before we dove right in!

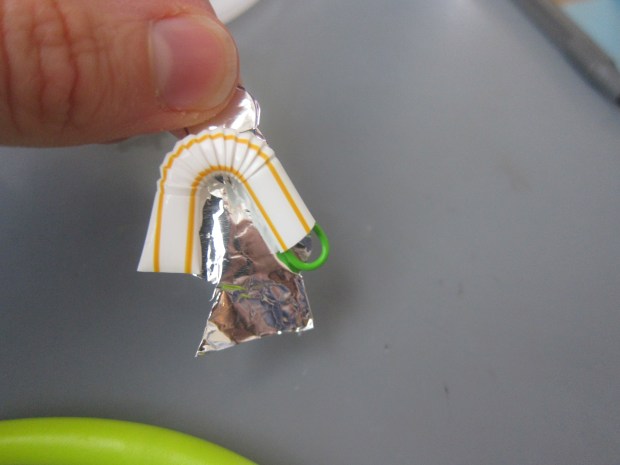
First, every secret agent needs a gadget, so Travis got to Build Your Periscope. This was a matter of folding the provided cardboard base…

Kiwi Agent (12)

…peeling stickers from each of the two mirrors to attach

Kiwi Agent (13)

…and securing it all with rubber bands.

Kiwi Agent (14)

He loved peeking around corners! For a quick STEM lesson, explain to your budding agent how they are seeing the reflection of a reflection, as opposed to a simple mirror reflection straight on. You can also flip one periscope piece to see things upside down, or make it longer or shorter by sliding the pieces together.

Kiwi Agent (15)

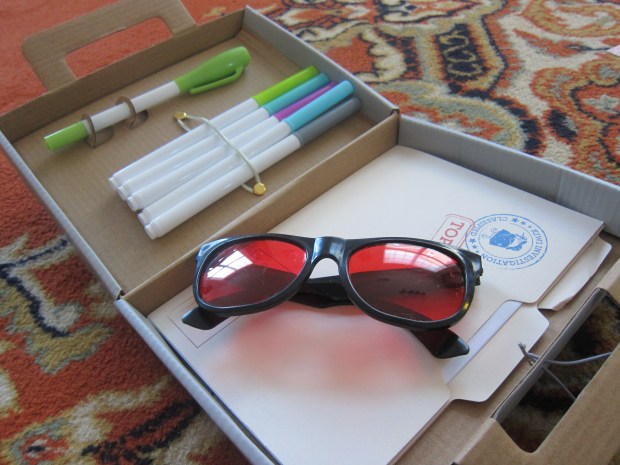
Next up, we got to Explore Secret Messages. There are two folders labeled “top secret”, one containing patterned paper and one with blank white paper. Use the provided markers to write messages on the patterned paper. The secret agent spy glasses (with red lenses) will cancel out the red lines that obscure the page so that messages can be detected.

Kiwi Agent (4)

This was a bit tough to illustrate to a non-reader, but I helped him understand which colors showed up best by drawing a series of lines with the markers, then giving him the glasses.

Kiwi Agent (5)

Next we took turns drawing pictures with the provided invisible ink and UV pen. The latter turns on with a switch, and was by far his favorite item in the kit.

Kiwi Agent (7)

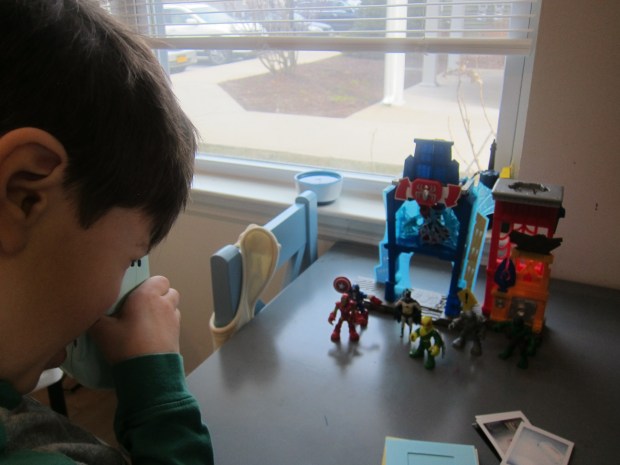
Our booklet recommended making an invisible map, so I sent him off on a hunt around the house. A real secret agent on the move! He soon proudly designed a map for me, leading to a “villain” we had to catch.

Kiwi Agent (9)

Finally, every agent needs to Pack Your Briefcase. Travis helped insert brads and elastics as the clasp, and to set up a cardboard insert with elastic fasteners to hold his agent supplies.

Kiwi Agent (2)

Now your little detective can store their markers (regular and UV!), as well as all the Top Secret folders and spy glasses.

Kiwi Agent (3)

Travis paraded around with this briefcase the entire rest of the day, filling it with other items he deemed necessary for an agent. What fantastic imaginative play it prompted!

Kiwi Agent (16)

We then delved into Explore magazine, which had us learning about other codes and doing fun find-it pages. Next we explored other ways to leave a secret message. First up was white crayon. Because Travis can’t read, this was most easily illustrated for him using his name. We wrote with white crayon on white paper, then painted over it with watercolor for the big reveal.

Kiwi Agent (18)

You can also color over your white crayon with colored pencils.

Kiwi Agent (19)

One neat idea is to send a hidden message to a friend. Wrap up a happy birthday message and give it to a friend with colored pencils so they can uncover the secret.

Kiwi Agent (22)

Travis’s next code was made with lemon juice. First, squeeze a lemon – always fun!

Kiwi Agent (20)

Dip a paintbrush in the lemon juice and write out your message. Once it dries, place a second sheet of paper on top and go over it with a hot iron (grown-up step).

Kiwi Agent (28)

All will be revealed! We had fun making this a secret message for daddy.

Kiwi Agent (21)

Finally, the booklet gave a lesson on fingerprints and the ways that secret agents use them. Travis was quite intrigued, and tested leaving his prints on our window.

Kiwi Agent (24)

He copied the suggested fingerprint art, checking out his unique whirls and swirls.

Kiwi Agent (25)

Then it was time to get creative – this print turned into a long-legged spider!

Kiwi Agent (26)

In sum, Kiwi Co hit it out of the park with this one!
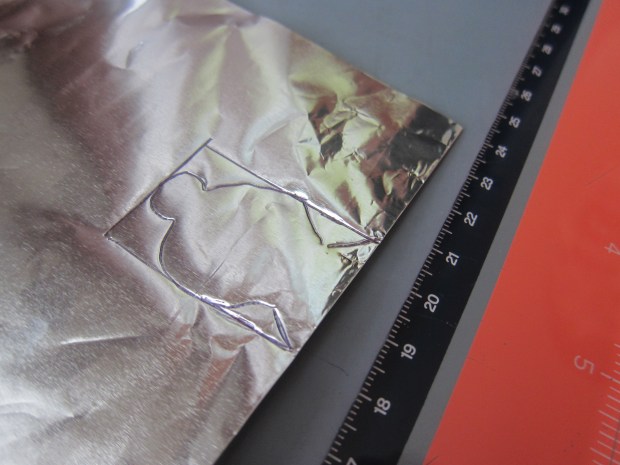
 

Whole Wheat Goldfish Crackers

Goldfish Crackers (7).JPG

As a mom of vegan kids, my biggest goal is to make sure they never feel left out. This means I come prepared with vegan pizza slices and cupcakes to every birthday party we attend, stock my son’s preschool cabinet with vegan cheddar squares and rice cereal bars, and happily go out of my way to try a new recipe or test a new vegan meat on the market.

But one item we haven’t been able to replicate was goldfish crackers. Until now! These snacks are ubiquitous, and Travis has been asking about them, so I special ordered a little goldfish cookie cutter. Turns out the crackers are a cinch to make, and now he can have them at snack with his school buddies!

Ingredients:

  • 1 and 3/4 cups shredded Daiya cheddar
  • 1/2 cup all-purpose flour
  • 1/4 cup whole wheat flour
  • 4 tablespoons Earth Balance butter
  • 1/8 teaspoon onion powder
  • 1/8 teaspoon salt
  1. Combine all the ingredients in a food processor, using the dough blade attachment. Process for about 2 minutes, until a dough forms, scraping the sides of the bowl as needed.Goldfish Crackers (1)
  2. Turn the dough out onto a work surface and gather into a ball. Note: the dough is a bit crumbly, but will stick together as you work it with your hands.
  3. Roll the dough out.Goldfish Crackers (2)
  4. Use a mini fish cookie cutter to cut out the shapes.Goldfish Crackers (3)
  5. Transfer the fish to a baking sheet – we had quite the little school of fishies!Goldfish Crackers (5)
  6. Use a toothpick to make a small eye in each fishGoldfish Crackers (6)
  7. Bake at 350 degrees F for 15 minutes.

Note: The original recipe said to roll the dough 1/8-inch thick, but ours was closer to 1/4-inch. Honestly, we preferred the results, with crackers that were a little chewier and a little less cracker-crispy than actual Goldfish.

Leprechaun Lollipops and St. Patrick’s Day Fun

Leprechaun Lolly (4).JPG

We’re getting in the mood for all things green here in honor of St. Paddy’s Day. Confession: I have not a drop of Irish blood in me, but I’m obsessed with Ireland, so I love making this holiday special for Travis.

This year, we had so much fun with this lollipop idea from Parents magazine. First, insert lollipop sticks into kiwi slices.

Leprechaun Lolly (1)

Place 1 bar of vegan white chocolate (such as Charm School Chocolate) in the microwave for about 30 seconds, until melted.

Dip each kiwi slice in the white chocolate, then press into a dish of green sprinkles.  Alternatively, try yellow (gold) sprinkles or rainbow color, which also fit with this holiday theme!

Leprechaun Lolly (3)

Transfer to a plate lined with parchment paper and chill in the fridge for about 5 hours, or until set.

Leprechaun Lolly (2)

While we enjoyed this Emerald Isle treat, we also did a little learning! Travis’s class has been working a lot on tracing letters at school, so we did a St. Patrick’s-themed word trace.

Leprechaun Lolly (7)

Writing and spelling is so much fun with this St. Patrick’s Day Word Tracer worksheet! For more educational resources, visit Education.com!

Leprechaun Lolly (10)

Travis was so proud of his ability to follow along, since the letters were smaller than his school worksheets. He loved discovering that this word spelled “luck!”

Leprechaun Lolly (8)

Finish off the St Paddy’s snack with a video clip of Irish dancing or a quick rundown of Irish symbols like the shamrock or the pot of gold.

Leprechaun Lolly (9)

Maple-Sesame Mashed Sweet Potatoes

Maple Sweet Potatoes (3).JPG

It’s the tail end of maple sugaring season, something Travis and I got to check out in person last year, helping to collect sap from a spile! So we decided to feature maple syrup in tonight’s dinner, to celebrate the tail-end of winter.

Maple Sweet Potatoes alt.JPG

Ingredients:

  • 2 medium sweet potatoes
  • 1/4 cup vanilla almond milk
  • 1/4 cup maple syrup
  • 1/2 teaspoon tahini
  • 1/4 teaspoon salt
  1. Peel and cube the sweet potatoes, and cook in boiling water until very tender – about 15 minutes.
  2. Mash the potatoes with a potato masher until smooth – Travis loved this step!Maple Sweet Potatoes (1)
  3. Stir in the maple syrup, almond milk, and tahini, then sprinkle with the salt.Maple Sweet Potatoes (2)

Cartesian Diver

Cartesian Diver (7).JPG

I had no idea until after Travis and I made this little project that this is a classic experiment dating back to… the 1600s! It’s so-named because it was first described in detail by Rene Descartes, and it’s a neat way to show kids some basic principles of pressure and density.

First, we made our little diver – and by little, I mean little! Measure a 1 inch x 1.5 inch rectangle on aluminum foil (we folded our foil double so it was a little thicker and sturdier).

Draw a little diver shape onto this rectangle and cut out.

Cartesian Diver (1)

Travis thought he was so cute!

Cartesian Diver (2)

Cut 1.5 inches from a bendy straw. Bend into an upside-down U and attach to your diver with a small paper clip. Be sure to use a small one! Our first was big and so heavy our diver sank right down.

Cartesian Diver (3)

Now add a tiny bit of clay to his feet. Test that he doesn’t sink in a glass of water before you use a bottle; if so, just remove some clay.

Cartesian Diver (4)

If he’s horizontal, you need a little more clay. We made the mistake of skipping this step on our first try, although Travis thought it was hilarious to fish our diver out from the bottle once we realized he was sinking.

Cartesian Diver (5)

Once we had the proper diver who floated just right, we filled an empty 2 liter bottle with water nearly to the top. Screw the cap on tightly.

Squeeze the bottle and watch him go up and down! He’ll sink when his straw fills with water, increasing the density just enough, then float when you release the bottle and the water drains out of the straw again.

Cartesian Diver (6)

Ours wasn’t as perfect as some example we saw online, but we had fun!

Cartesian Diver (8)