Textured Painted Fish


Textured Fish (12)

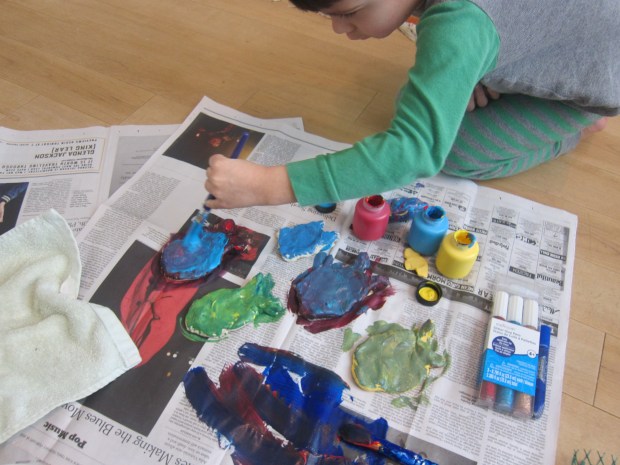
Travis and I haven’t played with clay in some time, so he was really excited when I pulled out a fresh pack of it this morning. Pretty soon, we came up with great under-the-sea fun, and added texture in two unique ways.

Textured Fish (1)

First, we shaped the clay into little fish. Travis needed some help with this, but sort of got the hang of shaping an oval body and pinching the back to form a tail.

Textured Fish (4)

More so, though, he made his own variations on sea creatures, which was just great to watch; he thought this looked like a perfect seahorse!

Textured Fish (3)

Next we painted the fish, and he loved mixing colors to help them “camouflage.”

Textured Fish (5)

Now for the texture fun. I pulled out a mesh bag, and we placed it on the wet clay. Cover with a rag (to avoid dirty hands!) and press down.

Textured Fish (6)

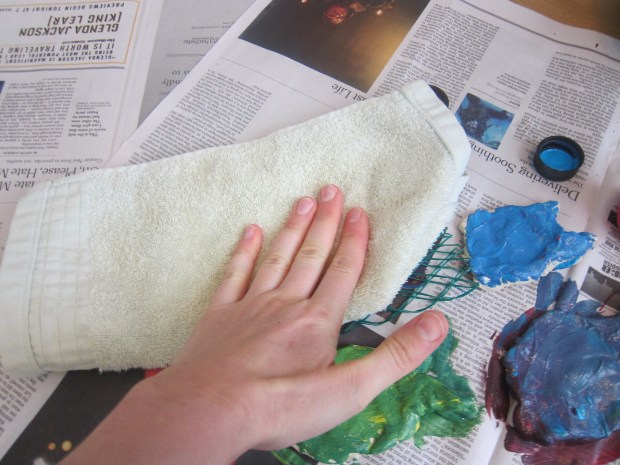
Now our fish had scales!

Textured Fish (7)

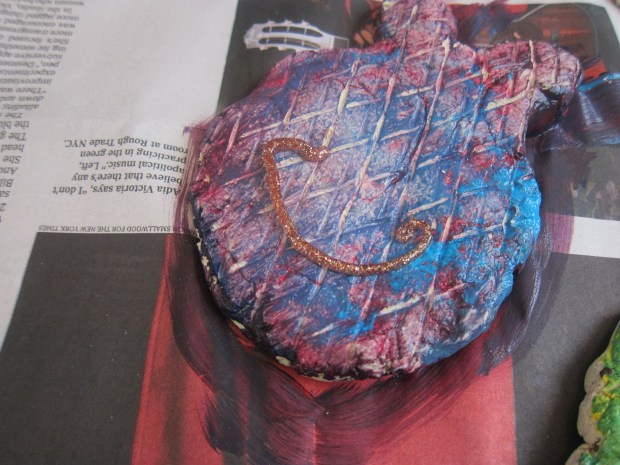
Travis loved it! Some glitter paint was the final shimmery touch for the fish, but Travis wasn’t done yet, so added “coral reefs” (which got lots more glittery glue).

Textured Fish (8)

Finally, our fish needed an ocean to swim in. We painted a piece of poster board blue, and added texture in another fun way – by running a comb over it for ocean waves and currants.

Textured Fish (2)

In sum, this was a great art project, with lots of fun elements, new ways to make texture, and opportunity for creativity.

Textured Fish (10)

Whale Ball Toss

Whale Ball (10)

For a museum exhibit on President’s Day, Travis got to play with old-fashioned toys in honor of George Washington, including wooden favorites like a Jacob’s Ladder and a cup-and-ball toss. So he was eager to craft this whale-tastic take on the latter at home. (Fun fact: the game dates back to the 14th century! Admittedly, this cetacean update from Kiwi Co. is a bit newer).

Ideally, start with blue plastic cups for your whales. We only had paper cups, which got a nice coat of blue paint.

Whale Ball (2)

Travis was so excited once they were dry! Punch a hole in the bottom of each cup, and thread through a three-foot long piece of yarn. Tie it in a loop around the cup.

Whale Ball (3)

Tie a wooden bean onto the other end of the yarn – this is the “krill” for the whale to eat.

Next, we traced the cup onto white paper, and cut out.

Whale Ball (7)

Cut the circle in half, then cut little strips into it to make fringed “baleen.” I was really proud of Travis’s scissor skills here.

Whale Ball (9)

I cut out a tail and fin template for him, which he then traced onto blue paper and cut out. Again, loved watching his fine motor skills.

Whale Ball (6)

Finally, we taped these pieces – tail, fins, and baleen, along with two googly eyes – onto each whale.

Whale Ball (11)

Hold the cup and swing the bead, and see if your whale can eat it. Here goes!

Whale Ball (4).JPG

Success!

Whale Ball (5)

This was a great game, and since we made two, we could challenge one another to a competition.

Glowing Fishbowl

Glowing Fishbowl (5).JPG

Although I don’t advocate keeping real fish as pets (it’s a sad existence to travel around and around a bowl for years on end), fake fish can make adorable companions! On a recent trip to a local fish hatchery, Travis picked up a plastic fish and turtle. We thought it would be cute to make them a little habitat to stay in. What’s better than a fishbowl home? A glowing fishbowl home!

First we squirted glue into the insides of the a clear glass bowl with a wide mouth, intending to make lines that looked like seaweed. Our glue was very runny, so didn’t work as well as we hoped, but we still then managed to dump in a whole can of glow-in-the-dark glitter and swirl the bowl until it coated the “seaweed.”

glowing fishbowl (2)

Definitely do this step over a trash can!

I then piped on a few fish with additional glow-in-the-dark paint and we set it aside to dry.

The glitter, disappointingly, didn’t show up as glowy as we hoped, but the fish were cute glowing in the dark.

glowing fishbowl (3)

Once we filled the bowl with water, it was the perfect home for our fish and turtle.

glowing fishbowl (4)

Jellyfish Lantern

jellyfish lantern (8)

It’s getting hard to impress Travis with crafts these days; let’s be honest, we’ve done a lot of them! It seemed like time for new materials – hence this awesome paper lantern jellyfish. It is by far the coolest jellyfish we’ve made together, and we’ve done a few in the past.

Travis remembered seeing paper lanterns from a summer festival back in August, and was so excited when I announced I had one for our craft. He needed to play with it first, of course!

jellyfish lantern (1)
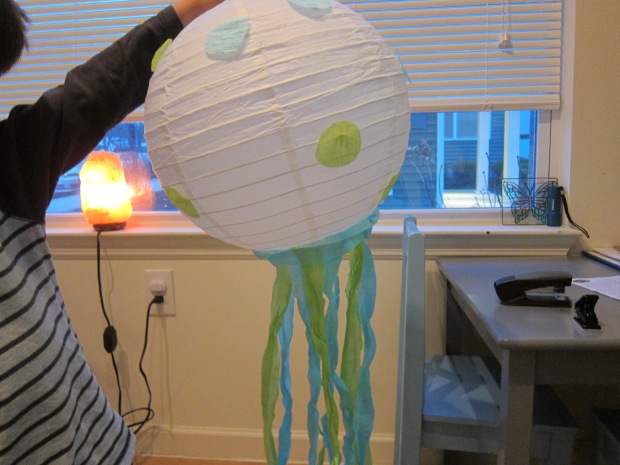
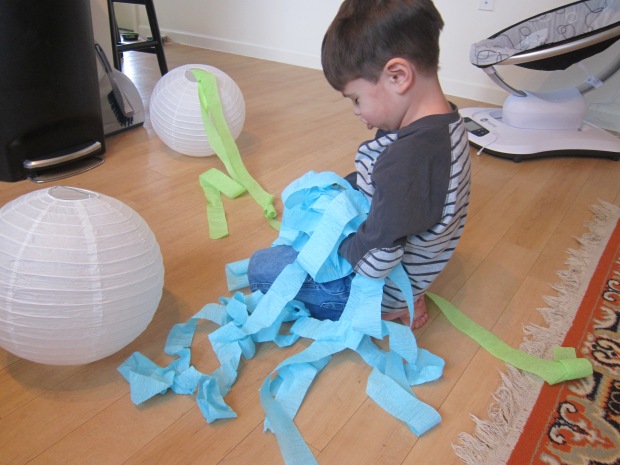
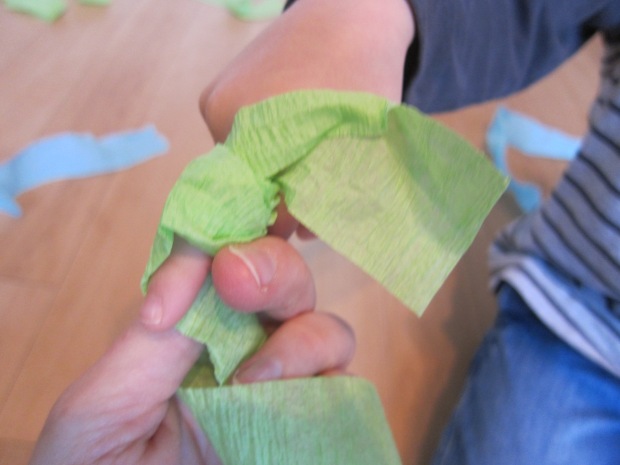
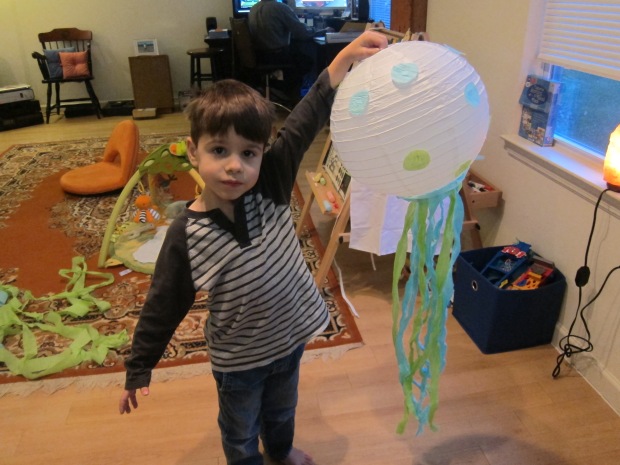
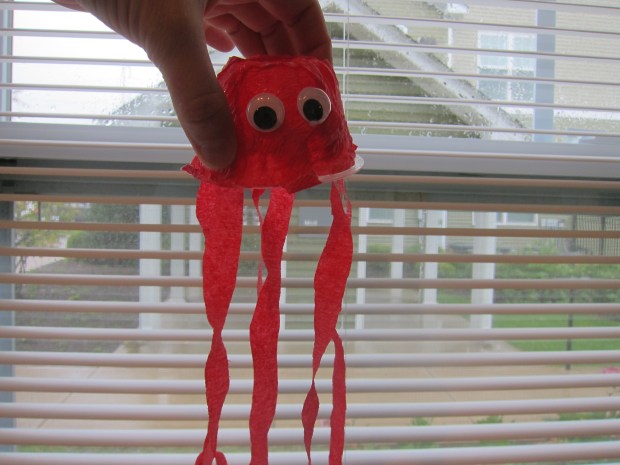
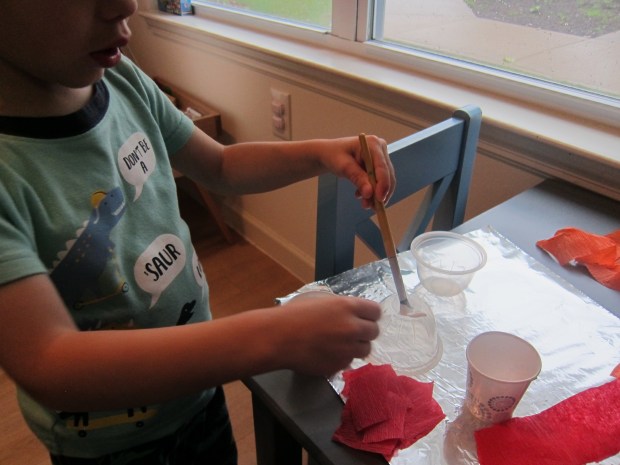
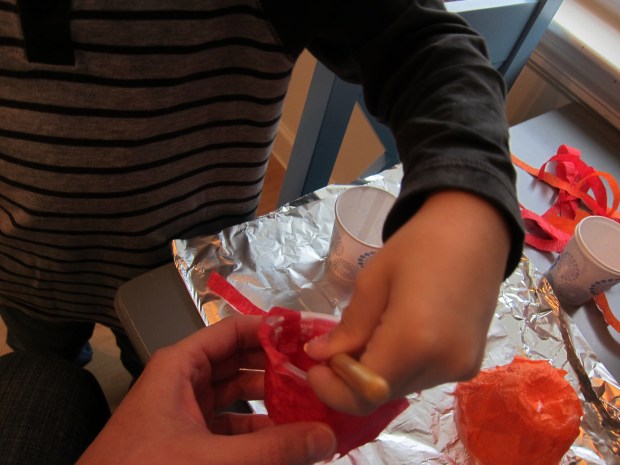
Next we needed crepe paper for the tentacles… It wasn’t long before we had crepe paper madness in the house, too!

jellyfish lantern (2)

I was happy to see him have so much fun, while I made sure to save enough pieces of equal length to be the tentacles.

Next I showed him how we could change the look of the crepe paper by wrapping around a finger. This gave the tentacles great texture!

jellyfish lantern (3)

Glue the tentacles around the bottom rim of the lantern. Add a final piece of crepe paper in a circle around the rim, to hide all the edges. Let dry.

jellyfish lantern (4)

We also cut a few circles from additional crepe paper to be spots on the jellyfish. So pretty!

jellyfish lantern (5)

Travis couldn’t wait for it to dry, after which the jellyfish was instantly a prop in his games.

jellyfish lantern (7)

Once he lets go, we’ll hang it from the ceiling for a beautiful ocean corner of his bedroom.

jellyfish lantern (6)

Feed the Frog

Feed Frog (7)

Ha, this activity is probably more suited to a creepy-crawly time of year like Halloween, but how do you keep a 4-year-old busy on the day before Christmas? With some good, spider fun, it turns out!

Travis spotted an old trove of spider rings in our craft bin, so we set up this game.

We needed a tissue box, and I let Travis go to town emptying the box and playing with the leftover tissues – something I wouldn’t normally encourage, but every once in a while, you need a sacrificial tissue box.

Feed Frog (2)

Ideally, use a green box. Ours had streaks of green as well as other colors, so I guess looked more like one of those tropical bright frogs – why not!

Feed Frog (3)

I made two big eyes for the frog, simply drawing black circles onto white paper and taping to the frog. Cut out the plastic around the hole of the tissue box, and your frog is ready to eat.

Present your child with the “frog”, a pair of tongs, and a set of spiders, and challenge him or her to feed the frog. Tongs are great for fine motor skills!

Feed Frog (4)

Travis would happily have done this all day. To throw in a little education, I asked if he could think of a pattern to feed the frog. “Black, orange, black, orange,” he suggested. Yes!

Feed Frog (5)

Next we tried rolling a dice, taking turns and feeding the frog the appropriate number of spiders.

Feed Frog (6)

When our frog got full, we simply dumped him out and started over.

Travis wanted other things for froggie to eat, so we found red pom poms, which he decided were poisonous bugs.

Feed Frog (8)

He even suggested we make a little mouth for froggie that could open and close, to keep all the food inside.

In sum, a great way to keep your kids entertained!

Coffee Filter Fish

Coffee Fish (9).JPG

Pretty rainbow fish are lighting up our doors and windows these days! This is an easy activity you can do with your child almost any time, requiring only coffee filters and markers.

First, be sure to cover your work surface (things will get wet!) and prep your materials. You’ll need permanent marker for this craft, not the washable kind, which made Travis feel very grown up.

Before he even started coloring our white coffee filters, he grew impish… Who doesn’t just want to spray water?

Coffee Fish (1)

He slowed down once I demonstrated how to color in a filter as completely as possible for the best results, so the colors will bleed together. Then he got to soak my marker-covered filter.

Coffee FIsh (4)

Now he had the idea!

Coffee Fish (5)

He scribbled in various color combos, declaring this one was a library fish, that one was a doctor fish, etc.

Coffee Fish (6)

We left our filters to dry completely.

To complete the fish, cut a triangle from one part of each circle as the mouth.

Coffee Fish (7)

Glue the triangle onto the opposite side of the circle – voila, a tail!

Coffee Fish (8)

Finish by drawing in eyes, and hanging the fish some place where they will catch the sunlight.

Coffee Fish (10)


Watercolor Resist Painting

Watercolor Resist (8).JPG

Our recent Cityscape crate from Koala Crate reminded me of the beauty of resist painting, which we haven’t done in quite some time. That was the inspiration for this beautiful ocean-themed project!

No need to have strong artistic skills; I printed a template for our sea creatures and traced each one onto contact paper.

Watercolor Resist (1)

Cut out and attach each animal to a piece of watercolor paper.

Watercolor Resist (2)

We talked about ocean colors as we added watercolors, which had Travis proudly concentrating on blues, purples, and greens.

Watercolor Resist (4)

It was an interesting lesson that the watercolor wouldn’t spread across the plastic surface of the contact paper!

Watercolor Resist (3)

If your child tires of painting before the entire paper is covered, that’s fine; just be sure the watercolors reach all the edges of the animal shape.

Watercolor Resist (6)

Let dry, then peel off for the big reveal. Wow!

Watercolor Resist (7)

Snack Cup Jellyfish

Snack Jellyfish (6).JPG

Travis currently adores any animal with lots of long legs, be it the eight-legged octopus or the many tentacles of the jellyfish, so I knew he’d love this simple. fun craft. It’s the perfect way to make use of canned fruit or applesauce cups once your snack cup is empty!

Snack Jellyfish (1)

We rinsed the snack cups, and then covered with a layer of glue.

Snack Jellyfish (2)

I gave him squares of red and orange crepe paper (tissue paper would work, too), and we layered them until our jellyfish bodies were covered. Let dry.

Snack Jellyfish (3)

His favorite part was adding the tentacles, carefully applying a dot of glue on the inside of the cup where each should go, and attaching a long ribbon of crepe paper.

Snack Jellyfish (4)

Add two eyes to the body of the jellyfish, and let dry again.

Snack Jellyfish (5)

Finally – time to play with Mr. Jellyfish! These are wiggly and wonderful to “swim” around your home.

Snack Jellyfish (7)

If you prefer to use them more as decoration, poke a small hole in the top of the snack cup and thread through a string. Hang near an open window or air vent where you can watch them sway.

Puffin Costume

Puffin (10)

Our October issue of Ranger Rick Jr. featured a cover story on puffins, with information inside about these bright-beaked birds. If your child is still looking for a Halloween costume, consider putting together this DIY puffin outfit. It’s perfect for trick-or-treating… or just everyday dress up!

Because we were making the costume simply for play at home, I skirted a few corners. But you can be more exact if this will actually be the Halloween garb of choice for your child.

First, make the puffin’s head. Fold a 20 inch x 12 inch piece of white felt in half. Draw the head shape (available from the online template) onto one side of the fold and cut out.

Puffin (1)

Add two “head top” shapes cut from black felt with fabric glue or a hot glue gun. Next cut the beak shape from orange construction paper and glue on as well. Let dry.

Puffin (2)

We added details like eyes and feathers with a marker. Here is my very serious puffin testing out the headpiece.

Puffin (7)

The piece of black felt I had at home was big, but not quite large enough for the suggested wings – a full 34 inch x 18 inch rectangle! So working with what I had, I traced on the wing shape from the template in chalk, and cut out. I added a ribbon to tie around Travis’s shoulders; if you are using truly large enough felt, part of the felt itself will become the tie.

Puffin (5)

Finally, we needed puffin feet. Trace the foot shape onto orange craft foam and cut out; add details with marker.

Puffin (6)

Poke a pipe cleaner (ideally orange) through the middle of each foot shape, and wrap around the thong of a flip flop. If you’re going all out for Halloween, make sure your pipe cleaners and flip flops are orange too! Yellow pipe cleaners and some old summer flip flops worked for us in a pinch.

Puffin (9)

Finish a true puffin costume with a white shirt and white pants.

My little bird was happy just to fly around the apartment.

Puffin (8)

What a cute idea this was!

Rattlesnake and Other “Critters”

Rattlesnake (4)

You can bring the “wild wild west” to life for your kids with this easy snake craft. I purchased a tie on clearance at Target for our snake, but you can also raid daddy’s closet for old ties instead of buying something new.

First, we cut a bit of length off the end where it was too narrow, then stuffed bells into the seam to be the snake’s rattle. You can also use wooden beads for this step – anything that will make a noise!

Rattlesnake (1)

Secure the bells or beads between two elastic bands.

For the head, stuff in two old socks. I was worried the socks would fall out, so used a safety pin to help keep them in place.

Rattlesnake (5)

To finish our wiggly friend, Travis glued on two googly eyes and decorated with markers.

Rattlesnake (3)

Squiggles from Travis, diamonds care of mama. (And yes, he insisted on wearing another pair of old socks on his hands as he worked, ha!)

Rattlesnake (2)

Now it was time to take our snake out for play. He can squiggle…

Rattlesnake (7)

…or coil up in a ball!

Rattlesnake (6)

As we played with the snake, we talked about other Wild West critters, like vultures and armadillos. Your kids can pretend to be the animals, curling up in a ball like the armadillo, or trotting through the Western town horseback. For more Wild West fun, see our Koala Crate from ages ago!