Clay Animals

Clay Animals (3)

After a recent snacktime story in High Five magazine about clay animals, Travis couldn’t wait to make our own. “Let’s do it right now!” he begged – good thing I had colored clay on hand!

Clay Animals (1)

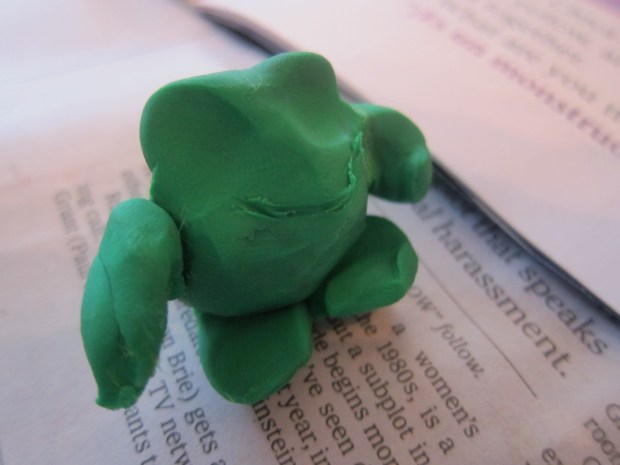
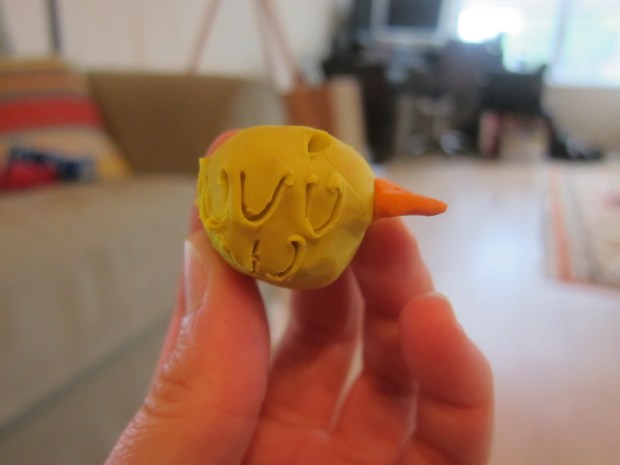
We started out copying the animals from the story – a yellow chick, red crab, and green frog.

Clay Animals (5)

But soon Travis was off and running with his own ideas, proudly holding them up for me. A snail!

Clay Animals (2)

A starfish!

Clay Animals (4)

We used clay that won’t dry out since we weren’t concerned about keeping our creatures, but do use air-dry clay if your kids will want things a bit more permanent.

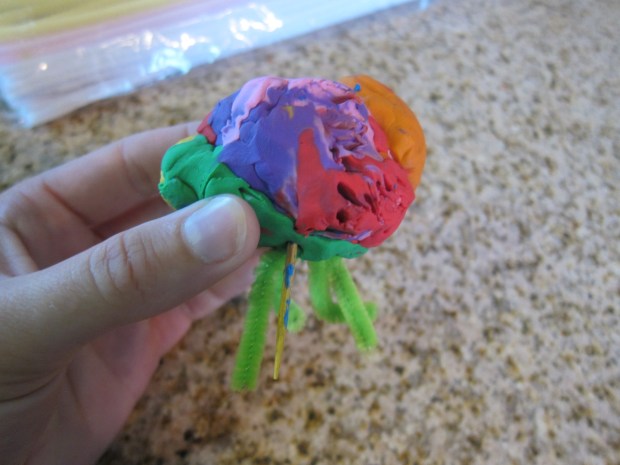
To add some fun, you can snip pieces of pipe cleaner to attach heads to bodies, as well as arms and legs. We tried out this method on a little bunny.

Clay Animals (6)

Mushing colors together made… a robot!

Clay Animals (11)

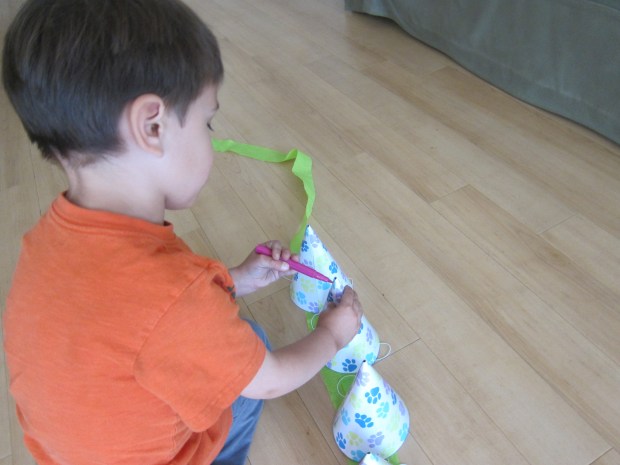
Toothpicks are great for adding details like mouths and eyes, or even chick feathers.

Clay Animals (8)

Travis soon decided the toothpick was a mosquito biting the animals, so then we needed clay band-aids.

Clay Animals (9)

Great fun on a rainy day!


Jeweled Garden Sticks

Jewel Sticks (5)

We’re proud of the little garden we’ve managed to create on our patio this summer (a goal from our Bucket List!), with everything from chalkboard planters to little coiled snakes as decorative guests. Now we wanted to make sure pests stayed away, and I read a tip online that shiny items act as a deterrent.

Travis was a pure imp putting this project together, but luckily I had our work surface well covered! First, cover jumbo craft sticks with glue.

Jewel Sticks (1)

Add sequins or any other shiny items (such as beads or buttons) from your craft bin. I thought Travis might want to place pieces on deliberately or in a pattern, but no… dumping the bag of sequins was much more fun!

Jewel Sticks (2)

This method worked surprisingly well. When we shook off the excess, we had shiny jeweled sticks left over.

Jewel Sticks (3)

Let dry completely before heading outside to put in the dirt near any plants you want to protect.

Jewel Sticks (4)

We’ll see if it works!

Sun-Melted Crayons

Sun Crayons (6)

You probably know that you can melt old crayons in the oven – but in the summer, you can also let the sun do the work!

This craft is the perfect use for all those old or broken crayons in your house. Remove the paper liners and place the crayons in a zip-top bag. Smash into pieces with a hammer.

Sun Crayons (2)

Travis couldn’t believe he got to use the grown-up hammer!

Sun Crayons (1)

Select cookie cutters and place on a baking sheet lined with foil or parchment paper. Fill with the crayon pieces to about 1/2-inch deep.

Sun Crayons (3)

Place in a sunny spot for at least 6 hours, or until melted.

Sun Crayons (4)

Although our crayons got very soft, they never did melt together all the way (we ought to have taken advantage of last week’s 95 degree heat wave, instead of our 85 degrees today!) so we ultimately popped them in the oven to finish the process. This only took 5 minutes (at 170 degrees F) since they were already so soft.

Let cool before popping out of the cookie cutters.

Sun Crayons (7)


Cardboard Tube Coiled Snakes

Cardboard Snakes (8)

This is a fun craft to put together, and the adorable final product can be used either to play with or to occupy a cute space in your garden!

First, paint toilet paper tubes with paint on the insides and out. We liked selecting fun bright colors for this project!

Cardboard Snakes (1)

If you intend to set the snakes outside in the garden, be sure to use acrylic paint. Painting the inside was a bit tricky for Travis, so I did that part and neatened up the outside of his blue one. Let dry completely.

Cardboard Snakes (2)

Cut each tube into a coil shape. I confess that I found this step tricky, so our snakes only have about 4 loops each. I saw others online that were cut into very thin little spirals – by all means go ahead if it doesn’t hurt your wrists as it hurt mine!

Cardboard Snakes (4)

Coil your snakes around a longer tube (like an old paper towel roll) to hold them steady and add colorful dots using the handle of a paintbrush rather than the bristles – a novelty!

Cardboard Snakes (5)

Let one side dry completely before you flip the tubes and dot the other side.

Cardboard Snakes (6)

For a final touch, we glued on triangle “tongues” made from red paper and two googly eyes.

Cardboard Snakes (7)

Travis was so excited by the way the snakes stretched out! Great for imaginative games.

Cardboard Snakes (9)

When it’s time to find your snake a place in the rainforest (er, I mean garden), choose a cozy spot and nestle them in.

DIY Fireworks

DIY Fireworks (6)

We’re making our own fireworks this Fourth of July… on our t-shirts that is!

Ages ago Travis and I made toddler tie-dye, and the method for this shirt is a variation on the idea. Except now Travis can design with much more intention.

First, place a piece of cardboard inside a plain white t-shirt.

DIY FIreworks (1)

Use permanent markers (such as sharpies) in blue and red to draw asterisk shapes on the shirt. This design was a bit over Travis’s head, but he enjoyed scribbling with the sharpies.

DIY Fireworks (3)

Use an eye dropper (great for building those little finger muscles!) to drop a few drops of alcohol onto each colored portion of the shirt. The colors will bleed out into “fireworks” and sparkles. Travis had incredible concentration and determination as he dripped the alcohol over each line of marker.

DIY Fireworks (5)

Let dry completely before wearing.

DIY Fireworks (7)

Happy Fourth!

Paper Pinwheels

Paper Pinwheel (6)

Summer brings with it a plethora of parades, whether for Fourth of July, local events, or just no reason at all. Inevitably, vendors hawk items for kids on the sidelines like bead necklaces and pinwheels. Skip the expense, put together your own pretty pinwheel and bring it along to all your town events this summer – parades, fireworks, picnic dinners, music at the bandshell – or whatever else is on in your town!

You can use decorative paper to make the pinwheels, but we thought it would be more fun to color our own. Spirals, polka dots, stars and stripes – whatever strikes your kid’s fancy!

Paper Pinwheel (1)

Once colored, cut the paper into 6 inch squares, then cut a slit (about 3 inches deep) at each corner.

Paper Pinwheel (2)

Cut a small circle from your scrap paper to be the center of your pinwheel.

Adults, using a pin or brad, poke through all the layers: start with the center circle, then add the cut corners of the pinwheel one at a time, moving in a circular motion. In retrospect, we would have colored both sides of our paper!

Paper Pinwheel (3)

Finally, poke the brad down into a pencil eraser. The perfect item to wave as the parade goes by!

Paper Pinwheel (4)


Mini Pinatas

Mini Pinatas (1)

Do your kids have extra energy to burn off at the end of a summer day? Whack out those summer crazies with homemade mini piñatas – no birthday party required!

To make the piñatas we first had fun decorating old party hats. Any cone-shaped vessel will work well, such as paper cups used for sno-cones in the summer.

Travis preferred using markers and playing with the leftover crepe paper.

Mini Pinatas (4)

Meanwhile, I added strands of crepe paper around all the hats.

Mini Pinatas (3)

Fill half of the cones with candy or other treats. Travis opted for Annie’s fruity bunnies!

Mini Pinatas (6)

Originally I snipped the top off of the remaining cones, intending to thread a string through, but found it was easier to make a hole punch and tie the string through that.

Mini Pinatas (5)

The next step is a bit tricky: Hot glue two cones together to make one piñata. It was hard to line the edges up exactly… but that said, the more tenuously your two halves hold together, the easier it will be for your tykes to break them open.

Mini Pinatas (7)

Ideally, we would have hung these outside from a tree branch. But lacking a backyard, we tied them up inside.

Mini Pinatas (8)

That didn’t stop Travis’s fun one bit. He loved having permission to swing with the baseball bat as hard as he could.

Mini Pinatas (9)

Come out candy!

Mini Pinatas (10)

Fun for everyone!

Dinosaur Hat

Dino Hat (5)

We’ve had so much fun with dinosaur projects lately that it was time to turn Travis into a dinosaur himself! Look for blank hats at the craft store, in whatever color your child prefers as the background. All you need is sheets of felt to complete the look. I recommend sticky-back felt for the easiest time putting this hat together, otherwise you’ll need to use hot glue or tacky glue.

First our dinosaur needed eyes. I cut two circles, as well as two smaller ones to be the irises.

Dino Hat (1)

Next up was circles to make dots on the dinosaur’s head, two teardrop shapes for the nostrils, and fangs glued on to the brim.

Dino Hat (3)

For the spikes, you’ll need to cut two pieces of felt for each size spike desired. Attach the pieces back to back, and then adhere the bottoms along the crown of the cap.

Dino Hat (2)

Roar! What a ferocious dinosaur.

Dino Hat (4)

Paper Plate Kite

Plate Kite (7)

Let’s be honest. Kites are great but they can also be a royal pain – all that tangled string, getting enough wind to launch the kite high, etc.

This quick project gives kids the fun of a kite without the hassle. (Bonus points: there’s fine motor skill practice involved!).

Cut the center from a paper plate (or several plates, if you want multiple kites).

Plate Kite (3)

We went through our craft bin and selected pretty ribbon to tie on as the kite tails.

Plate Kite (1)

Now for that fine finger work! Help your child tie each ribbon around the bottom rim of the plate.

Plate Kite (2)

Travis was really proud when I told him this was almost like tying shoelaces.

Plate Kite (5)

No need to wait for a windy day – just run and the kite flutters with you!

Plate Kite (6)

Looking for a slightly more complicated project? Try out our plastic bag kite or tissue paper kite.

Farm Land

Farm Land (7)

Farming is naturally on our minds this time of year, with local farmstands around us beginning to brim with late spring and early summer produce. This project is a neat visual if you are doing a unit at home about farming, about where food comes from, and about different landscapes children might see on a farm.

To get the most out of the craft, I recommend first looking at a book with a good visual of farmland, or finding a few pictures online. Although not very vegan-friendly, my son loves the description of farm life year-round in Gail Gibbon’s Farming.

Farm Land (1)

We talked about the different portions of land he saw in the picture, starting with what was up top – sky – and what was on the bottom – garden dirt.

Next I cut paper into 4 pieces, and we took turns painting them in color blocks just like in the picture: blue for sky, green for grass, yellow for hay or wheat, and brown for the vegetable patch.

Farm Land (2)

Let your colors dry, then come back to add details. For added fun, we raided mommy’s bathroom cabinet and used cotton balls for clouds:

Farm Land (4)

… and q-tips to paint details like flowers in the meadow and brown wheat in the yellow section. Let dry again.

Farm Land (5)

The final step was to use a glue stick to put it all back together again on a large piece of construction paper. This is neat because it will be almost like a puzzle for the kids. Don’t worry if a few sections get mixed up along the way.

Farm Land (6)

If you can, cap things off with a trip to a local farm; lots of places have pick-your-own veggies and berries getting underway now that we’re almost to June!