Christmas Cookie Crate

koala-xmas-6

We received this delightful holiday kit from Koala Crate, featuring both pretend and real Christmas cookies. The craft would be easy to put together yourself, simply by purchasing felt and stickers! I love that we not only engaged Travis’ imagination with the make-believe cookies, but then got to whip up real Christmas cheer with the included recipe.

First, we played with the felt cookie set. Travis thought the cookie cutters were very neat, since the pre-cut felt let him pop the trees and gingerbread people right out.

koala-xmas-2

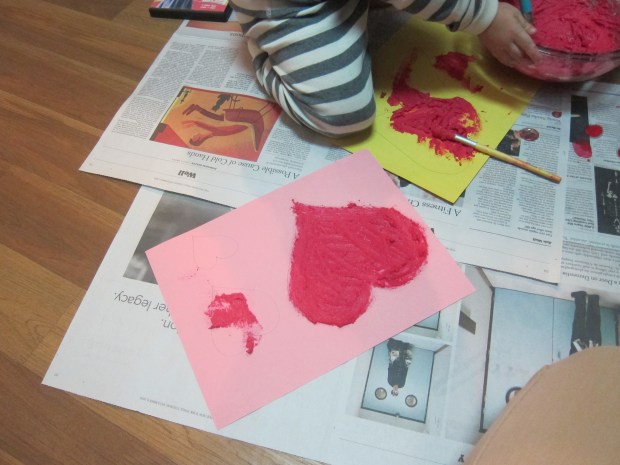
The stickers for decorating were a big hit, and although we didn’t decorate the suggested Santa, snowman, and gingerbread people as depicted, we certainly had fun creatively applying the decorations!

koala-xmas-4

Then it was time to really bake! This recipe is super kid-friendly; tots can help measure, pour, or mix ingredients, as well as help to roll the dough and use cookie cutters.

For the sugar cookies, you’ll need:

1 cup Earth Balance butter

1 cup sugar

1 Ener-G egg

1 tablespoon vanilla extract

2 tablespoons baking powder

3 cups flour

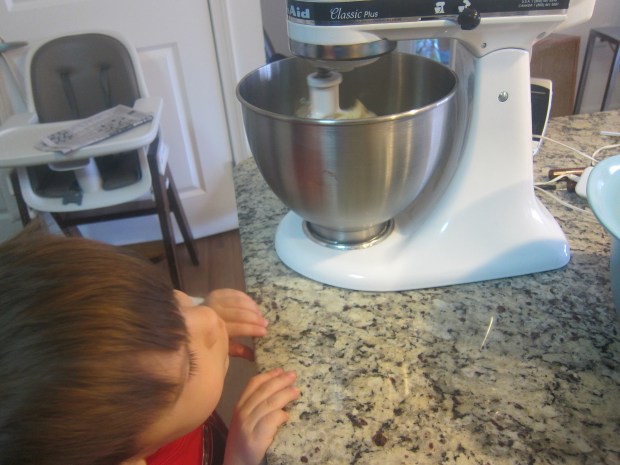
  1. Cream together the butter and sugar in a large bowl. Mix in the vanilla and Ener-G egg.
  2. Combine the flour and baking powder in a separate bowl, then add to the wet ingredients. Once a dough forms, finishing kneading the dough with wet hands.
  3. Divide the dough into portions (we worked with one quarter at a time) and roll out to 1/4-inch thick on a lightly floured surface.
  4. Use round cookie cutters (or holiday ones!) to make shapes, and place on a cookie sheet. Bake at 350 degrees F for 10 to 12 minutes.
  5. Cool the cookies briefly on the baking sheet, then transfer to a wire rack.

koala-xmas-8

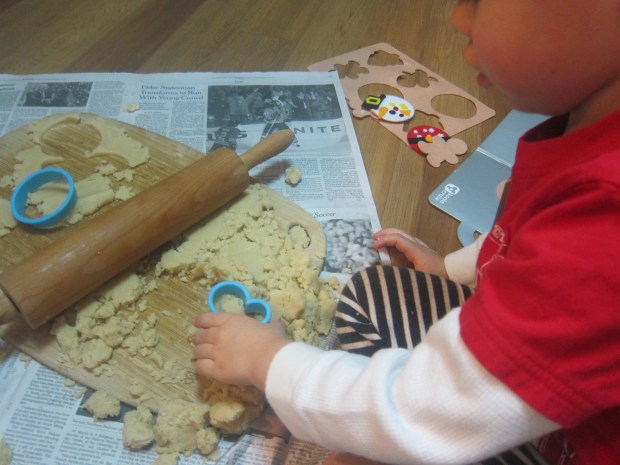
Travis did take a quick turn with the rolling pin, but then he loved crumbling the dough and pressing cookie cutters into his mess, so we lost some of our dough to toddler madness!

koala-xmas-9

Luckily, we still managed to bake enough cookies to decorate.

koala-xmas-10

For the icing, you’ll need:

1 cup powdered sugar

2 tablespoons non-dairy milk

3 tablespoons brown rice syrup

Food coloring

  1. Mix together the powdered sugar and milk. Add the brown rice syrup – your frosting should be thick.
  2. Divide into zip-top plastic bags, and add a sprinkle of food coloring to each bag, kneading to incorporate. Snip a small hole in one corner of each bag and squeeze onto the cookies.

Travis loved this part – be prepared to get messy!

koala-xmas-13

For a final dose of fun, we added colored sprinkles to some of our cookies, and crushed candy canes to others.

koala-xmas-14

In sum, a crate-ful of holiday cheer!

koala-xmas-15

Rocky Road Brownie Mix

Rocky Road Mix (7).JPG

Layer the ingredients for this rich chocolate brownie mix in a gift tin; it makes the perfect gift for a teacher or neighbor during the holidays! Travis loved helping to measure and pour out the ingredients as we arranged them in the jar. And of course, don’t forget to whip up a batch to enjoy at home! Omit the pecans if your recipient has nut allergies.

rocky-road-mix-8

First, the recipe itself:

Ingredients:

  • Cooking spray
  • 1 cup sugar
  • 1/3 cup unsweetened cocoa powder
  • 1/2 cup flour
  • 1 teaspoon baking powder
  • 1/4 teaspoon salt
  • 1/2 cup melted Earth Balance butter
  • 2 Ener-G eggs
  • 1 teaspoon vanilla extract
  • 1/4 cup vegan chocolate chips
  • 1/3 cup vegan mini marshmallows (such as Dandies)
  • 1/4 cup finely chopped pecans
  1. Coat a 9-inch baking pan with cooking spray and set aside.
  2. In a bowl, combine the sugar, cocoa, flour, baking powder and salt (a.k.a. “the brownie mix”) with the butter, Ener-G eggs, and vanilla extract. Stir until well blended.
  3. Spread the batter into the prepared pan and bake at 350 degrees F for 20 to 25 minutes.
  4. Sprinkle the chocolate chips, marshmallows, and pecans over the batter. Bake for an additional 3 to 5 minutes – the marshmallows should be puffy.
  5. Transfer the pan to a wire rack and cool completely before cutting into 16 squares.

rocky-road-mix-4

To prepare the recipe as a gift, layer the sugar, flour, baking powder, and salt in a glass jar with lid. Omit the wet ingredients. Place the marshmallows, chocolate chips, and pecans in a zip-top plastic bag, and set over the dry ingredients. This was Travis’ favorite part, especially because he stole a few marshmallows for snacking!

rocky-road-mix-2

Make sure to seal the gift jar tightly.

Write out the recipe instructions on an index card so your recipient can add the wet ingredients at home. Use a hole punch to punch a hole in one corner, and tie the index card to the jar with a ribbon.

rocky-road-mix-5

Travis helped add stickers to the index card as the finishing touch!

rocky-road-mix-6

Puffy Paint Hearts

puffy-paint-hearts-5

Say ‘I love you’ with this fun make-it-yourself paint. Children will love the puffy paint mixture, and a special adult will love receiving the final product, either as a card or stand-alone gift this holiday season!

To make our puffy paint, we combined the following:

1/2 cup flour

1/2 cup salt

1/4 cup water

1/4 cup tempera paint

Travis had so much fun mixing the gloppy paint together that it took a while before I could direct his attention to the rest of the craft!

puffy-paint-hearts-2

I outlined several hearts on paper with pencil for him, and let him fill in the shapes with his puffy paint.

puffy-paint-hearts-4

I also filled in one heart myself as an example, so he had a sense of what his final craft could look like, but don’t expect a toddler to get the heart exactly right!

puffy-paint-hearts-3


Christmas Tree Alphabet

christmas-alph-1

Why not sneak in a little learning with your holiday decorating? If you don’t celebrate Christmas, you could try this idea on a drawing of a dreidel or menorah instead – or any time of year with the appropriate seasonal picture!

Draw the outline of a Christmas tree on poster board, and fill in with the letters of the alphabet, in random order.

Next, write out all the letters on blank stickers, and present your toddler with both.

christmas-alph-2

Now it’s time to match the letters to the tree!

christmas-alph-4

Travis loved the activity, especially the find-and-seek aspect of it.

christmas-alph-3

Preschoolers may have the attention span to get through the whole alphabet in one sitting, but Travis lost patience and instead returned to the game over the course of a few days.

christmas-alph-5

It’s a fantastic way to test recognition of the alphabet without going through the letters in rote order.

Handprint Wreath

handprint-wreath-6

This easy “wreath” to adorn a door or fridge makes a wonderful keepsake, since you’ll be capturing the size of your child’s hand. Consider making one every few years to keep a record!

Adults only: Cut the center from a paper plate, leaving the rim intact; set aside.

Trace your child’s hand on green or red construction paper. You can then use this hand as the template, and cut out as many more hands as you need to march around the rim of your plate.

handprint-wreath-2

Travis has been very into tracing lately, so this was his favorite part of the project. He also thought his red hands looked like the stop hands at traffic signals.

handprint-wreath-1

We then smeared glue all around the rim of our plate, and I asked Travis to help me arrange the hand prints, though to be honest, his interest faded for this part.

handprint-wreath-3

We glued on three small red circles to be “berries” as the finishing touch.

handprint-wreath-5

Happy decorating!