Cartesian Diver

Cartesian Diver (7).JPG

I had no idea until after Travis and I made this little project that this is a classic experiment dating back to… the 1600s! It’s so-named because it was first described in detail by Rene Descartes, and it’s a neat way to show kids some basic principles of pressure and density.

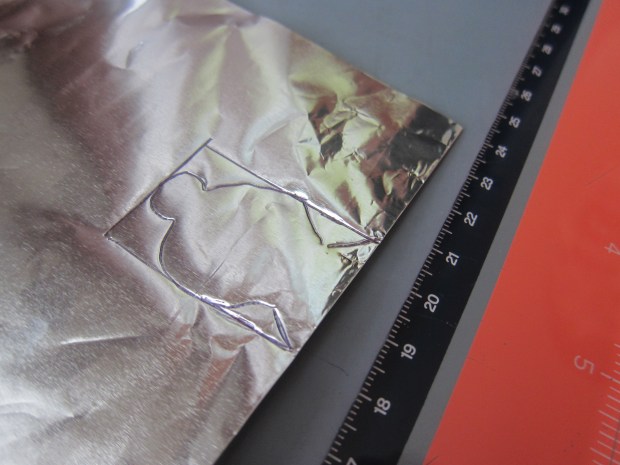
First, we made our little diver – and by little, I mean little! Measure a 1 inch x 1.5 inch rectangle on aluminum foil (we folded our foil double so it was a little thicker and sturdier).

Draw a little diver shape onto this rectangle and cut out.

Cartesian Diver (1)

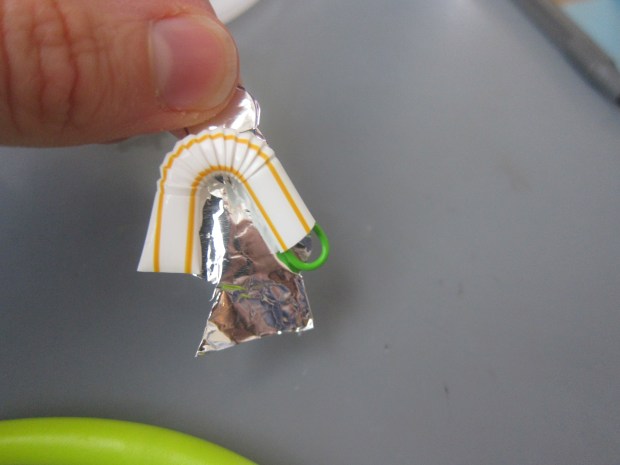
Travis thought he was so cute!

Cartesian Diver (2)

Cut 1.5 inches from a bendy straw. Bend into an upside-down U and attach to your diver with a small paper clip. Be sure to use a small one! Our first was big and so heavy our diver sank right down.

Cartesian Diver (3)

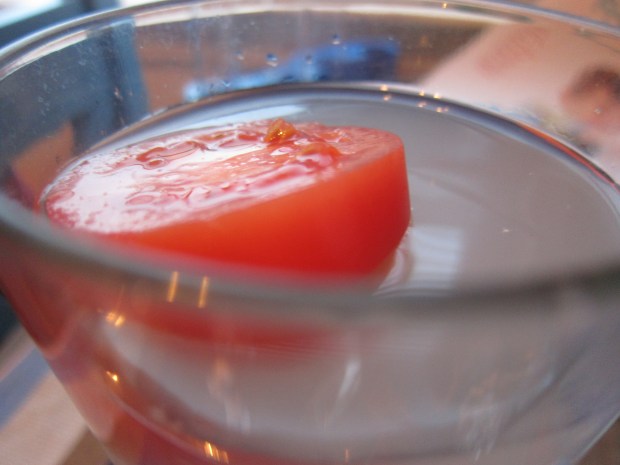
Now add a tiny bit of clay to his feet. Test that he doesn’t sink in a glass of water before you use a bottle; if so, just remove some clay.

Cartesian Diver (4)

If he’s horizontal, you need a little more clay. We made the mistake of skipping this step on our first try, although Travis thought it was hilarious to fish our diver out from the bottle once we realized he was sinking.

Cartesian Diver (5)

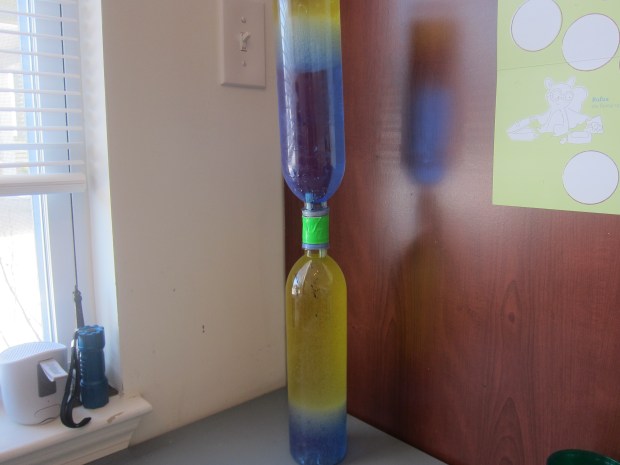
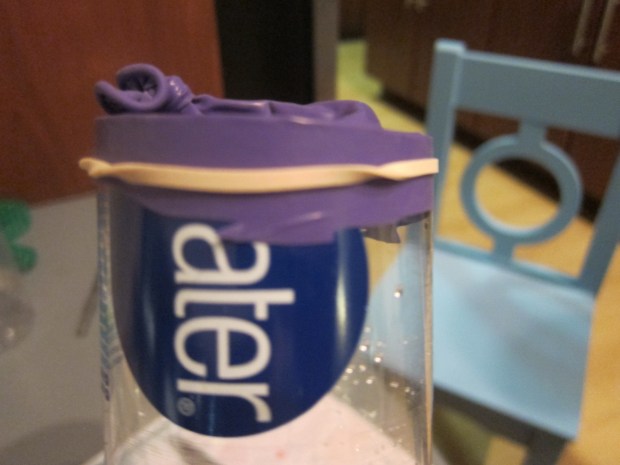
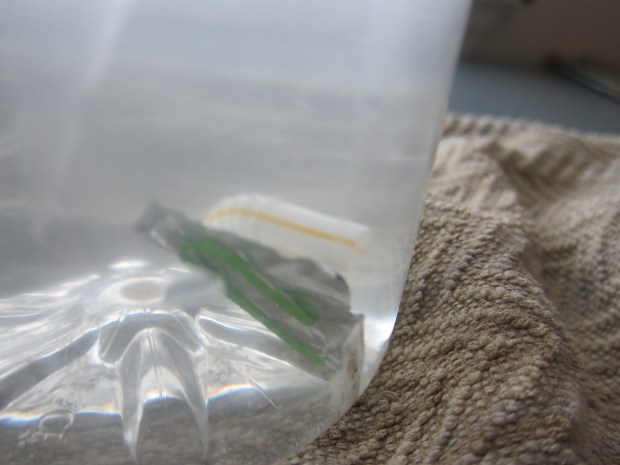
Once we had the proper diver who floated just right, we filled an empty 2 liter bottle with water nearly to the top. Screw the cap on tightly.

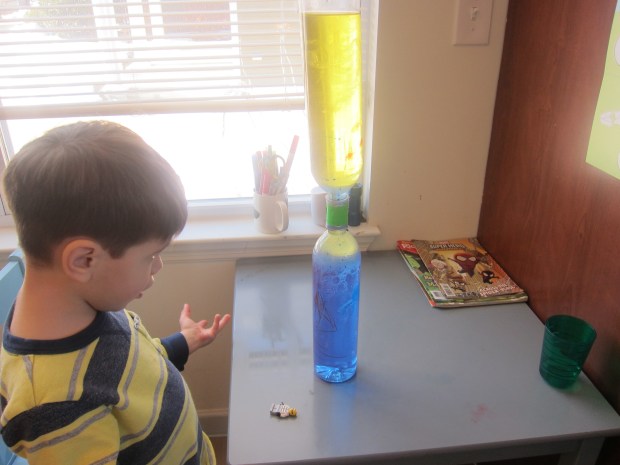
Squeeze the bottle and watch him go up and down! He’ll sink when his straw fills with water, increasing the density just enough, then float when you release the bottle and the water drains out of the straw again.

Cartesian Diver (6)

Ours wasn’t as perfect as some example we saw online, but we had fun!

Cartesian Diver (8)

Baking Soda Ocean Art

Baking Soda Ocean Art (17).JPG

Travis and I made a batch of a neat baking soda dough today! Originally we hoped to craft a few ocean creatures and corals. It turns out Travis also just had a blast playing with the dough in his own way while I did more of the actual sculpting, but that means it was a win-win all around.

To make the dough, combine 1 cup baking soda, 1/2 cup cornstarch, and 3/4 cup water in a bowl. Travis loves whenever we make “potions” like this.

Baking Soda Ocean Art (2)

Microwave for 1 minute, then stir. Microwave for a second minute and then stir; you’ll notice it is starting to thicken around the edges.

Continue to microwave at 20 second intervals thereafter, until the mixture is thick and creamy like mashed potatoes. Travis was the button presser for this part, as you can see! We needed about 3 or 4 intervals.

Baking Soda Ocean Art (3)

Cover the bowl with a damp paper towel, and let cool.

Baking Soda Ocean Art (4)

(Note: if your child is antsy during this waiting period, put leftover baking soda to good use with a classic volcano).

I tested the dough to make sure it had cooled completely, and found it to be quite sticky. I sprinkled in additional baking soda, and needed quite a lot; I wasn’t measuring, but probably close to 1/4 cup. If your dough is also sticky, add a little baking soda at a time and knead in after each addition. If you find you have the opposite problem (a dough that is too stiff), add a little extra water.

Travis loved the way it felt!

Baking Soda Ocean Art (5)

At first he wanted to know how to make sea creatures, especially the starfish: Form 5 teardrop shapes, and attach them together.

Baking Soda Ocean Art (6)

Some extra dots of dough give the starfish bumpy texture.

Baking Soda Ocean Art (8)

Coral was also fun; form a round ball, then add marks with a pencil for texture.

Baking Soda Ocean Art (9)

From there, Travis had his own game going, happily getting his hands into the dough over and over again.

Baking Soda Ocean Art (12)

I rounded out our ocean collection with a few more sea creatures. For a sand dollar, roll a ball and then flatten. Draw a flower shape in the center with the tip of a pencil, and add a few holes around the edges.

Tube sponges were the neatest to make: Roll a few log shapes, then attach together, and punch a hole in the center of each with a pencil.

Baking Soda Ocean Art (14)

Finally, we rolled up a few cute sea snails.

Baking Soda Ocean Art (16)

Travis really wanted to play with these right away, which you can do if you bake at 175 degrees F for about 45 minutes. But when he learned that this would mean the dough turning brown, he – maturely! – decided he could wait the day or so you’ll need for the dough to dry completely.

Baking Soda Ocean Art (13)

Definitely worth the wait.

Baking Soda Ocean Art (15)


Comb Waterbending

Comb Bend (5)

Hive mind! Travis and I need your help with this one. We set out to do some science, which unfortunately didn’t work. The idea is to use polarity to make water bend, using nothing more than a comb, a ruler, and some freshly-shampooed hair. But our water stayed straight – rats! So will this work for you?

First, we turned the faucet on to just a thin stream, and placed a ruler across the sink for an accurate test – the water hit right about the 6 inch mark.

Comb Bend (2)

We held the comb up to the water, to ensure we were starting with no bend to the water stream.

Comb Bend (3)

Travis was fresh from the bath, so we ran the comb through his just-washed hair to generate static. These negative particles should then attract the positive particles in the water, which kids will be familiar with if they understand magnets and “opposites attract.”

Comb Bend (1)

Online testers of this experiment seemed to have no trouble, saying the comb bent the water stream as much as 3 inches! But we saw no movement.

Did his hair need to be dry? We waited for it to air-dry, then tested again. Still no movement.

Comb Bend (4)

Knowing that it was static we were after, we then tried running the comb through a blanket right out of the dryer – one that was full of static! And still our water didn’t bend.

Comb Bend (6)

So, posting this game here for my readers in the hopes that someone else has better luck. If so, what worked? Can you figure out why? We’re eager to make the water bend next time!

Liquid Hourglass

Liquid Hourglass (9).JPG

Are you passing the hours during a snow day, or the latest winter storm, or just having a day that’s too cold to venture outside? Then this hourglass project is for you! It will make watching the passing hours into a fantastically cool experiment.

To start, you need two identical bottles (we used empty water bottles that were 1 liter).

Liquid Hourglass (1)

Hot glue the caps together, pressing for a tight seal.

Liquid Hourglass (2)

Next add a piece of duct tape, to make a water-tight seal.

Liquid Hourglass (3)

Mark two dots where you will insert straws, then (grown-up step!) drill through the holes.

Liquid Hourglass (4)

Cut straws into pieces that are 2-inches long. Insert one straw 1/3 of the way into one of the holes. Insert the other straw 1/3 of the way in the other direction.

Liquid Hourglass (5)

Fill your first bottle with vegetable oil. Definitely use the cheap stuff here, folks, since the bottle needs to be filled completely. We used a funnel to avoid any mess.

Liquid Hourglass (6)

Fill the second bottle with water. We added blue food coloring for visual effect.

Liquid Hourglass (7)

Now screw one half of the bottle cap onto the bottle with oil. Quickly and carefully, flip over and screw onto the bottle with water. Immediately you’ll get a big bubbling result as the two liquids start to mix.

Liquid Hourglass (8)

After a few minutes, the bubbles will settle down and you can really see what’s happening. Because the oil is less dense than water, it will bubble up, bit by bit through the straw, at the same time that the water bubbles down.

Liquid Hourglass (13)

First, we were simply in awe of how cool this looked.

Liquid Hourglass (10)

Then we decided to get more scientific: Had we really created an hourglass? We timed it and discovered it took 45 minutes on the dot before we had one completely blue bottle, and one completely oil bottle.

Liquid Hourglass (16)

And then there’s the fact that this is simply mesmerizing to watch. Seriously, I could have meditated in front of these bubbles.

Liquid Hourglass (14)

And Travis’s glee made it apparent he felt the same.

Liquid Hourglass (15)

Although not necessary, you can decorate your bottles, too. Since the blue and yellow effect reminded us of sand and water, we added a little octopus and his cave…

Liquid Hourglass (11)

…and these fishy friends.

Liquid Hourglass (12)

What a way to watch the hours pass!


Soda Teeth Experiment

Soda Teeth (3).JPG

Need a way to discourage your kids from drinking dark, sugary sodas? If you’re having a hard time convincing them that it’s no good for their teeth, look no further than this science experiment.

If your children are old enough to have lost baby teeth, then that’s truly the best material for the activity; just make sure you play before the Tooth Fairy pays a visit, or they’ll be confused!

At only 4, Travis hasn’t lost any teeth, so we needed another material that would tarnish in soda like tooth enamel. The online suggestion was… eggs!

That means I need a little caveat before the post, because now it sounds very vegan-unfriendly. We also needed a can of Coke, and one of Sprite, two sodas we wouldn’t actually be drinking in our household anyway. But in the name of science, the sodas were purchased, and eggs were borrowed from my mother-in-law!

With that vegan caveat out of the way, it was time to be scientists. We filled one glass with Coke and another with Sprite.

sodateeth28229

Travis was very curious about the eggs, so we checked them out before adding one to each cup.

sodateeth28129

He loved seeing the way the sodas bubbled. “And that would hurt my teeth!” he surmised. He’s onto something…

sodateeth28629

Then it was just a matter of waiting. We set up a chart, with a column for each soda and a row for each day we’d observe. This was a nice chance for Travis to practice writing his numbers.

sodateeth28429

Every day, we used a big spoon to scoop out the eggs and observe. You can definitely break out the magnifying glass each day, too.

sodateeth28529

The first thing he noticed was that the bubbles faded by Day 1. The eggs, however, had changed very little.

sodateeth28729

By Day 2 we wondered: was the Coke egg a little darker?

Finally by Day 4 it was obvious; the coke had tarnished one egg. (Hopefully Travis’s take-away is not that he should drink lots of clear soda!).

sodateeth28829

I reminded him that what we saw in the egg was similar to what we’d see in a tooth. So avoid sodas to avoid discoloration and decay.

sodateeth281029

Overall, we liked the STEM aspect of this project, but I think it would have been clearer for him with real teeth. Perhaps we’ll have to do it again when he loses his first!

sodateeth28929


Make a Model Lung

model lung (6)

This neat visual of how a lung and diaphragm work together can be made with just a few simple household items. It was a great dose of STEM learning on a stormy day cooped up inside.

You’ll need to start with a sturdy plastic bottle. At first I assumed larger was better, and tried a family-sized club soda bottle… but our balloon wouldn’t fit in the next step, so be aware! You really need a single-serving bottle (16 ounces), either of water or soda.

Carefully cut the bottle in half. This was definitely a grown-up step, and I cautioned Travis that the edge of the bottle was a bit jagged. Keep the top half; recycle the bottom of the bottle.

Tie a knot in an uninflated balloon, and snip off the top of it. Stretch that top over the end of the bottle, and secure with a rubber band.

model lung (1)

Your bottle might squash a bit, but that’s fine as long as no air can get in.

model lung (2)

Now slide a straw into a second balloon. Secure them together with a rubber band, making sure the balloon is attached, but not so tight that air can’t get in. Travis tested with a few huffs!

model lung (4)

Now push the balloon into the neck of the bottle, and use a little clay around the straw to hold it in place.

model lung (5)

Holding the bottle firmly, pull down on the bottom balloon. The balloon inside will inflate!

model lung (7)

Explain to kids that this movement replicates what happens when you breathe: when your diaphragm moves down with each breath in, it makes room for your lungs, which then fill with air.

Travis’s favorite part of the activity was trying to get the balloon to “hiccup”, which you can do by pulling the bottom balloon a few times quickly. The balloon in the bottle will jump, which is what happens when you get a case of the hics.

All in all, this was a great addendum to the fun we had with our My Body crate from Kiwi Co.

Baking Powder vs. Baking Soda

baking powder (9)

Today Travis and I made potions!

The impetus for this little experiment came from Raddish Kid’s lesson plan attached to our Hot Cocoa Cupcakes. Kids can delve further into the world of leaveners and what makes baked goods rise. I knew some of the science was too advanced for Travis, but I culled out bits of the lesson that were appropriate to a preschooler.

baking powder (1)

First, I set out a dish of baking soda and baking powder, and invited Travis to explore them. We ran through the five senses: touch, taste, smell, sight, and sound. Could we hear the powders? We giggled at that, then moved on to the others.

baking powder (2)

He noticed that the baking soda was smoother and finer than the baking powder, although they felt similar. He declined the offer to taste, but in this case, it’s perfectly safe to do so!

A quick science lesson followed: baking soda is basically ground up rock, and it’s a base, which means it needs an acid to react.

Baking powder contains a base and two acids, and it will react in a recipe two times. Travis liked this idea, and that it means fluffier pancakes or cupcakes.

To start out experiment, I put out two test tubes of water. We added baking soda to one and baking powder to the other. Aha, only the baking powder reacted, so water was not an acid!

baking powder (3)

Now we tested each in four other liquids: vinegar, liquid soap, rubbing alcohol, and juice. The baking soda only reacted in the vinegar and juice – we found our two acids!

baking powder (5)

Baking powder, on the other hand, reacted in everything. That said, none of baking powder’s reactions were quite as spectacular as the classic baking soda/vinegar pairing.

baking powder (7)

Travis’s favorite? Baking soda in the vinegar of course; we had to do that a few times. The juice was quite fun too, bubbling up wildly to the top of the test tube.

baking powder (8)

In sum,this is a neat way for your kids to understand why baked goods are rising in the oven; you can really see that bubbling and rising action at work.

baking powder (6)

Another oldie but goodie? Show your kids that you can blow up a balloon with yeast! This is something Travis and I did when exploring the letter Y, back when he was only 2 years old, but it never grows old!

Glowing Planets

Glowing Planets (6).JPG

One of the bonuses about winter’s early sunsets is that even little kids are awake to see the stars and planets. Travis and I talked recently about what it is that makes planets glow; they don’t make their own light the same way stars do, of course, but they do reflect the light of the Sun and thus give off a glow – sometimes the brightest one in the sky!

We came in to make our own glowing planets, thanks to a few simple materials.

glowing planets (1)

First, I asked which planets Travis wanted to make, and for each, we brainstormed a little diagram of what he knew about it. Earth, for example, would appear blue and green from space, and has oceans and continents.

glowing planets (2)

Saturn was made of gases, has rings, and is colder than Earth.

glowing planets (4)

We finished out diagrams for Earth, Mars, Saturn, and Neptune (the four that Travis picked) and colored four golf balls accordingly. Travis loved making Mars bright red! Use permanent marker for the best results.

glowing planets (3)

Now make a slit in the bottom of each ball with an X-acto knife (grown-up step), and place over the flame of a tea light.

glowing planets (5)

We found that small tea lights worked better than tall ones, even though we had more of the latter.

glowing planets (8)

Now your planets glow just like the ones in the sky! These were especially fun in the bedroom at night.

glowing planets (9)

Glow in the Dark Moon and Stars Painting

Glow Moon (6).JPG

Travis loves the craters on the moon, and is always asking how they’re made. So we’ve done a few fun projects where he gets to make craters, everything from poking holes into clay to making explosions outside. This little project was also another way to add a comforting glow to his bedroom at night. We just needed glow-in-the-dark paint, and a fun tool – q-tips! – and we were ready to start.

glow moon (1)

First, I marked off a section of dark construction paper with masking tape. The area within the tape would be the moon, and the rest of the paper was for the stars.

glow moon (2)

We filled in the moon with glow-in-the-dark paint, then used a q-tip to form lots of craters.

glow moon (3)

The only glow paint we had is actually meant to be squeezed from a tube, not brushed on, so to make stars we squeezed out dots of paint and then smooshed them with a q-tip.

glow moon (4)

Travis loved this step!

glow moon (5)

Now we just had to wait until dark. We let the painting dry under bright lights, and transferred to his room at bedtime.

Glow Moon alt.JPG

A beautiful glowing (crater-filled!) moon.

Fresh Water, Salt Water

fresh water (4)

This activity from Travis’s January issue of High Five magazine provided a nice dose of STEM learning, alongside the usual monthly craft. We’ve done a similar experiment before, but liked the set-up for this version!

Fill 2 large clear glasses with 1 and 1/2 cups warm water each.

fresh water (1)

Add 1/3 cup salt to one cup, and stir until dissolved.

fresh water (2)

The instructions said to tint the other cup blue with food coloring so you can tell them apart. Because the salty cup is cloudy, this step isn’t really necessary, but blue water is cool, so why not!

Now add the same object to each of the two cups, and observe any differences. We tried the magazine’s suggestions of aluminum foil balls, which floated to the top in both versions.

Next we tested plastic dinosaurs. Both sank. Hmm, no difference!

fresh water (5)

Finally, when we tried tomato slices, the tomato in the salt water seemed to pop above the surface with more buoyancy.

fresh water (6)

But why hadn’t the others been different? We added more salt to the salty cup, liberally pouring in and stirring. After two more tries, we had a crayon that floated!

fresh water (7)

The crayon in the opposite cup, down at the bottom, helped illustrate buoyancy best for Travis.

fresh water (8)

Overall, he loved the set-up and scientific nature of the project, plus adored pouring the salt. Great for budding scientists.