Edible Constellations

Edible Constellations (4)

Travis and I put together this super smart snack on the heels of fun starry night exploration. Your kids get a sweet treat plus an astrology lesson – a win-win!

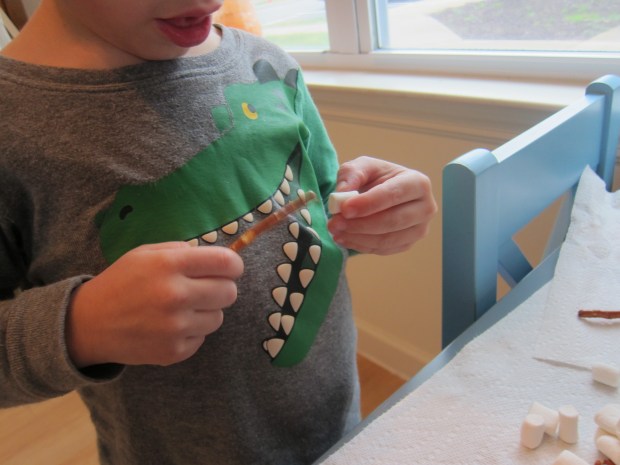
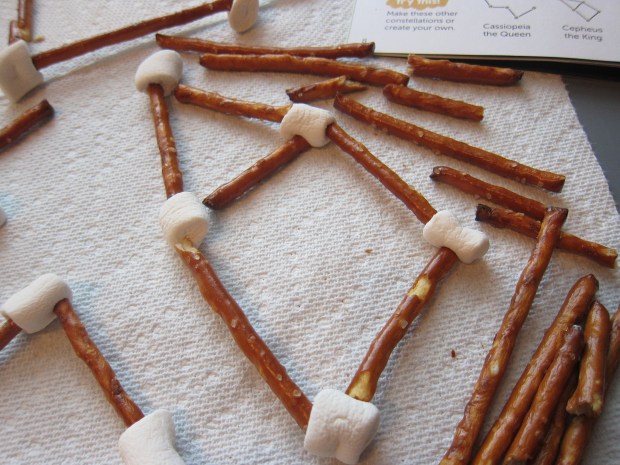
Using Dandies mini marshmallows and pretzel sticks, we mapped out what the Big Dipper would look like. Attach 1 marshmallow to the end of a pretzel stick for each star.

Edible Constellations (2)

Repeat three times to make a square.

Edible Constellations (3)

Stick a fourth “star” into the marshmallow at the upper right corner to begin the Dipper’s tail.

Break a pretzel stick in half, and add two smaller pieces of pretzel + marshamllow to complete the constellation.

Travis watched as I tested out a couple of others, too, including Cassiopeia (the Queen)…

Edible Constellations (5)

… and Cepheus (the King). These didn’t last long before they were gobbled up!

Edible Constellations (6)

I noticed he wasn’t eating the Big Dipper, and asked if he wanted more of his snack. He said he didn’t want to ruin our constellation!

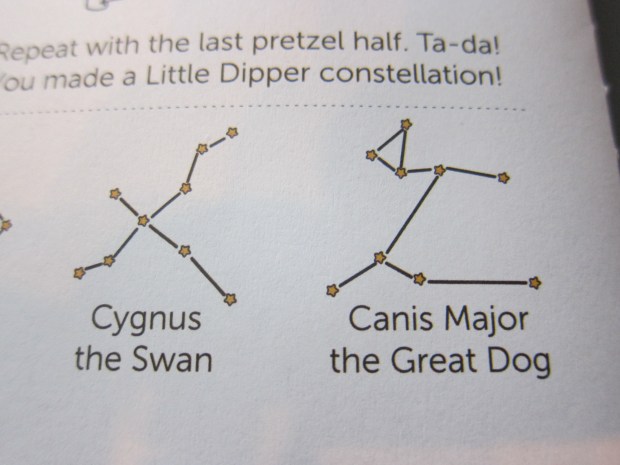
If your kids want to get even more creative, test out Cygnus (the Swan) or Canis Major, too.

Edible Constellations (7)

Travis wanted to know if we could make Orion (which he calls Bow Hunter), next, and I was so proud he remembered that constellation without any prompting.

Edible Constellations (1)

Happy snacking!

Magic Thermostat Hands

Thermo Hands (2)

Brr! It’s getting chilly out there, that time of year where suddenly a 60 degree day feels downright warm, if you’ve had a spell in the 40s or 50s. I always marveled at this phenomenon myself as a child, and it was a great prompt to teach Travis about how temperature to our bodies is relative. All you need are three buckets of water. Ready, set, chill!

Fill one bowl or bucket with ice water. Fill a middle bucket with lukewarm water. Fill the third with hot water (make sure to test this one first, so it won’t hurt your child’s skin).

Thermo Hands (1)

Encourage your child to put one hand in the ice water and one in the hot. Let sit for about 30 seconds, then transfer both hands to the lukewarm water.

Thermo Hands (3)

They will discover that the ice water hand feels warm now, and the hot water hand feels cooler. Voila, a lesson on relative temperature!

Thermo Hands (4)

Leaf Chromatography

Leaf Chroma (9)

You can show your children a visual rainbow of molecules with this simple science experiment. It’s a great way to explore what happens to leaves in the fall!

Travis and I had been waiting to do this activity all season, but the leaves were stubbornly slow to change. Finally we spotted a landscape of vibrant reds, oranges,  and yellows, and couldn’t wait to take them home and experiment.

Leaf Chroma (1)

First, tear up the leaves into pieces, and divide into glass bowls, one color per bowl. Travis loved the tearing!

Leaf Chroma (3)

Mash the leaves slightly using a pestle or muddler.

Leaf Chroma (4)

Ooh, next up was a grown-up ingredient: Rubbing alcohol. Travis very carefully helped me pour enough in each bowl just to cover the leaves. Place the bowls in a baking dish and add a few inches of hot water.

Leaf Chroma (6)

Now cut a coffee filter into strips, and drape over chopsticks (or kebab skewers, or pencils – anything long and straight), letting one side dangle down into the rubbing alcohol. Place the entire baking dish some place dark and let sit overnight.

Leaf Chroma (7)

In the morning, you’ll see bands of color on each filter strip! This shows the layers of color that were in each leaf, slowly revealed as chlorophyll breaks down in cold temperatures. To be honest the yellow and orange were a bit underwhelming, but it was neat to see several layers of color exposed in our red leaves.

Leaf Chroma (8)

In sum, a neat science experiment!

Exploding Sodas

Exploding Soda (4)

We’re late the to the game on this one, but better late than never! Apparently big kids and science teachers have been exploding diet soda with Mentos for years now, but this activity was definitely new to my 4-year-old, and the perfect summer science experiment. Get outside – some place with lots of room – and then watch the geysers explode!

For the most fun, purchase several large bottles of diet soda in different varieties, so you can compare the height of the geysers (big kids may want to be more scientific about this, measuring off the heights, but we simply had fun).

Exploding Soda (1)

Line up the bottles, and drop five Mentos (very quickly!) into them one at a time. Note: You can drop in as many as seven Mentos, but by five, I had to run in the other direction.


Now here’s the important step – move back! The geyser is going to happen fast, and high.

The diet root beer took me so completely by surprise that I only had time for a picture of the aftermath.

Exploding Soda (2)

By the diet Coke, I was ready with my camera.

Exploding Soda (3)

Interestingly, diet Mountain Dew only gave us a small fizz.

Exploding Soda (6)

Travis loved hosing off the driveway in the aftermath!

Exploding Soda (5)

Which sodas did you try? Please share in the comments!

Rainbow Density Cylinder

Rainbow Density (7)

Here’s a neat visual way for even young kids to grasp the concept of density. You’ll get messy in the kitchen, mix up some colors, and sneak in some science to boot!

Rainbow Density (1)

While Travis was napping, I set up paper cups and all of the liquids we’d be using for the project, in this order of density:

Corn syrup (or carob syrup)

Maple syrup

Water

Almond milk

Vegetable oil

Dish Soap

Rubbing alcohol

Note: Feel free to adapt this list, depending what you have at home, including agave nectar or honey for non-vegan families.

Travis was so intrigued at the set-up, and we talked briefly about how some liquids sit on top of (are less dense) than others. Was he ready to see how it worked? Yes!

Rainbow Density (2)

We tinted a few of our liquids with food color for a better visual effect: green for the water, red for the dish soap, and blue for the rubbing alcohol.

Rainbow Density (3)

Carefully help your child pour the liquids, in order of density, into a glass container. Thinner containers will work better, such as a recycled jam jars or an old dressing jar.

Rainbow Density (6)

It may take your layers a few minutes to settle, making a rather goopey mixture at first!

Rainbow Density (5)

After we gave it a moment, our layers were more apparent – we loved the hit of bright blue from the alcohol at the top!

Oddly, the blue alcohol layer disappeared when we returned to the jar about an hour later, but here you can see some of the layers even more clearly.

Rainbow Density (9)

Travis had so much fun that I gave him extra cups and additional food color to mix up for some time.

Rainbow Density (8)

A fun afternoon in the kitchen!

Hot Air Spinner

Hot Spinner (4)

This was the perfect science experiment to do hot on the heels of our wind-themed kit from Koala Crate. You’re illustrating for children that warm air is less dense than cold air. So if you hold something above a heat source (like an uncovered lightbulb), the cold air pushes the warm air up and makes it spiral!

First, draw a circle on construction paper, and then pencil in a spiral shape. Cut out.

Hot Spinner (1)

These kinds of projects are great practice for Travis – he gets to mimic my movements (drawing circles, cutting with safety scissors) while I make the version that is precise enough for a science experiment.

Hot Spinner (2)

Next we needed to staple a thread (be sure to use sewing thread; twine or yarn will be too heavy) to the center of the spiral – by far Travis’s favorite part!

Hot Spinner (3)

The next step was a bit tricky to catch on camera! Wrap the other end of your thread around a pencil and hold over a lightbulb (we put a lamp on the ground and removed the shade). Stay still until the spiral comes to a stop, then carefully observe – in moments it will start to whirl!

Hot Spinner (5)

Some good STEM fun to kick off our summer!

Grow a Science Garden

Grow Garden alt.JPG

This indoor way to show your kids how vegetables grow is almost trippy! All you need is a head of romaine and a small glass jar. Then watch the magic happen.

Cut the leaves from the base of the romaine. Use the leaves for a big salad of course. I also gave my budding chef some of the leaves to play with in his set of pots and pans.

Grow Garden (4)

Meanwhile, trim the very bottom of the romaine head off thinly – this will help it absorb more water.

Here is a slightly skeptical Travis checking out the early stage of our experiment.

Grow Garden (2)

Place in a glass of water, making sure the base is completely covered, and place somewhere sunny. Change the water every day and watch your romaine sprout!

Grow Garden (3)

Within a day we had a few little leaves.

Grow Garden (6)

The picture at the top of this post shows growth after about 4 days. We can’t wait until we have enough for a fresh salad!

If you want to continue the fun, try the same experiment with a fennel bulb. You can also save the tops of carrots or radishes, place in a shallow dish with water, and watch for fresh greens to emerge. Thanks to Parents magazine for the idea!

Update: Here’s the lettuce about a week in, as tall as we let it grow. Honestly it was beginning to brown slightly around the edges, so I’m not sure I’d recommend growing it longer.

Grow Garden alt

But needless to say, Travis was thrilled!

Grow Garden var


Juice-Pouch Stomp Rocket

Juice Rocket (5).JPG

Don’t toss that juice pouch from your child’s next snack time. With just a few embellishments, your kid will have him- or herself their very own rocket launcher!

First, make sure the juice pouch is completely empty and rinse any juice from the straw. Reinsert the straw into the pouch; this is your launcher.

Cut a regular straw in half; discard half and keep the rest as your rocket.

Trace 3 trapezoids onto colored paper – littlest kids might need help with this one. The shapes should measure 3 inches on the bottom, 1 inch on the sides and 3/4-inch on the top. Cut out, and cut one of them in half vertically, leaving the other two full.

Tape the 2 full trapezoids to each side of the straw as the rocket fins. Add the half pieces of trapezoid at the bottom with more tape.

Juice Rocket (2)

Travis decided that he wanted to add a few strips of washi tape as embellishment, too.

Juice Rocket (1)

Seal the end of the straw with a little ball of clay. Now your rocket is ready to soar!

Blow into the straw of the juice pouch to make sure it is full of air.

Juice Rocket (3)

Slide the “rocket” onto the straw of the juice pouch. Now stomp (or press) on the pouch and watch your rocket soar!

Juice Rocket (4)

You can teach your little scientist that this project works thanks to compressed air from the pouch, otherwise known as pneumatics!


How Much Water Is in Snow?

Water in Snow (4)

Here’s a super-simple experiment for the next time it snows. It combines a whole host of scientific ideas, from talking about liquid vs. frozen states of matter to making a hypothesis.

First, we needed to fill a clear glass jar with snow. For the best results, make sure to tamp the snow down so your jar is truly filled all the way.

Water in Snow (1)

We took the jar inside and measured the snow (15 cm) and made guesses as to how much water would be left once it melted, keeping in mind past lessons on how ice takes up more space than water.

Water in Snow (2)

Travis guessed really low, at 2 cm! I chose 5 cm to keep things interesting. I tried marking our guesses directly on the jar, but since it was still a little wet, we found that masking tape worked better.

Water in Snow (3)

Next we needed to be scientific and record our results. We took measurements at one hour intervals over the next three hours with the following results:

3.27 pm – 15 cm

4.27 pm – 12 cm

5.27 pm – 7 cm

6.27 pm – 4 cm – all water!

Water in Snow (5)

It was neat to see that it took a full 3 hours, as well. Next time, we’d make hypotheses about the timing as well, and record that at the start.

Expanding Snowman

Expanding Snowman (12).JPG

We’ve been waiting for a snowy day around here, because snow always lends itself to exciting winter games and science experiments. With leftover Alka-Seltzer tablets on hand, I had plans for exactly how we could use the snow this time around.

First, I drew a snowman’s face for Travis on a plastic bag. Note to self: next time use a sharpie! We had some inky orange and black hands later on…

Expanding Snowman (1)

Next we needed to collect fresh-fallen snow into our bag. Make sure you fill your bag almost to capacity with snow, or this experiment won’t work. We learned by trial and error!

Expanding Snowman (2)

Now drop in two Alka-seltzer tablets and seal the bag. You may want to place it on a towel, just in case the bag bursts…

Expanding Snowman (10)

Over the course of about an hour, we checked on the bag. The tablets slowly release gas that will make your snowman puff up more and more and more.

Expanding Snowman (11)

Here’s Travis poking a bag filled mostly with gas and leftover slush by the end.

Expanding Snowman (13)

I think the process would be even better if I had left the bag outside, so the snow didn’t melt simultaneously as the gas expanded – whoops!

The whole thing takes a while, of course, because the tablets react very slowly with freezing cold water. Because he grew impatient as we waited, I filled a second bag with hot water from the tap and we dropped in a few Alka-Seltzer.

Expanding Snowman (6)

They immediately fizzed and the bag puffed up with gas, and we talked about why the reaction happened so much faster in the heat.

Expanding Snowman (7)

Can’t wait for the next snowfall and the chance for more snowy games! What do you do with your kiddos to take advantage of a snow day? Please share in the comments!