Bookmark

Bookmark (4)

I love crafts that capture the size of my children’s hands or feet at regular intervals, a beautiful way to freeze time, given how fast they grow! I was due for a new craft like this with Veronika, and today I decided to make it a bookmark version!

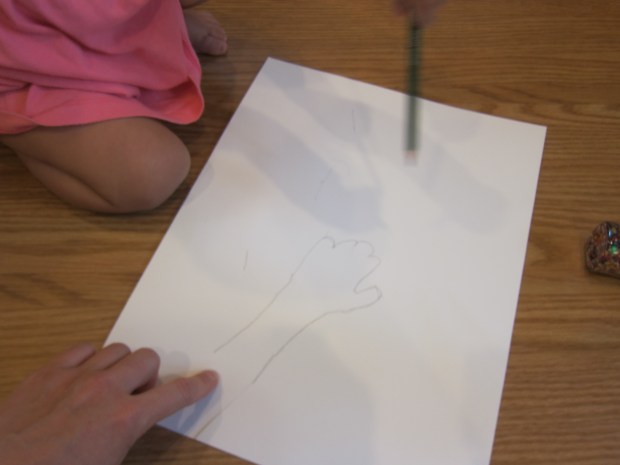
It was admittedly hard to get Veronika to hold still while I traced her hand and forearm on a sheet of poster board. She giggled when the pencil tickled her, or just seemed surprised at the feeling, but I managed to get a fair approximation.

Bookmark (1)

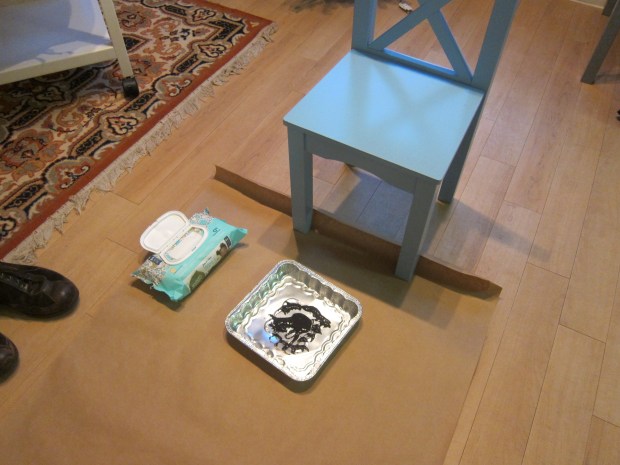
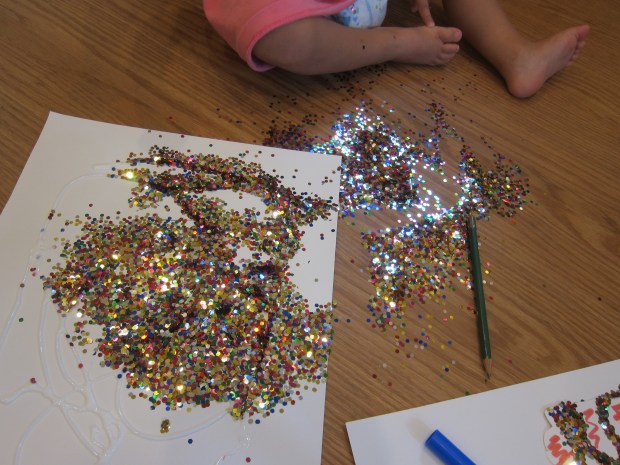
Cut out the shape you’ve traced and let your toddler decorate. I thought Veronika might want to use markers, but she was far more into the glitter bottle I pulled out. Knowing she was likely to dump the whole bottle, I put down wiggly lines of glue on her hand shape and then placed it over a second sheet of poster board to catch the mess. Phew, this mostly contained the glitter dump!

Bookmark (3)

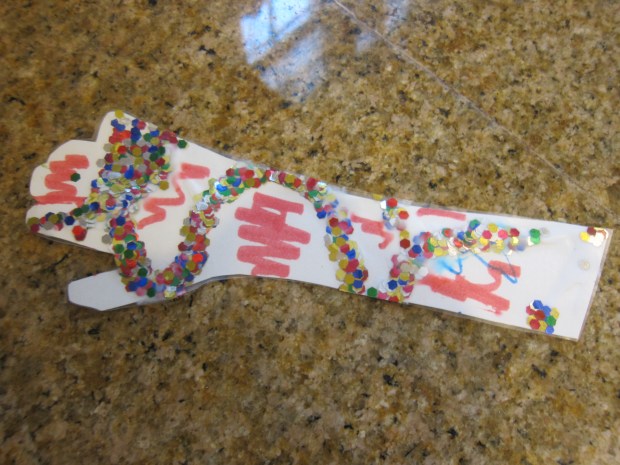
Once decorated, cover your child’s artwork with contact paper, and trim the contact paper to the same shape as the bookmark.

Bookmark (5)

Don’t forget to write the name and date on the back! This is going to make a beautiful memento when I read. I think we’ll even make one or two more to give to grandparents as gifts!

Handprint Cookies

Handprint Cookies (8)

Part baking project and part bonding activity, these sibling handprint cookies are absolutely adorable. I can think of no better way to spend these cozy days of social distancing than creating strong memories for the kids, despite the scary news in the outside world.

So first things first, we needed cookie dough! I knew the dough needed to chill for a while, so whipped up a batch first thing in the morning.

Ingredients:

  • 1/2 cup coconut sugar (or brown sugar)
  • 1/2 cup Earth Balance butter
  • 2 Ener-G eggs
  • 1 teaspoon vanilla almond milk
  • 2 and 1/2 cups flour
  • 2 teaspoons baking powder
  • 1/4 teaspoon salt
  1. Cream together the sugar, butter, Ener-G eggs, and almond milk in a stand mixer. Add the flour, baking powder, and salt, mixing at low speed just until combined.
  2. Gather the dough into a ball and chill for at least 3 hours.

When it was time to make the cookies, I sat Veronika in her high chair with one portion of dough, and Travis stood at the counter to help me roll out the rest.

Handprint Cookies (2)

Press a child’s hand to the dough and trace with a butter knife.

Handprint Cookies (1)

Travis was able to hold his hand still for a realistic approximation on his cookie. I had to use a little more creative license with wiggly toddler Veronika, as expected! Then we gathered the scraps and re-rolled the dough for heart and star cookie cutter shapes.

Handprint Cookies (3)

As a sweet touch, they pressed their thumbprints into a few cookies.

Handprint Cookies (5)

Let the kids decorate them however they want!

Handprint Cookies (4)

I stepped back and let them choose, which meant our cookies had a cinnamon-sugar sprinkle and Dandies marshmallows in the center.

Handprint Cookies (6)

Bake at 375 degrees F for 8 minutes, until lightly browned.

Handprint Cookies (8)

Then half the fun is eating them of course!

Hands of Love

Hands of Love (6)

With only a few days left before her first birthday, it was time for another set of hand prints with Veronika. I haven’t done this since she was nine months old and those little hands have grown.

Anyone who follow this blog knows that handprints with Veronika are a risky endeavor. I had plates of paint ready, along with a thick soft paintbrush, and wet wipes right next to me.

Hands of Love (1)

Gently brush paint over your baby’s palm. She seemed to like the soft sensation!

Hands of Love (2)

I pressed her hand firmly down on a small canvas tote bag. The idea was to make gifts for upcoming holidays! Other fabric like t-shirts or hand towels would be fun, too, if you use acrylic paint.

Hands of Love (3)

You can also just press the prints onto thick paper for pretty commemorative artwork. Add a border with marker, and don’t forget to add the date!

Hands of Love (7)

Now compare these prints to your older sets and marvel at how much your baby has grown.

Hands of Love alt.JPG


Simple Hand- and Footprints

Simple Handprints (7).JPG

I tried making a handprint for Veronika when she was just home from the hospital, and quickly realized why my attempt was so difficult – newborns keep those fists curled up tight!

At two months old, you should be able to capture the size of those tiny fingers, now that your little one is keeping his or her fingers open. Veronika seemed to love the process behind this, her first little art project.

You can make the prints on almost any surface you choose. I used a small canvas from the craft store and a blank tea mug. Regular watercolor paper would work just fine, too! Make sure you are set up with all your supplies before you begin. You’ll need a safe, water-based paint, a paintbrush, and a pack of wipes ready to go for cleanup!

simple handprints (1)

I started with the feet, since that would involve less mess, tickling Veronika’s toes with the brush and then pressing gently against the canvas and the mug.

simple handprints (2)

We cleaned her foot off, then applied a coat of paint to one little hand. It was still a bit difficult to press her finger flat, and do so without her moving it side to side, so the hand prints were a bit smeared.

simple handprints (4)

But we still captured the adorable tiny size of her hands and feet at this age.

simple handprints (3)

This is sure to become a precious memento. Don’t forget to add baby’s name and date!

simple handprints (5)

Handprint Wrapping Paper

Handprint Wrapping (10).JPG

Parents and grandparents will love any gift that your child gives them – but make it extra special with this fun hand- and footprint paper. The paper itself may very well charm them more than the gift inside!

First, I set up everything for footprints, the messiest part of the project. I recommend using tempera paint, and having a pack of baby wipes right next to you to wash off messy feet.

Handprint Wrapping (1)

Note: you can use acrylic paint, but it will simply require a more thorough scrubbing with soap and water.

Travis sat in a chair in front of a large sheet of butcher paper (alternatively, you can cut open brown bags from the supermarket so they lie flat), and giggled as I brushed paint onto his feet.

Handprint Wrapping (2)

I held his hand as he walked across the paper, leaving tracks behind. He loved peeking back over his shoulder at his trail!

A quick wipe, and then we were on to the hand prints. Travis was giggling again for a nice coat of Christmas red.

Handprint Wrapping (3)

He loved pressing his hands down, making sure each print had all 5 fingers.

Handprint Wrapping (5)

We left the paper to dry, then used it to wrap a package for daddy.

Handprint Wrapping (4)

If multiple children are decorating the same sheet of wrapping paper, you can add names and the date next to their prints.

Handprint Wrapping (7)

A Christmas surprise for under the tree!

Handprint Wrapping (9)

Hand-Shaped Dish

Hand Bowl (7)

I’m a sucker for any craft that incorporates the size of a child’s hand. Last year, we made  a wreath featuring Travis’s handprints. This year we switched our art medium to clay. This little dish is perfect for holding holiday candies, and would also make a great gift for grandparents on your Christmas list!

To start, we gathered our materials: air-dry clay and balloons. Balloons and clay first thing in the morning? Travis was in heaven!

Hand Bowl (1)

Blow up one balloon to a size your child can comfortably hold in his or her hand; set aside.

Hand Bowl (2)

Trace your child’s hand onto a piece of paper and cut out; set aside.

Hand Bowl (3)

Now flatten your clay using a rolling pin until it is large enough to hold the handprint.

Use a clay slicing tool or plastic knife to cut around the handprint.

Hand Bowl (4)

Now here’s the slightly funny part: drape the hand over the balloon, and let sit somewhere kids can’t touch it or mess with it until dry.

Hand Bowl (5)

Once dry, remove the balloon and set your hand on the counter as a decorative dish.

Hand Bowl (6)

Don’t forget to inscribe with kids’ names and the year, so you’ll always remember!

Hand Bowl (8)