Pom Pom Squeeze Water Play

Pom Pom Squeeze (10)

Here was the perfect game to play on the patio with Veronika while big brother had “recess” today. It not only involves great sensory elements, but also builds fine motor skills from squeezing.

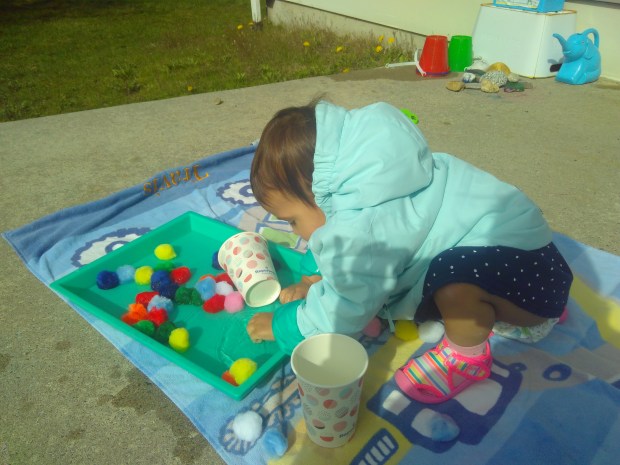
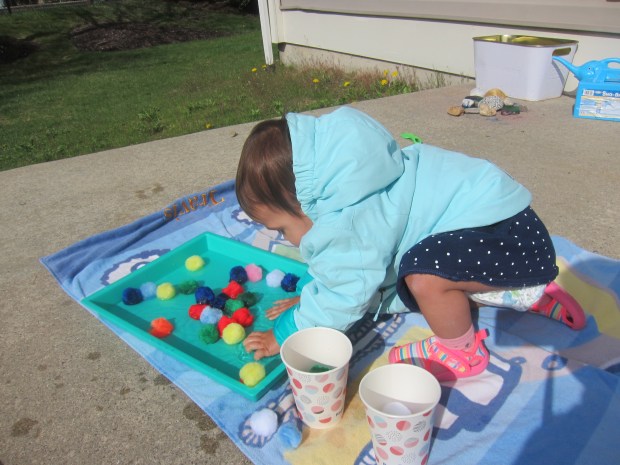
I first laid down a towel, both for comfort and to absorb any spilled water as we played, then I set out a shallow tray filled with pom poms. Because Veronika still puts small objects in her mouth at times, I used only large ones. Use a variety of pom pom sizes for older toddlers!

Pom Pom Squeeze (1)

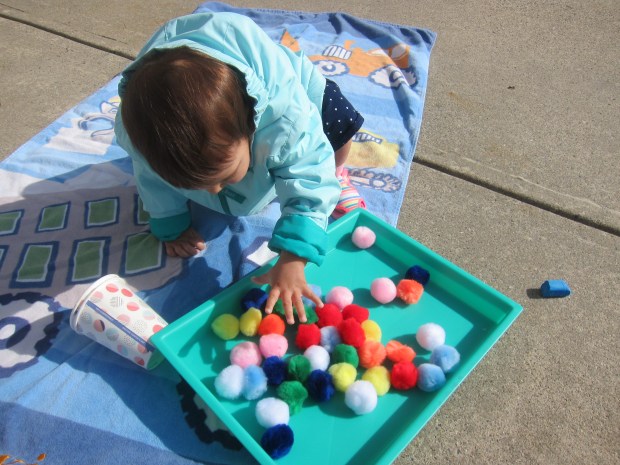
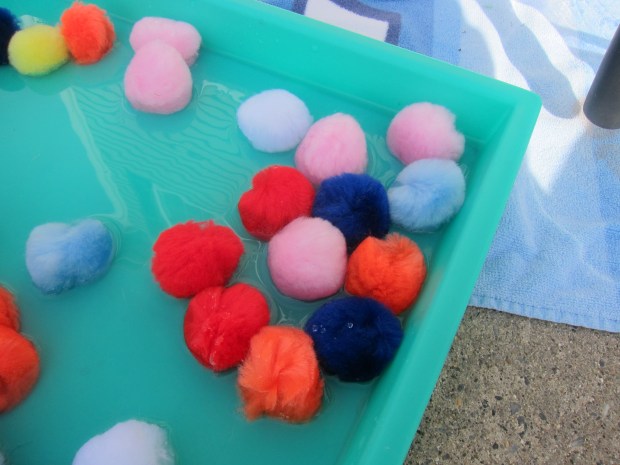
First I just let her play with the dry fluffy pom poms, because she loves them. Then I filled the tray with a little warm water (use cold water if it’s a hot day!). The pom poms will almost immediately become saturated.

Pom Pom Squeeze (2)

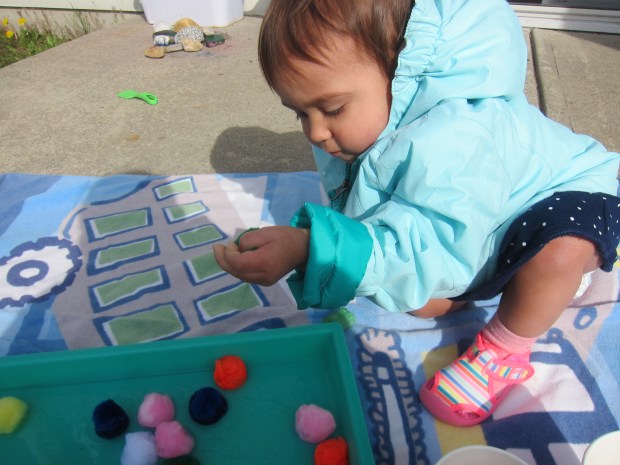
I pointed out to her that they felt differently now, and then I showed her how to squeeze out the pom poms over a cup.

Pom Pom Squeeze (3)

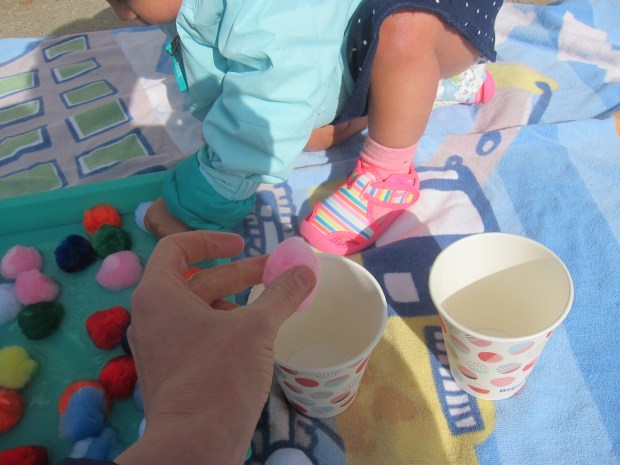
“Squeeze!” I said, and she echoed me and clenched her fists around a few of them.

Pom Pom Squeeze (4)

She also of course loved splashing her hands in the warm water.

Pom Pom Squeeze (8)

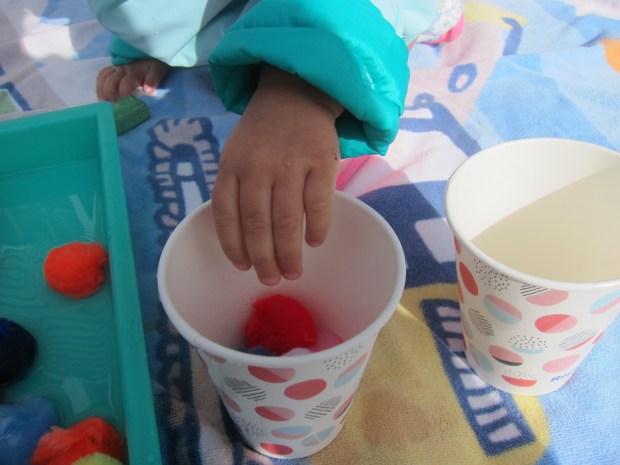
She sometimes squeezed the pom poms over the cup, and sometimes just tossed them in.

Pom Pom Squeeze (6)

Older toddlers and preschoolers will really enjoy the challenge of squeezing out water until the cup is filled to the brim! It turns out pom poms can hold a lot of water.

Pom Pom Squeeze (7)

Then there’s the fun of pouring the water back out of the cup and starting over.

Pom Pom Squeeze (5)

Or the fun of transferring pom poms from one cup to another.


Pom Pom Squeeze (11)

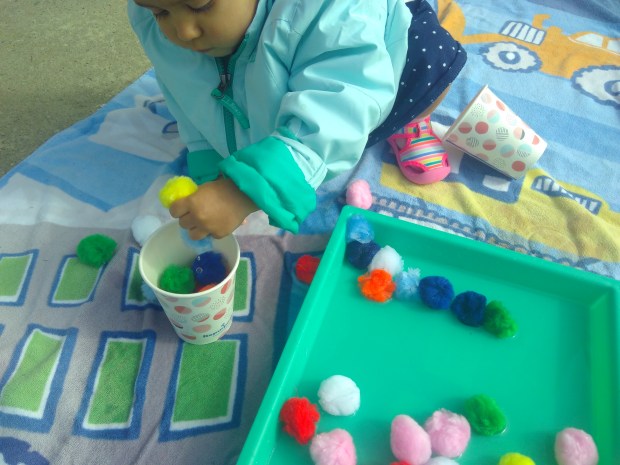
Or just swishing all those pom poms around in the shallow tray endlessly. In sum, this one is sure to keep your toddler busy!

Pom Pom Squeeze (9)


Pompom Puppets

Pompom Puppets (6)

Travis needed an art project for the first day of “home school”, so I turned to Highlights magazine for inspiration. It turned out the pompom puppets we tackled were a bit advanced for a kindergartner, but we sure got silly and had fun making them.

The method looked simple enough: Wind colorful yarn around the tines of a fork to make the body of a pompom.

Pompom Puppets (1)

Tie with a small piece of yarn in the center, making sure to tightly double-knot, then slide off the fork and snip the loops on either end so you have the frills of a pompom.

Pompom Puppets (2)

This sounded good in theory! But we quickly found out that the fork resulted in very small pom poms and they unraveled into pieces when we tried to cut the loops. Thinking quickly, we wound around mommy’s fingers instead! This resulted in workable pompoms.

Pompom Puppets (3)

To turn them into puppets, wrap colored felt around your child’s finger until it is the right size, then use glue to secure.

Travis helped pick out decorations for his silly creatures, but once again the project was a bit hard for small hands. I jumped in with a little hot glue to secure pipe cleaner antennae, wiggle eyes, and button decor according to his wishes.

Pompom Puppets (4)

What silly creatures!

Pompom Puppets (7)

Travis loved waving them on his fingers. Soon they even had little space pods to travel around in.

Pompom Puppets (9)

Plus he even had fun playing with the extra yarn from our failed attempts, in what turned into a very creative game. So these turned out to be great for imaginative play, even if the crafting was too advanced for him.

Pompom Puppets (8)


Pom Pom Push

Pom Pom Push (4)

This game is sort of like a DIY shape sorter, only all the shapes are circles and it’s more about dexterity than exact shape matching. Regardless, it was a huge hit with Veronika at just shy of fifteen months old.

Make holes in the lid of a large (empty and clean) yogurt container. You can use a drill for this, but I found it worked just fine to poke the initial hole with an Xacto knife and then use scissors to snip into an even circle. Just make sure you have no jagged edges, as cut plastic lids can be sharp. Return the lid to the top of the container.

Pom Pom Push (1)

I then presented Veronika with the container and pom poms. Since the pom poms were on the smaller side, you’ll definitely want to supervise this activity closely and make sure none find their way to your child’s mouth.

Pom Pom Push (3)

We had two sizes: tiny green ones that slipped right into the holes and slightly bigger red ones that needed a push with the thumb. She loved them both! I loved watching her dexterity as she plucked the small green ones from my palm and inserted into a hole.

Pom Pom Push (2)

Of course once the container is filled, the lid can be taken off, the pom poms dumped out, and the fun begun again!

Pom Pom Push (5)

And don’t be surprised if your toddler finds other uses for that empty yogurt container. Apparently it made the perfect seat for Veronika’s “baby”!

Pom Pom Push (7)


Sombrero Station

Sombrero (8)

This adorable craft will keep kids busy if you have Cinco de Mayo plans for tomorrow! Travis and I made ours early, but the craft easily multiplies to keep kids of various ages entertained.

First, I hot glued one paper cup upside down onto a paper plate for each sombrero. Pretty, colorful plates work best, although you could use white if kids will want to decorate them with markers.

Sombrero (2)

We set out an assortment of decorations, including tassels, pom poms, pipe cleaner pieces, and a big dish of glue.

Sombrero (1)

Travis’s favorite decoration by far was to dip a pom pom in glue before finding the perfect spot for it on his sombrero.

Sombrero (4)

Ole!

Sombrero (3)

To attach tassels to the brim of the sombrero required more hot glue, so that was another grown up step.

Sombrero (6)

Now place atop your head and celebrate (glass of leche optional)!

Sombrero (7)