Flower Prints

Flower Prints (6)

As summer draws to a close, I’m working through a bucket list of warm weather projects before we move on to fall and autumnal activities! This fun idea from Barefoot Books Kids’ Garden kit lets you bring flowers indoors as a keepsake that will last all winter!

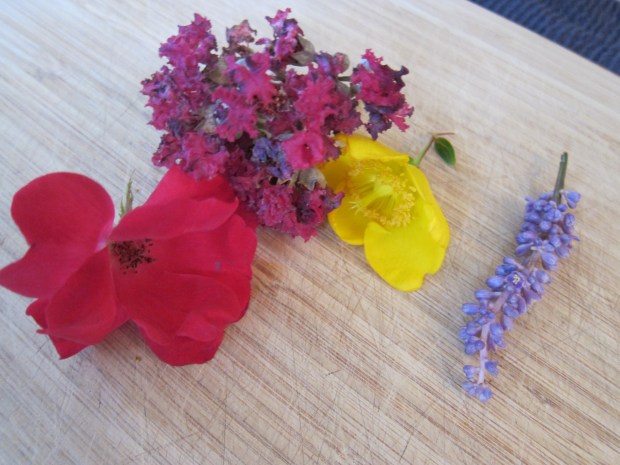
The first step of course was to gather our flowers. If you don’t have your own garden, find any pretty blossoms on a stroll through your neighborhood or a local park. Flowers that lie flat will work best, but we picked a variety just to test the results.

Flower Prints (1)

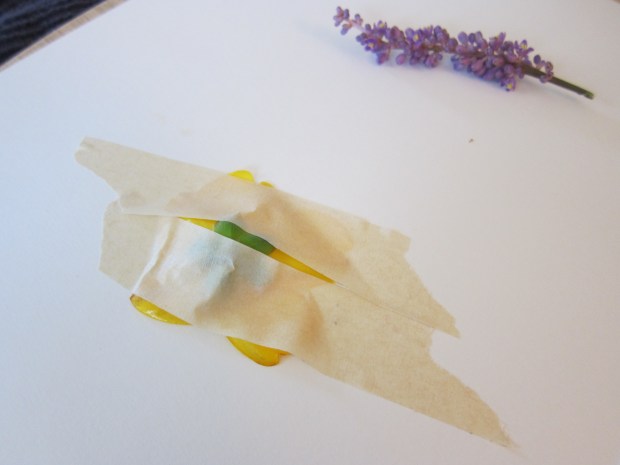
Travis was very intrigued by the set up when we returned home. On the floor, place an old dish towel for traction, followed by a cutting board and then watercolor paper.  Place your flowers, petals down, on the watercolor paper after removing as much of the stems and leaves as possible. Finally, cover your petals with painter’s tape, being sure to cover the flower completely, but trying not to let pieces of tape overlap.

Flower Prints (2)

And now for the fun part! Although adults will need to do most of the hammering, Travis got to take a few swings at the flowers under careful supervision.

Flower Prints (3)

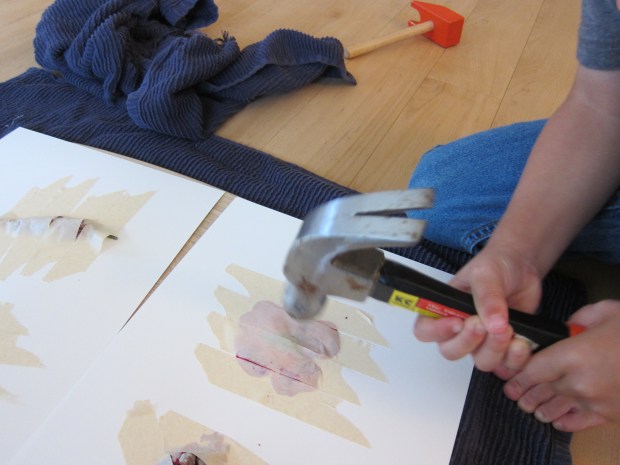
He then played along with his toy hammer while I finished the real work. You may want to peel back your painters tape a few times to make sure the color of the flower has transferred over to the paper, before removing the tape completely.

Flower Prints (5)

Peeling off the tape was great fun, too, of course.

Flower Prints (4)

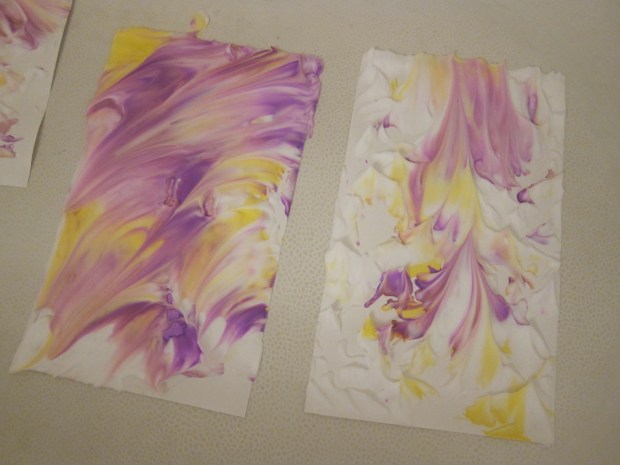
Once the hammering was complete, Travis lost interest fairly quickly, but I loved the old-fashioned Victorian feel to the result. In a whimsical nod to the method by which we had obtained our prints, I “framed” them in additional painter’s tape in Travis’s room – a beautiful reminder of the fleeting beauty of summer’s blooms!

Flower Prints (7)

String Roller Print

String Print (9)

You can upcycle your empty toilet paper tubes and enjoy some messy fun with this project.

To create the rollers for our prints, first squeeze glue onto a disposable plate or tray. Add pieces of string and have fun squishing the string through the glue until coated.

String Print (1)

Travis was actually a bit squeamish about this step, so my fingers got good and messy; I finally cajoled him into winding some of the gluey strings around our two empty toilet paper tubes.

String Print (2)

We set the tubes aside to dry – nap-time was the perfect pause.

String Print (3)

To make our prints, I splattered several colors of paint onto parchment paper. First we needed to swirl them together a bit with a paintbrush.

String Print (8)

Then it was time to roll through our rollers. The whole project was neat because it made me think of roll printing on fabric.

String Print (7)

Travis was a little hesitant about getting his fingers covered in paint, but soon the rollers were rolling about on a piece of poster board.

String Print (6)

He decided to add a few brushstrokes with the paintbrush to finish his creation. Overall, very Jackson Pollock-esque!

String Print (10)

Shaving Cream Prints

Shaving Print (8)

There is definite WOW factor to this project, even for grown ups!

To begin, squirt a healthy dose of shaving cream onto a baking sheet or tray. Ooh, already this project is exciting!

Shaving Print (1)

Now add a few drops of liquid watercolor to the shaving cream. Travis loved seeing the color appear against the white background, after which I instructed him to swirl the colors through the shaving cream with a skewer.

Shaving Print (3)

Next, press heavy card stock or poster board onto the mixture, one piece at a time. Travis loved helping to gently press the paper on, and lift it up for the big reveal.

Shaving Print (5)

Wipe the excess shaving cream from each piece with an old towel, and set aside to dry – what a gorgeous marbled effect!

Shaving Print (7)

The secret is that the soap in the shaving cream pushes the color away, so it is left behind after the cream is wiped off. It also leaves the paper with a velvety texture that feels amazing!

Shaving Print (9)

This paper is so pretty that you’ll definitely want to use it for gifts – perhaps bookmarks:

Shaving Print (10)

Or thank you cards:

Shaving Print (11)

Or simply hang in a prominent place to display your child’s work of art!

Shaving Print (12)