Fruit Ripening Science is Bananas

Fruit Ripe (5).JPG

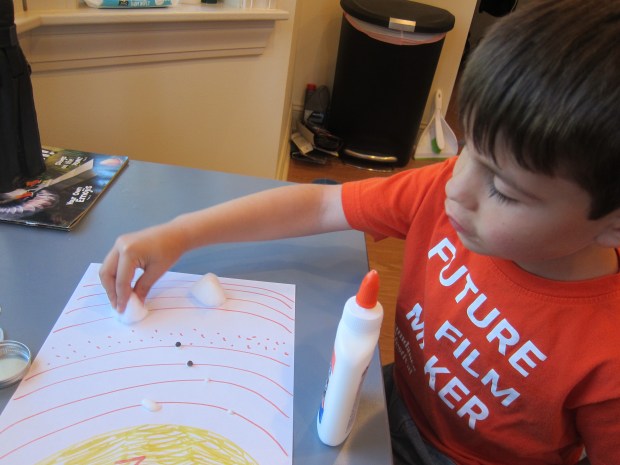
Just before Halloween, Travis made Boo-Nana Bread form Raddish KidsSpooky Kitchen crate. Now we’re finally getting around to the fruit-ripening science lesson attached to it!

Before anything else, we needed to set in motion an experiment that would take 5 days. I purchased a bunch of (fairly) green bananas at the grocery store, as well as a few riper ones.

Ask your child to describe the differences they notice between the ripe and unripe bananas. Travis pointed out the obvious color difference, first. A little probing helped him go deeper: the ripe ones were softer, and smelled sweeter.

Fruit Ripe (1)

I asked him if a banana needed anything other than itself to ripen. Somehow he knew it needed air (oxygen). Smarty pants!

Fruit Ripe (3)

But for scientific backup to this hypothesis, we experimented by placing the following:

  • 1 green banana out on the counter
  • 2 green bananas in a paper bag, folded up tight
  • 1 green banana and 1 ripe banana (for ethylene) in a paper bag, folded up tight
  • 2 green bananas in a sealed plastic bag
  • 1 green banana wrapped in layers of plastic wrap

That last was Travis’s favorite, pretending we were making a banana mummy!

Fruit Ripe (4)

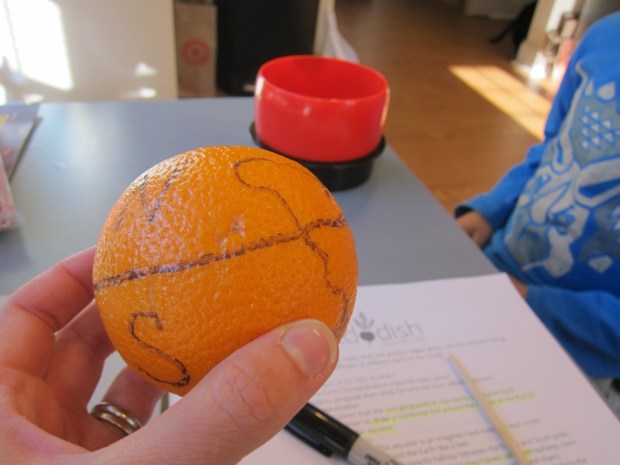
Meanwhile, it was time for a little science behind the lesson. I set out two plates for him, one featuring non-climacteric fruits i.e. they do not ripen after picking. Raddish provided a long list to choose from, and our plate included: a bell pepper, blueberries, cucumber, orange, and yellow squash.

The second plate had climacteric fruits i.e. ones that do ripen after picking. This plate held an avocado, a pear, and a mango.

Fruit Ripe (6)

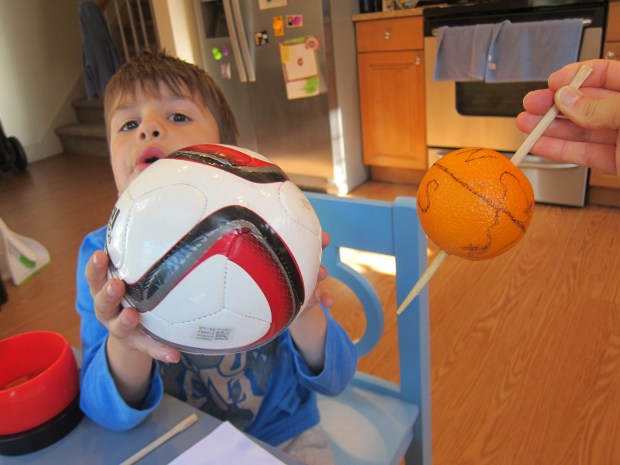
“Can I eat it,” he asked right away of the mango. “Is it ripe?” At first he was stumped about how I had categorized them, guessing I had sorted them by color. But hmm, why wasn’t the cucumber on the green plate?

Fruit Ripe (7)

I loved watching him really ponder this! I guided him back to his very first comment about the mango. Was it ripe? Now he understood that one plate held fruits we needed to wait for; the other plate was fruits that wouldn’t ripen further after picking.

Fruit Ripe (10)

Time to explore! I let him have at the food just for fun. He loved peeling the squash and taking little nibbles of it, plus practicing his knife skills on the bell pepper…

Fruit Ripe (9)

…and crunching into the cucumber for a big bite.

Fruit Ripe (11)

He decided to wait until the mango was riper before peeling it. Good choice! Plus he gave the unripe avocado a big squeeze and it was solid as a rock.

Fruit Ripe (8)

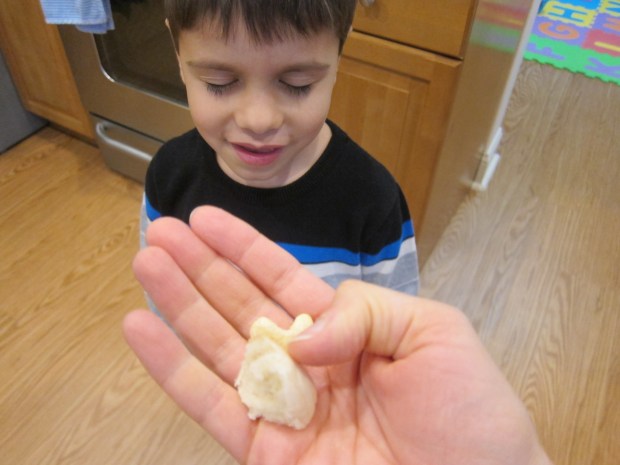
Five days later, we finished with a little more science now that we had our banana results. Our finding weren’t quite as promising as hoped, likely because I had to start with green bananas on the verge of yellow and a yellow banana on the verge of green, based on what the grocery store had to sell. But we still could see that the countertop banana was the brownest/ripest and the plastic bag bananas had retained the most green.

Fruit Ripe alt

Interestingly, our plastic-wrapped banana had gotten quite ripe, so we must not have made the “mummy” tight enough.

The green bananas in the paper bag had ripened faster than the ones in plastic, since the porous paper gives them access to oxygen. But the one that also enjoyed the company of a ripe banana had both oxygen and extra ethylene, so that was riper still.

Fruit Ripe (12)

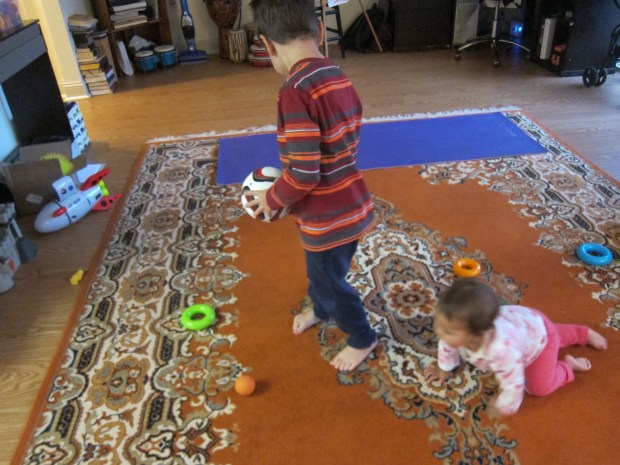
Enough science; as it turns out, leftover bananas are lots of fun to play with, even for little sister!

Fruit Ripe (13)

We enjoyed one final video of a similar experiment done with supermarket food. If your kids loved the banana experiment, try out an avocado one!

Travis and I also decided to check out the suggested book Science Experiments You Can Eat, by Vicki Cobb. We read through a couple of the experiments, but didn’t actually put any to the test.

Autumn Potpourri

Autumn Potpourri (4).JPG

How can you keep the house cozy for your kids when an early winter blast comes barreling through in November? Set this heavenly-scented potpourri to a simmer on the stove, and the whole house will be hygge in no time.

I gave Travis a quick reminder of what potpourri is before we set to work: any fragrant mixture of plant materials, like herbs, spices, fruits, flowers, or wood. Simmering the mixture on the stove gives a stronger scent than dry potpourri in a bowl, plus it adds moisture to dry air!

Autumn Potpourri (2)

Travis loved helping me slice up an orange to start. We added the orange slices to a saucepan, then added:

  • 3 cinnamon sticks
  • 1 tablespoon whole cloves
  • 1 tablespoon vanilla extract

Autumn Potpourri (3)

Take the time to make this a sensory activity, too. Travis loved smelling the spices, and even licking an extra cinnamon stick!

Autumn Potpourri (1)

Add water to the pot until it’s about 2/3 full. Bring to a boil, then reduce heat and simply let simmer. If the pot runs low on water, add more as needed. We kept ours on a gentle simmer all evening and hardly noticed the cold knocking at the windows!


The Kitchen Bowl

Kitchen Bowl (11)

Forget the World Series or the Super Bowl, today Travis and I competed in the… Kitchen Bowl!

This was an adorable idea from Raddish Kids to round out their Game Day crate. If you have a large family, or are hosting a family gathering, or just want to invite friends over, then you can play these games with proper teams. Travis and I had more of a “tennis match”, going one-on-one to see who could win. For a few of the activities, I challenged him solo.

First, of course, we had to name our teams. Travis declared himself the Speedy Lemons (after his favorite food) and made the Melty Ice Creams. We decorated posters with our names and mascots, and Trravis was proud of his very inventive blue lemon.

Kitchen Bowl (6)

The first event was the Ultimate Taste Test. Could he identify items blindfolded? I knew Travis wouldn’t be “game” for anything liquid, so stuck to yummy snacks like mini bagels, graham crackers, and cashews. He aced them all (pun intended!).

Kitchen Bowl (9)

Next we played a round of Basket-foil. Wad up aluminum foil into balls (about 6 per team) and place a mixing bowl across the room.

Kitchen Bowl (1)

See who gets the most baskets in 60 seconds! We tied with 2 each.

Kitchen Bowl (2)

Tong Training got lots of laughs: Each team has two cups, one filled with 1/4 cup beans. See how long it takes to transfer the beans from one cup to the other. The Speedy Lemons had an impressive 45 seconds.

Kitchen Bowl (3)

You’ll need to work those fine motor skills if one drops.

Kitchen Bowl (4)

Uh oh, the Melty Ice Creams upended the cup.

Kitchen Bowl (5)

Then I challenged him to Memory Madness. I placed 5 utensils in a brown bag (use up to 10 items for bigger kids) and had Travis look at them for 30 seconds. Could he remember all 5?

Kitchen Bowl (7)

With some coaching from the sidelines, he proudly recalled all the items.

Kitchen Bowl (8)

Finally, Speed Whipping! I set out two bowls and two whisks. We had vegan Coco Whip which won’t really whisk up into stiff peaks, so this was just a matter of being silly and seeing who could whip fastest. The Melty Ice Creams came out on top!

Kitchen Bowl (10)

Did I mention this was all before the school bus came? What a way to start the morning!

Kitchen Bowl alt.JPG

Baseball Explored

Baseball Explored (7)

The final lesson to go with Travis’s Game Day recipes from Raddish Kids was an in-depth look at baseball… with a little art and drama thrown in!

First, I read Travis some facts about the game and we watched a quick video of the rules. Bedtime stories like Pete the Cat Play Ball! by James Dean, I Got It! by David Wiesner, and F is for Fenway by Jerry Pallotta all introduced the imagery and lingo of baseball and its stadiums.

Baseball Explored (2)

Even more fun was making a diorama of a stadium! I pulled together supplies, including a large box, construction paper, craft sticks, glue, markers, an egg carton, and tin foil.

We looked at images of Fenway and other baseball fields and I asked Travis what we’d need. Raddish included a full worksheet to fill out before beginning the diorama, but with an eager kindergartner and a one-year-old getting into all the supplies, we had to work a bit more quickly than that!

Baseball Explored (3)

Travis noticed what I hoped he would right away: We needed green on the bottom for the field. We glued down green construction paper, then I drew on the baseball diamond dirt with brown marker.

Baseball Explored (4)

The baseball field is a great chance to talk about shapes, in general. The dirt lanes form a diamond, the pitcher’s mound is a circle, and the bases needed to be squares. Travis chose shiny tin foil for the bases, a nice touch!

Baseball Explored (5)

I helped him think about what else his stadium needed. Soon we had an old egg carton glued on the sides as the bleachers with little pom pom “spectators”. Pipe cleaners were our players.

Baseball Explored (6)

Travis’s proudest contribution was adding a mini lantern to be the stadium spotlight.

The worksheet suggested adding food or drinks, which older kids can carefully craft. Travis was quite proud to glue together two craft sticks, crossed to look like soft pretzels.

Baseball Explored (8)

Next up: the drama portion! We watched a few suggested clips of movement in baseball, ranging from the best catches of all time, to how to slide into base, to how to throw peanuts in the stands. Travis then put on his acting shoes. Here is his baseball movie, in three parts:

Batting!

Sliding!

Tossing peanuts!

What a fantastic way to get kids up and moving on a rainy evening. There’s lots more that older children can do with this lesson, whether making a painting or collage representing baseball or reading biographies of famous players.

We intend to finish the lesson with a baseball movie (Angels in the Outfield is a great pick for younger kids) and a game on TV once the World Series starts!

Football Math Touchdown

Football Math (4)

This math-heavy lesson from Raddish Kids was a little tough to tailor to a kindergartner, but I appreciated the challenge, and that Raddish had us thinking about new concepts and skills. We’re excited to make more ballpark fare to go along with the learning!

The lesson begins with brainstorming a list of sports. I put white poster board up on the wall just like a teacher and gave Travis a big sports-couch-voice, “Go!” He soon had a great list.

Football Math (1)

I told him today we would focus on football, and went through some of the facts that Raddish provided. Did you know that the first official football game was all the way back in 1869? We watched a quick overview of the rules and took a look at all the gear players have to wear.

Pause a moment and make a second chart with your child, focusing on what we learn from losing and what we learn from winning. I was proud of Travis coming up with items like, “You learn not to cheat” and “not getting upset when you lose”.

Now go over a bit of football facts and figures (6 points for a touchdown, 3 points for a field goal etc.) and set up some math problems with manipulatives. We used dried beans, and I talked Travis through three problems. First up, addition:

If the Dallas Cowboys scored 2 touchdowns and 2 extra points, how many points did they have altogether?

Travis counted out 6 beans for each touchdown, plus the extra two, then added them all up. This is a sophisticated problem for a kindergartner, and I don’t think he even realized it!

Football Math (3)

We next did subtraction:

Last night the Kansas City Chiefs lost to the New York Jets by a score of 7 to 10. How many fewer points did the Chiefs have?

Again, manipulatives made it a cinch. He counted out each team’s score in beans, then took away 7 from the Jets pile. How many were left? “Three!” he declared.

Football Math (5)

Finally, fractions:

If there are 4 quarters in a game and 2 have been played, how many are left?

Beans made the answer clear.

Football Math (6)

After that big brain workout, we needed a physical one! We played two fun variations on “football” that we found online, adapting them to be a mom-and-son game instead of requiring teams. For the first, I set up a yoga mat as the end zone. His job was to get as many balls as possible into the end zone in 1 minute.

Football Math (7)

For the second, he stood on a target (we used stacking rings) and had to catch a ball. If he caught it, he moved the target to his end zone for a point.

Football Math (8)

We even had an adorable cheerleader on the sidelines!

Football Math (9)

Finish up with a football read at storytime. Travis enjoyed A Running Back Can’t Always Rush, by Nate LeBoutillier

Football Math (10)


Seasons in the Hemispheres

Hemispheres (4).JPG

This very simply lesson from Raddish Kids was informative, though it lacked the “wow” factor of other lessons from the company. Still, Travis was intrigued and stuck with it from start to finish.

First, I asked him to name the four seasons. Chart your child’s answers, and then make a list of different aspects of the seasons. Travis came up with things like: cold versus hot; snow versus sun; and different colors, like white versus green.

Now time for a little lesson; the world is divided into northern and southern hemispheres, separated by an imaginary line called the Equator. When it it is summer in the north, it is winter in the south, and vice versa.

Hemispheres (1)

To illustrate this point in a tangible way, draw a line around an orange. We labeled the top N and the bottom S. I had him point out where we lived, and we drew a simple outline for North America. An outline of Argentina, where our recipes came from, went into the south.

Hemispheres (2)

Spear the orange with a chopstick from “north pole to south pole” to show Earth’s axis. Now hold up a soccer ball as your sun. As you rotate the “Earth” around at a slight tilt (fun fact, Earth’s axis is tilted 23.5 degrees), your child will start to see why sometimes it is summer and sometimes winter.

Hemispheres (3)

We watched two suggested videos for a slightly more in depth explanation.

Hemispheres (5)

Now it was time for Travis to plan his winter birthday party! As a summer baby, I had him imagine what it would be like to live in a southern continent. He decided it would be an ice party, where everyone drank hot cocoa and came in snow boots.

Hemispheres (7)

If you really wanted to go all out for this lesson plan, you could recreate a mini birthday celebration of opposite seasons for your kids! At the very least, celebrate with some dulce de leche cookies.

Finally, we checked out the difference in temperature in the hemispheres today. Because it is fall/spring, the difference wasn’t thrillingly obvious. Older kids may want to pick a city in the opposite hemisphere and chart the differences in temp over a whole week.

Hemispheres (8)

Exploring Patagonia

Patagonia (1).JPG

Here was a very different lesson plan from Raddish Kids, in conjunction with the Comida Argentina recipes Travis has been cooking up. My kindergartner got to learn social studies, all about one region of the world!

Truth be told, the unit was quite simple compared to many Raddish lessons. I showed Travis the Patagonia region on a fantastic map we have featuring elevated surfaces for mountains. He immediately picked up on how mountainous the region was, and also how close to the ocean.

We read a few fun facts about the area, including the discovery of dinosaur fossils. Then it was time for a video!

Raddish provided a worksheet for children to draw images of what they learned in the travel video. Travis immediately paused it and said, “Mom, there’s water!” His delight was infectious, pausing the clip every few seconds to draw the glaciers (“silvery mountains!”), desert, flies, or any other things that jumped out to a five-year-old boy.

Patagonia (2)

There are numerous ways to continue the lesson from here. Children are encouraged to present their knowledge while pretending to be something, be that an archaeologist, chef, journalist, or artist.

Because Travis loves YouTube clips, I suggested he be a travel blogger giving his review of Patagonia. But first, he wanted to make those glaciers! He raided the craft bin and wrapped Styrofoam balls in aluminum foil. These were glued to a sheet of shiny cardstock as “ice”. He added dowels as “desert”. All of this received lots of glue on top as snow.

Patagonia (3)

Without further ado, here’s my little travel blogger, enticing you to Patagonia!

Solar System Models

Planets alt

When you’re the only mom who gets her kid up and dressed and backpack packed and lunch made and head to the bus stop and then learn that the Friday before Labor Day is apparently also a day off from school… Well then whoops, you suddenly have a day to fill!

Luckily I had this little project from Raddish Kids up my sleeve, a chance to make two models of the universe: one tiny and one huge!

First I asked Travis what planet we live on. He correctly knew Earth, and was able to name a few facts about it, like how its watery.

Raddish provided a chart to name the other planets, all of which my budding astrologer could fill in. He proudly gave me a fact about each, which I wrote down (in glittery galactic pens, of course). Filling in the column with further questions about each planet was a bit harder for him to grasp, but big kids can write in any pending querries here, as well.

Planets (1)

After watching a suggested video that helped him fill in a few new facts about each planet, it was time to model!

First up was the Tiny Solar System. I drew a half circle on the edge of a piece of white paper and labeled it as the sun. I drew 8 orbits, with an asteroid belt making a wide patch between the fourth and fifth lines.

Planets (2)

For scale models of the planets, we glued on the following:

2 sesame seeds (Mercury and Venus)

2 peppercorns (Earth and Mars)

2 cotton balls (Jupiter and Saturn)

2 coffee beans (Uranus and Neptune)

Planets (3)

Note: the scale obviously isn’t exact, but the idea here is that the relative sizes of the planets (the enormity of Jupiter, the tininess of Mercury) become apparent. This model also didn’t show the distance between orbits to scale.

Planets (4)

Travis marveled at the tiny sesame seeds. In fact they were so small we could barely see them until the glue dried!

Now for the Large Solar System! We headed out to the playground with a bag full of balls in various sizes. Travis was very curious as I collected these from around the house, but was soon to see why.

I inflated a silly starfish to be the sun and put this right in the center of a baseball diamond. (Note: A beach ball would work, too, but I liked that the starfish was a sun/star shape).

Planets (5)

Next we walked out a full 78 steps from the sun holding a wiffle ball as “Neptune.” This took us right to the edge of the baseball field.

Planets (6)

Repeat with the following:

50 steps: wiffle ball (or tennis ball): Uranus

25 steps: soccer ball: Saturn

13 steps: basketball: Jupiter

4 steps: ping pong ball (or golf ball): Mars

3 steps: ping pong ball: Earth

2 steps: marble: Venus

1 step: marble: Mercury

Planets (8)

This exercise is eye-opening even for a grown-up, revealing how truly close our rocky neighbor planets are, and how truly vast the distances are between the outer planets.

Planets (9)

I shared these fun facts with Travis to highlight the great distance across the baseball field. Each step we’d taken was equal to 36 million miles. A rover took 6 months to reach Mars, that “one step” away, but 12 years to reach Neptune! He seemed impressed, but then wanted to play soccer… There goes Saturn!

On the way home, we made up some corny space jokes.

How did Mars know what Venus was thinking? It red its mind.

Why was Jupiter so stinky? Because it passed gas.

Ha, what space joke will your kid create? Please share in the comments!

Planets (7)

Backyard BBQ Games

Backyard Foodie (13).JPG

It’s the last week of summer, and we’re making the most of it by spending time outdoors with family and friends! The following five games are ones we’ve planned to play all summer, ever since making the delicious trio of recipes from Travis’s Backyard BBQ Raddish Kids crate. Whether you’re hosting an actual BBQ or just getting outside in the sunshine, here are a few fun games to try.

1. Egg Toss

Backyard Foodie (7)

We made the game vegan with plastic eggs to toss as an alternative to hard-boiled eggs (try Egg & Spoon Race from International Playthings). Travis loved that the eggs could really crack open when we tossed them…

Backyard Foodie (6)

And missed!

Backyard Foodie (8)

2. Hot & Cold

Backyard Foodie (5)

Hide an object (Note: the “hard-boiled eggs” from our egg toss were perfect) while one player closes his or her eyes. Players instruct the finder where the treasure is by noting if they are cold (far way) or boiling hot (close!).

Backyard Foodie (4)

Travis enjoyed finding the item first, but then preferred to be the hider and guide me with his words.

3. Blind Taste Testing

Backyard Foodie (2)

This is a fun one if your family has prepared a special summer meal together. I blindfolded Travis and had him sample some of our fresh-from-the-market veggies.

Backyard Foodie (1)

He got them all right, even blindfolded! You can make this more challenging by far if you use sauces or spices for big kids, instead of the rather-obvious vegetables.

Backyard Foodie (3)

4. Capture the “Foodie”

Backyard Foodie (14)

This is just like Capture the Flag except you play with fruit pieces instead of flags! Good choices include items with peels, like oranges or bananas. See which team captures the other’s fruit first, and don’t get tagged and sent to jail (i.e. the steps) in the process

Backyard Foodie (15)

Easily the favorite, Travis got a kick out of hiding his banana, and delighted when he could find the other team’s first.

Ideally you’ll need four players or more for this, but even two people can have fun and race to find the other person’s “foodie” first.

Backyard Foodie (16)

5. Restaurant Relay Race

Backyard Foodie (12)

For this silly game, we loaded a tray with plastic cups, forks, and fake picnic food. See who runs the fastest without dropping something along the way. Travis thought this was quite hilarious.

Backyard Foodie (11)

Which of the BBQ games is your child’s favorite? Please share in the comments!

Faces of the Moon

Face of Moon (10)

If you’re looking for the most delicious way under the sun (er, moon!) to teach your kid the names for all the moon’s different phases, this quick lesson plan from Raddish Kids has you covered. Hint: It involves Oreo cookies.

But before I let Travis eat cookies, we focused on a little moon information. I asked Travis what he pictured when he thought about the sky; he came up with ‘blue’ and ‘clouds’. Two great daytime picks! But what about focusing on the nighttime sky, I asked him.

Face of Moon (1)

We watched two quick background videos on moon phases and I also made him a chart (which earned a “thanks Mom!”). This was his first introduction to some great science words, like waxing, waning, and gibbous.

Face of Moon (2)

Now it was time to show him the moon phases with three neat projects.

To make the first, a moon phase viewer, cut a black rectangle from construction paper. Fold the paper in half and open back up again. Cut a white square from white construction paper that fits in the folded black rectangle, leaving a long tab on either end so you can pull the white paper side to side.

Trace a coin on the black paper, pressing firmly so the imprint is visible on the white paper below as well. Cut out both circles.

Face of Moon (3)

Now line up your viewer and slide the white paper to see it change from gibbous to half to crescent to new and back again!

Face of Moon (4)

For the second moon viewer, you’ll need two plastic cups. Glue or tape a yellow circle onto black construction paper and insert into one plastic cup; tape into place.

Face of Moon (6)

On the second cup, label a place for full, waning half, new, and waxing half moons. Now rotate your yellow circle and color over it with black sharpie as appropriate to form each moon phase, leaving the full moon with no sharpie. Travis loved spinning this one!

Face of Moon (5)

The third version is where he had the real fun! I set out eight cookies (we like Newman O’s) on a diagram and it was Travis’s job to scrape the right amount of frosting off each to form the eight phases.

Face of Moon (7)

Needless to say, there was much nibbling along with the scraping!

Face of Moon (9)

I had to help him with some of the trickier ones (gibbous, crescents), but he was a pro at half and new moon.

Face of Moon (8)

We finished off with a read of The Moon Book by Gail Gibbons.

Face of Moon (12)

Consider making craters in a clay moon if your kids want to continue the fun!

Face of Moon (11)