Rubber Band Activity

Rubber Band Activity (13)

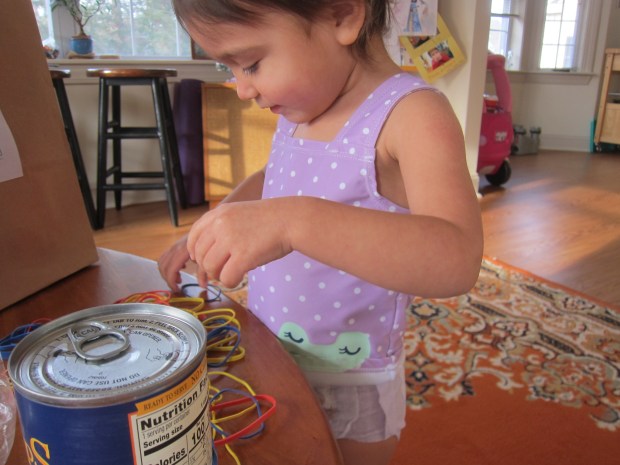
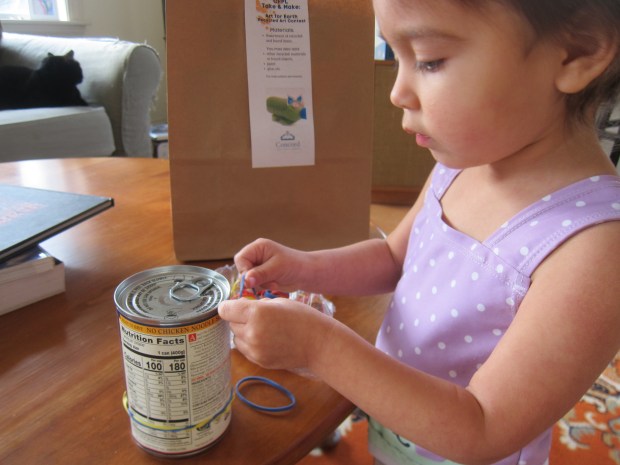
I spotted this gem of a hand-strengthening and boredom-busting activity over at Hands on As We Grow ages ago and finally decided to see if Veronika was up for it. The activity couldn’t be simpler; you just need lots of rubber bands and a can from the pantry and you’re ready to go.

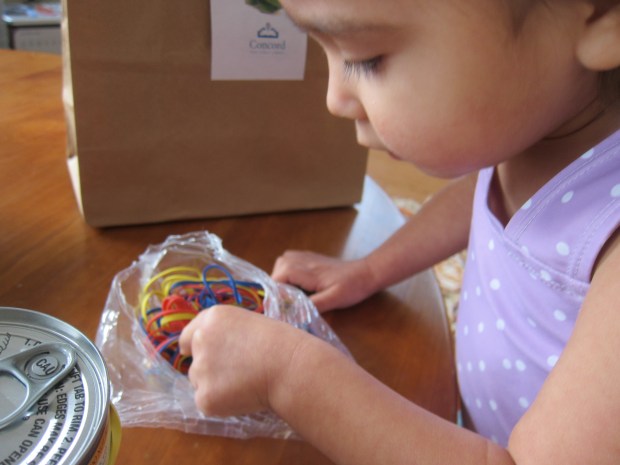
We have a rubber band ball that is an endless source of fascination for the kids, so Veronika was thrilled when I showed her how to peel a rubber band off of it.

Rubber Band Activity (3)

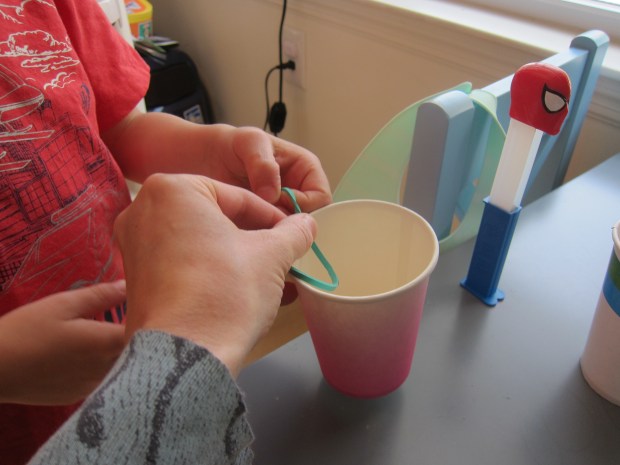
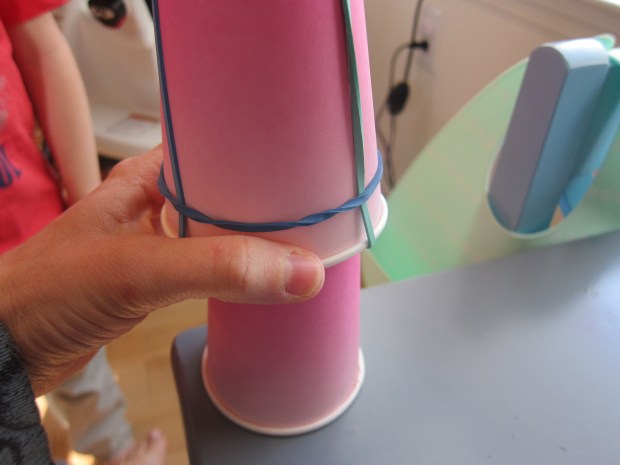
I challenged her to get one rubber band onto the can. At first she simply stretched it wide, but quickly realized it wasn’t going to get around the full circle of the cylinder like that.

Rubber Band Activity (1)

She’s still young, so she needed my help to loop the rubber band over one side of the can. But from there she could pull it across and over the other side.

Rubber Band Activity (5)

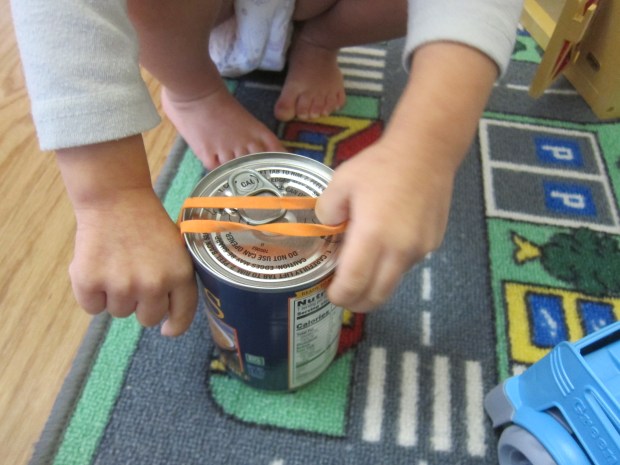
She had fun on our first round using only orange rubber bands, but enjoyed it even more when I pulled out a pack of multi-colored ones. She loved selecting which color to put on next (blue was the favorite today).

Rubber Band Activity (12)

Your kids might want to be really neat and careful as they go about this task; make patterns with different colors; or just pull on as many as they can in an allotted amount of time. Older kids could even make it into a race or a competition.

Rubber Band Activity (10)

Veronika was too young for all that, but when I challenged her to see how many rubber bands she could get on the can, she came up with her own method: Sprinkling them on top! Now that’s thinking outside the box.

Rubber Band Activity (16)

This is sure to be an activity we return to again and again as she gets older.

Rubber Band Activity (14)

Rubber Band Launchers, Two Ways

Spider Launcher (13).JPG

Ok, we’ve launched marshmallows from cups and rockets from straws, so now it was time for Travis to play around with how he could launch things with rubber bands!

First up, thanks to a renewed fascination with bugs, was a Spider Launcher. This project was a little tricky; we had to redo it twice before we got the elastics right!

First, cover a sturdy cardboard tube (such as an empty roll of packing tape) with construction paper.

Spider Launcher (1)

We chose orange because, well, spiders and Halloween and all that, but any color would work. Glue or tape the paper on.

Glue 4 lollipop sticks around the tube so that they form a square.

Spider Launcher (2)

Leave these to dry for at least 2 hours, so your structure is sturdy. Full disclosure: we did have one pop off, and I duct-taped it back on.

To make your “web,” slip an elastic over all 4 posts. Loop it around each post, then push down to the bottom of the sticks.

Spider Launcher  (4).JPG

Slip a second elastic over the post. Completely lift the first one up and over the second elastic (so only your second elastic is now looped on the lollipop sticks, if that makes sense).

Spider Launcher (6)

Repeat with a third elastic, slipping it around the post, and then lifting the second elastic completely up and over it.

Repeat with a fourth elastic, slipping the third elastic completely up and over it. Confused yet? I hope the visual helps!

Spider Launcher (12)

Now place a toy spider in the middle. Pull back on the tautest, center of your web. Snap the elastic back, and spider flies!

Spider Launcher (10)

This was tricky for my four year old, but he could do it with help for bigger launches, and by himself for shorter launches.

Spider Launcher (9)

Even better, his bug toys now had a web to call home, so overall it was a success!

Since this turned out to be so complicated, I also asked him if he wanted to make a much simpler rubber band launcher, using just with a couple of elastics and a cup. Here, then, is the Rubber Band-Powered Cup Launcher.

Rubber Band Rocket (5)

Put two rubber bands on a sturdy paper cup so they form a cross.

Rubber Band Rocket (1)

(Note: It may help to stretch your rubber bands out a few times to loosen them, or your paper cups will crumple).

Rubber Band Rocket (2)

Place a third rubber band around the cup to hold the other two in place.

Rubber Band Rocket (3)

Press this cup down over a second paper cup. The elastics will go taut, and when you release… Boing!

Rubber Band Rocket (4)

This one is simple enough to do with a crowd of kids, and would be a fun one outdoors, perhaps for any upcoming Memorial Day barbecues!

Rubber Band Splatter Painting

Rubber Band (8)

Following on the heels of outdoor painting and yoga, here’s still-more fresh air fun. Technically you could do this inside, but it’s so messy you’re really going to want to be out in the grass.

To set up, you’ll need an old picture frame (or one that you don’t mind getting a little paint-splattered), ideally about 8×10. Remove the backing and glass, and attach large rubber bands at intervals around the frame.

Rubber Band (1)

Set up newspaper under your work surface, and then place construction paper (or other heavy paper) underneath the frame. Travis wanted black as the background – why not!

I set him up with a tray of paints, and showed him how to paint just along the rubber bands (drips are okay, of course). Travis liked the tricky wobbly nature of this.

Rubber Band (3)

Imagine his surprise when I showed him the next step: Snapping back a rubber band and letting the paint on it splatter onto the paper below. Boing!

Rubber Band (5)

Because the black wasn’t the best background, I suggested lighter colors like pink and yellow for our next few rounds.

Rubber Band (7)

The result is very neat, splattered paintings. Don’t forget the art smock for this one!