Mirror Pattern Gloves

Mirror Socks (10).jpg

This project is a fun intro-to-sewing for little kids, and also helped drive home some recent lessons on mirror imagery that Travis and I have talked about lately.

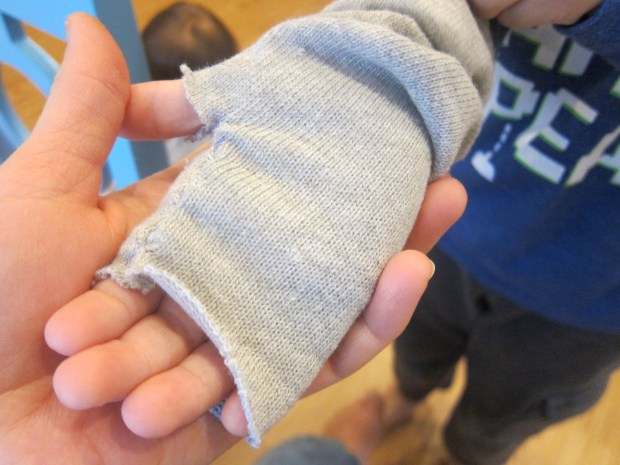
To make the gloves, you’ll need a long pair of socks. I had Travis put his forearms at the ends, and traced a wide L shape where his fingers and thumb would go.

Mirror Socks (1)

Cut off and discard the sock above this L.

Mirror Socks (2)

Fold the sock inside-out and do a basic running stitch (in, out, in, out) to attach the two sides, up to where the thumb is. Honestly, I am no seamstress: here is my hack job of a running stitch.

Mirror Socks (4)

But Travis loved helping thread a plastic needle and make a few practice threading motions.

Mirror Socks (3)

Put the sock right-side out again and try it on for size! Repeat with the other sock to make your second glove.

Mirror Socks (5)

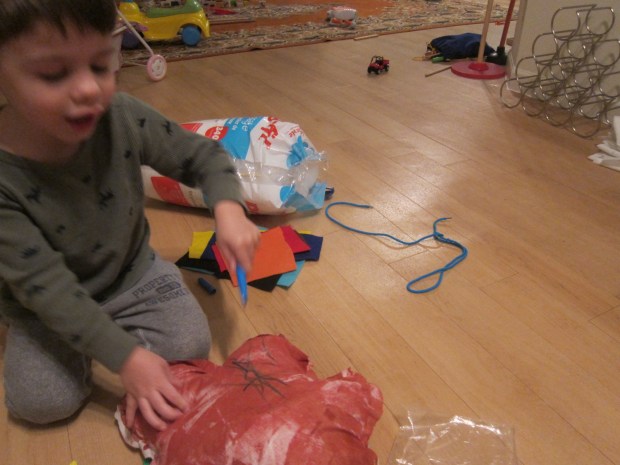
We wanted to decorate our “mirror image” gloves with felt stickers but the only ones I had were Christmas-themed! So perhaps he can pull these out to wear around the holidays.

Mirror Socks (6)

As he placed each sticker, he thought hard about what would make a mirror image. Should the blue sticker go to the left or to the right?

Mirror Socks (7)

He quickly got the hang of it. And loved wearing the fingerless gloves once the project was complete!

Mirror Socks (8)

Change the Scenery

Change Scenery (5)

We’ve only decorated Veronika’s nursery with little touches here and there, and I wanted to add a nice change of scenery for her. There are two ways to make this cute bunting – the true way if you can really sew, or my super-quick hack if you have no skill with a needle and thread!

First, I traced a triangle onto paper, and cut out. Use the triangle to cut shapes from different patterned fabrics (available at a craft store).

Change Scenery (1)

What a pretty assortment!

Change Scenery (2)

Lay down a long piece of colored duct tape, and arrange the fabric triangles along the tape, evenly spaced. Fold the tape down to secure them in place, then hang on your baby’s wall or in the nursery windows.

Change Scenery (3)

If you are more skilled – and own a sewing machine! – here are more detailed instructions. Safety pin the paper template onto the fabric, and cut two triangles for each desired pattern. Pin the pieces together inside-out, then use a sewing machine to attach on the long sides. Turn the flags the right way around and trim with pinking shears.

Insert the sewn flags into bias tape. Pin the flags to the tape at 2-inch intervals, and sew together. I’d love to see the results if you do this correctly, so please share in the comments!

Change Scenery (6)


Classroom or Naptime Keepsake

Keepsake (12)

A stuffed friend can make all the difference if your child feels anxious about school, or needs an extra snuggle at naptime. And when your child has a hand in making that stuffed friend, things are even better!

I am no sewer, so this craft was entirely new territory for me, requiring a sheet of cotton canvas from the craft store. First I asked Travis what shape he’d like his comforting keepsakes to be. The first was a small car, which we made small enough to fit in his school backpack. Then we traced a larger free-form shape for naptime, sort of like a cloud, but mostly abstract.

Keepsake (1)

Cut out your designs (you’ll need two of each, to be the front and back of the stuffie), and paint with fabric paint. This was a fun chance to use our paint roller! Let dry completely.

Keepsake (3)

You can decorate the keepsakes further before sewing and stuffing. Try gluing on pieces of felt, or coloring with fabric markers. Travis opted for the latter.

Keepsake (7)

Next it was time to stuff and sew! This meant a special trip to visit grandma and her sewing machine – Travis was ecstatic seeing the machine in action.

Keepsake (10)

At home, we finished the keepsakes with stuffing; Travis loved helping poke it into the furthest corners.

Keepsake (5)

He was so proud to set his naptime keepsake on his bed.

Keepsake (8)

Lastly we tucked the small car stuffie in his backpack, just in case he needs to give it a special squeeze at school.

Keepsake (11)