Leaf Color Experiment

leaf-color-4

Our autumnal fun continues! Although the science behind this experiment is advanced for toddlers, even little kids will delight in seeing how the water changes colors. For preschoolers and older kids, you can go into more detail about chlorophyll and why leaves change color in the fall.

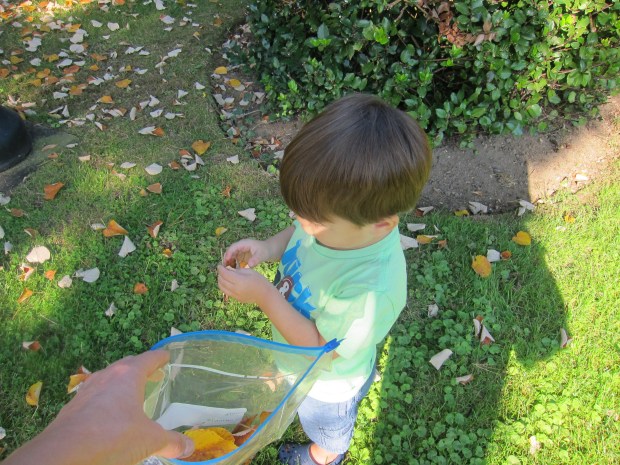
As with our leaf glitter project, half the beauty of this activity is going out to collect your leaves. Get outside and have fun!

leaf-color-1

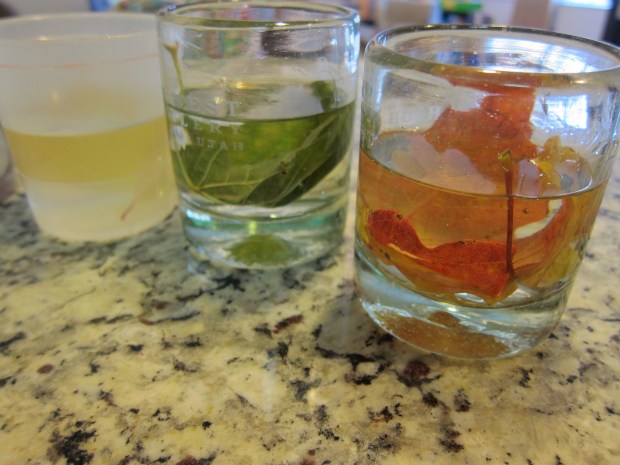
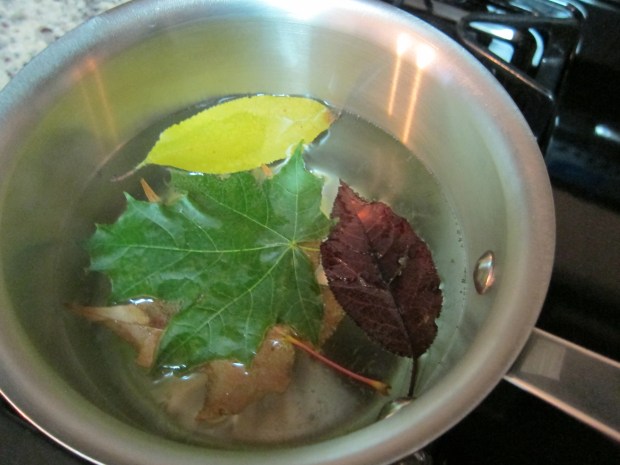
Choose a variety of autumn-hued leaves, and return home to cook in boiling water for 5 minutes. Carefully use tongs (adults only!) to transfer the leaves to clear glasses or test tubes filled with rubbing alcohol.

leaf-color-3

Let sit for at least an hour, and you’ll see the alcohol “magically” change color to match each leaf. The results will only get better after time – at the 8 hour mark, Travis was really excited to note the changes. Leave over night for the most vibrant result.

leaf-color-6

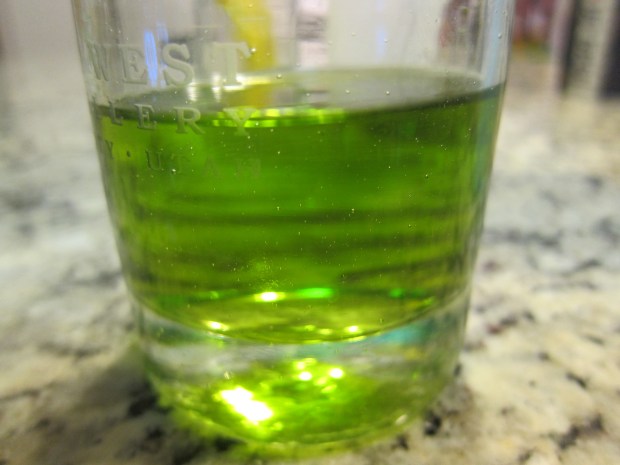
Interestingly, our green performed the best, and our most vibrant fall orange leaf barely tinted the liquid. Even adults can be surprised by experiments!

Pumpkin Peepers

pumpkin-peepers-2

It wouldn’t be Halloween without pumpkins of course, but toddlers are too young for carving… So what to do?

This cute idea, adapted from Parents magazine, couldn’t be easier, and allows toddlers to make a silly face, no knife required.

pumpkin-peepers-1

Simply cut various-sized circles from craft foam, and use glue dots or sticky Velcro dots to attach the eyes and a pupil to each pumpkin. We used goofy colors, but you could also stick with a more traditional black and white palate.

To finish the faces, simply use a sharpie for noses and mouths.

Leaf Glitter

leaf-glitter-3

Turn autumn leaves into a masterpiece with this simple but delightful project!

Half the fun, of course, was just heading outside to select our leaves. With a warm and dry fall so far, the color wasn’t as vibrant as I hoped, but I set Travis the task of finding leaves in all the possible colors – greens, reds, oranges, yellows, and browns – and we came away with a better collection than I expected. Travis loved the adventure in the park!

leaf-glitter-4

We let the leaves dry at home for a couple of days, and then it was time to turn them into “glitter”! What toddler can resist ripping leaves into tiny pieces?

leaf-glitter-5

Exercise those little hand muscles and let your child squeeze glue all over a piece of construction paper. You can sprinkle on the leaf glitter almost like confetti, pressing down to adhere.

leaf-glitter-2

We shook our creation off a few times to figure out which leaves weren’t stuck yet, and then added more glue as needed.


Autumn Painting

apple-prints-4

Prints are a great way to keep painting projects fresh and different for toddlers. At any time of year, items around the house (like toilet paper tubes and Duplo blocks!) make for fun print painting. Two very autumnal items lend themselves perfectly to this idea.

First, Travis and I tried apple prints. Cut an apple in half and remove the seeds, lightly drying the inside of the apple with a paper towel. This is also a great way to take about the fruit with your toddler, since the inside looks so different from the outside!

apple-prints-1

Dip the cut apple halves in paint and press onto paper for a neat, almost heart-shaped effect.

apple-prints-3

Next we tried corn rolling, using ears of beautiful dried corn from the farmers’ market. Travis loved the corn, carrying it all around the house, so I was surprised that when the time came to paint, he wasn’t interested.

corn-rolling-2

Aside from one brief roll, he had a very toddler moment wanting to dip his whole hand into the blue paint. So… you win some you lose some! On the other hand, he loved looking at the example I finished, proudly telling anyone who saw it that we made it with corn.

corn-rolling-4

What other fall items have you made prints with? Please share in the comments!

No-Bake Pumpkin Cookies

pumpkin-cookies-3

October is the perfect time to make this no-bake treat, whether you use canned pumpkin or mashed fresh sugar pumpkin. Because there’s no oven involved, even toddlers can put the whole recipe together! Older kids can help with the measuring, too.

Ingredients:

  • 1 cup quick oats
  • 1/4 cup sugar
  • 1/4 cup raisins
  • 1/2 teaspoon ground cinnamon
  • 1/2 teaspoon ground ginger
  • 1/2 cup canned pumpkin
  • 1 teaspoon vanilla extract
  1. In a bowl, combine the oats, sugar, raisins, cinnamon, and ginger.
  2. Add the pumpkin and vanilla, stirring until the mixture is moist.
  3. Using your hands, divide the batter into 15 to 20 portions, rolling each into a small ball.
  4. You can transfer to the fridge to chill for a few hours, or eat right away if the kids can’t wait!

pumpkin-cookies-2

More Spider Fun!

paper-plate-spider-3

Between spider lanterns and spider rocks, we’ve been having fun with all manner of creepy-crawly arachnids leading up to Halloween. Today we not only made a new spider, but gave him a web to call home!

For the spider, invite your child to color on two paper plates with crayons however they like. Preschoolers can draw their own spider face, but I helped by drawing a spider on one plate and letting Travis have free reign on the other.

paper-plate-spider-1

Punch a hole in the center of one plate, and thread through a knotted piece of string. You’ll be able either to hang your creation, or to jump it about like a jumping spider once complete!

We then glued 8 strips of black construction paper onto the inside rim of one plate before gluing the two plates together.

paper-plate-spider-2

Let dry completely before the play begins.


Paper-Plate Spider (4).JPG

I had leftover cooked and cooled spaghetti on hand, so for Itsy Bitsy’s web, we got nice and goopy again!


Fill a shallow plate with glue, and show your child how to dip the spaghetti strands in the glue before arranging in a “web” on waxed paper.

spider-web-2

Travis couldn’t wait to get his hands on the spaghetti, and very quickly decided they also looked like worms. I finished our web while he had a blast stirring the worms around and making them “wiggle” a nice reminder that toddlers are very good at creating their own games no matter what materials we present to them!

spider-web-3

Let the web dry completely, then peel off the wax paper. Because the web is very delicate, I found it was best to leave some of the wax paper behind as backing.

img_0009

Don’t forget to add one of your spider friends to live inside!

img_0032


Spaghetti Monsters

spaghetti-monster-7

If ever there was a time for oopy goopy fun, Halloween is it! Travis is too young for classic Halloween gags like a bowlful of spaghetti “brains,” but it’s the perfect time to play with cooked spaghetti and make friendly “monsters” instead.

Present your child with a bowl of cooked and cooled spaghetti. Demonstrate how to take a handful of spaghetti, dip it in a shallow plate or pie tin filled with tempera paint, and then smear onto construction paper.

spaghetti-monster-2

I thought Travis might be hesitant to get so messy, but he dove right in! He had so much fun dipping the spaghetti in the paint that I had to remind him to transfer over to the paper on occasion.

spaghetti-monster-4

When the paint is dry, finish your friendly “monsters” with googly eyes and any other scraps you have on hand, like ribbon, yarn, or fabric.

spaghetti-monster-6

The silly looking monsters are a nice way to decorate with non-threatening creatures around the house, making sure the holiday isn’t too scary for little ones.

spaghetti-monster-8

Harvest Bowling


Harvest Bowling (1).JPG

Gourds aren’t just for decoration… Help develop your toddler’s coordination with this adorable take on bowling!

Set up a variety of gourds at the end of a masking tape “alley.” Look for ones that are shaped similar to bowling pins, wide on the bottom and tapering on top.

harvest-bowling-2

Use a small sugar pumpkin as the bowling ball. Adults can give the pumpkin a roll all the way from the end of the alley.

harvest-bowling-3

Kids will likely have to roll from very close, but that won’t dampen their excitement when all the “pins” fall over.

harvest-bowling-4

Strike!

Tissue Paper Ghosts

Tissue Ghosts (6).JPG

Probably the simplest and oldest Halloween craft in the books, this one still delights adults and children alike. You can make just a few ghosts, but I think it’s better to make a whole bunch of them and hang all around the house (or yard if you have one).

Show your toddler how to fold a tissue paper over a cotton ball, and then secure the tissue just under the cotton ball with a piece of masking tape. If you’re going to hang the ghosts, make sure to stick a length of string or yarn under the tape as well. Travis helped with a couple, but then just loved playing with the materials involved while I prepared more.

tissue-ghosts-1

We had a big pile pretty soon!

tissue-ghosts-2

Decorate the faces with marker. For the best ghost-y mouth, show your toddler how to press a marker firmly into the tissue paper for a big spooky O.

tissue-ghosts-3

Travis liked fluttering the ghosts about by hand, and helping me hang them.

tissue-ghosts-4

I confess the resulting ghosts look a bit morbid, dangling from their necks, but heck, it IS Halloween…

tissue-ghosts-5

Spider Rocks

Spider Rocks (5).JPG

Following up on our spider lantern decorations, Travis helped me create a few more spider friends to populate our house for the Halloween season!

Find a few small, round rocks and paint in any color – we used blue and black for a dark Halloween feel, but neon bright colors might be fun too! Let dry overnight.

spider-rocks-1

Cut pipe cleaners in half. For the legs of each spider, wrap one pipe cleaner piece around the middle of three others, then bend the ends out to make the legs. This part was a bit complicated for Travis, but he loved watching me do it, and thought the legs made great “crickets” to jump around for a while.

spider-rocks-2

Glue one rock onto each set of pipe cleaner “legs” and let dry completely – I recommend lying them upside down.

spider-rocks-3

All you need to add are stickers or googly eyes for the cutest little spiders I’ve ever had in my house!

spider-rocks-4