Sock Matchup

Veronika is working on the concept of “matching” lately; specifically when presented with a variety of objects, can she find the two that match. This vocab word will make the most sense to your child only in context, so start with the most classic match (or dreaded mismatch!): Socks.

To make the task one step more advanced than classic laundry sorting, I put dot stickers on each of her socks with numbers written in permanent marker. Now she had pairs of socks numbered 1 through 8, and we needed to help each one find its match!

Sometimes during this task she focused on the number to make a match.

Sometimes, I could tell she was looking more at the color or pattern of the sock instead. But ultimately, she was able to find each match!

Coffee Shop Role Play

Veronika loves our daily jaunt out to get mommy’s coffee, so today she got to play barista with a coffee shop of her own! To start, I simply set her up with a toy coffee machine set we have, one of those great ways for kids to mimic the grown ups.

She could brew the beans, pour the coffee, and top it off with sugar and creamer for her patrons (a.k.a. stuffed animals).

Even better, though, is when you give kids a chance to play with the “real thing”. When I set out my coffee pot, the game immediately became more fun.

Now she needed a full coffee house set-up. We added menus, for which I designed the outside, but she helped decorate inside.

She could take “orders” before very seriously pouring from the percolator.

Overall, this was a great riff on tea party play, and kept her quite busy for a while!

Q-Tip Painting, 4 Ways

Whenever Veronika spots q-tips in the bathroom, she’s eager to play with them. So today we gave into that urge, and used the cotton swabs for arts & crafts instead! Below are four different methods that she and I tested out.

One: Negative Images

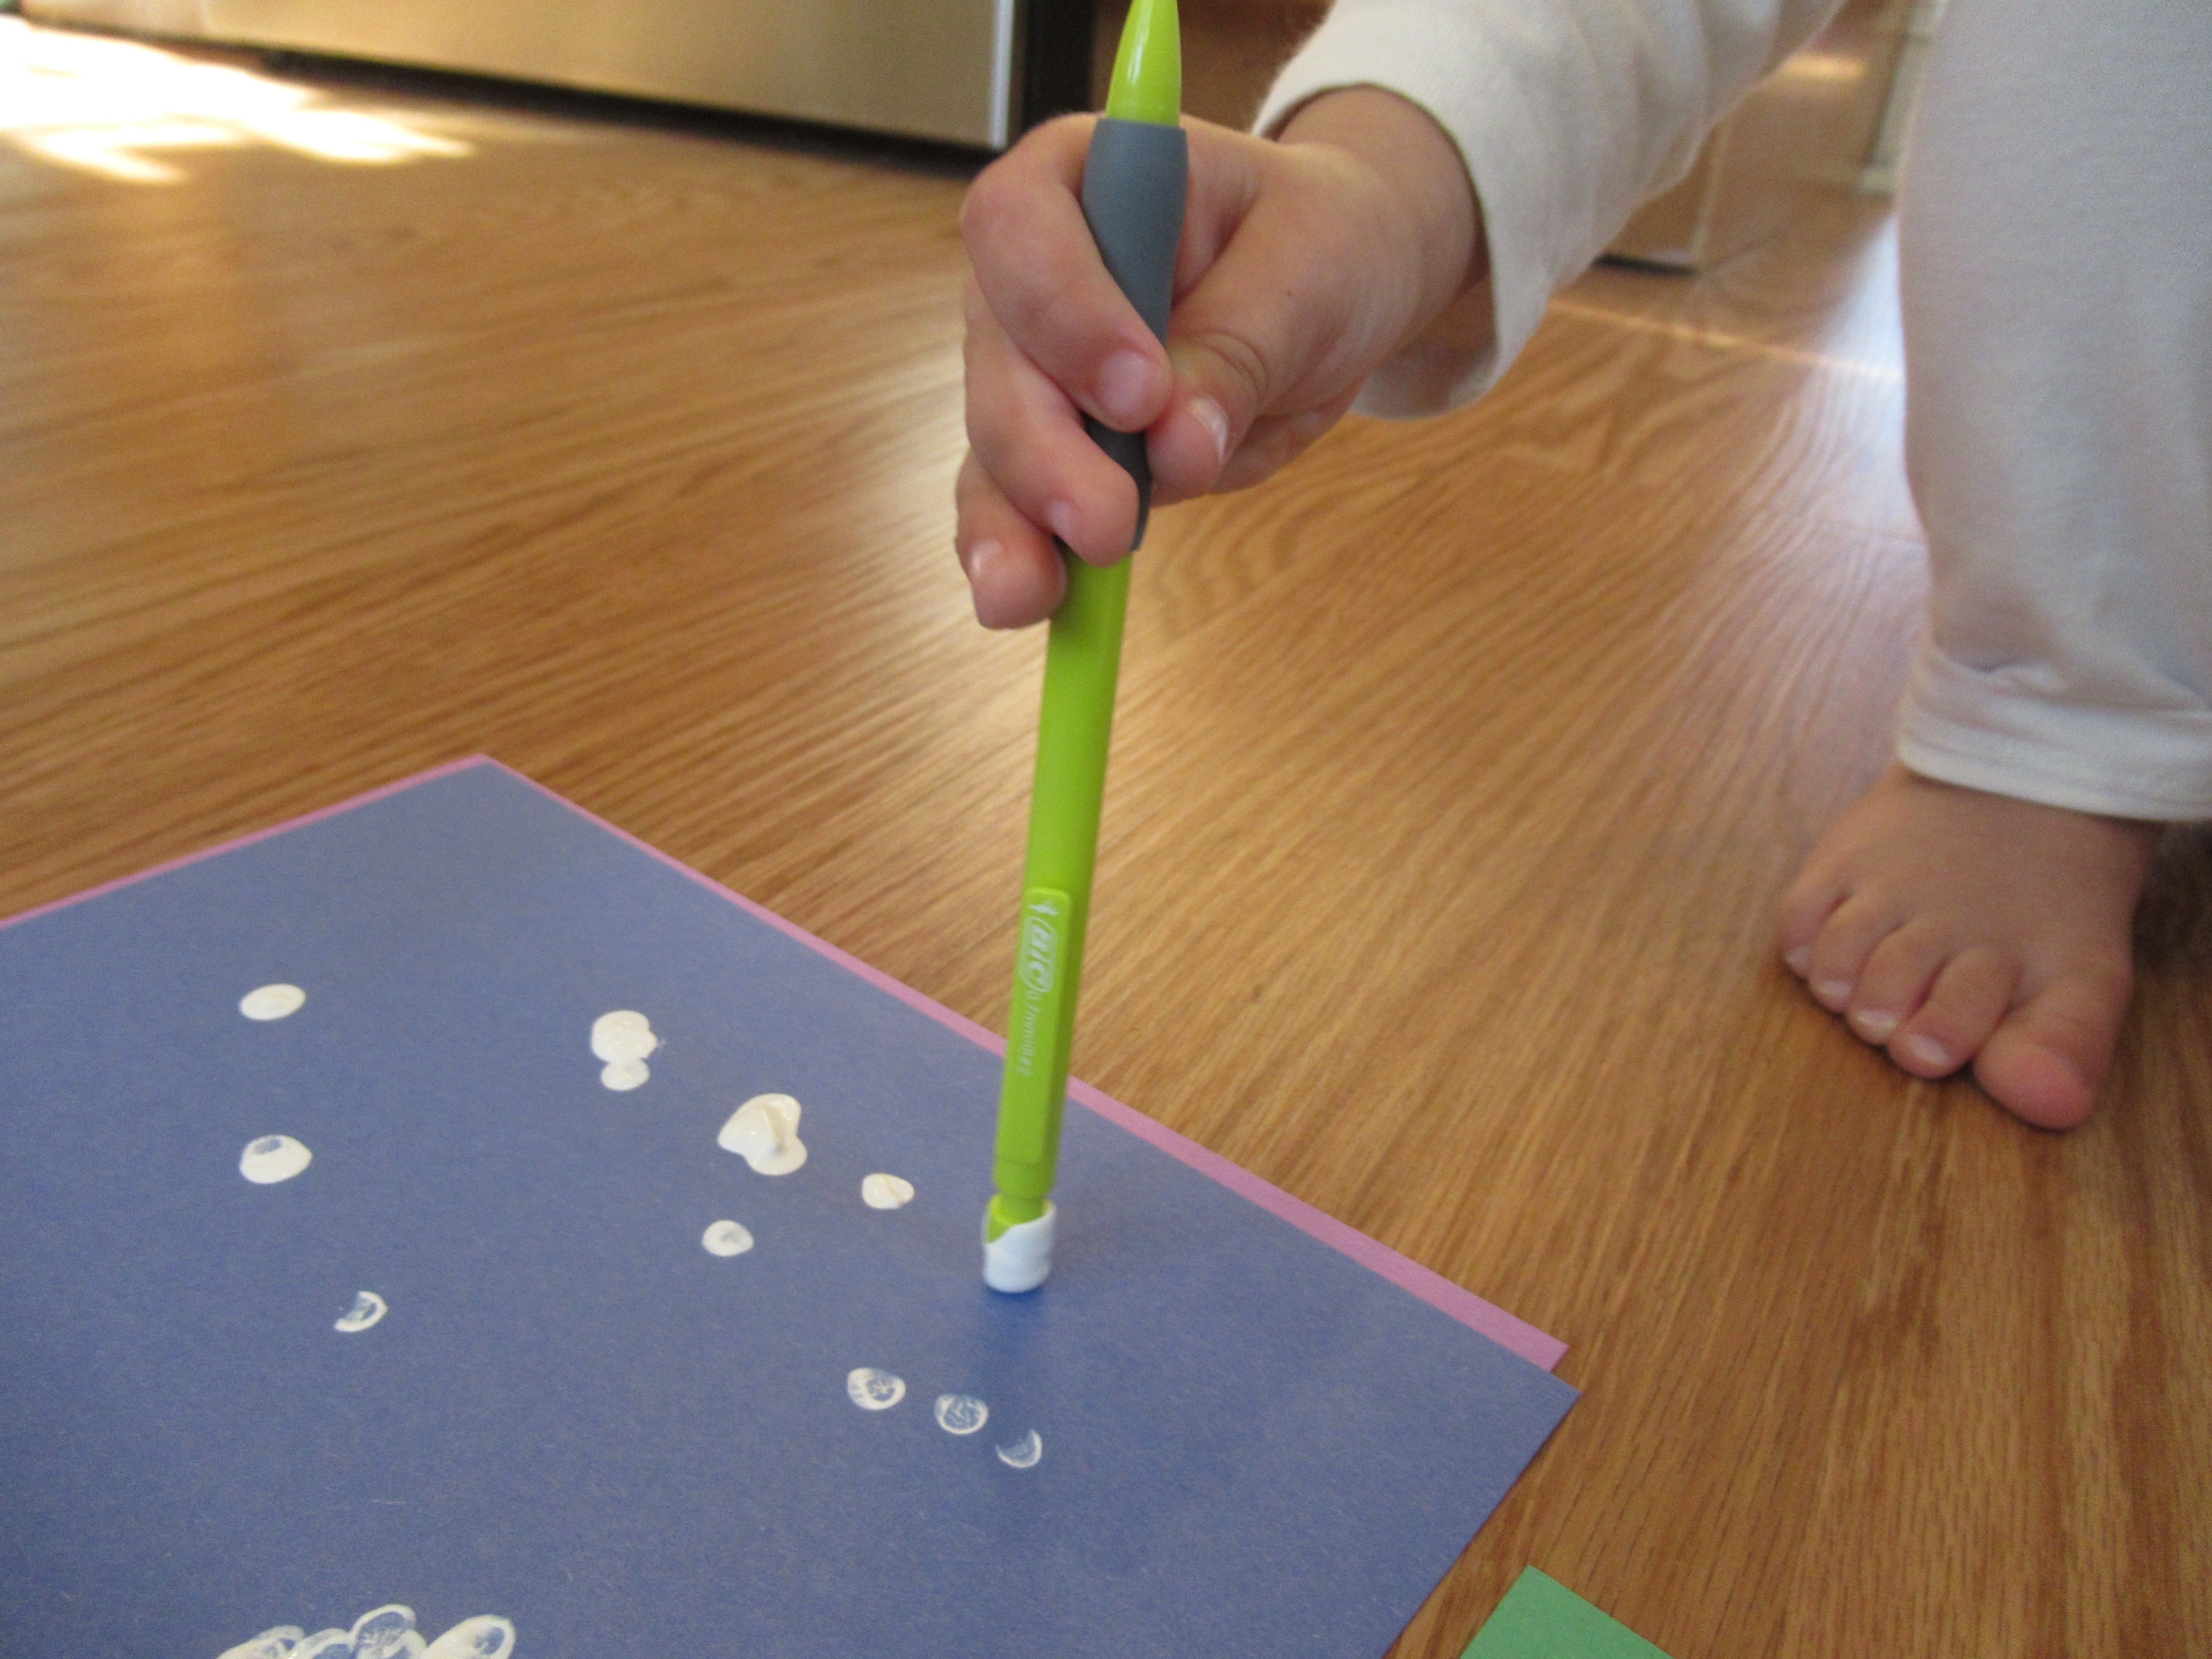
For the first craft, you can use any glass pie plate (or baking dish or loaf pan) as the “canvas”. I spread a little tempera paint thinly in the bottom, then handed Veronika a q-tip as her brush. Any lines that your child makes leave a negative image or etching behind.

The idea was a bit advanced for Veronika, but after she’d done some scribbling, she loved seeing the deliberate images I drew for her, like a sun or puppy.

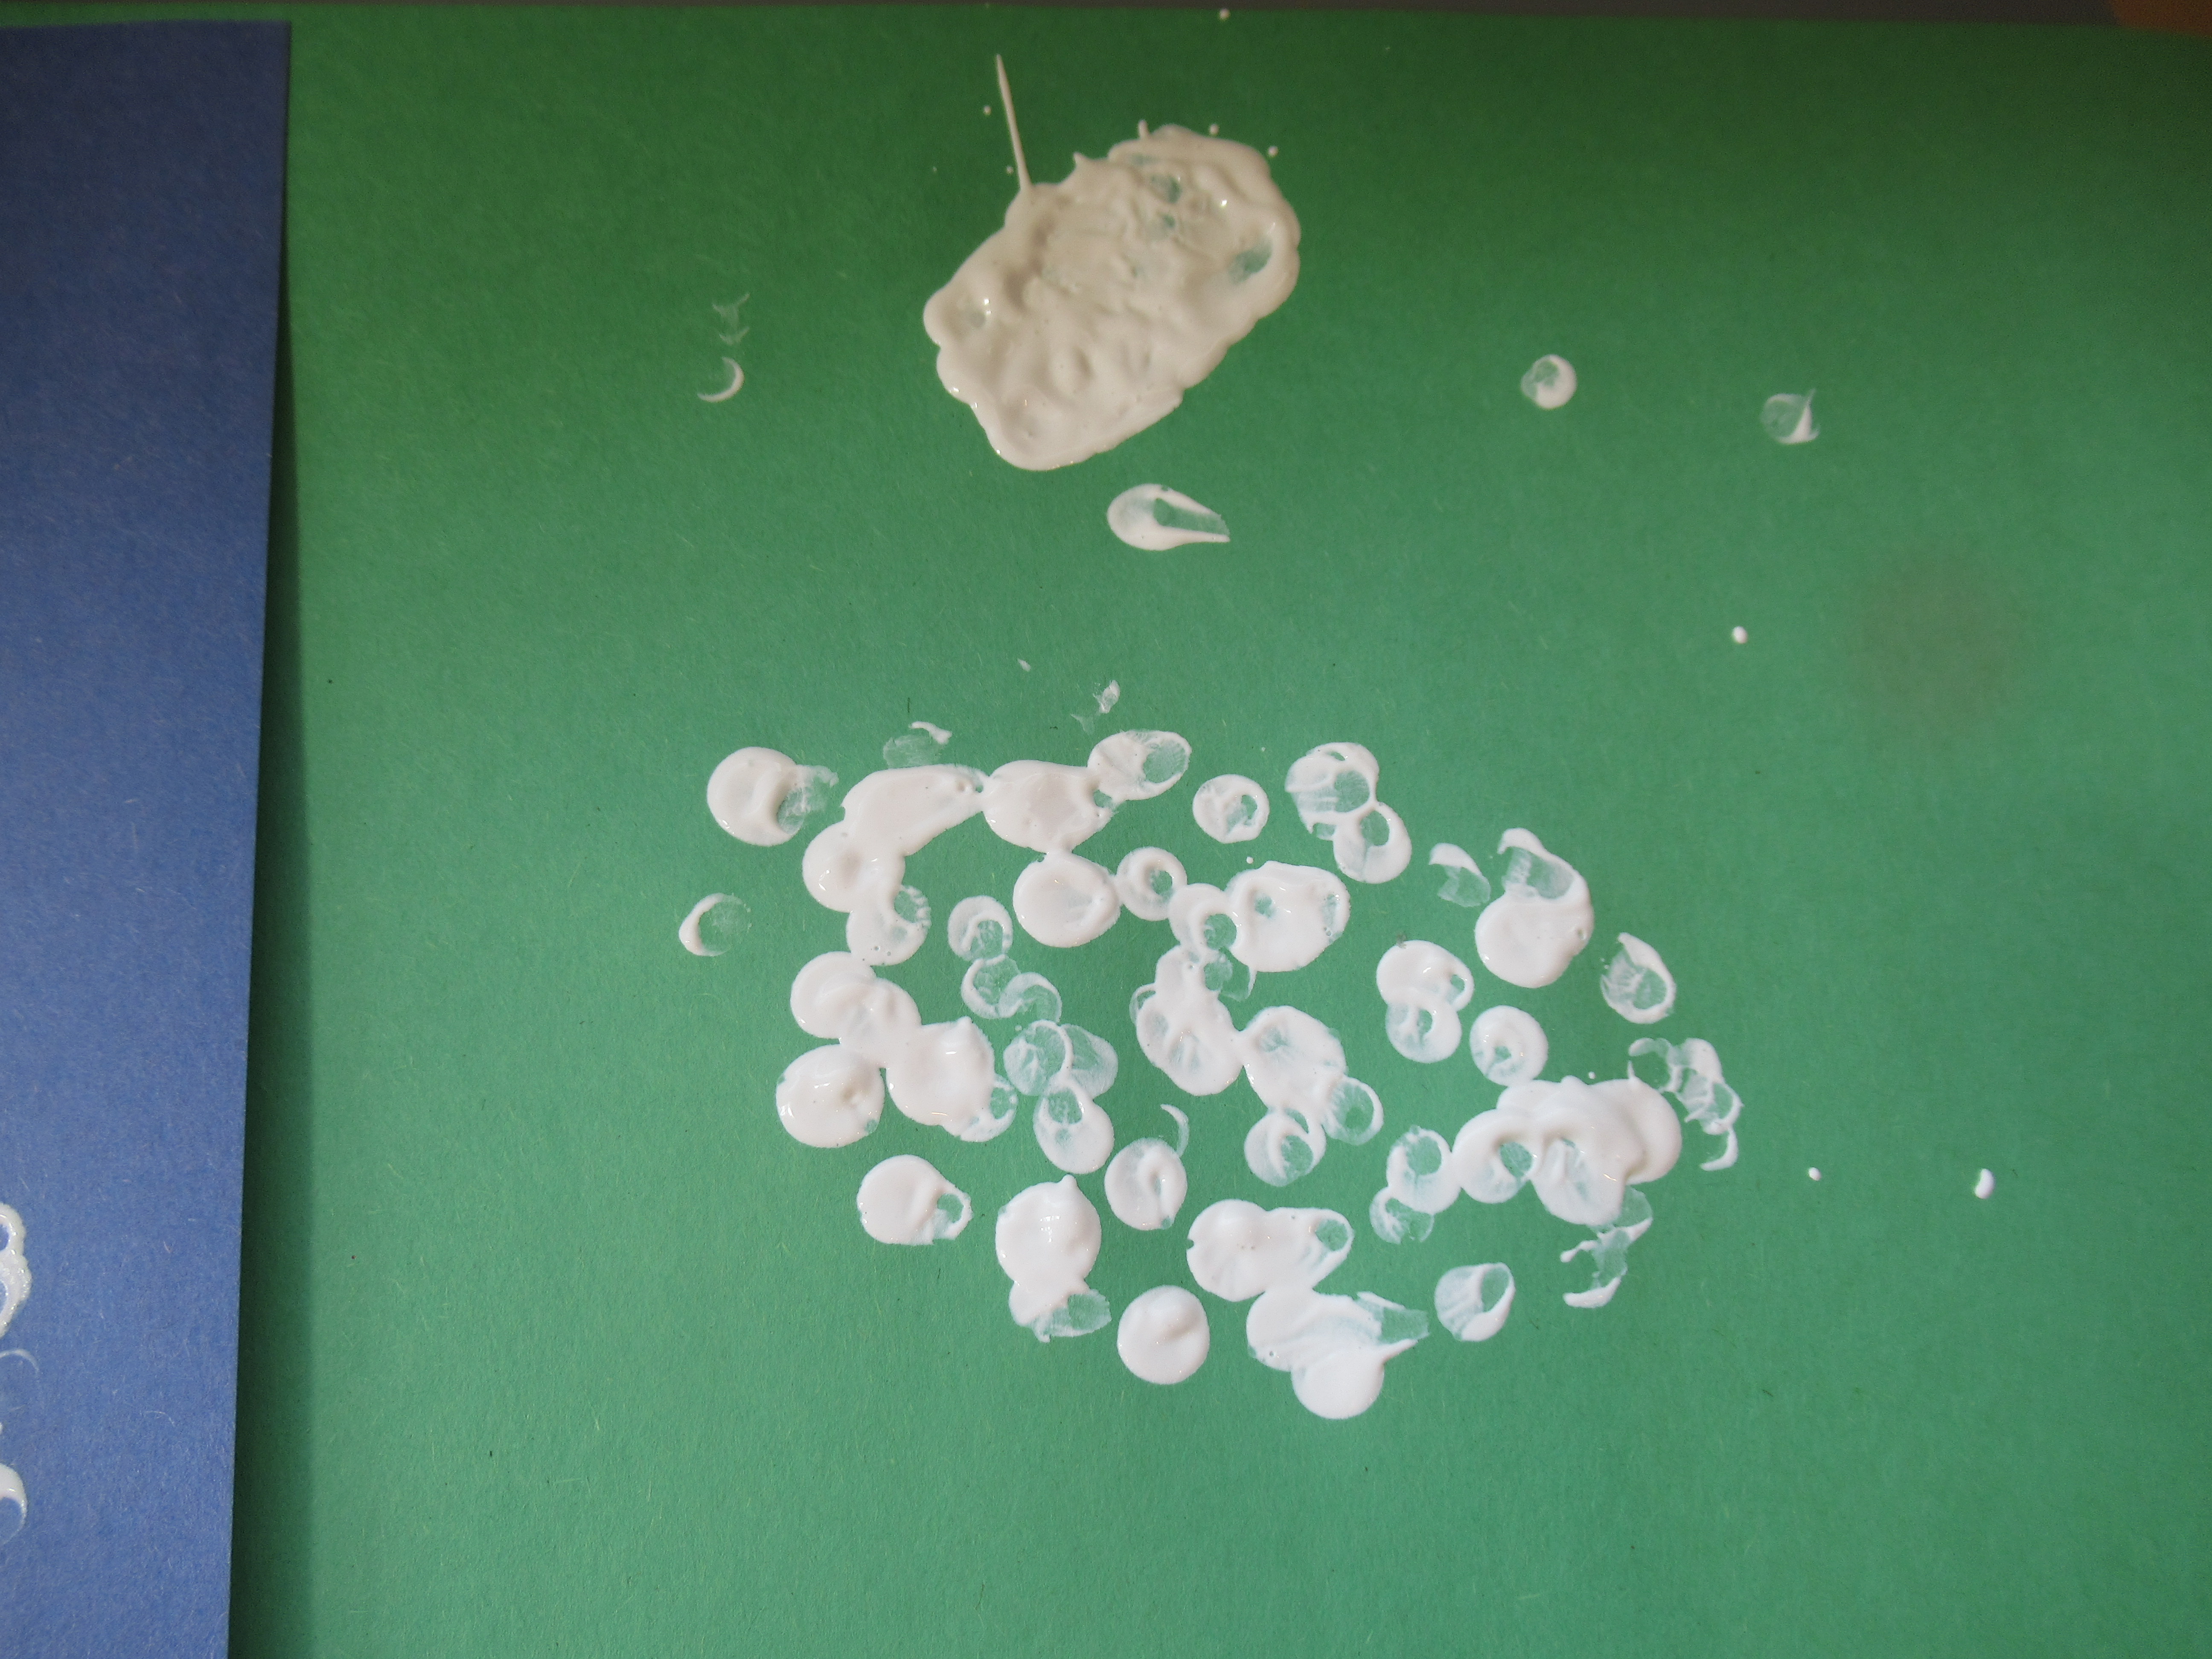
We even tried making a print of it by pressing down a piece of white paper, although it ended up looking more like abstract art.

Two: Color mixing

Cotton swabs are just right for mixing up colors, giving a chance to teach a little about primary and secondary colors! I poured a little of each primary color (red, yellow, and blue) onto a paper plate, and first showed them to Veronika as we named each.

One at a time, we mixed them! Our red and yellow made orange, yellow and blue made green, and blue and red made purple. Now we had a full palette for…

Three: Pointillism

The tip of a cotton swab is naturally suited for making dots (although Veronika practiced making a few swirls, too), which is a great introduction to the pointillist style of painting.

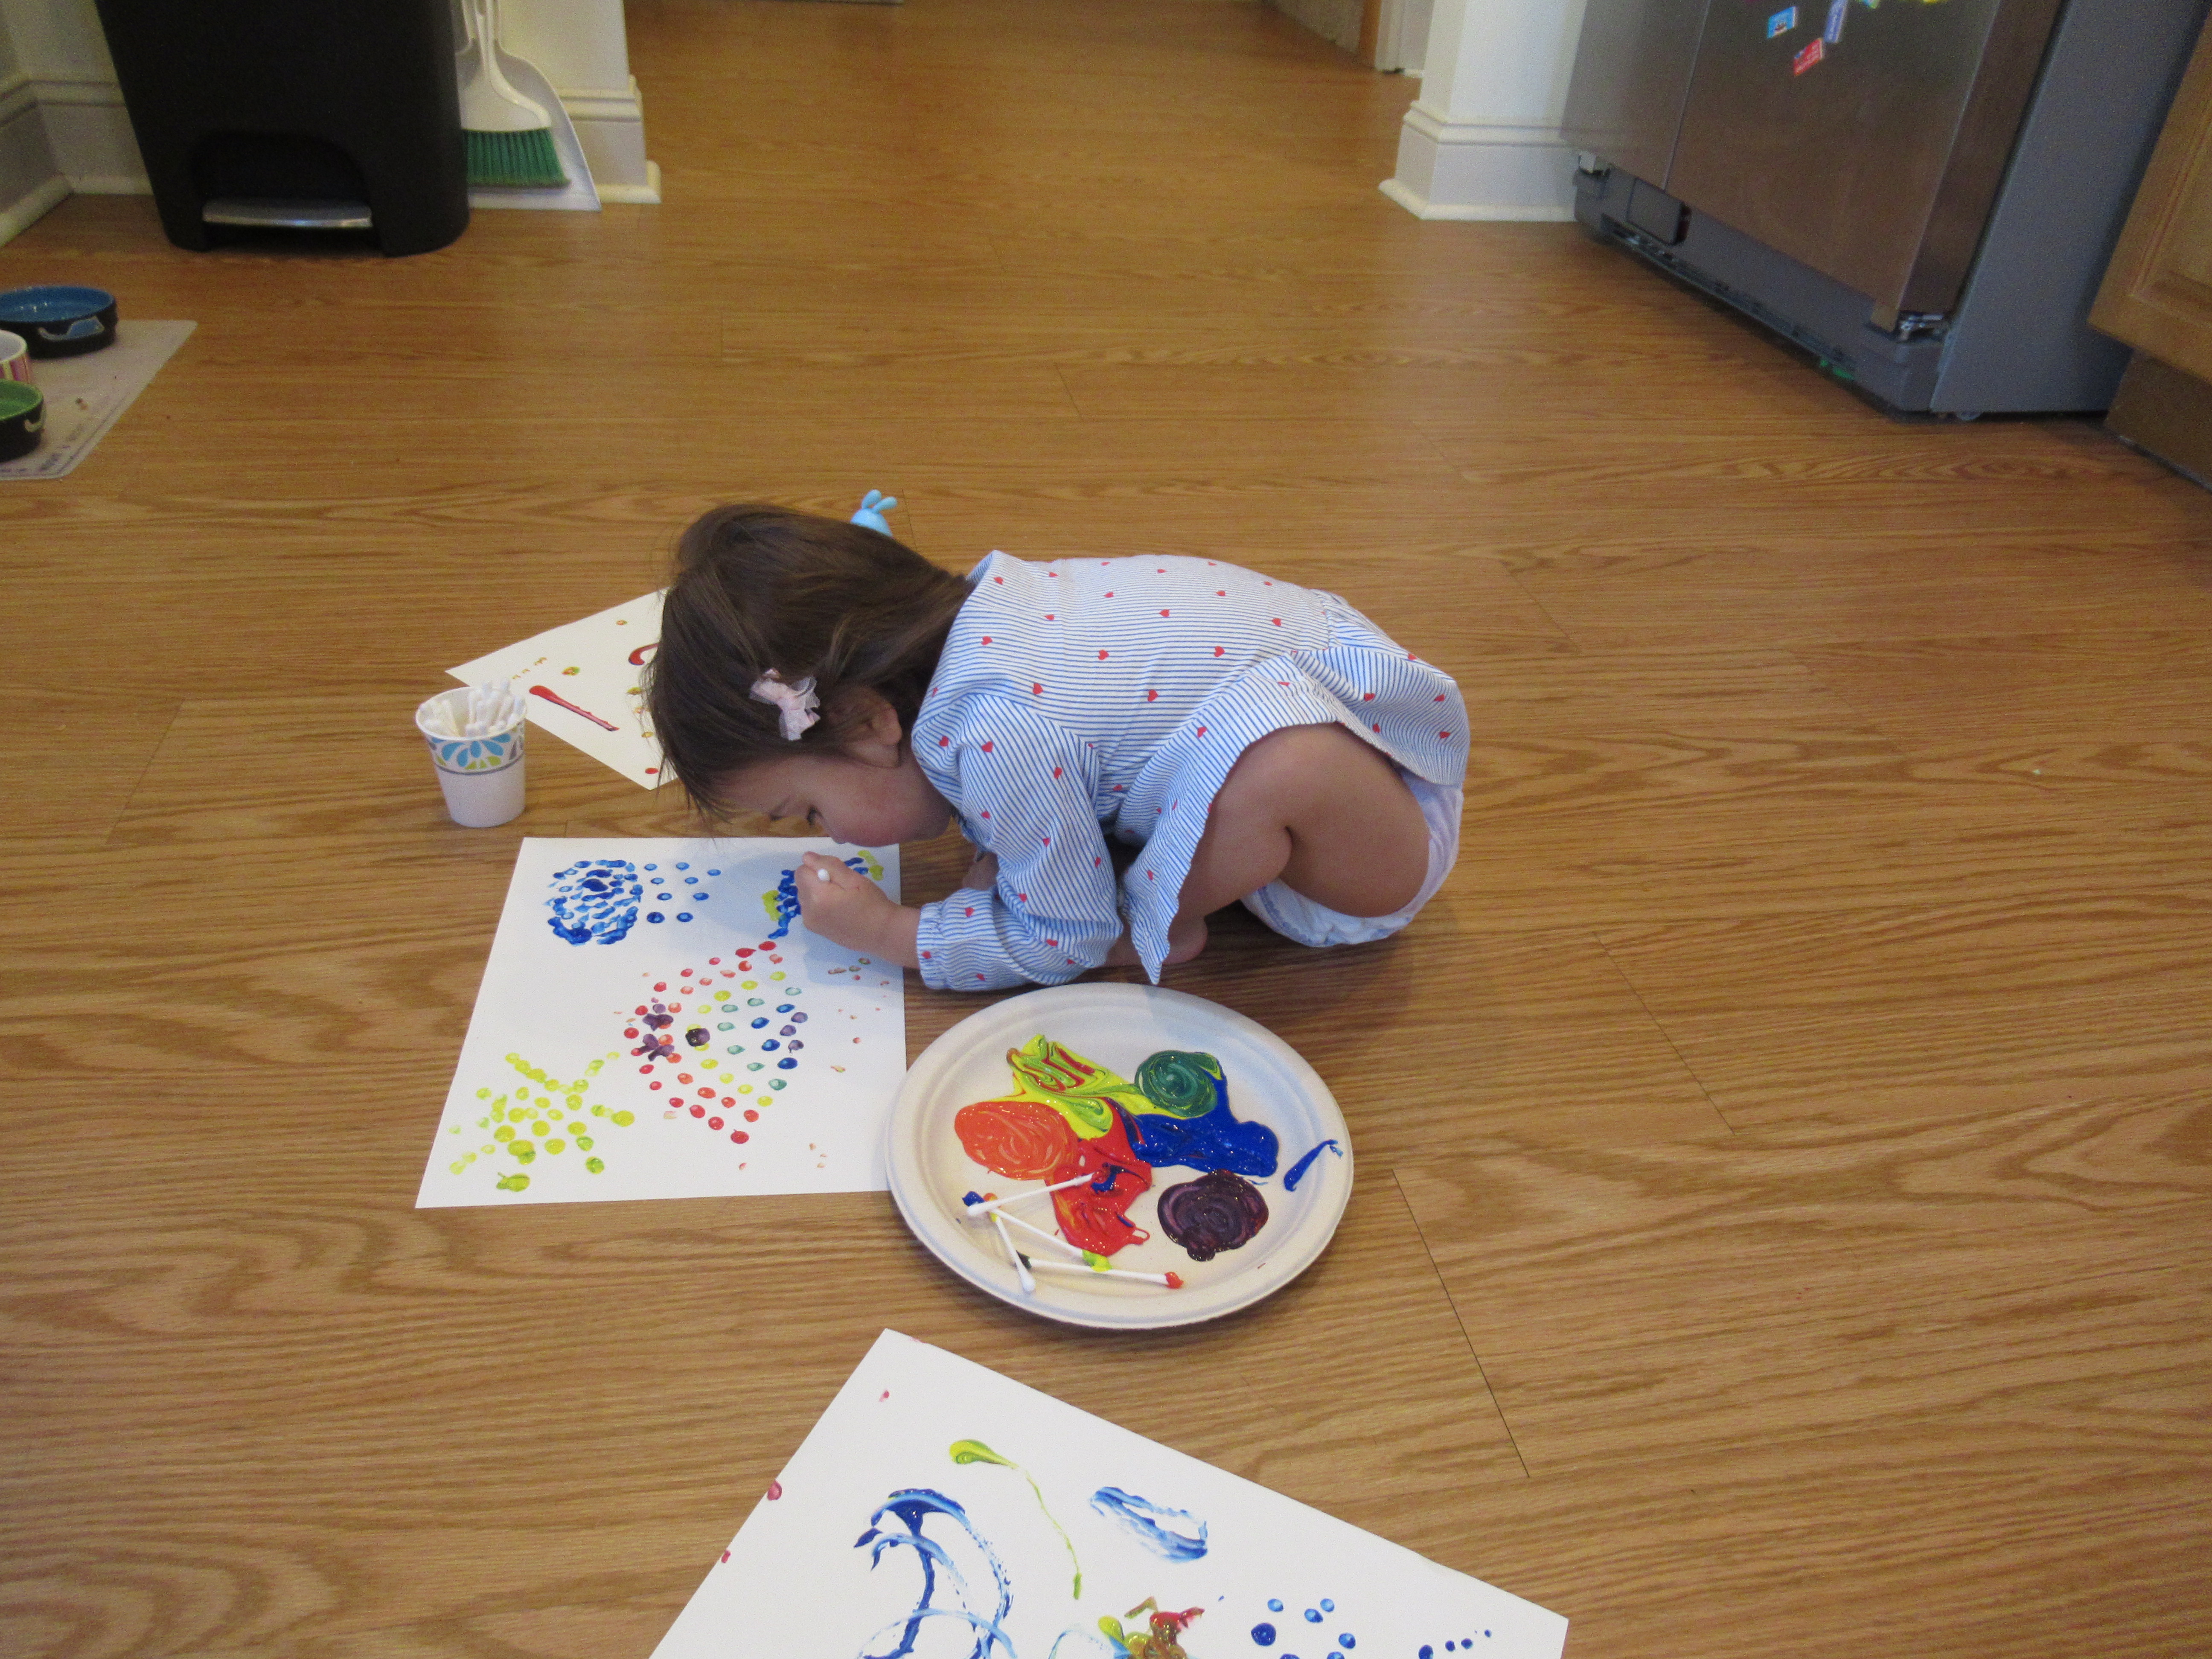
I dotted right alongside her, so pretty soon we had a pointillism rainbow and sun and clouds, with a little blue puppy beneath. Veronika loved adding to the picture I started, making very emphatic dots. My little artist at work!
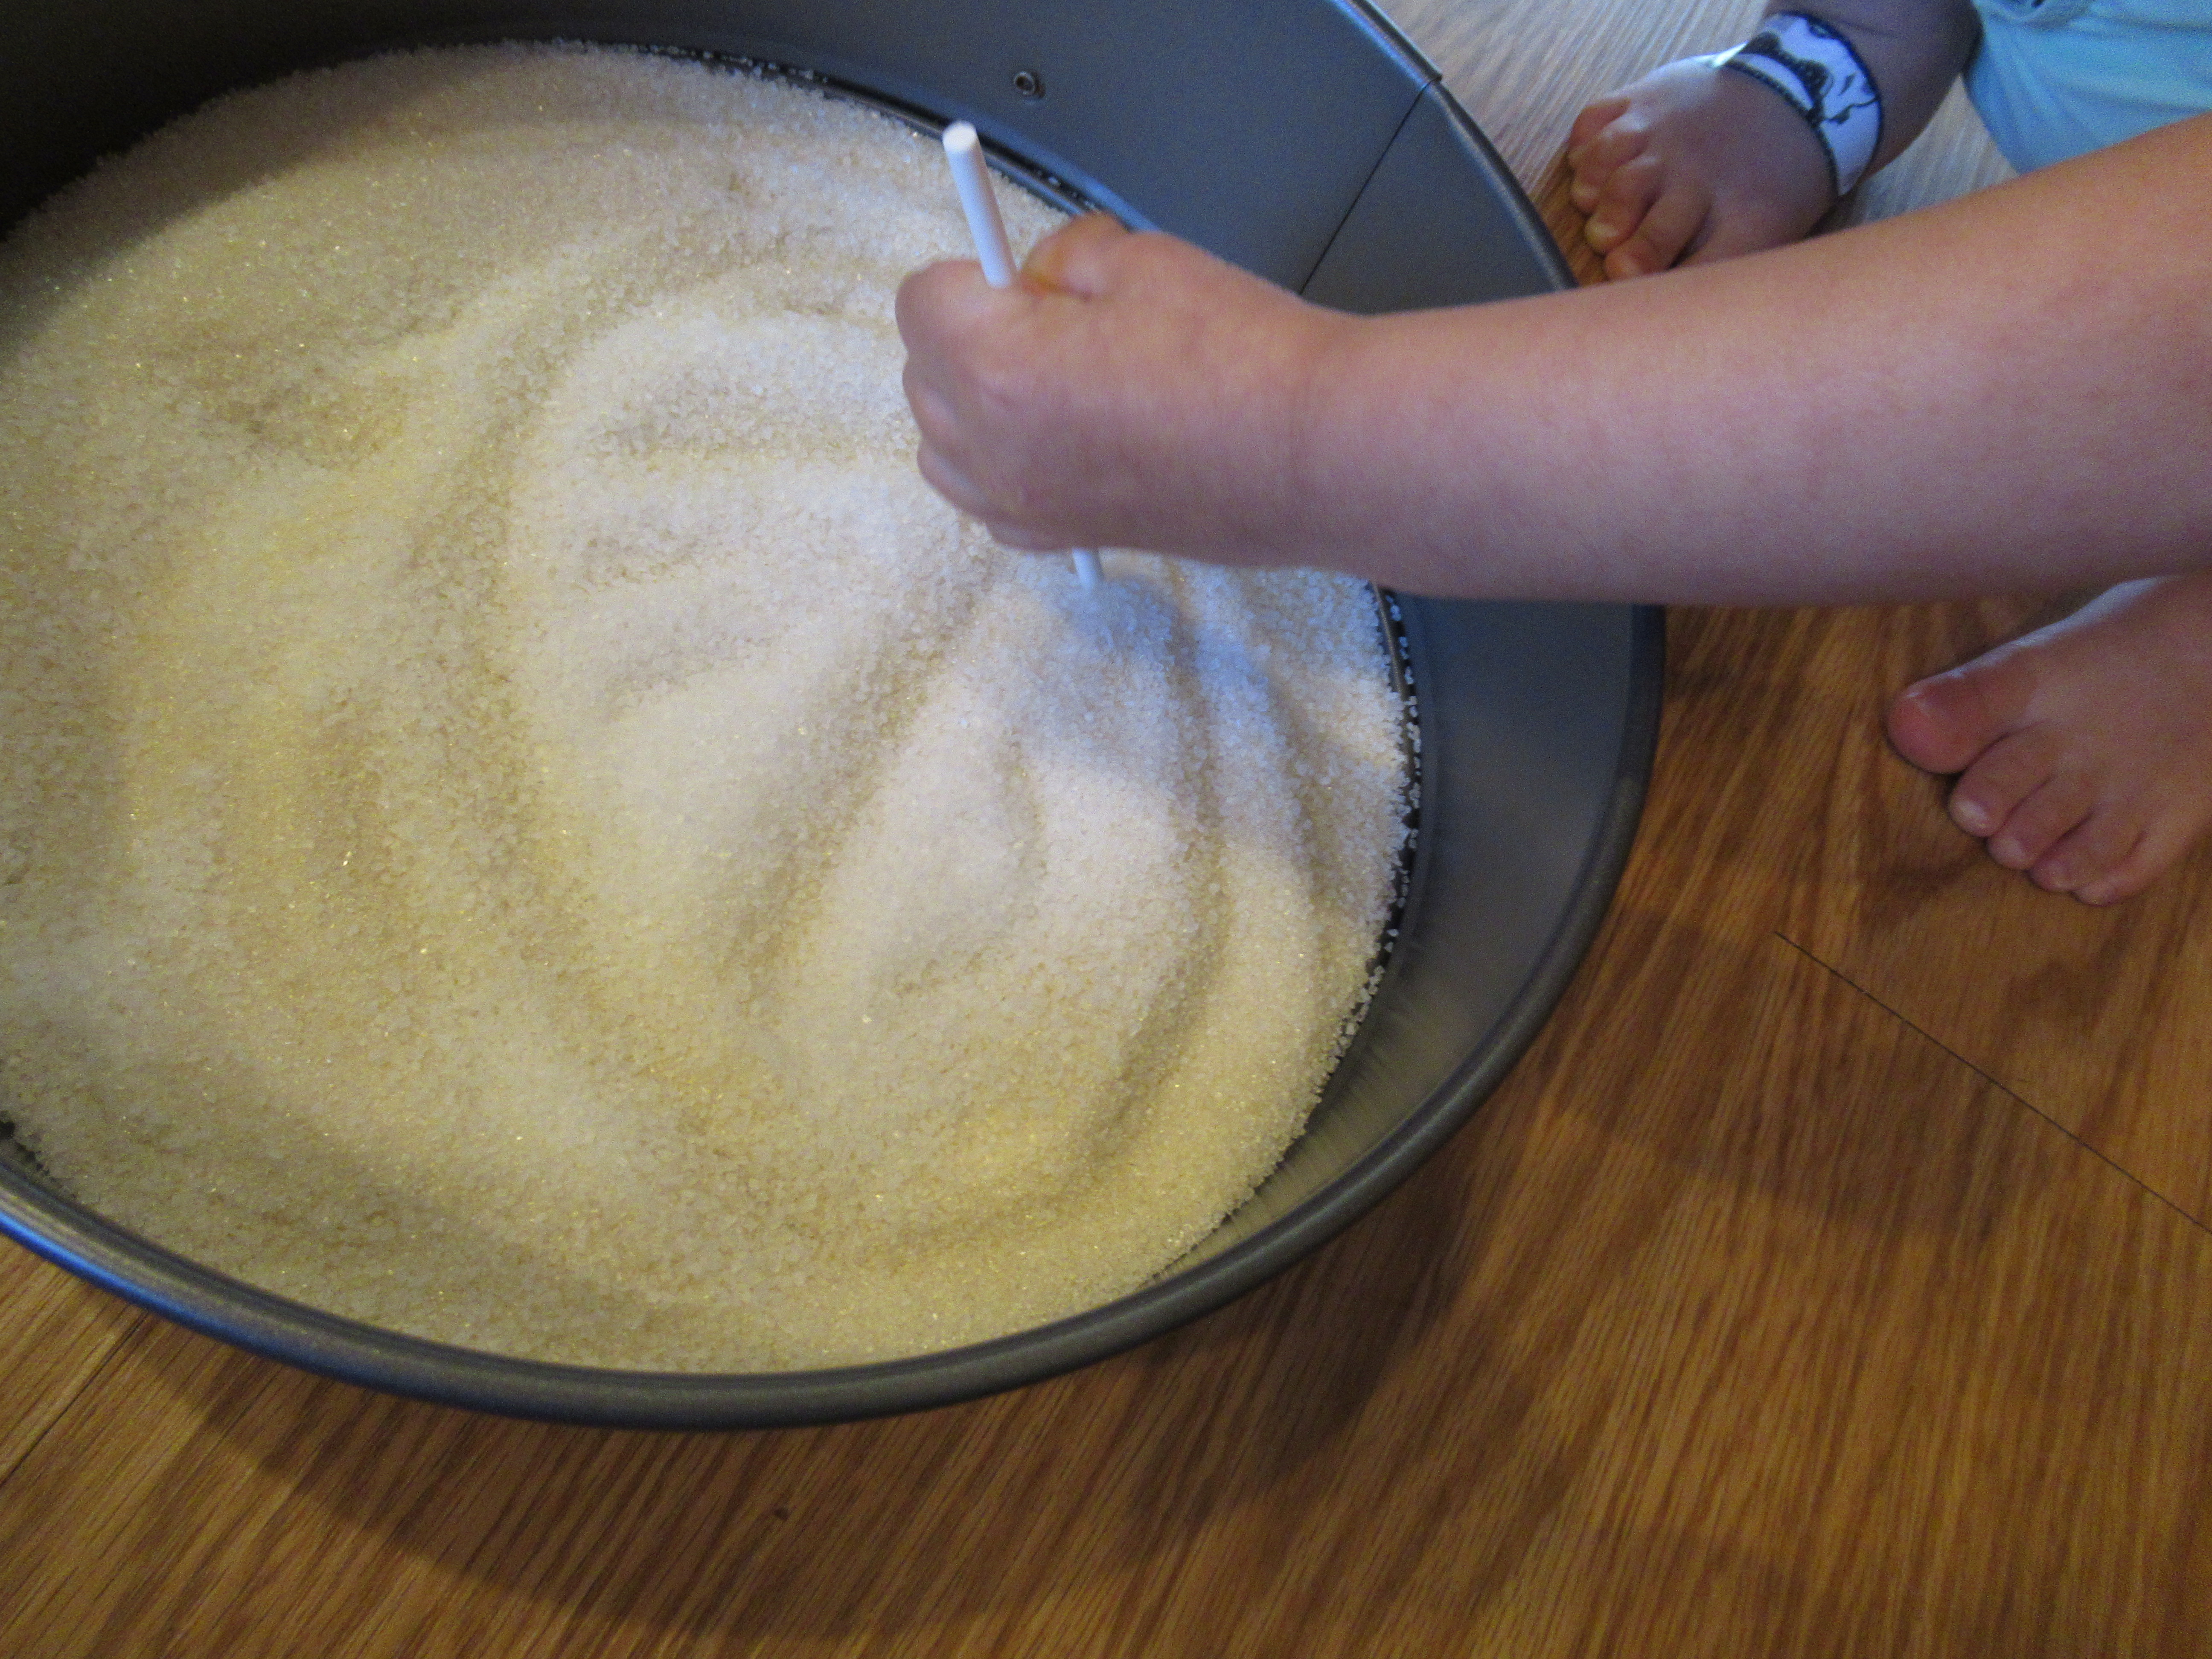
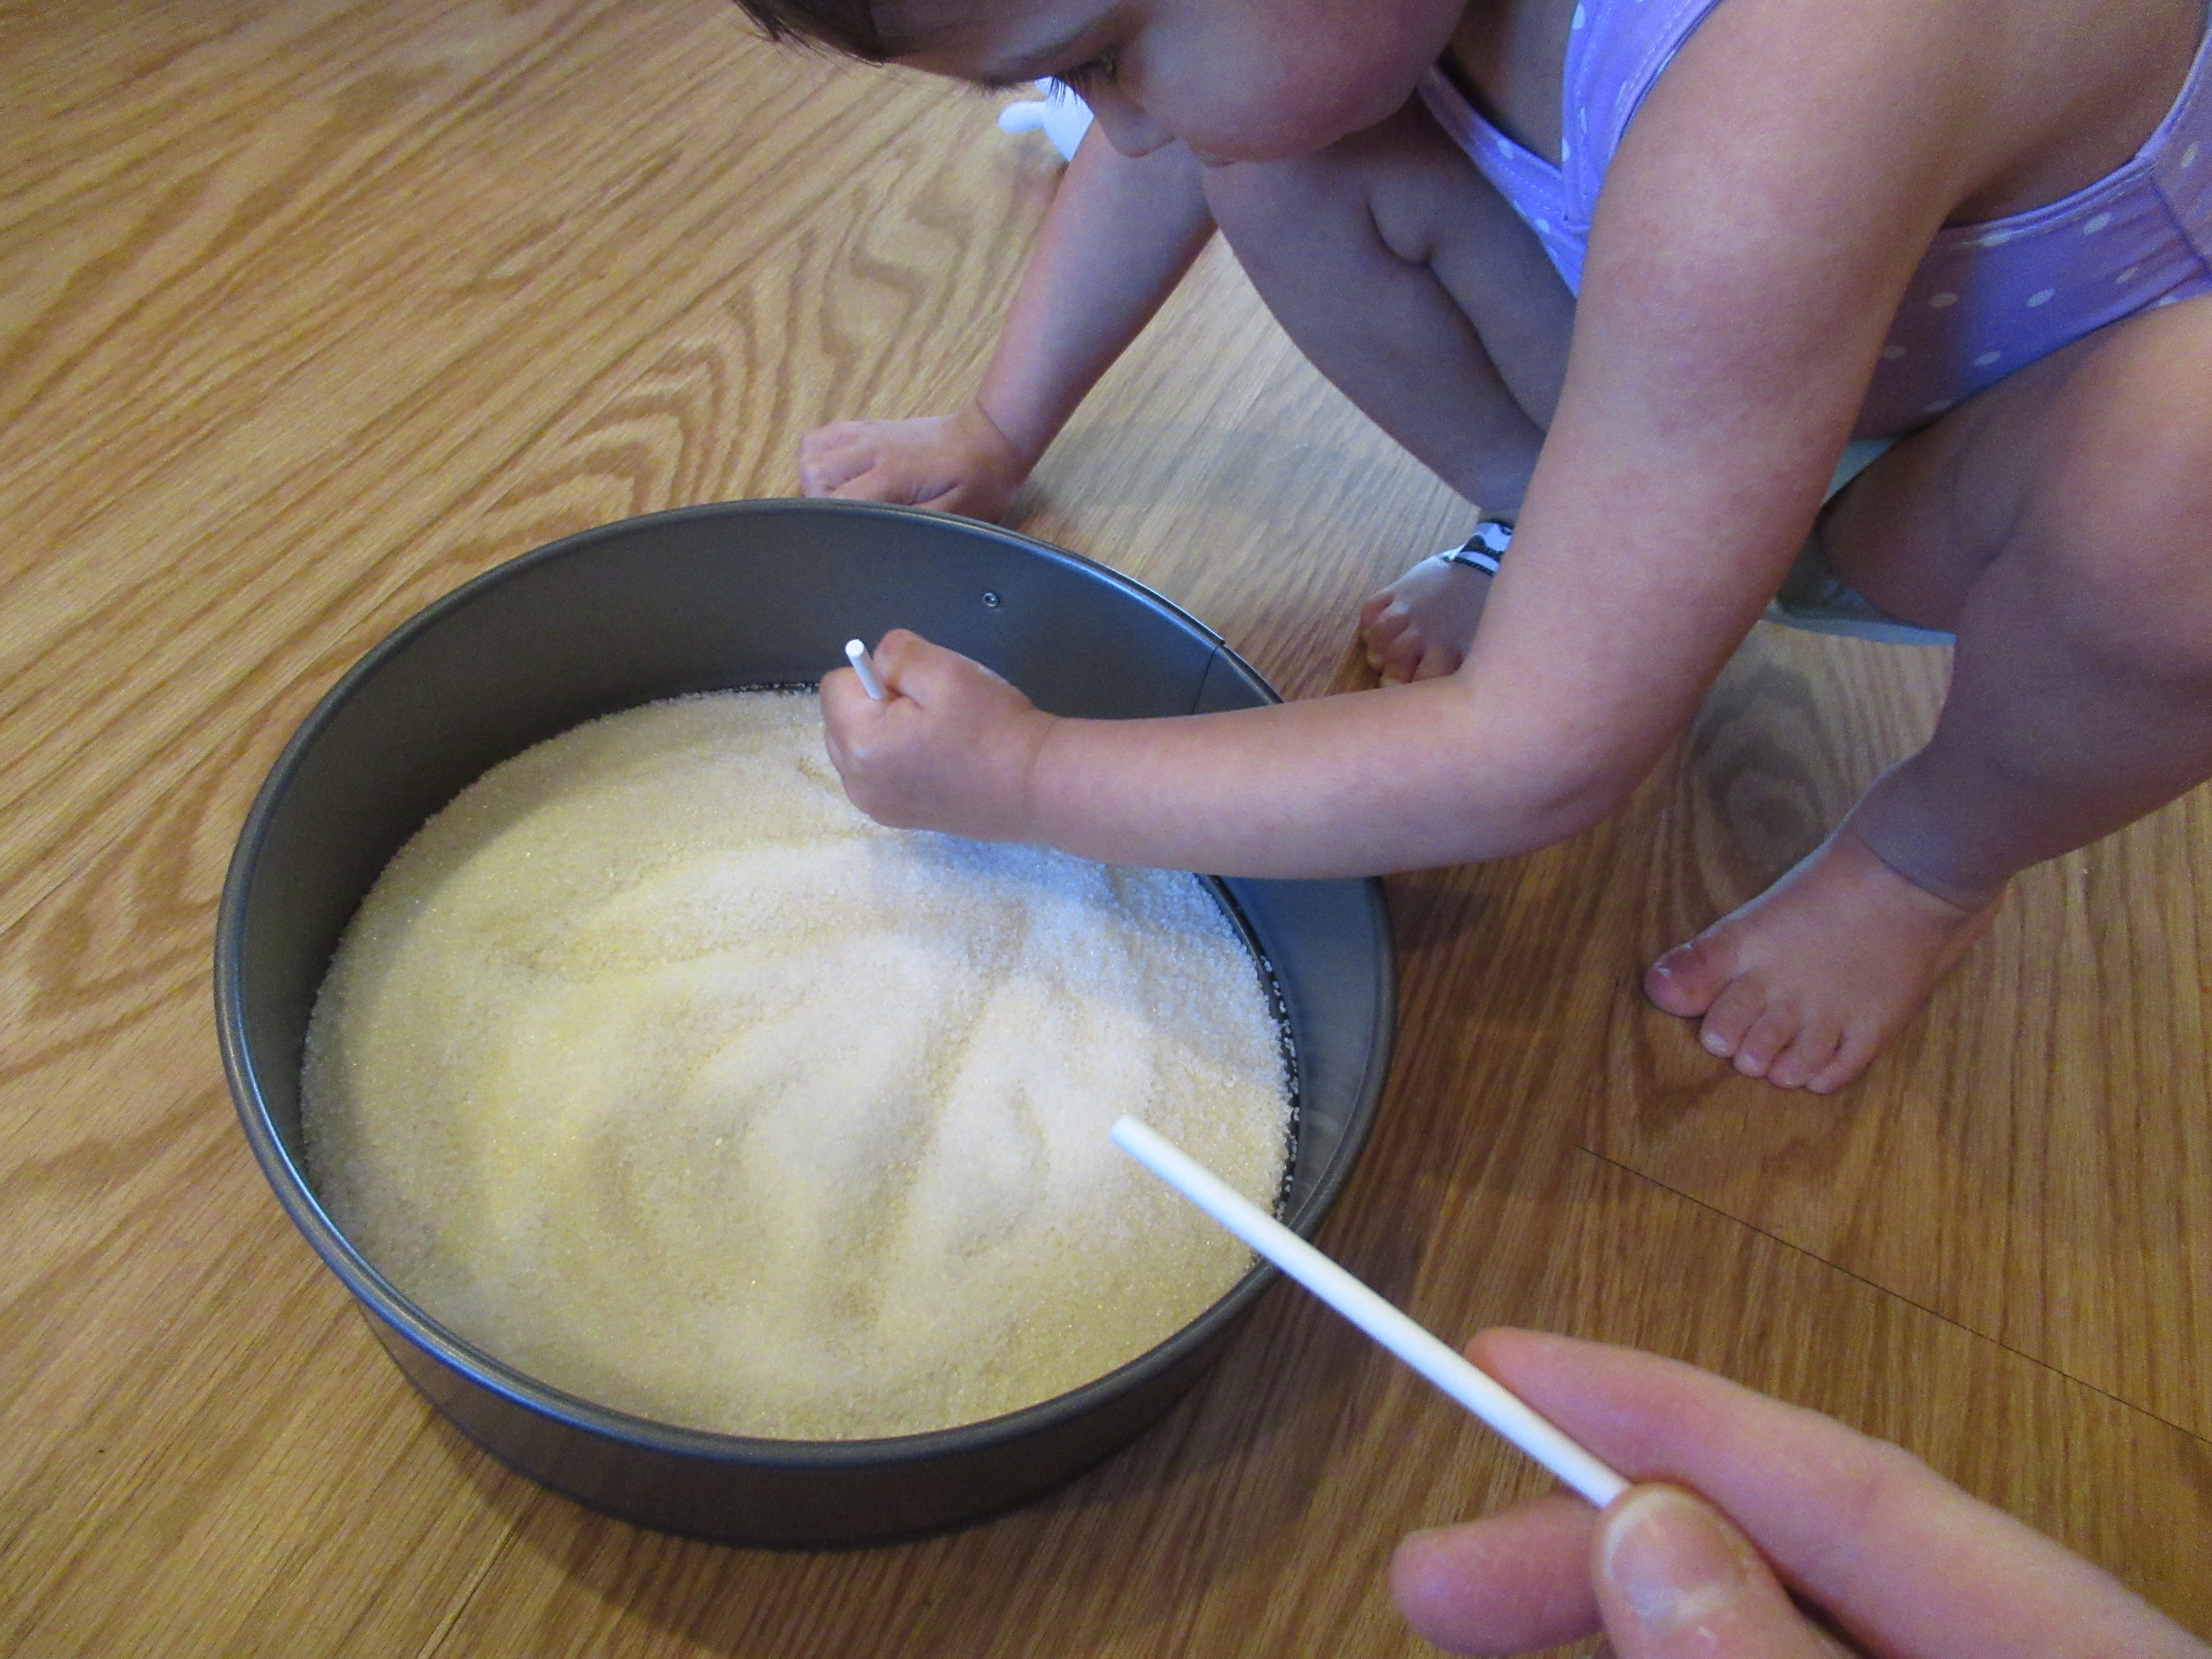
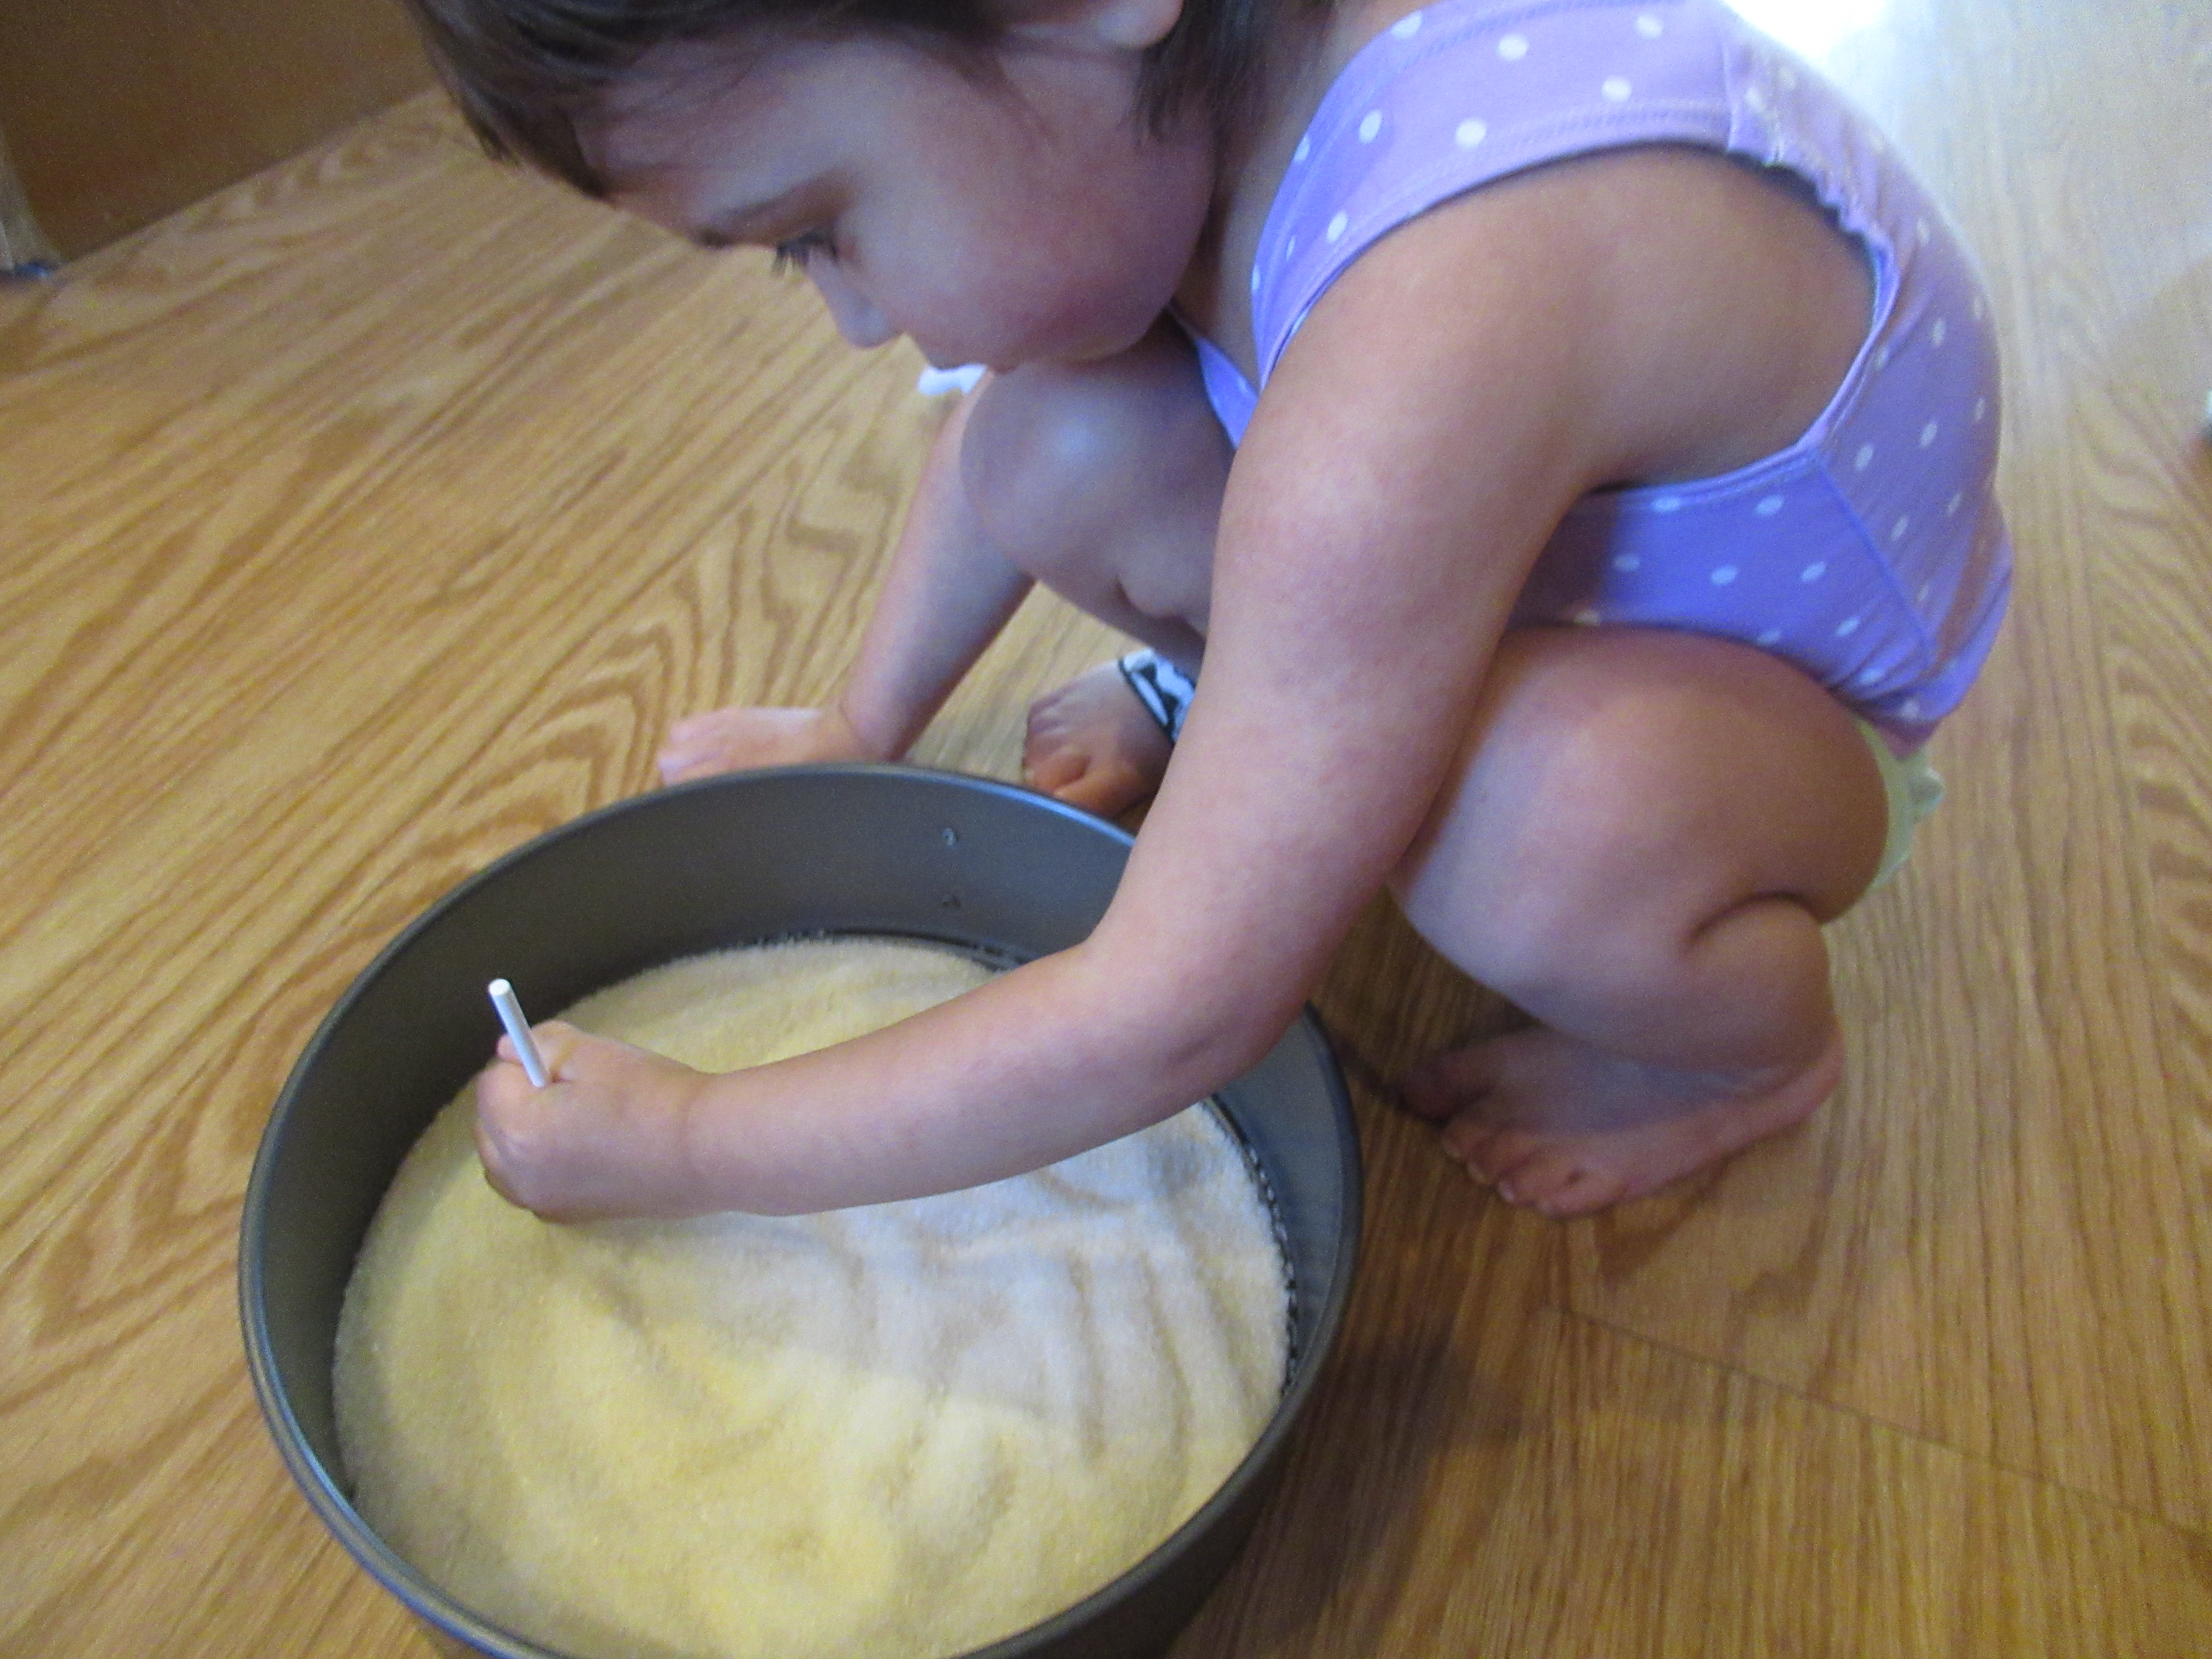
Four: Counting

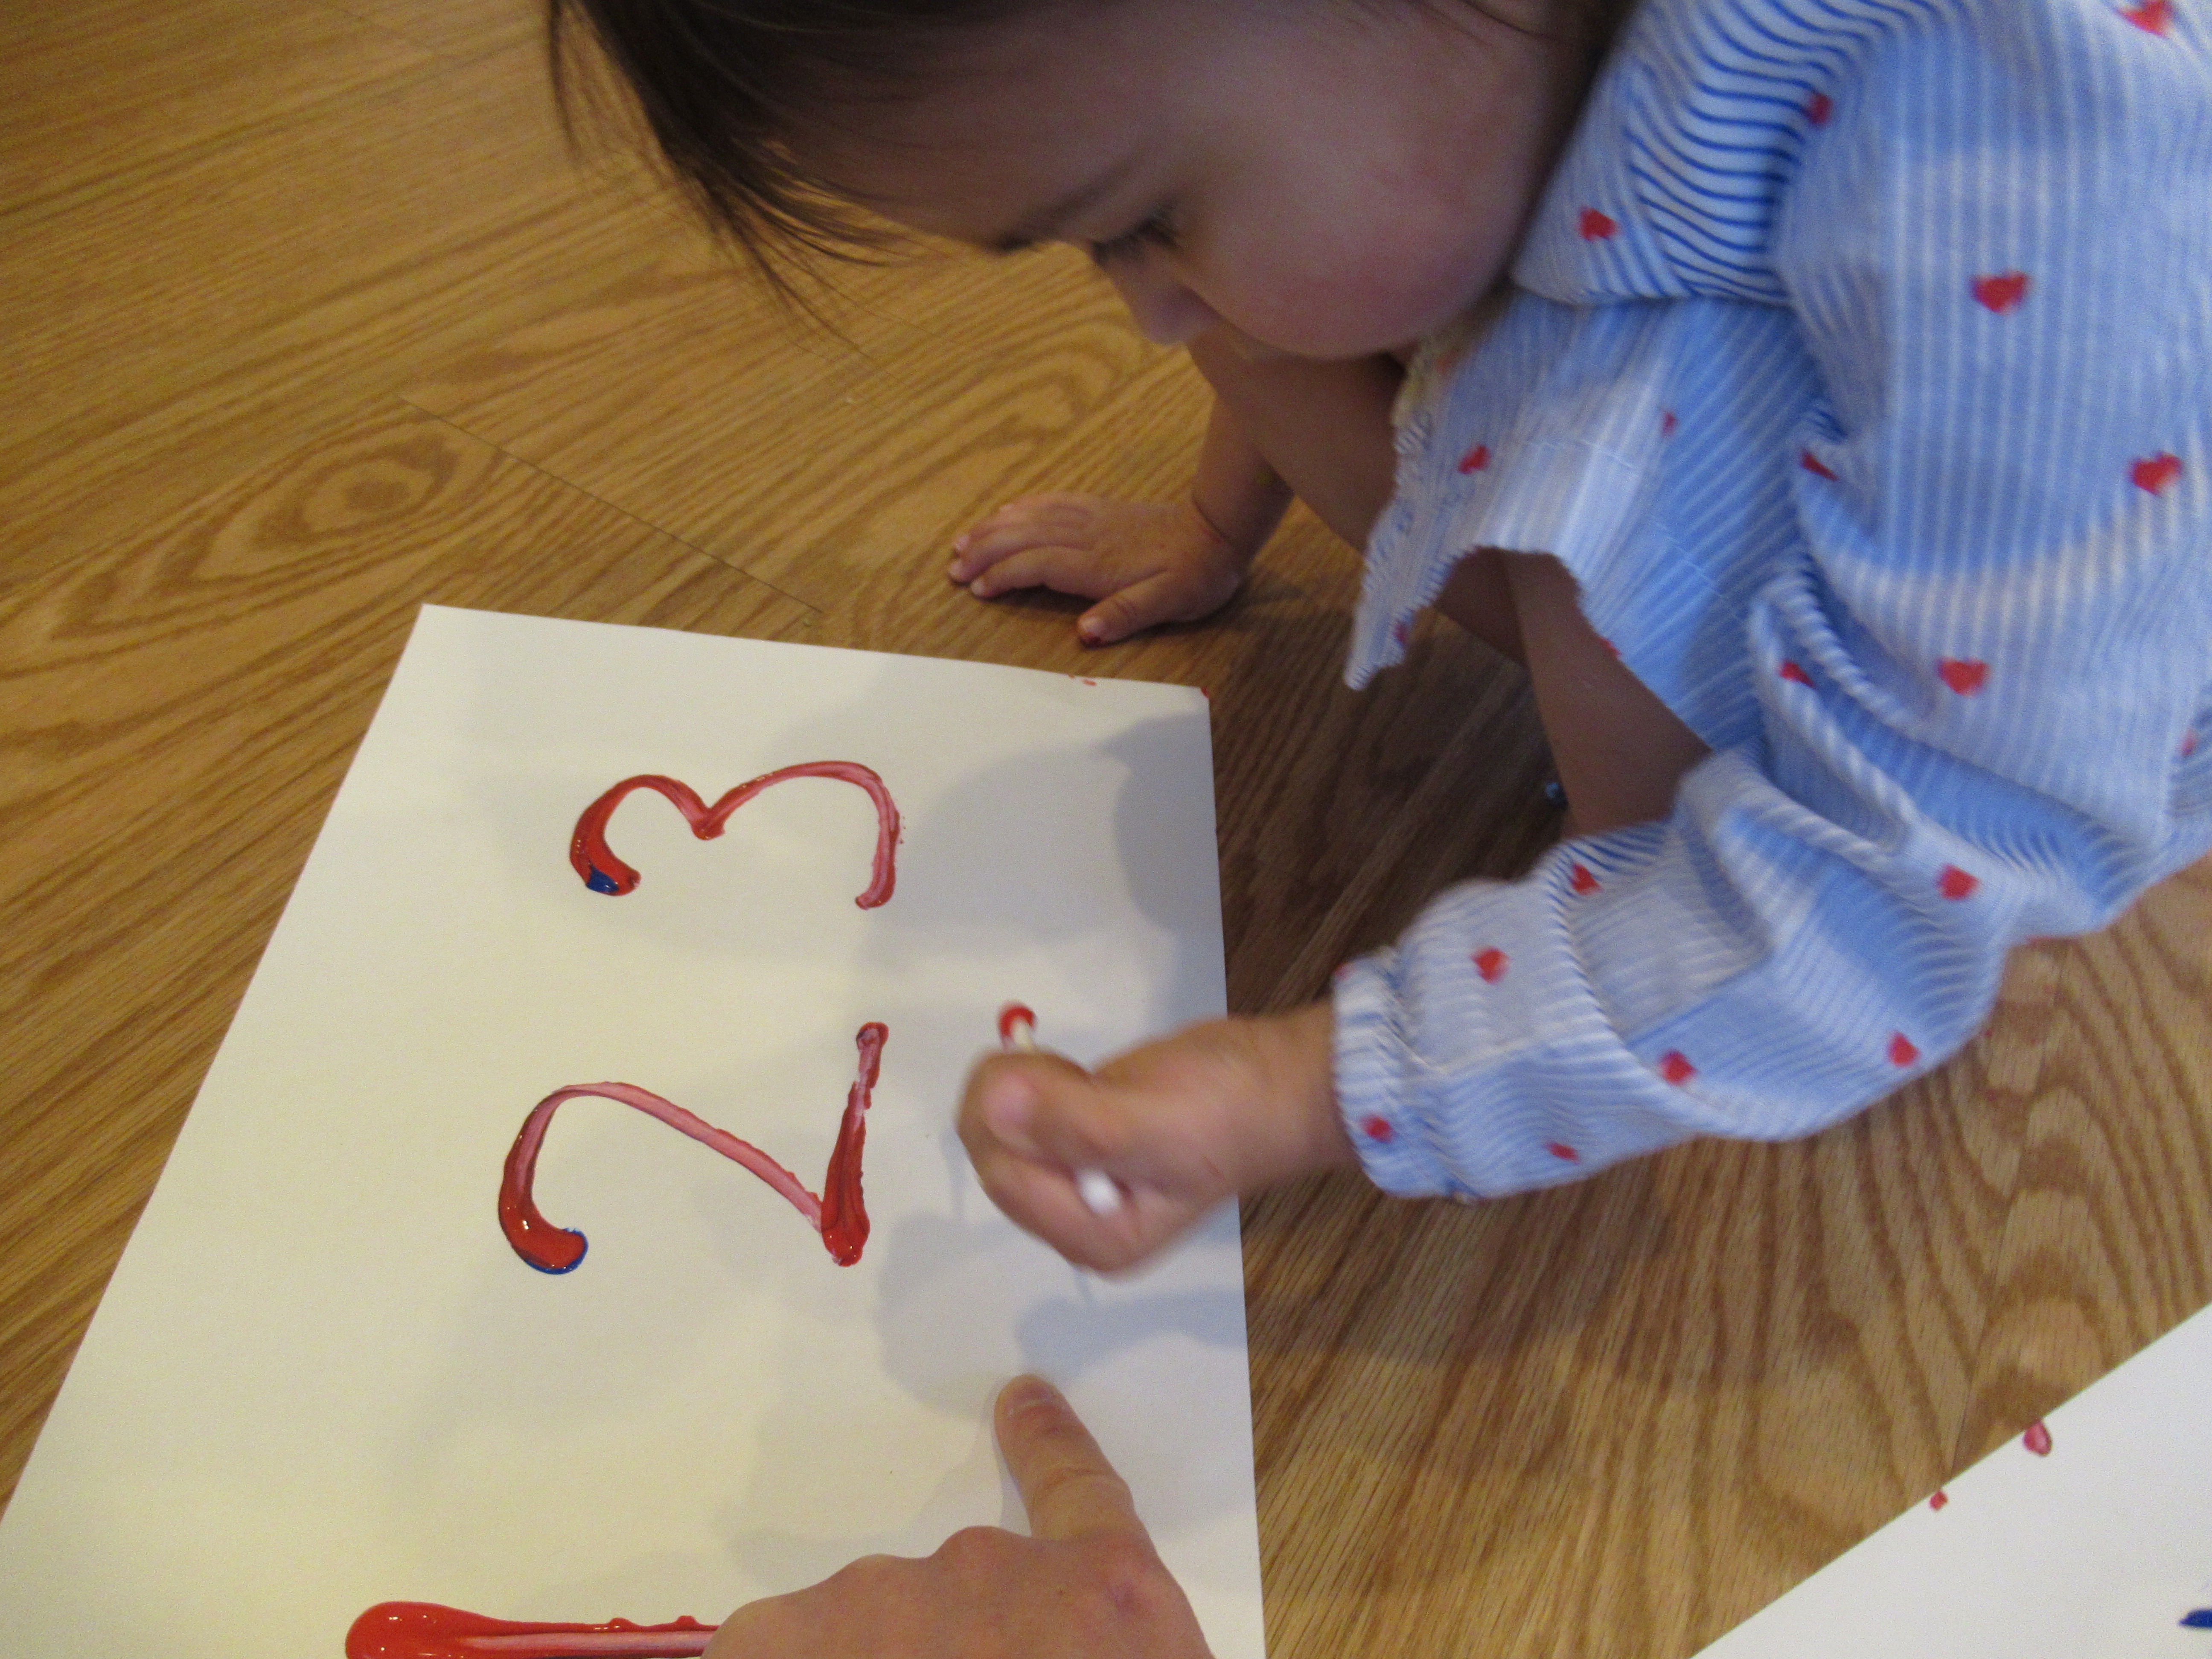
For our final q-tip activity, I wrote out the digits 1, 2, and 3 for Veronika. After encouraging her to name each number, I asked her to make the correct number of dots with her q-tip underneath. “Can you make 1 dot?” I asked her. Dot!

She was also able to do this for number 2. By 3, she just started dotting everywhere. But of course preschoolers can tackle this task all the way up to 10, or higher! For an even greater challenge, stamp out a connect-the-dots with the q-tips, then number them and have your child connect the lines.

Which of these q-tip activities does your child like best? Please share in the comments. Many thanks to Hands on As We Grow for all these q-tip ideas!

Marching Song

Whether your toddler has reached that age where he or she is determined to walk instead of being carried (“all by myself!” Veronika insists) or whether you’re trying to encourage such a shift, there’s one inconvenience to those independent toddler footsteps: those little feet can go sloooow. Sometimes, a good marching song is exactly what you need to help the pace along!

This version is to the familiar tune of “Twinkle Twinkle Little Star”, making it easy for little one’s to latch onto. So for example when we make a routine daily trek, like our walk to the mailbox, Veronika and I sing:

See the soldiers in the street,

Hear the marching of their feet.

They are singing as they go,

Marching, marching to and fro

See the soldiers in the street

Hear the marching of their feet.

This definitely helps Veronika pick up the pace. As a bonus, it can help you as the grown-up feel less frustrated, and more engaged in the moment! There’s a reason soldiers have marched to songs for millennia.

Shoebox Train Craft

Veronika has loved books about trains lately, especially old favorites like The Little Engine That Could. So today we made her a train of her very own!

To set up, I used three cardboard boxes (none of which were actually shoeboxes, despite the title of this post, but they were roughly that size). Make sure the box you choose for the engine still has a lid. Cut two rectangles from that lid, and cut out a “window” from each, then adhere to the sides of this first box as the sides of the engine. Our engine box also still had a flap on the front which was perfect for gluing down an empty toilet paper tube as the funnel. You can also affix an additional flap of cardboard here if needed.

Next, I measured construction paper to fit the sides of each box, and then affixed with hot glue. We used blue for the engine, green for the middle car, and red for the caboose. Cut black circles from construction paper as wheels and glue down. Finally, punch a hole in the front and back of each box so you can tie them together with string. This train was ready to chug along the track!

I pulled it up to the “station” (i.e. the playroom) where lots of Veronika’s stuffed animals were waiting to board. She wasted no time loading her passengers into the train!

She absolutely adored chugging the train all around the apartment, sometimes pausing to let passengers on and off, or sometimes talking to her passengers: “Come on black puppy!”

You can use these train cars in other ways, too, even for color sorting blocks or other toys into the train car with the same color paper. We skipped that part today, though, since Veronika loved loading it up in conjunction with another read-though of Little Engine.

Chugga chugga choo choo!

Alphabet Sand

When I needed to occupy Veronika quickly today, I gave her a little tray of alphabet sand, one of those “oldie but goodie” sensory games that never fails.

What is alphabet sand, you ask? It isn’t sand at all, but my secret mix of equal parts sugar and salt in the bottom of a cake pan. Set it down in front of your toddler and let them practice tracing the alphabet!

For early learners like Veronika, I usually start out by coaching her through a few easy examples like O, X, V, and T. We use our fingers, but also lollipop sticks, which make great “pens”.

After she’s done a few letters, she’s usually ready just to squiggle, or to draw lines and circles. She also loves to let the mixture sprinkle down into the cake pan from her fingers. When she shifts her sprinkling over to the floor, that’s when I know the game is done and we quickly sweep up.

Want something similar but a bit more challenging? Hide alphabet puzzle pieces in the mixture instead!

Dump Truck Domino Counting

Here was a fun way to combine Veronika’s truck play with a little early counting! She can count by rote up to about 20, but it’s still early for her to connect the idea that those rising numbers correlate to one more thing added each time.

We chose dominoes for the activity because we have lots of them and they fit easily into the truck bed. My hope was that physically them out would help her make the link. First, we just started filling up the truck randomly:

She eagerly counted along as we placed each domino in, and we made it all the way into the teens before she was too tempted to… dump!

For the next round, I challenged her to fill the truck with only a certain color. This meant we only counted as high as ten, and then it was time to dump. We repeated with the remaining colors.

For older kids, you can even make predictions about the point at which dominoes will start to spill out, without having to tip back the bed of the truck at all.

We played this version toward the end, piling in all the dominoes (confession: we stopped counting!) and watching them spill out. Chances are your toddler will stay happy with trucks and dominoes for some solo play after the lesson, too.

Musical Teepee

Sound is often a neglected part of “sensory” outdoor play, since we focus so much on touch or sight. This was a great way to get Veronika’s ears buzzing on a spring morning.

First, we gathered a few large sticks (which were easy to find after recent wind storms!), and then positioned them until they formed a little teepee. The sticks propped each other up so securely that I didn’t have to do much more, but added a little string for extra insurance.

The first item I wanted to add was a small wind chime. I dangled this from one of the sticks so it hung just below the teepee. Veronika was immediately intrigued!

I also added a musical triangle, a metal colander, and a metal cookie cutter, then handed Veronika a mallet. Time to play!

She loved exploring all the different sounds, from the tinkle of the wind chines to the ping of the triangle, to almost a snare drum sound from the colander on top!

I plan to leave this up for at least a few days so she can interact with it differently every time we pop outdoors.

Foot Tracing “Pedicures”

Veronika is far too young to get her first pedicure at a salon, of course, but this little tracing game also involves a bit of make-believe for adorable “mommy & me” pedicures at home!

To start, I stood on a piece of paper and showed Veronika how I could trace around my foot with a pen. She wanted to help out with the tracing, meaning the print wasn’t exact, but that didn’t matter.

Next it was her turn! She stood so still on a sheet of white paper as I traced around her feet, and giggled when we got to her ticklish toes. “We made paw prints!” she said with delight.

You can take a moment to talk about relative sizes (big versus small), and then it’s time to decorate!

Toddlers can fill in the tracings with crayons and markers, but for something extra fun, I trotted out a vial of real nail polish. I showed her how to dab this into each toe like she was painting a little nail on each.

The soles of our feet were painted, too!

I hope your little one enjoys this day at the “spa” as much as Veronika did!

Eraser Stamped Sheep

We recently re-read a favorite picture book, The Dot, by Peter H. Reynolds, which had us thinking about other ways to make art from just dots. This sweet craft is easy enough for toddlers to follow along, and felt just right for springtime and baby lamb season!

To start, I set out a plate of white paint, along with a few sheets of construction paper and pencils. I handed Veronika one of the pencils and showed her how to dip just the eraser end in the paint, then dot on the paper.

White dots!

Veronika had fun simply experimenting at first, but then I showed her that if she clustered a few of those white dots together, it began to look like a woolly sheep. She loved seeing the little animals take form.

Of course she couldn’t control her dots exactly, which I wouldn’t have expected from a two year old. Anywhere that gaps needed filling, I added a few extra dots to make the sheep. That meant sometimes we had big mommy sheep, and sometimes baby lambs.

Once the glue dries, just add an eye and four legs for each sheep with black marker.

We loved the ways these looked once we cut them out in individual circles, resulting in a whole little flock.