Snack in a Fox

Snack in a Fox (5)

You’ve heard of a Jack in the box – today we’re switching the rhyme around to a snack in a fox! I adapted this idea from our September issue of High Five, where it was intended as a lunch bag for bigger kids headed back to school. I have snack-size brown bags at home, which made our “fox” perfect to take along to the summer toddler workshop Travis and I have been attending.

The craft itself was mostly an adult project. Snip the corners from the top of the bag, and set aside (these will be the fox’s ears). Fold the top down, and tape place a cone-shaped coffee filter under the “nose.”

Snack in a Fox (1)

Tape the corner scraps to the back of the bag to make the ears, then decorate the fox’s face with markers.

Snack in a Fox (3)

I gave Travis a second set of all the materials – bag, coffee filter, markers – to play with while I made the real thing, and he loved helping out with the tape.

Snack in a Fox (4)

Then it was time to fill our fox with pretzels, resulting in one happy boy!

Snack in a Fox (6)

He also loved taking his snack to “work” at his new play desk.

Snack in a Fox (7)

Roll and Color

Roll and Color (3)

I had so much fun with this little project because it counts as Travis’s first “board game.” Although he didn’t quite understand the full concept, it was a nice way to introduce him to multi-player games, and I look forward to playing it with him as he gets older.

The big excitement for toddlers comes for the out-size die – made from an old tissue box! Cover the box with white paper, and color in one dot on each side, in 6 different colors.

Roll and Color (1)

Mark those same 6 colors on strips of paper – these are each player’s “score cards.”

Now give that big die a toss!

Roll and Color (2)

When it lands, have your toddler tell you what color he or she sees, then select a matching pom pom. A roll of green, for example, means you can place one green pom pom on your score card. The first player to collect all the colors “wins.”

Roll and Color (4)

Of course, Travis and I played a modified version, rolling and selecting pom poms, but we didn’t keep score. As mentioned, though, I liked introducing the idea of a board game to him.

Roll and Color (5)

If you try this with a preschooler, I’d love to hear how the game goes in the comments!

Grapes to Raisins

Grapes to Raisins (5)

Introduce the magic of chemistry with this easy at-home experiment. Does your toddler know that grapes can turn into… raisins?

When I presented this mystery to Travis and told him we needed heat in order to make them change, he immediately said, “We need an oven!” Chemistry 101, complete!

Grapes to Raisins (1)

Slice as many grapes as you like in half, keeping in mind that you’ll end up with a significantly reduced volume of raisins, then have your toddler helper assist you in sprinkling the grape halves evenly over a baking sheet.

Grapes to Raisins (2)

Or dumping them on:

Grapes to Raisins (3)

Place the grapes in the oven at 200 degrees F for 2 and 1/2 hours. Now we wait!

Grapes to Raisins (4)

To be honest, you can probably leave your grapes the oven in quite a bit longer (3 or 4 hours) for truly raisin-y raisins. Ours were a sublime mix that was half juicy grape, half condensed raisin, warm from the oven and very golden raisin-y in taste. Travis was thrilled with the result. The perfect dessert just before bed.

Grapes to Raisins (6)

If you’re even more ambitious, you can profit from the summer weather to make real sun-dried raisins. Place your grapes in a sunny spot for several days (yes, days!) covered with cheesecloth to prevent them from getting dirty. I hope to try this some day when we live in an area with less car traffic.

Frog’s Dinner

Frog's Dinner (3)

Here’s a silly and fun way to teach kids how very differently frogs eat from us – not just that they eat bugs, but that they use a long tongue to do it!

To set the scene, we gathered together all of Travis’s stuffed frogs, and said the frogs were very hungry!

Frog's Dinner (1)

Attach Velcro pieces to any plastic bugs you have (I love the Velcro strips sold with a sticky backing already, so you don’t need glue). Attach additional pieces of Velcro  to the ends of paper party blowers. Then, show your toddler how an elongated party blower latches right on to one of the bugs and slurps it up, just like a frog’s tongue!

Frog's Dinner (2)

Travis thought the game was an absolute delight. He didn’t want to try blowing a party blower himself, but loved watching mom and dad do it! I put a few pieces of Velcro directly over the stuffed frogs’ mouths so they could “slurp” up the bugs just by pressing onto the Velcro as well.

Frog's Dinner (5)

Party blowers were fascinating in and of themselves, and provided entertainment for a nice little while.

Frog's Dinner (6)

Dyed Rice

Dyed Rice (4)

Here’s a simple idea to take your sensory play with materials like rice or pasta up a notch. I’ve read about versions of this game using Kool-Aid powder, but since I’m leery of a few of the ingredients in Kool-Aid, I wondered if I could copy the method with natural paint powders. The result wasn’t quite as vibrant as Kool-Aid… but that’s probably a good thing!

Set-up is a little messy. If your child is under 3, you’re probably going to need to do most of the work, although I let Travis sit in on the action. Place about 1 cup rice in large zip-top freezer bags, making as many portions as you want colors. Add 1 to 2 teaspoons paint powder to each bag. Travis did enjoy this part, so I didn’t mind a little mess!

Dyed Rice (1)

Add 1 teaspoon rubbing alcohol to each bag, then seal the bags and let your toddler shake or knead to incorporate the color.

Dyed Rice (2)

Transfer the colored rice to a foil-lined baking sheet. Note: you may want to separate each color with a strip of foil as well, until they are dry. Let dry overnight.

Dyed Rice (3)

The next morning, it’s exploration time! I poured the rice into a bin for Travis, and he was amazed to see colors instead of plain white. First we explored the rice by hand.

Dyed Rice (5)

Then of course it was time to mix them all together!

Dyed Rice (6)

Travis would fill a smaller container and then dump it back into the larger bin, talking about the colors as they poured. Overall, the game was a nice variation, since regular rice has become old-hat around here.

Toddler Tie-Dye

Toddler Tie-Dye (4)

Here’s a simple – groovy! –  way for even the youngest toddler to make his or her own tie-dye. Preschoolers will no doubt enjoy the craft, too… and perhaps more so, knowing you’re allowing them to play with normally-taboo permanent markers.

Stretch any white fabric over the rim of a wide plastic jar (like an empty peanut butter jar), and secure with an elastic. Since we have so many plain white onesies, I decided it would be fun to let Travis make a few into one-of-a-kind pieces! If you don’t want to sacrifice white onesies, napkins or handkerchiefs would also be fun.

Toddler Tie-Dye (1)

Let your toddler use colorful sharpie pens on the fabric, adding dots, lines, or circles.

Toddler Tie-Dye (3)

Using a water dropper, add drops of rubbing alcohol until all of the ink has been moistened. The sharpie colors will bleed, producing a beautiful tie-dye effect. I was impressed to see how Travis’s skill with the dropper had improved, even over the course of the few days since we used it to make a rainbow tote bag.

Toddler Tie-Dye (2)

Shift a clean section of fabric to the mouth of the jar, securing with the elastic again, and repeat as many times as desired. Once finished, place in the dryer for 15 minutes to set the colors.

Since our first onesie was purely a toddler creation (in every color imaginable!) I made a second version after Travis was busy elsewhere, this time with a unified color scheme. I look forward to having him wear these!

Toddler Tie-Dye (5)

Birthday Blocks

Birthday Blocks (1)

It can be hard to plan games for kids to play at a birthday party for a one- or two-year-old. At this age, kids are still engaging in “parallel play,” so you’re not going to have great luck corraling them into organized games of Pin the Tail on the Donkey and Simon Says. Instead, foster their enjoyment and let them socialize side-by-side with this cute idea, care of 365 Toddler Activities That Inspire Creativity.

Before the party, wrap any building blocks you have around the house in wrapping paper. I used alphabet blocks,leaving the alphabet face of each block uncovered, to encourage the children’s curiosity about what was hidden underneath the paper. If you prefer, you can wrap the blocks completely.

Birthday Blocks (2)

Kids can either build with the wrapped block or – more likely! – will want to tear the wrapping paper open and discover the blocks inside; this way everyone gets to tear open a “gift” at the party! Whichever way they play with them, the kids are sure to have fun.

Dump Cake

Dump Cake (8)

We had a construction truck theme for Travis’s second birthday. When I stumbled across this recipe, I thought: what better name for a construction party cake than a “Dump” Cake?

It turns out the name has nothing to do with dumps or construction sites, but rather with the fact that all of the ingredients are simply dumped into a baking pan, no mixing or measuring required. That means your toddler can literally make it him or herself! It was a doubly-perfect recipe for his second birthday cake.

Dump Cake (1)

Ingredients:

  • 2 (15-ounce) cans sliced peaches in juice (such as Native Forest)
  • 1 box vegan yellow cake mix
  • 12 tablespoons Earth Balance butter
  1. Grease a 13×9-inch baking dish, and have your child dump in the peaches, including the juice.
  2. Sprinkle the cake mix over the top of the fruit. (Adults: you can step in and make sure the mix is sprinkled evenly, if your child is concentrating things in one corner).
  3. Add 12 tablespoons of butter, spaced evenly over the top. (Again, adults may need to do a little “clean up”).
  4. Bake at 350 degrees F for 1 hour – the cake should be bubbly.

Dump Cake (2)

You can also prepare a version using 1 (15-ounce) can crushed pineapple and 4 cups cherry pie filling. Native Forest’s canned pineapple is vegan, but I needed to step in with a tiny bit of prep for a homemade cherry pie filling, meaning Travis didn’t quite make the second version all by himself… but close enough!

Dump Cake (7)

He was so proud when the moment came to blow out two candles, and tell relatives he had made the cake his “whole self.”

Dump Cake (9)

Rainbow Painting

Rainbow Painting (2)

We’ve enjoyed exploring rainbows recently, and I read about this neat painting method to continue our fun – perfect for little hands not yet ready to draw an arced rainbow line by line. It’s a little bit messy, but great fun!

Paint the colors of the rainbow in order on a clean sponge, making the paint quite thick. Preschoolers can paint the rainbow on themselves, but toddlers will no doubt need adult help. This craft was a great opportunity for us to try out our new Glob paints, another great vegan and all-natural option. When the powder is mixed with water, the paints were as globby as their name would suggest, with wonderfully vibrant colors, and a rich texture on paper whether we used sponges or regular paintbrushes.

Rainbow Painting (4)

Flip over the painted sponge, drag it across white construction paper or poster board, and you’ll create a perfect rainbow – wow!

Travis did rather quickly lose interest in the rainbow exploration, but thought painting the globby paint on the sponges was fantastic fun, so we continued that for a while. We had a good time seeing what other prints we could transfer from sponge to paper (I made this little flower for him to press down):

Rainbow Painting (8)

….painting on other color combinations of stripes:

Rainbow Painting (5)

… and just painting on the sponges!

Rainbow Painting (7)

Travis loved when his hand got messy in the process, too. “I have a rainbow on me!” he told me proudly. And then of course it was clean up time!

Rainbow Painting (6)

Feed the Baby Bird

Feed the Baby Bird (2)

We’ve had fantastic tenants at our apartment recently – a family of barn swallows decided to make their nest on our balcony, and we’ve been honored to watch the mommy and daddy bird grow their family!

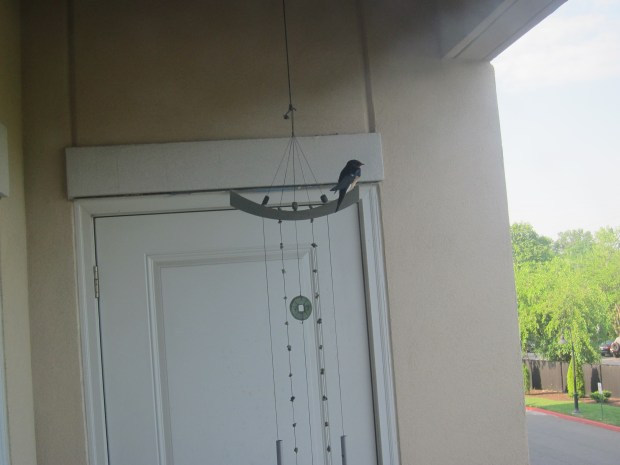
It all started with a flutter of activity one morning in June – no doubt daddy bird scouting his nest-building location. We woke up the next morning to the nest! Unfortunately, I had a hard time getting photos, as the balcony corner is dark, but hopefully you can see a little here:

Feed the Baby Bird (3)

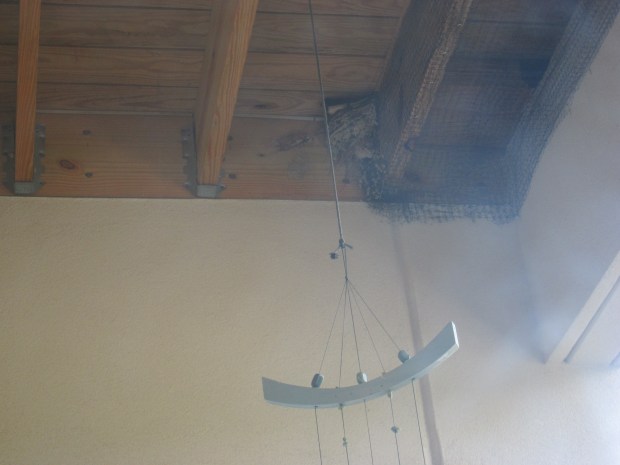
The next few days were quiet. Daddy bird would sit on the balcony railing or wind chimes, and give a signal of alarm for any noise or worry, sending mommy bird flying from her cupped nest.

We departed on vacation, and I worried Travis would miss the chance to see the birds hatch, but nope! It wasn’t until early July that we saw little beaks appear above the rim of the nest. We got to watch mommy and daddy bird swoop in to feed them many times over the next few days. Travis loved the excitement, calling out whenever he saw “Daddy bird.”

Feed the Baby Bird (5)

I was amazed how long the four chicks stayed in the nest; they looked awfully cramped up there by the end. Then one day, we looked outside and saw that two of the fledglings had taken their first flight! They were perched on the balcony, looking very downy and adorable and uncertain.

Feed the Baby Bird (6)

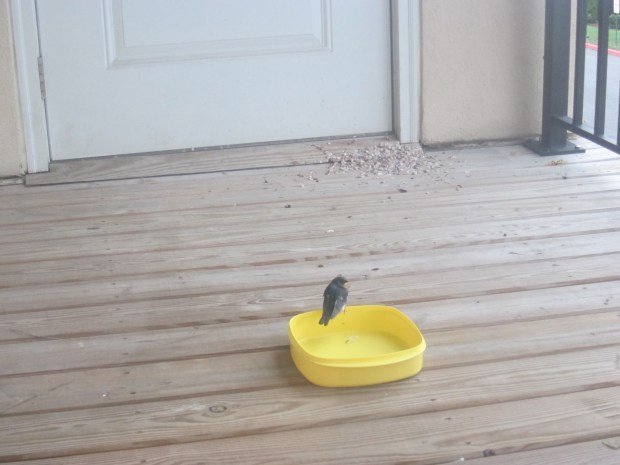
A torrential rain storm swept through right after, unfortunately. We were very relieved to see at least one of the fledglings had returned to the nest after, and I’m hopeful the other one made out okay in the storm. Meanwhile it was touching to see mommy and daddy bird swoop in during the storm to make sure their chicks were okay!

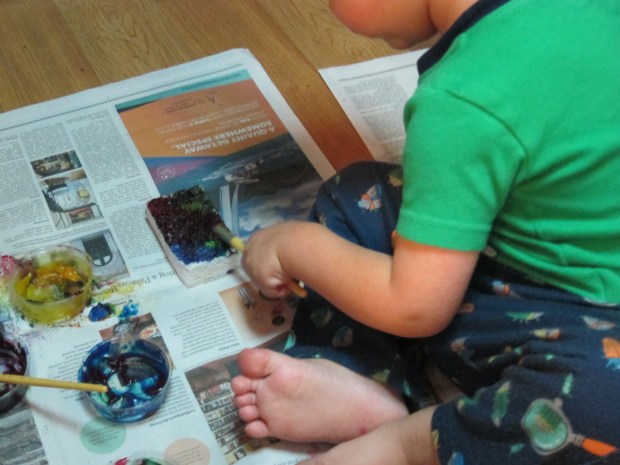
Travis and I continued the fun at home with mommy and baby bird play. He sat in a little nest made out of brown blankets, and I “flew” in to give him bites of Surf Sweets gummy worms (a leftover birthday treat!) as a snack. He gets a kick out of the fact that birds eat worms, and now probably believes all worms taste gummy and fruity.

Feed the Baby Bird (7)

We’re still waiting for the final two chicks to leave the nest, and are honored to have shared in the birds’ journey!

Update: Here are the three surviving chicks, on the day before they left us for good. I had heard swallows didn’t return to the nest after their first flight, so was delighted that they lingered for nearly a week, playing on our balcony by day, and sleeping in the nest at night. So glad we were able to give them a safe place to begin their life’s journey.

birdie final