Rainbow Crate

koala rainbow (8)

Please forgive the long post, but we’ve received our first Koala Crate, and the projects inside were fantastic! A year’s subscription to the crate was my gift to Travis for his second birthday, and I’m so excited to delve into a year of crafting and exploring with him.

This month’s theme was rainbows, and the crafts inside ranged from super-simple to a bit more involved. Travis needed my help with all three, since technically the crates are marketed to age 3 and up… but he understood the concepts and fun behind them!

You could easily pick up the materials needed at a craft store for a DIY version of all the following crafts.

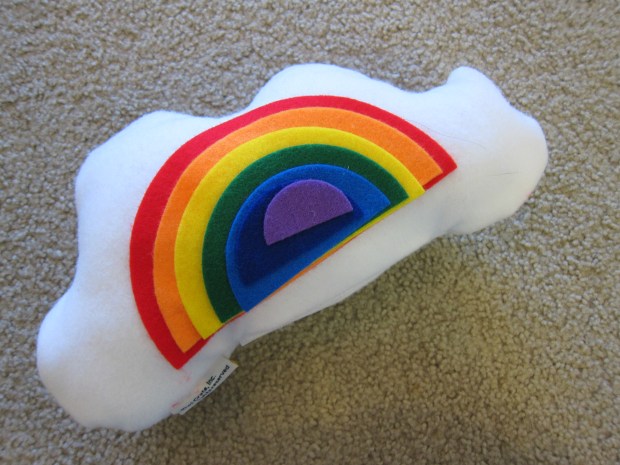
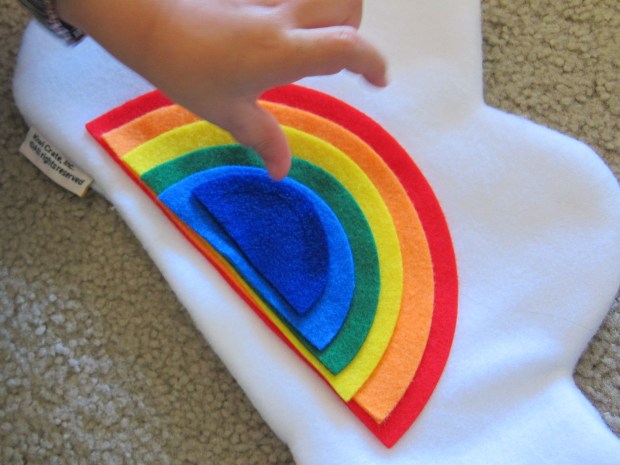
First up was a cute rainbow cloud pillow, adding half-circle stickers to a felt cut-out of a cloud. I directed Travis to put the stickers on in rainbow order, and he surprised me knowing what should come next!

koala rainbow (2)

Not all of his stickers ended up in the “right” spot, though I hesitate to use the term. I corrected the ones towards the back, just so he could see that we were producing an arced rainbow. By the time we got to blue and purple, I left them where he placed them, slightly askew – it was his project after all!

koala rainbow (4)

He was fascinated by fluffy roving (filling) for the pillow and called it a cloud – how appropriate!

koala rainbow (5)

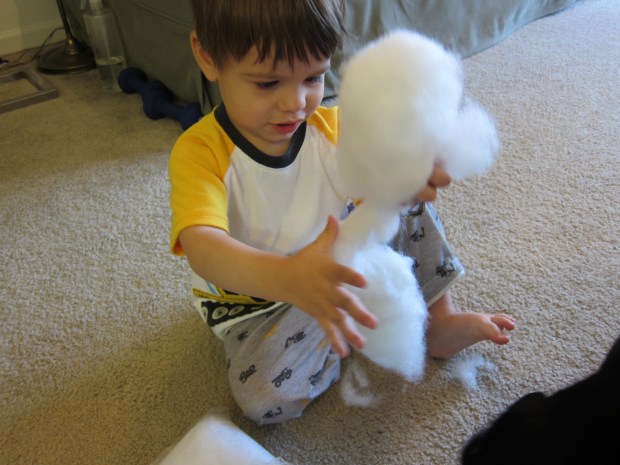
He very eagerly helped me stuff the roving in, and once our rainbow pillow was sealed shut, it needed a big soft hug

koala rainbow (7)

Craft #2 was a rainbow-dyed tote bag. If you have no Koala Crate, buy any small canvas tote bag, and do the steps below using tissue paper and rubbing alcohol, rather than plain water. Q-tips will work in place of a water dropper.

Travis loved helping get the bag wet under the faucet, but was slightly frustrated as we laid down the tissue paper squares, since the wet squares stuck to his fingers. I covered the remainder of the bag, and then introduced him to the water dropper!

Koala rainbow tote (1)

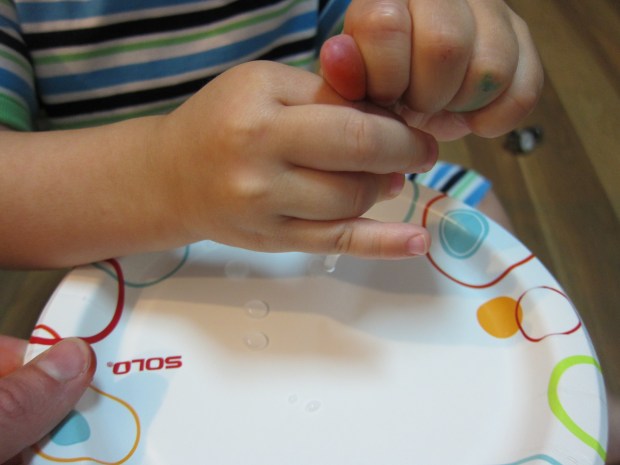
This was a great challenge for little fingers. Although I needed to drip enough water over the squares to make an effect, Travis got in excellent practice making droplets onto a paper plate.

Koala rainbow tote (3)

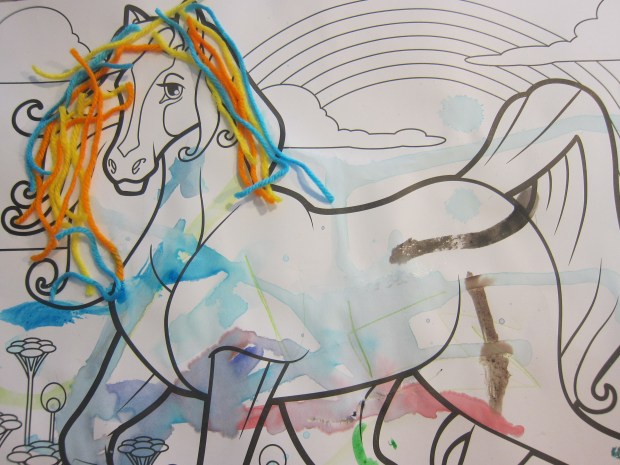
We left the bag to dry overnight, and then removed the dried tissue, revealing our colors. Travis didn’t quite grasp that it was our water droplets that had done the work, but we had fun talking about the colors – which were bright (blue!), which were very hard to see (yellow!) – and adding cloud stickers as the finishing touch.

Koala rainbow tote z

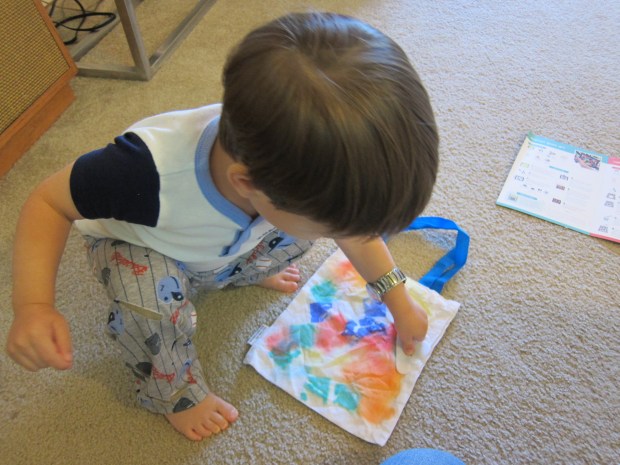
The perfect size tote for a toddler to carry his toys to the car!

Koala rainbow tote c

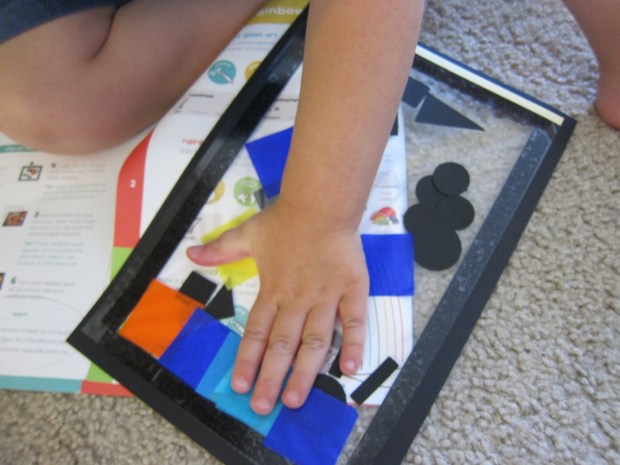
Finally, craft #3 was a “stained glass” window. Use clear contact paper, construction paper shapes, and tissue squares, if you’re not a Koala member.

koala rainbow stained (2)

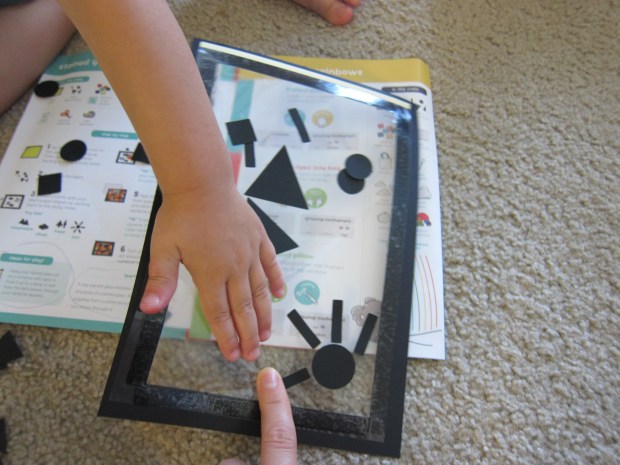
The shapes provided were fun to punch out and add to the sticky “window frame.” I made a sun, and Travis joined a bunch of circles together and told me he’d made a cloud.

Once our black shapes were in place, we stuck on the remainder of our tissue squares – great fun!

koala rainbow stained (3)

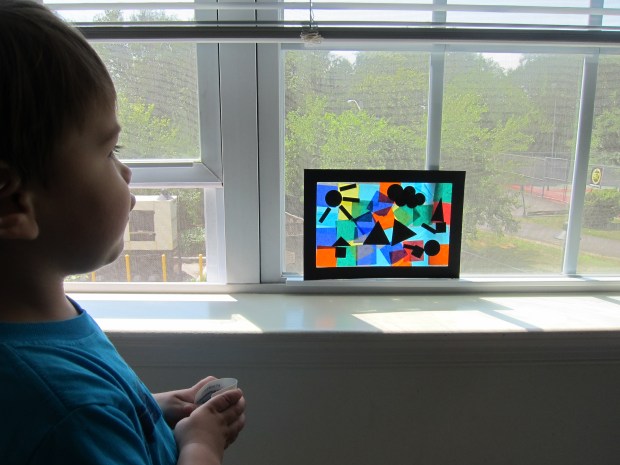
Best of all was setting the “stained glass” up in our window, beautiful with light filtering through.

koala rainbow stained (7)

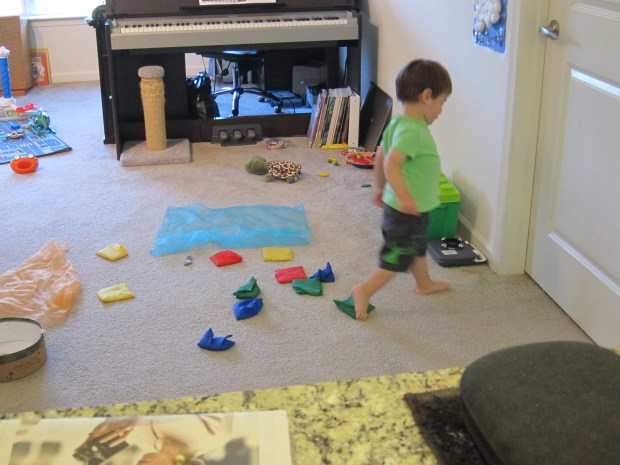
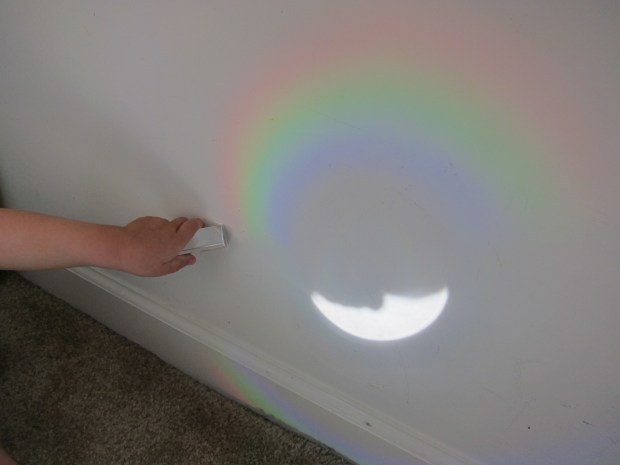
To finish our rainbow exploration, we made rainbows at home with two easy tools. A CD in a ray of sunlight produces a great rainbow against a wall.

Koala rainbows alt (1)

A prism takes a bit more work, to find the perfect angle, but Travis had so much fun waving it in sunlight until he spotted a rainbow.

Koala rainbows alt (2)

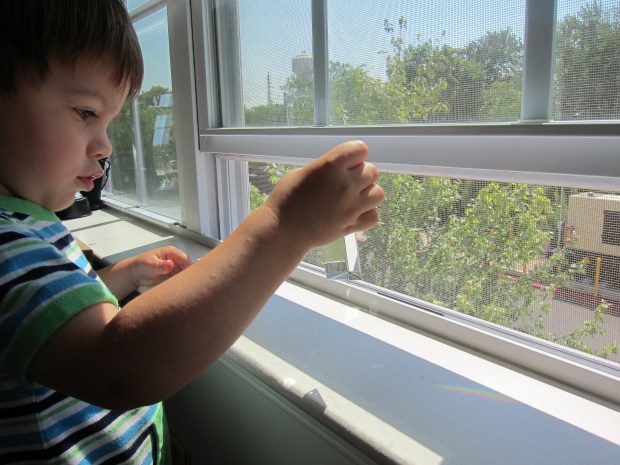
“I see it, I see it!” he would exclaim, and delighted in touching the colors on carpet and wall.

Koala rainbows alt (5)

Stayed tuned for more Koala Crate adventures!

koala rainbow stained (5)

Cupcake Crayons

Rainbow Crayons (6)

Ever wonder what to do with all the broken crayons a toddler seems to endlessly generate? I sure did! We had so many crayon pieces that I began compiling what we called our “broken crayon collection” – a plastic bag filled with all the bits and pieces. Travis even comes running now with a broken one, and watches with fascination as I add to our growing pile. It was finally time to do something about it!

Remove the paper wrappers from all the crayons. This is really an adult task, since I recommend making a small slit with an x-acto blade in each wrapper; this way, the two halves peel away easily from the crayon. Preschoolers can probably help with a bit of the peeling and unwrapping though!

Rainbow Crayons (2)

Break the crayons into small pieces, and arrange in muffin tins lined with cupcake liners – don’t fill the cupcake liners very high, just a layer or so of crayon pieces on the bottom of each.

Rainbow Crayons (3)

Bake at 170 degrees for 20 minutes, until the wax is melted. Cool completely, then peel away the liners.

Rainbow Crayons (4)

Kids will be fascinated  by the circular shape of these crayons, since they’re used to straight ones, and will love how each crayon produces a “rainbow” of colors, as they rotate it from side to side.

Rainbow Crayons (5)

To be 100% honest, Travis turned to me after a bit of exploration, and asked for his “pointy crayons” back. Can’t win ’em all!

Update: Turns out the third time was a charm! When I pulled out our cupcake crayons about ten days later, Travis was suddenly fascinated. He loved the “magical” way that each crayon could change color. “It turned blue!” he would cry with delight. “It turned orange!” We also tested out what he needed to do if he wanted a particular color to appear on the page – perhaps he needed to rotate his wrist, or turn the crayon a certain way? In sum, wonderful exploration.

Rainbow Crayon alt

Rescue

Rescue (5)The cute idea for this game came from 365 Toddler Activities that Inspire Creativity. Although we didn’t exactly adhere to the script, the game is a great launching-off point for imaginative play. In our case, I started Travis with a few prompts, but then he took the game in his own direction! Try it and see where your imagination takes you.

Have your child help you scatter rags or beanbags on the floor – anything that can be used as “dangers” to avoid. We dubbed our bean bags “alligators”.

Rescue (1)

Next, place a stuffed animal or toy in the center, and have your child “rescue” the toy without touching any of the dangerous bean bags.

Travis found the task to be very easy – he just reached in and picked up his stuffed owl – but was also very proud! He had a great time messing the bean bags all around, saying, “don’t step on the alligators!”

Rescue (2)

Next we set up a car in need of help:

Rescue (3)

Rescue!

Rescue (4)

But because the game seemed too easy, we reversed things next – what if Travis could only step on the bean bags, and needed to avoid the “alligator-infested” water around him? This led to great fun stepping from bag to bag:

Rescue (6)

And practicing a big jump off of them.

Rescue (7)

Oh no, Travis fell in the ocean!

Rescue (8)

I’m not even sure what’s going on here, except that he clearly had some game going in his head!

Rescue (9)

After seeing if he could walk around from bean bag to bean bag, Travis reversed things again. What if he could move around without the bean bag falling off him?

Rescue (10)

This proved delightful for a little while, although he was frustrated it didn’t stay on his back as long as he hoped. I swooped in and made the bean bag fall off my head a few times – always a sure way to make him laugh!


Turtle in a Shell

Turtle Shell (4)

We had adorable, impromptu play this morning, and although the photos didn’t come out very well (a very blurry Travis on the move!), I wanted to put up a quick blog post.

A stuffed turtle became a favorite yesterday, having to come along on car rides with us and sleep in Travis’s crib. When he woke up this morning, Turtle followed us into the living room, so I thought: why not invite Travis to pretend he was a turtle as well?

I explained how the turtle has a shell that goes everywhere with him as he crawls around, and then placed a light blanket over Travis’s back. Well, he just loved pretending! He scampered all about the apartment, shouting out that he was a turtle…

Turtle Shell (1)

And interacting with his new stuffed buddy:

Turtle Shell (3)

I used a second blanket on my own back to show him how a turtle pulls its head inside the shell when it gets startled, which turned into a fun game of peekaboo.

Even once the turtle play ended, Travis loved parading around with the blanket on his shoulders for a while. A very fun, imaginative way to play with stuffed animals!

Turtle Shell (5)

What stuffed toys does your little one have that lend themselves to make-believe? Please share ideas in the comments!

Rain-Themed Day!

Rain Theme (2)

We have blazing sunshine here today, and we’re waiting for a rain storm to come break the heat. In the meantime, Travis and I are making our own rain at home!

He loved the gross motor play to fit our theme – making a downpour with various kitchen colanders and sieves. The kitchen sink was a bit high for him, even on his stepstool…

Rain Theme (1)

So I moved things to the kitchen floor. Spread a towel underneath, and you won’t need to worry about “puddles”!

Rain Theme (3)

Travis loved scooping and pouring, as well as seeing the way water ran through the holes of the colander.

Rain Theme (4)

When he tired of that, he asked if he could get in the basin of water we were using. I rolled up his pants and had him pretend it was a real puddle, and he had a blast stomping and making bubbles and waves with his feet.

Rain Theme (6)

Even better, if you’re doing these activities on a real rainy day, put on some rubber boots and head outdoors to stomp!

For fine motor skills, we made a raincloud. Trace a rough outline of a cloud on blue construction paper, and have your child cover the area with glue before pressing down cotton balls. Don’t worry if the cotton ends up outside the lines, of course!

Rain Theme (9)

Travis loved this part, so much so that he needed to make a second cloud while our first was drying.

Rain Theme (11)

I was surprised he wasn’t more into the idea for raindrops – little teardrop shapes cut from shiny foil. So after he dabbed on more glue, I arranged the “rain” myself.

Rain Theme (10)

Round out your themed day with other rain toys you can think of – shake rain sticks, do a rain dance, or bring out bath toys and have a “storm” at bathtime.

A great nursery rhyme to recite is Doctor Foster:

Doctor Foster went to Gloucester

In a shower of rain.

He stepped in a puddle

Right up to his middle

And never went there again.

We also sang our favorite rainy day songs (Rain Rain Go Away; I Hear Thunder), and ended the day with a book about rain (Soggy Saturday).

And how perfect: by bedtime we were rewarded with this:

Rainy Day

Rolling Wheels

Rolling Wheels (3)

I have yet to meet a little boy who didn’t love all things with wheels – buses, cars, trucks, bulldozers – you name it! So what better way to paint than to create “tire tracks” in your own home?

Tuck the paintbrushes aside for the day, and instead set a variety of small trucks and cars alongside paper plates or foil pie tins filled with a different paint colors. Black is an obvious choice, to make authentic-looking tire tracks, but we had fun with green and orange paint too. Sturdy construction paper or poster board are good for this project.

Rolling Wheels (1)

Travis loved dipping his cars in the paint, and seemed surprised every time he saw the resulting color on the page, after giving a vroom. “It’s green!” he would declare with delight.

Rolling Wheels (4)

For variety, try using cars with wheels of varying thickness. A Brio train made nice big tracks.

Rolling Wheels (5)

When we were cleaning up, Travis invented a new method of painting: he dipped a wet wipe in the paint trays and rubbed all over the newspaper we had layered on the floor – quelle artiste!

Rolling Wheels (6)

Pirate’s Treasure

Pirate's Treasure(6)

Travis has lately been enthralled with finding “gold” rocks, leading to rock hunts all around our courtyard and when we visit the beach. Usually, I call any yellow or white ones we find “gold” rocks to make them special… but I decided to give Travis a real surprise at home!

Although normally it’s fun to do paint projects with your toddler, do this one while they’re sleeping – shh, it’s a surprise! Paint various rocks yellow (if your child still puts objects in his or her mouth, make sure they are too big to be choking hazards). For even truer color, you can spray paint them gold, but I have yet to find a spray paint that’s vegan. Let the rocks dry overnight.

The next day, bury them in a sandbox. If you’re indoors, a pan filled with coarse salt, oatmeal, or even flour makes a great sand substitute.

I told Travis I had a special surprise for him, and handed him a shovel. The hunt begins…

Pirate's Treasure (1)

What’s that he sees?

Pirate's Treasure (2)

The joy on his face was absolutely priceless.

Pirate's Treasure (3)

He was so ecstatic from having found “real” gold rocks that he hardly knew what to do with himself. He reburied them a few times so he could dig them up again, and then we played with them all around the house.

Pirate's Treasure (5)

I can think of a few ways to expand the game: creating a “treasure chest” to keep them in; pretending to be pirates on an island… Let me know what variations you and your child come up with in the comments!

Backyard Grill

Backyard Grill (9)

This one’s a little complicated, parents, but I promise it’s worth it!

The idea came from our August High Five magazine, and although I wondered if Travis would understand the concepts – we’ve never grilled dinner with him! – he has lately been very curious about the grills in our building’s courtyard, and took to the whole game with alacrity.

You’ll need to do some set-up the day before. Cut sponges into circles and have your child paint some brown and some yellow to make (veggie) burgers and buns. Our yellow is on the brown-ish side anyway, but if yours is bright yellow, you might want to tone it down with a drop of brown for better bun color.

Backyard Grill (2)

Travis had a blast painting the sponges, proudly saying, “We’re making burgers!” Make sure to let dry overnight – the sponges will absorb a lot of paint.

Backyard Grill (1)

While he slept, I did a little mommy work: roll toilet paper tubes in yellow tissue paper, and tuck in the ends. Add a piece of green tissue paper to one side, securing with tape; twist the overhanging end and secure with a rubber band. Draw on corn kernels with brown pen. Now you have corn on the cob!

Backyard Grill (7)

If your child is a preschooler instead of a toddler, they can probably help out with this part too!

Backyard Grill (10)

In the morning, I told Travis we were setting up the grill, and he was so excited. We used castle blocks as the base, but any blocks or Duplo you have around the house will work. We crumpled up black construction paper for charcoal, and then I told Travis we needed to add fire so our grill would be hot like the oven. He loved adding wads of red and yellow tissue paper, and helped me blow on the coals to start our fire!

Backyard Grill (3)

We added a cookie rack as the grill itself. Then it was time to cook our burgers!

Backyard Grill (4)

Travis became an expert burger flipper:

Backyard Grill (5)

Added green tissue paper “lettuce”:

Backyard Grill (6)

And liked the corn even though he seemed very unsure what it was:

Backyard Grill (8)

And after about 20 minutes of good fun, toddler happened:

Backyard Grill (11)

A good ending!

Shoebox Golf

Shoebox Golf (3)

Develop hand-eye coordination with this toddler version of mini golf, no golf club required!

For visual fun, decorate the inside of a shoebox lid with crayons, before cutting a hole in the center large enough for a golf ball or ping pong ball to roll through. Travis wasn’t a fan of coloring the lid because he kept running up against the edges, so I designed a mini golf course for him – grass and a flag!

Shoebox Golf (1)

Use masking tape to secure the lid, upside down, on top of the shoebox, and place the ball inside. Now show your child how to maneuver the lid until the ball drops through the hole – goal!

Travis had a hard time gripping both the lid and box at the same time, so we actually just took the top off, and let the ball drop onto the ground with each goal. This method also eliminates the need to untape the lid every time your toddler “scores” and retrieve the ball from inside the shoebox, so I think it’s a better solution all around. Try it both ways and see which you prefer!

Shoebox Golf (2)

Apologies for the blurry photos – all our pics were action shots for this game, of course!

What other shoebox games have you and your toddler come up with? Let me know in the comments!

Horse-Themed Day!

Horse Theme (1)

Occasionally, I’ll introduce a “theme” for the day, a nice way to give a loose structure to our play and spark ideas for creativity. Travis and I made today all about horses!

As a fine motor skills project, I thought it would be fun to use yarn as the mane on a coloring book cut-out of a horse. Surprisingly, since he loves yarn, Travis wasn’t in the mood to do the gluing or pressing down of the yarn, but it was a great way to introduce ‘mane’ into his vocabulary. He then enjoyed finishing the picture with watercolors (his request!) and crayons.

Horse Theme (2)

For gross motor play, I turned an old wrapping paper roll into a “hobby horse,” taping it closed at intervals and adding play scarves as the mane. Travis ignored the game in the morning, but surprised me mid-afternoon by picking the tube up and trotting about the apartment.

Horse Theme (4)

To add to the fun, we sang familiar horse ditties (“Trot Trot to Boston” “This is the Way the Ladies Ride”) as he galloped around.

Horse Theme (3)

To round-out your horse-themed day, pull out other toys around the house that contain horses (plastic barns and toy animals, stuffed animals etc). You can also read any books you have at home about horses.

Horse Theme (5)

And to end the day on a sweet note, sing ‘All the Pretty Little Horses’ as a lullaby!