Paper Plate Kite

Plate Kite (7)

Let’s be honest. Kites are great but they can also be a royal pain – all that tangled string, getting enough wind to launch the kite high, etc.

This quick project gives kids the fun of a kite without the hassle. (Bonus points: there’s fine motor skill practice involved!).

Cut the center from a paper plate (or several plates, if you want multiple kites).

Plate Kite (3)

We went through our craft bin and selected pretty ribbon to tie on as the kite tails.

Plate Kite (1)

Now for that fine finger work! Help your child tie each ribbon around the bottom rim of the plate.

Plate Kite (2)

Travis was really proud when I told him this was almost like tying shoelaces.

Plate Kite (5)

No need to wait for a windy day – just run and the kite flutters with you!

Plate Kite (6)

Looking for a slightly more complicated project? Try out our plastic bag kite or tissue paper kite.

Strawberry Picking and Basket Weaving

Summer 2 (c)

Summertime! This season is synonymous with so many things, and one of those is berry picking. Last year we headed out late in the season for blueberries. This year we made sure not to miss the strawberry window. Kids will love gathering the sweet red berries, and discovering the baby green strawberries still on the plant.

Summer 2 (b)

The fun doesn’t end at home: Fruit baskets are great for fine motor skills! We picked a few pretty colors of ribbon and wove through the holes in the basket.

Strawberry Basket (1)

If you already have strawberry crates at home, do this project ahead of time, and bring your one-of-a-kind basket when you do your picking.

Strawberry Basket (2)

Then of course comes the bonus: strawberry vanilla pancakes for breakfast.

1 cup flour

2 tablespoons brown sugar

2 teaspoons baking powder

1 teaspoon salt

1 Ener-G egg

1 cup vanilla almond milk

2 tablespoons canola oil

1 tablespoon vanilla extract

1 cup chopped strawberries

Combine all of the ingredients in a bowl.

Strawberry Basket (3)

Cook on a griddle or skillet for 3 minutes until bubbles form on the top. Flip over and cook 2 to 3 minutes on the other side.

Strawberry Basket (4)

Pancakes have never tasted so much like summer!

Strawberry Basket (5)

Candle in the Wind

Candle Wind (3)

Now that we’ve the got the wind in our sails (haha), we’re having lots of fun finding out about other properties of wind. Will wind be able to travel around an obstacle in its way? This experiment is an easy illustration of the fact. Parents be aware: You will need a candle with a flame for the experiment to work. Supervise very closely, and only do so if you know your children won’t touch the flame.

Candle Wind (1)

To start, light a small sturdy candle, and place behind an object with square corners – a vase worked well for this step.

Candle Wind (2)

Travis huffed and puffed, but the wind couldn’t reach the candle this way. Onto the next attempt!

Place an object with round sides between your child and the candle, such as a water glass.

Candle Wind (5)

The wind will make it around the sides and poof – out goes the candle.

Candle Wind (4)

Looking for more windy fun? Check out our recent experiment with hot air spinners.


Hot Air Spinner

Hot Spinner (4)

This was the perfect science experiment to do hot on the heels of our wind-themed kit from Koala Crate. You’re illustrating for children that warm air is less dense than cold air. So if you hold something above a heat source (like an uncovered lightbulb), the cold air pushes the warm air up and makes it spiral!

First, draw a circle on construction paper, and then pencil in a spiral shape. Cut out.

Hot Spinner (1)

These kinds of projects are great practice for Travis – he gets to mimic my movements (drawing circles, cutting with safety scissors) while I make the version that is precise enough for a science experiment.

Hot Spinner (2)

Next we needed to staple a thread (be sure to use sewing thread; twine or yarn will be too heavy) to the center of the spiral – by far Travis’s favorite part!

Hot Spinner (3)

The next step was a bit tricky to catch on camera! Wrap the other end of your thread around a pencil and hold over a lightbulb (we put a lamp on the ground and removed the shade). Stay still until the spiral comes to a stop, then carefully observe – in moments it will start to whirl!

Hot Spinner (5)

Some good STEM fun to kick off our summer!

Wind Crate

Koala wind (15)

I was slightly skeptical when our latest offering from Koala Crate arrived, a package very specifically about… wind. It turns out this crate was fantastic, so my skepticism was unearned. As always, you can put together the following projects after a visit to your local craft store.

The first project was a Wind Car. Travis seemed slightly skeptical, too, as we put it together. A brief run down of the mechanics: push a dowel through the holes in the craft paper base. Koala Wind (1)

Slide a foam wheel onto each end of the sticks, then place the base into the slightly larger craft paper car “body”; the slots in the body will hold the wheels in place. Tape the body and base together (clear stickers are provided).

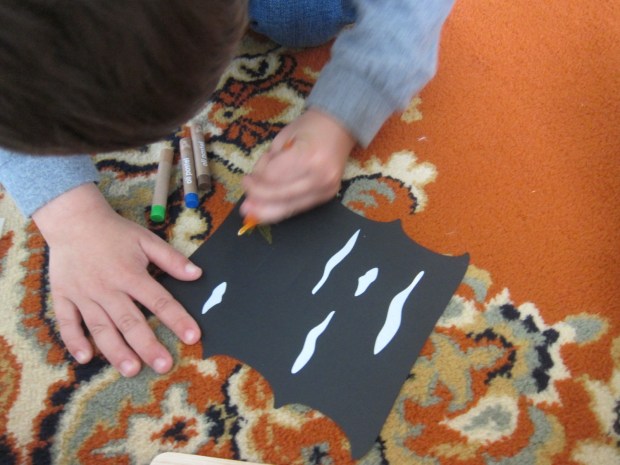
Place a piece of sticky foam in the center. This foam has a slit in it to hold the craft stick “masts” and sails.

Decorate the provided sails (the kit came with oil pastels, a nice deviation from crayons), and slide on to the provided craft sticks. Your child can opt which sail to test in their car, or swap them out whenever desired.

Koala wind (3)

Travis wasn’t very interested in the fan that came with the kit to propel the car along (wind power!).

Koala wind (5)

But once we set up an electrical fan, he was smitten!

Koala wind (6)

Many a game followed, playing with the different strength settings on the fan and changing out the shape of the sail to see what made the car race along the furthest and fastest. So much fun that we had to capture a quick video clip!

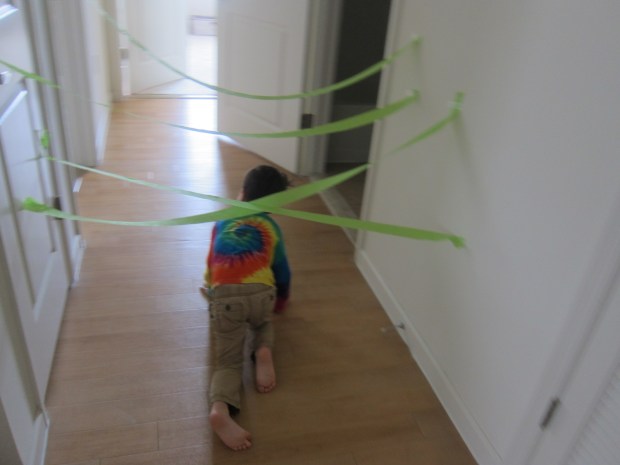
Next up was the Windsock. This craft was great for building fine motor skills, particularly knotting and lacing, and Travis was an eager participant. First he scribbled on decorations with those oil pastels.

Koala Wind (16)

Thread a piece of foam through the slits in the top; this will hold the top of the windsock open.

Koala Wind (17)

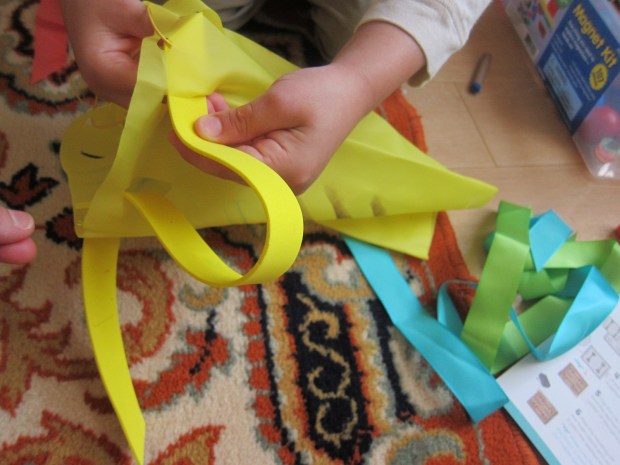
Next, thread in the provided string from which it will hang, and tie into a knot. Finally, fold ribbons in half, slip through a slot in the wind sock’s bottom edge, and knot. This was great for shoe-tying practice!

Koala Wind (18)

The windsock needed to be tested in front of the fan, of course.

Koala Wind (20)

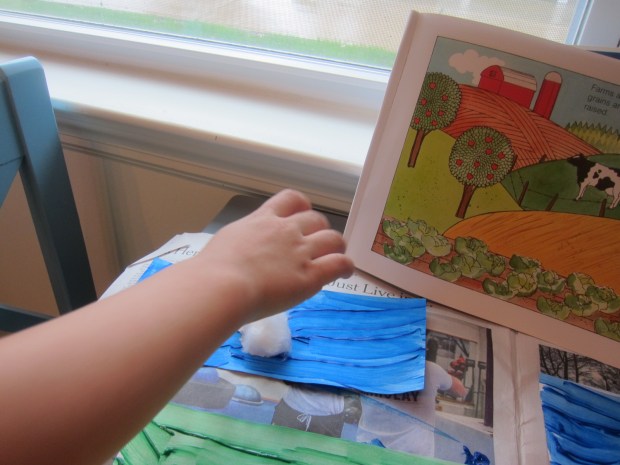
We found a place to hang it, and then just needed to add the final project to tie it all together… A Weather Chart!

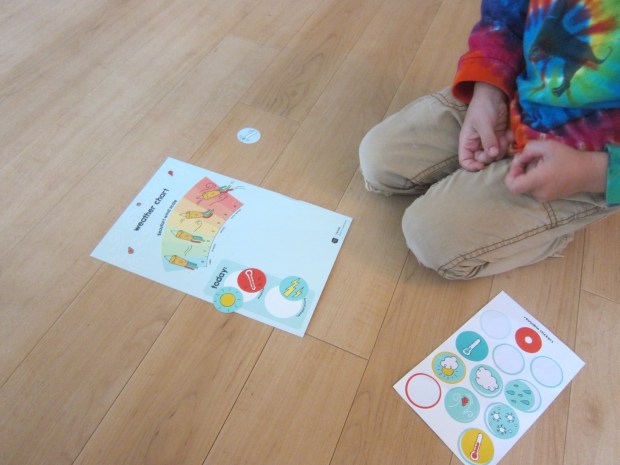
I’ve been wanting to make Travis a weather wall calendar for some time, so was delighted to find this was the crate’s third project. This one was super simple: a chart with re-useable stickers showing weather and temperature with simple pictures for pre-readers to understand.

Koala wind (10)

Hang it to the wall with the provided suction cup. Travis was delighted! He ran to the window (“We do this in school too!”) to determine which sticker to use, and then asked if he could just play with the stickers. Soon he was making up silly combinations like a sunny day with lightning.

Koala wind (13)

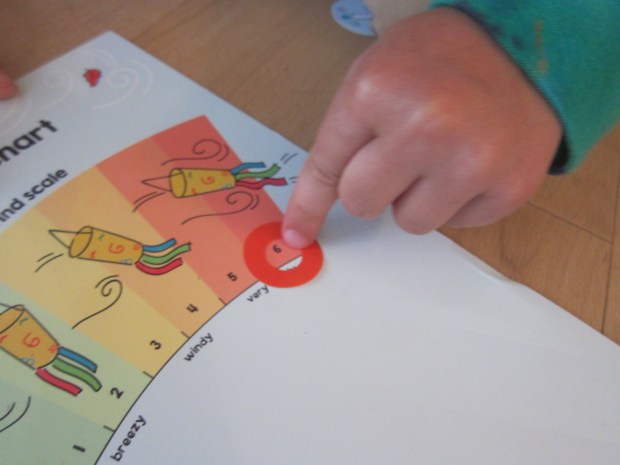
There is also a round sticker to move along the Beaufort scale each day, depending what kids observe on their windsock.

Koala wind (14)

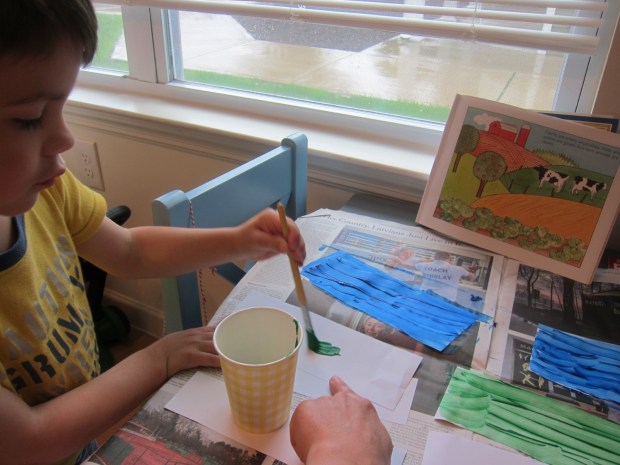
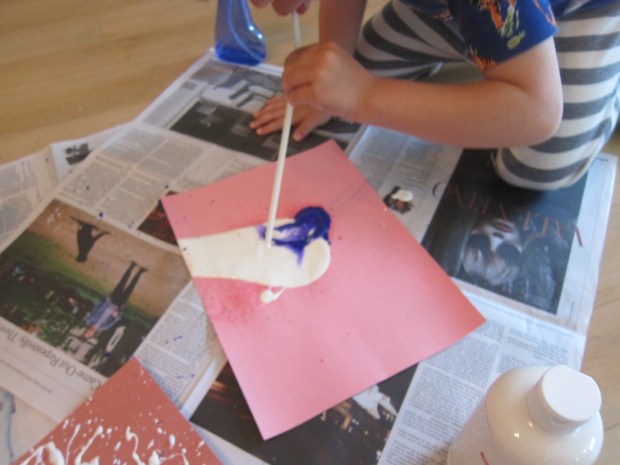
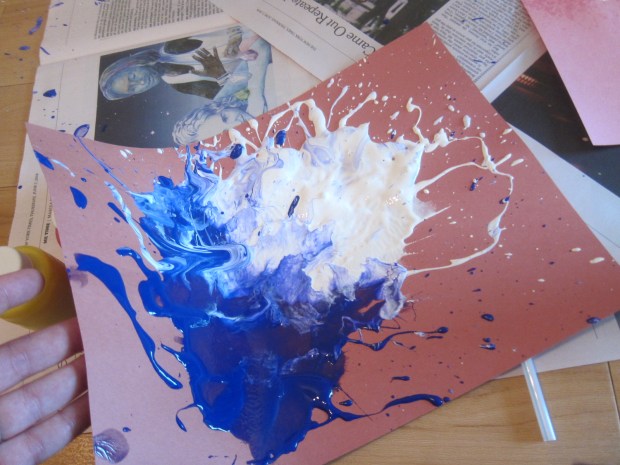
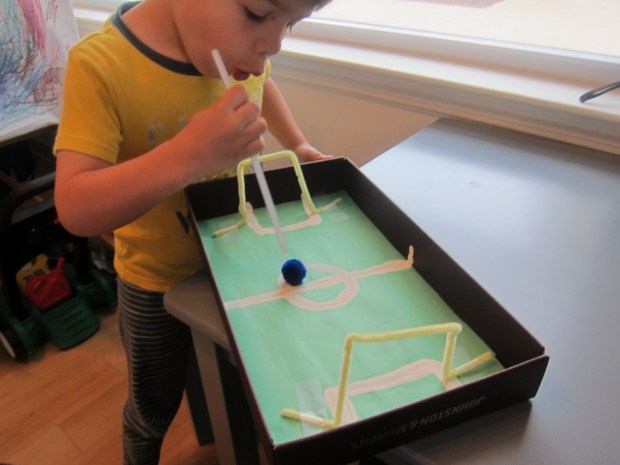
For some additional “windy” fun, we did a variation on painting through straws, using our lungs as the wind power. This time, Travis squirted big blobs of paint onto paper first.

Koala Wind (21)

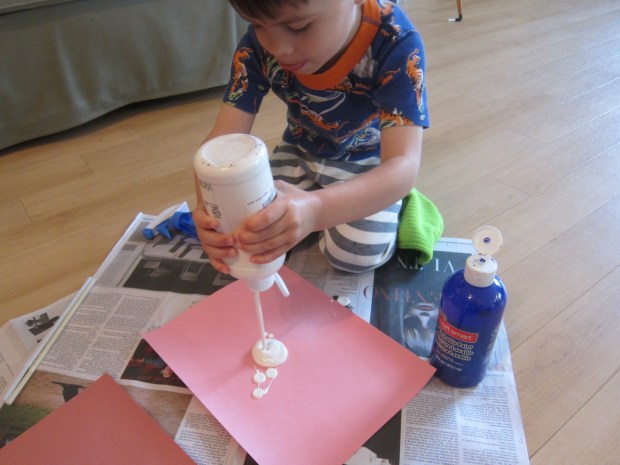
He loved watching the way he could make the colors move and mix.

Koala Wind (22)

And got a kick out of the mess I made!

Koala Wind (23)

Finally, the booklet provides prompts for questions to get your kids talking even more about wind and weather. What do they see moving in the breeze outside? What kinds of things can the wind do? What’s your favorite kind of weather? Enjoy the exploration!

Early Explorers Sports


IMG_0002

This month’s offering from Early Explorers, all about sports, was a fantastic one for getting active and introducing new games that even mom and dad didn’t know about! The booklet not only had us doing normal preschool activities – mazes, matching, patterns – but also brushing up on yoga poses and learning about neat new sports.

LP Sport (18)

And of course putting stickers on our map.

LP Sport (3)

Sports Craft: 

First up was making a game of tabletop soccer. First, glue green construction paper down into the bottom of a shoebox. We actually found that the shoebox lid worked better, since the sides weren’t as high.

LP Sport (5)

Use white paint to mimic the lines of a soccer field. Travis liked watching and naming the shapes I painted (which bigger kids can do themselves). 

LP Sport (7)

Fold pipe cleaners into the shape of goals and tape down. Now all you need is a pom pom and two straws to play. Players take turns blowing toward the opponent’s goal, while the person on defense tries to blow the pom pom away.

LP Sport (8)

Great fun!

Sports Science:

Ok, perhaps the following activity isn’t science, but since the booklet didn’t have anything that properly fit into this category, this will do: learning new games from around the world. The first, Semut, Orang, Gajah sounded like the Sumatran equivalent of Rock, Scissors, Paper but we got to learn cool new words and hand gestures. Here’s Travis with his semut (ant!) ready to defeat my gajah (elephant).

LP Sport (13)

The next game was a bit of a pickle: an Armenian form of egg jousting (!) played around Easter, where children crack hard-boiled eggs together until the loser’s egg cracks. How to veganize such neat sounding fun? I needed a food that would crack easily… So here we are chip jousting!

LP Sport (16)

It might not have been authentic, but it was certainly a delight.

LP Sport (17)

Sports Keepsake:

Travis loved the paddle ball from “Max and Mia” that came in this kit. He was determined to master the game, and I liked that it introduced him to a new activity.

LP Sport (1)

Sports Field Trip:

We had to go see a sport being played, naturally! Looking for cheap family fun? Check out minor league teams in your area. You’ll get great seats right up close to the action but minus the crowds, prices, and noise of major league parks. If you can’t make it to a local sporting event, tune into something on TV as a family and discuss the new game.

Ducks (1)

Sports Further Activities:

We wanted to take the booklet’s suggestion and try a game we’d never played before. Little Passport’s blog post on games from around the world was the perfect resource. Okay, so we didn’t have enough players for a true game of Egyptian Drop the Handkerchief, but Travis loved diving in to catch it before the count of 5.

LP Sport (15)

We also got a great dose of physical activity with a family obstacle course. Stops along the course included: navigating a crepe paper spider web;

LP Sport (11)ball and spoon races;

LP Sport (12)

and paper cup golf.

LP Sport (14)

As always, we hit up the library to further our exploration, opting for books on sports not featured in our packet.

IMG_0003

We talked about our favorite and Travis said his was baseball.

Finally, hit up the park and just play! Toss a football, kick a soccer ball, play a game of croquet, or whatever else suits your family’s fancy. Many thanks to this kit for getting us moving.

LP Sports final.jpg


Bird Cafe


Bird Cafe (7)

Our latest project (from High Five magazine) wasn’t as big a hit as past crafts, perhaps because Travis and I have made bird feeders before and it felt a bit ho-hum to him. But there’s never anything wrong with learning a new way to feed our feathered friends, and this one is easy to put together!

Save any clear plastic food container; shallow is better, like the kind used for nuts or dried fruit. Rinse and dry.

Cut a rectangle from the center of an 8×5-inch piece of craft foam. This step was a bit tricky for Travis, but he loved cutting separate pieces of craft foam into free-form shapes while I worked.

Bird Cafe (1)

Tape the foam around your container, then wrap the top of the craft foam around the lid and tape in place. The craft foam now acts as the “wall” connecting the bottom and the lid roof.

BIrd Cafe (4)

Hole punch the foam near the lid on each side, and thread through yarn or string to hang your feeder.

BIrd Cafe (5)

As the final touch, tape on a second sheet of craft foam bent into a “roof”.

Bird Cafe (6)

We’re hoping to get many a summer visitor!


Grow a Science Garden

Grow Garden alt.JPG

This indoor way to show your kids how vegetables grow is almost trippy! All you need is a head of romaine and a small glass jar. Then watch the magic happen.

Cut the leaves from the base of the romaine. Use the leaves for a big salad of course. I also gave my budding chef some of the leaves to play with in his set of pots and pans.

Grow Garden (4)

Meanwhile, trim the very bottom of the romaine head off thinly – this will help it absorb more water.

Here is a slightly skeptical Travis checking out the early stage of our experiment.

Grow Garden (2)

Place in a glass of water, making sure the base is completely covered, and place somewhere sunny. Change the water every day and watch your romaine sprout!

Grow Garden (3)

Within a day we had a few little leaves.

Grow Garden (6)

The picture at the top of this post shows growth after about 4 days. We can’t wait until we have enough for a fresh salad!

If you want to continue the fun, try the same experiment with a fennel bulb. You can also save the tops of carrots or radishes, place in a shallow dish with water, and watch for fresh greens to emerge. Thanks to Parents magazine for the idea!

Update: Here’s the lettuce about a week in, as tall as we let it grow. Honestly it was beginning to brown slightly around the edges, so I’m not sure I’d recommend growing it longer.

Grow Garden alt

But needless to say, Travis was thrilled!

Grow Garden var


Farm Land

Farm Land (7)

Farming is naturally on our minds this time of year, with local farmstands around us beginning to brim with late spring and early summer produce. This project is a neat visual if you are doing a unit at home about farming, about where food comes from, and about different landscapes children might see on a farm.

To get the most out of the craft, I recommend first looking at a book with a good visual of farmland, or finding a few pictures online. Although not very vegan-friendly, my son loves the description of farm life year-round in Gail Gibbon’s Farming.

Farm Land (1)

We talked about the different portions of land he saw in the picture, starting with what was up top – sky – and what was on the bottom – garden dirt.

Next I cut paper into 4 pieces, and we took turns painting them in color blocks just like in the picture: blue for sky, green for grass, yellow for hay or wheat, and brown for the vegetable patch.

Farm Land (2)

Let your colors dry, then come back to add details. For added fun, we raided mommy’s bathroom cabinet and used cotton balls for clouds:

Farm Land (4)

… and q-tips to paint details like flowers in the meadow and brown wheat in the yellow section. Let dry again.

Farm Land (5)

The final step was to use a glue stick to put it all back together again on a large piece of construction paper. This is neat because it will be almost like a puzzle for the kids. Don’t worry if a few sections get mixed up along the way.

Farm Land (6)

If you can, cap things off with a trip to a local farm; lots of places have pick-your-own veggies and berries getting underway now that we’re almost to June!


Seaside Stepping Stone

Stepping Stone (5)

Happy Memorial Day! We’re officially kicking off summer, beaches, and all things seashore with this craft, care of High Five magazine. The resulting hand- or footprints would make a beautiful hostess gift if you’re visiting friends or relatives by the ocean this year. Happy summer!

To start, roll air-dry clay flat with a rolling pin. The instructions suggested placing a bowl upside down on top of the clay to cut it into a perfect circle, but I didn’t have a bowl the right size. We decided we liked the rather imperfect result of ours anyway.

Stepping Stone (2)

Have your child step into the clay hard enough to leave a foot imprint (or, alternatively, press in a hand).

Decorate around the print with pretty sea-inspired bits, like seashells, or ocean-hued jewels and beads.

Stepping Stone (3)

The seashells were a huge hit, and Travis loved sorting through them and selecting his favorites.

Stepping Stone (1)

Let the clay dry completely before placing the stepping stone on the path to the ocean or beach!

Stepping Stone (6)