Magnetic Fishing Game

Magnetic Fish (9)

Travis and I played a game like this quite some time ago, but with a focus on numbers and letters more than the fish. Today, we just needed some silly fishy fun, and it turned out to be an interesting lesson in magnetism, too!

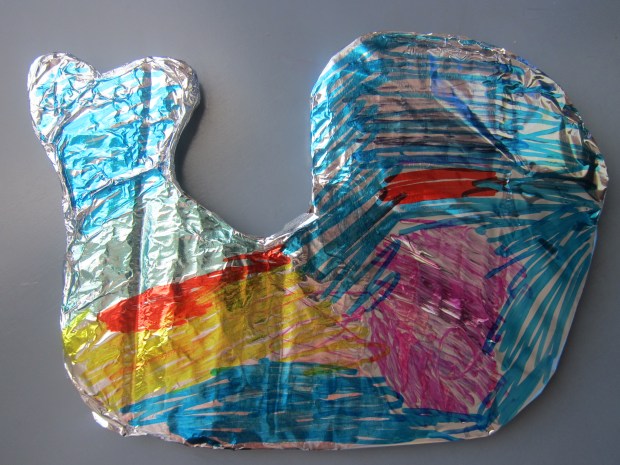
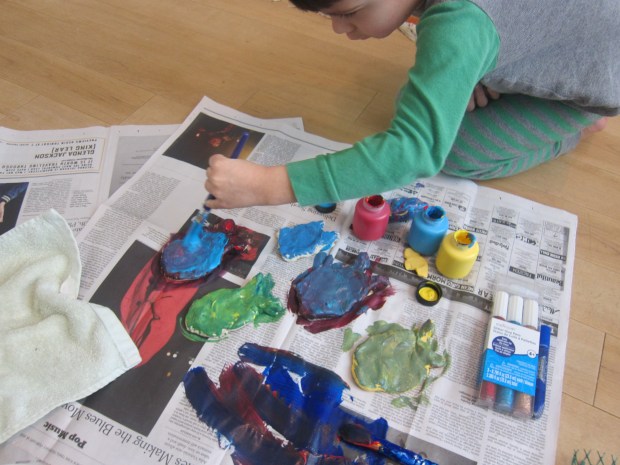
First, I cut out a fish template. Travis helped trace these onto construction paper and cut out.

Magnetic Fish (1)

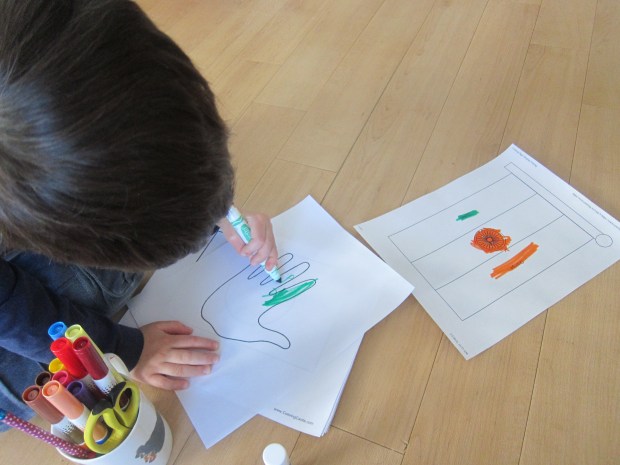
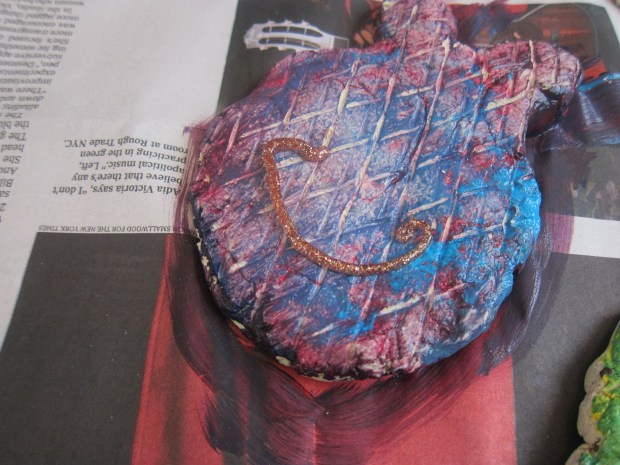
Instead of hammering home preschool skills with letters and numbers this time, I invited him to draw on the fish. Silly smiles and scales soon turned into him being a fish doctor.

Magnetic Fish (3)

Oh no, some fish had polka dot flu! Or squiggle-itis!

Magnetic Fish (6)

For the fishing rods, tie yarn around one end of a dowel, and secure with masking tape. I tied a small magnet onto the other end of the yarn.

Magnetic Fish (5)

We set up our fish in the ocean, and raced to rescue them as fish doctors. I loved that he came up with this imaginative element to the game all on his own.

Magnetic Fish (7)

When he tried to rescue more than one fish at a time, he was disappointed the second one fell off from the small magnets we were using.

Magnetic Fish (10)

Hmm, would one of the bigger magnets we had around the house rescue more fish faster? Whoa, look how many we could pick up with this magnet!

Magnetic Fish (11)

Pretty soon, we were testing relative magnet strength in all kinds of ways, so all-in-all I’d say this was a great activity to help pass a rainy morning!

Baking Soda Ocean Art

Baking Soda Ocean Art (17).JPG

Travis and I made a batch of a neat baking soda dough today! Originally we hoped to craft a few ocean creatures and corals. It turns out Travis also just had a blast playing with the dough in his own way while I did more of the actual sculpting, but that means it was a win-win all around.

To make the dough, combine 1 cup baking soda, 1/2 cup cornstarch, and 3/4 cup water in a bowl. Travis loves whenever we make “potions” like this.

Baking Soda Ocean Art (2)

Microwave for 1 minute, then stir. Microwave for a second minute and then stir; you’ll notice it is starting to thicken around the edges.

Continue to microwave at 20 second intervals thereafter, until the mixture is thick and creamy like mashed potatoes. Travis was the button presser for this part, as you can see! We needed about 3 or 4 intervals.

Baking Soda Ocean Art (3)

Cover the bowl with a damp paper towel, and let cool.

Baking Soda Ocean Art (4)

(Note: if your child is antsy during this waiting period, put leftover baking soda to good use with a classic volcano).

I tested the dough to make sure it had cooled completely, and found it to be quite sticky. I sprinkled in additional baking soda, and needed quite a lot; I wasn’t measuring, but probably close to 1/4 cup. If your dough is also sticky, add a little baking soda at a time and knead in after each addition. If you find you have the opposite problem (a dough that is too stiff), add a little extra water.

Travis loved the way it felt!

Baking Soda Ocean Art (5)

At first he wanted to know how to make sea creatures, especially the starfish: Form 5 teardrop shapes, and attach them together.

Baking Soda Ocean Art (6)

Some extra dots of dough give the starfish bumpy texture.

Baking Soda Ocean Art (8)

Coral was also fun; form a round ball, then add marks with a pencil for texture.

Baking Soda Ocean Art (9)

From there, Travis had his own game going, happily getting his hands into the dough over and over again.

Baking Soda Ocean Art (12)

I rounded out our ocean collection with a few more sea creatures. For a sand dollar, roll a ball and then flatten. Draw a flower shape in the center with the tip of a pencil, and add a few holes around the edges.

Tube sponges were the neatest to make: Roll a few log shapes, then attach together, and punch a hole in the center of each with a pencil.

Baking Soda Ocean Art (14)

Finally, we rolled up a few cute sea snails.

Baking Soda Ocean Art (16)

Travis really wanted to play with these right away, which you can do if you bake at 175 degrees F for about 45 minutes. But when he learned that this would mean the dough turning brown, he – maturely! – decided he could wait the day or so you’ll need for the dough to dry completely.

Baking Soda Ocean Art (13)

Definitely worth the wait.

Baking Soda Ocean Art (15)


Comb Waterbending

Comb Bend (5)

Hive mind! Travis and I need your help with this one. We set out to do some science, which unfortunately didn’t work. The idea is to use polarity to make water bend, using nothing more than a comb, a ruler, and some freshly-shampooed hair. But our water stayed straight – rats! So will this work for you?

First, we turned the faucet on to just a thin stream, and placed a ruler across the sink for an accurate test – the water hit right about the 6 inch mark.

Comb Bend (2)

We held the comb up to the water, to ensure we were starting with no bend to the water stream.

Comb Bend (3)

Travis was fresh from the bath, so we ran the comb through his just-washed hair to generate static. These negative particles should then attract the positive particles in the water, which kids will be familiar with if they understand magnets and “opposites attract.”

Comb Bend (1)

Online testers of this experiment seemed to have no trouble, saying the comb bent the water stream as much as 3 inches! But we saw no movement.

Did his hair need to be dry? We waited for it to air-dry, then tested again. Still no movement.

Comb Bend (4)

Knowing that it was static we were after, we then tried running the comb through a blanket right out of the dryer – one that was full of static! And still our water didn’t bend.

Comb Bend (6)

So, posting this game here for my readers in the hopes that someone else has better luck. If so, what worked? Can you figure out why? We’re eager to make the water bend next time!

Shiny Whale

Shiny Whale (5).JPG

Poor Travis had a sick day today, which meant lots of extra snuggles and okay, perhaps a little too much extra-special TV watching. But it’s good to still engage your little one, even when they’re under the weather, with quiet activities like puzzles and coloring. This minimal-effort art project was perfect; it helped distract him for just a bit, and he created something pretty to boot!

First, I traced a whale shape onto cardboard and cut out.

Shiny Whale (1)

We’ve done several whale projects lately, but this one got to be extra shiny. Wrap the shape in aluminum foil, folding the foil on the backside so the front stays smooth.

Shiny Whale (3)

I gave Travis lots of sharpie markers to decorate his whale, for even shinier effect.

Shiny Whale (7)

As I said, simple but pretty, and a good way to distract your kid from that runny nose or sore throat – at least for a few minutes!

Shiny Whale (6)

Liquid Hourglass

Liquid Hourglass (9).JPG

Are you passing the hours during a snow day, or the latest winter storm, or just having a day that’s too cold to venture outside? Then this hourglass project is for you! It will make watching the passing hours into a fantastically cool experiment.

To start, you need two identical bottles (we used empty water bottles that were 1 liter).

Liquid Hourglass (1)

Hot glue the caps together, pressing for a tight seal.

Liquid Hourglass (2)

Next add a piece of duct tape, to make a water-tight seal.

Liquid Hourglass (3)

Mark two dots where you will insert straws, then (grown-up step!) drill through the holes.

Liquid Hourglass (4)

Cut straws into pieces that are 2-inches long. Insert one straw 1/3 of the way into one of the holes. Insert the other straw 1/3 of the way in the other direction.

Liquid Hourglass (5)

Fill your first bottle with vegetable oil. Definitely use the cheap stuff here, folks, since the bottle needs to be filled completely. We used a funnel to avoid any mess.

Liquid Hourglass (6)

Fill the second bottle with water. We added blue food coloring for visual effect.

Liquid Hourglass (7)

Now screw one half of the bottle cap onto the bottle with oil. Quickly and carefully, flip over and screw onto the bottle with water. Immediately you’ll get a big bubbling result as the two liquids start to mix.

Liquid Hourglass (8)

After a few minutes, the bubbles will settle down and you can really see what’s happening. Because the oil is less dense than water, it will bubble up, bit by bit through the straw, at the same time that the water bubbles down.

Liquid Hourglass (13)

First, we were simply in awe of how cool this looked.

Liquid Hourglass (10)

Then we decided to get more scientific: Had we really created an hourglass? We timed it and discovered it took 45 minutes on the dot before we had one completely blue bottle, and one completely oil bottle.

Liquid Hourglass (16)

And then there’s the fact that this is simply mesmerizing to watch. Seriously, I could have meditated in front of these bubbles.

Liquid Hourglass (14)

And Travis’s glee made it apparent he felt the same.

Liquid Hourglass (15)

Although not necessary, you can decorate your bottles, too. Since the blue and yellow effect reminded us of sand and water, we added a little octopus and his cave…

Liquid Hourglass (11)

…and these fishy friends.

Liquid Hourglass (12)

What a way to watch the hours pass!


Etiquette Around the World

Etiquette (4)

Travis and I have been working on table manners lately; he’s old enough now that his behavior matters more when we go out to dinner, or even just dine as a family. No elbows on the table and staying in your seat are big rules in our house!

But I wanted to stop feeling like a broken record reminding him of these manners, so we did some investigation into etiquette around the world to make things more fun! This overlapped nicely with a home-school lesson to go with our Eggplant Parmesan from Raddish Kids.

Start off with some giggles, with a recitation of ‘The Goops.’ I remember this poem from my own childhood!

The Goops they lick their fingers.

The Goops they lick their knives.

They spill their broth on the tablecloth,

Oh they lead disgusting lives.

The Goops they talk while eating,

And loud and fast they chew; 

And that’s why I’m glad that I 

Am not a Goop – are you?

You can plainly see the giggles this elicited!

Etiquette (2)

I asked Travis what the poem was about, and he caught on right away that it was about manners.

Next we watched a clip of strange etiquette rules around the world. Travis was more interested than I would have guessed. “Mom, in one part of the world you can’t eat with your left hand,” he came rushing up to tell me, for example.

Etiquette (1)

Because he’s only 4, we parsed the video closely so it made more sense. I printed flags from 7 of the 12 countries (the full 12 seemed overwhelming) and printed pictures depicting the bad manner to go along with each. We colored them in (a nice geography lesson, too!) and then glued each flag to the appropriate etiquette picture.

Etiquette (3)

For some final silly fun, we read ‘The Goops’ again, and this time Travis got a kick out of acting out some of the bad manners – elbows on the table and fork licking!

Etiquette (5)

Big kids can make this into a proper skit, and delight their family or friends with their bad manners. What’s a big no-no in your house? Please share in the comments!


Snow Skeeball

Snow Skeeball (7).JPG

Finally! It took until March for us to receive our first real snowfall of the season, and we were so ready to play. Last weekend we were indoors at an arcade, so today we decided to replicate one of our favorite games in snowy form.

I fashioned a ramp out of the snow, making it lower at the bottom, and higher up top – good thing we had perfectly packable snow.

Snow Skeeball (2)

We wedged three buckets into the snow at intervals, and then I handed Travis a few golf balls.

Snow Skeeball (3)

Time to toss! We decided the first bucket was worth 1 point, the second was 2 points, and the third was 3. We even had tickets to use from a pretend-play carnival game!

Snow Skeeball (6)

The game was admittedly hard – next time we’d use bigger buckets. (Note: we’d also use colored balls, for rather obvious reasons!).

Snow Skeeball (5)

So here’s hoping for one more storm before spring. We’ll be out there playing skeeball… or should I say “ski ball”?

Snow Skeeball (4)


Textured Painted Fish


Textured Fish (12)

Travis and I haven’t played with clay in some time, so he was really excited when I pulled out a fresh pack of it this morning. Pretty soon, we came up with great under-the-sea fun, and added texture in two unique ways.

Textured Fish (1)

First, we shaped the clay into little fish. Travis needed some help with this, but sort of got the hang of shaping an oval body and pinching the back to form a tail.

Textured Fish (4)

More so, though, he made his own variations on sea creatures, which was just great to watch; he thought this looked like a perfect seahorse!

Textured Fish (3)

Next we painted the fish, and he loved mixing colors to help them “camouflage.”

Textured Fish (5)

Now for the texture fun. I pulled out a mesh bag, and we placed it on the wet clay. Cover with a rag (to avoid dirty hands!) and press down.

Textured Fish (6)

Now our fish had scales!

Textured Fish (7)

Travis loved it! Some glitter paint was the final shimmery touch for the fish, but Travis wasn’t done yet, so added “coral reefs” (which got lots more glittery glue).

Textured Fish (8)

Finally, our fish needed an ocean to swim in. We painted a piece of poster board blue, and added texture in another fun way – by running a comb over it for ocean waves and currants.

Textured Fish (2)

In sum, this was a great art project, with lots of fun elements, new ways to make texture, and opportunity for creativity.

Textured Fish (10)

Paper Cup Drums

Paper Cup Drums (8).JPG

A kitchen band never gets old; everyone loves clanging on pots, tapping together spoons, and banging on old pans, from toddlers to big kids. But sometimes I don’t want to clean out all the pots after the kids have played with them… and that’s where these clever paper cup drums come in, this month’s craft from High Five magazine. Travis got to use kitchen items for his instruments and I had no pots to wash – a win-win! You’ll also get to teach a little science, thanks to the different tones the drums make.

Paper Cup Drums (1)

First, set out 2 large paper cups and 2 small ones. Cut one large cup and one small cup in half, leaving the others whole – great scissor practice!

Paper Cup Drums (2)

Travis decorated the cups next, using marker on the outside and then coloring inside them, too, which I wouldn’t have thought of!

Paper Cup Drums (4)

We glued down our drums as a “drum set” on a piece of cardboard, then waited for the glue to set.

Paper Cup Drums (3)

Once dry, it was time to play! Use a spoon to tap on the “drums” – first we just enjoyed the sounds.

Paper Cup Drums (5)

But to be more educational about it, I asked Travis what difference he noticed between the big cups and small ones. Tapping first one, then the other, he could hear the difference – a low tone, then a high tone.

Paper Cup Drums (6)

I challenged him to guess how the medium cups would compare. Lower or higher than the big? He initially guessed lower, but then amended his guess once we played the tone. Interestingly, your intact small cup and cut-in-half big cup should now be nearly the same size, and thus sound quite alike.

Paper Cup Drums (7)

Note: We originally tried using a metal spoon, but found that the difference in cup size/tones was much more apparent when tapping with a plastic spoon.

Paper Cup Drums alt.JPG

Thanks for the musical play, High Five!


Foodie Family Dice Games & Game Design

Game Design (10)

In conjunction with our latest Raddish Kids recipes, tonight was family “date night”! The activity: board games, charades, dice games, and a game of our very own creation!

Game Design (2)

First, we did a little investigating; Travis and I talked about games in general, and the way they teach concepts of fairness, taking turns, and following the rules. More specifically, I then showed him a clip about the history of dice in this suggested video (Note: There are some bleeped out curse words, but they went right over Travis’s head). If you want to skip the video, just share some fun facts, like how dice have been around for 5,000 years (wow!).

Next, we cut out and folded up the two foodie dice provided in this month’s crate and played a round of “No Tomato.”

Game Design (3)

The rules are simple: roll the dice and rack up a point for every food tossed except… if you roll a tomato you lose your points for that round!

Game Design (4)

Travis loved taking a risk and giving one more toss on his turn, daring to inch his score closer to the 12 points needed to win.

Game Design (5)

The game was also a great lesson in score-keeping. He loved being in charge of our tally sheet, and erasing when someone lost their points.

Game Design (6)

Now it was time to design our own game! We settled on a few basics, using the helpfully provided Game Checklist as a guide. The theme of our game was Travis’s much-loved Spiderman. The goal was to reach the end of the path first. As he happily colored in decorations for the board, I drew the path and set up pitfalls.

Game Design (7)

Oh no, Spiderman’s enemies could make you lose a turn or get stuck until you rolled a certain number.

Game Design (9)

Lego men were our playing pieces, and we used a dice to move players around the board.

Game Design (11)

We played so many fun family rounds!

Game Design (12)

We followed up with another game using the Raddish dice, “Rad Yatzy”, a take on regular Yahtzee only using the foodie dice instead of pips.

Game Design alt.JPG

Cap off your family “date” with any other board games your kids love, or a round of charades.

Game Design (1)

Update: We had to wait until we had a large enough group of family members (6 people or more!), and then we could play a final foodie dice game: Catch the Radish!

Raddish Dice var

Two people opposite each other toss the dice, but must pass it to the next player if they roll a radish. The first person to have both dice at the same time wins!