Starfish Friend

Starfish Friend alt

If clay is fun, then sand + clay is infinitely more so! You can find colored sand at craft stores, and use whatever color you like best for this project.

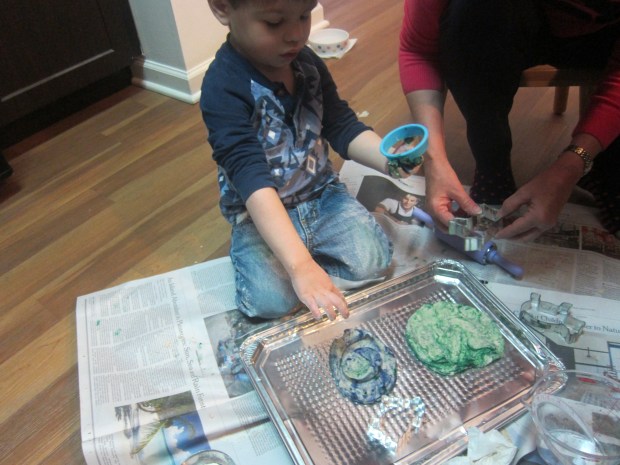
After a recent trip to a natural history museum’s touch tank, Travis was in love with the feel of sea animals, so we decided to make our own starfish at home. The project was great for using clay in multiple ways. First we rolled it flat.

Starfish Friend (1)

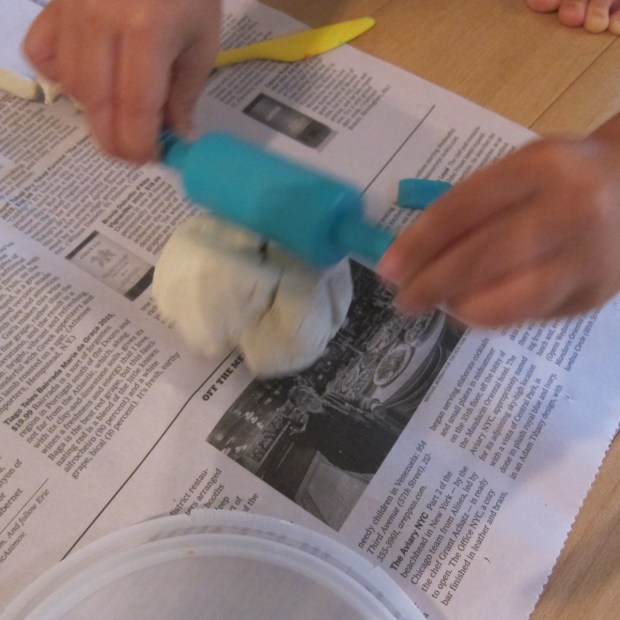
Then we needed to cut out our starfish. A big star-shaped cookie cutter would have worked great, but I couldn’t find ours, so a plastic knife did in a pinch.

Starfish Friend (2)

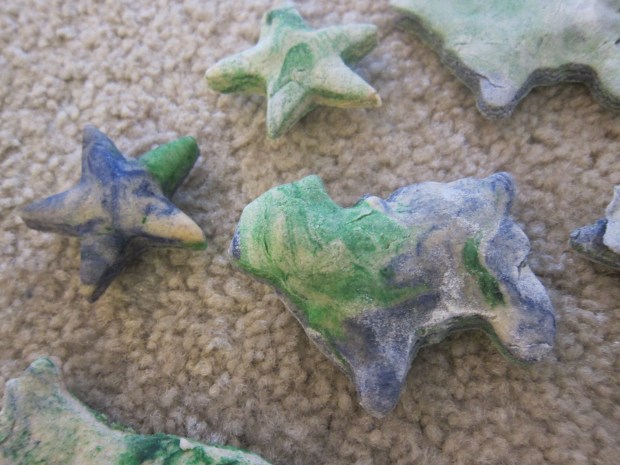
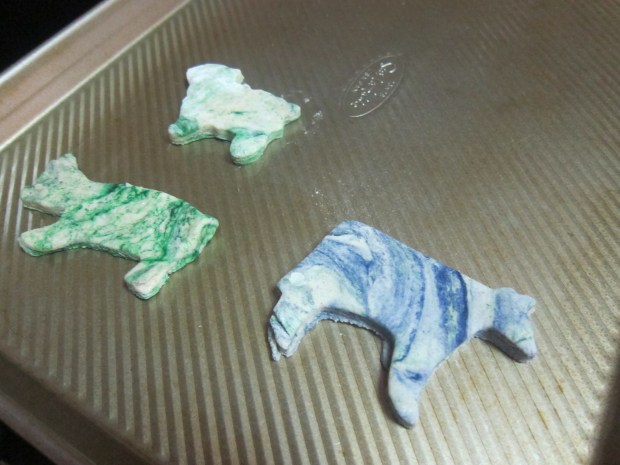
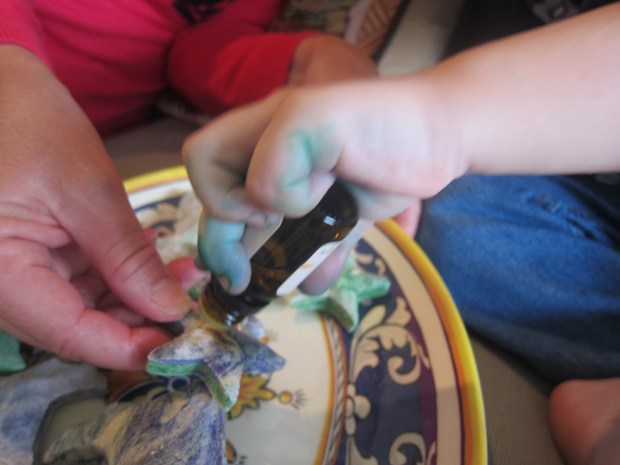
Now it was time for the extra special sand bit. It was amazing how much more fun this made clay play. Travis loved the way it made the clay look, so we couldn’t stop there – he began adding other denizens to our “touch tank” including “snails” and “crabs,” which all needed to be sprinkled in sand of course.

Starfish Friend (3)

These were “snail eggs.”

Starfish Friend (7)

Meanwhile, use googly eyes or buttons for the eyes to finish your starfish friend; we chose the latter, after which Travis loved pressing buttons into additional pieces of clay.

Starfish Friend (5)

For the final touch, we left our clay to air-dry slightly curved on a piece of newspaper; this gave it that real starfish look once it had dried!

Starfish Friend (4)

Scented Salt Dough


Scented Dough (5).JPG

Salt dough projects aren’t just for Christmas ornaments – we brought the scent of spring into our house with this neat take on the project!

The first step was to whip up salt dough of course, and Travis always loves projects that involve mixing. In a bowl, combine:

1 cup flour

1/2 cup salt

1/2 cup water

If your dough is too sticky, simply add a little more flour. Next we mixed in just a drop of food coloring and kneaded it in, resulting in a pretty marbled effect. Lavender and green felt like the perfect spring shades!

Scented Dough (1)

Instead of Christmas shapes, we rolled and cut our dough into animals like sheep, pigs, and cows. And of course Travis had fun just playing with the dough for a while, and requesting extra flour to make his hands a springtime mess!

Scented Dough (2)

Bake the dough at 350 degrees F for 30 minutes.

Scented Dough (4)

Once it cooled, we added the finishing touch – a drop of lavender oil to the back of each piece. After that, the whole apartment smelled like springtime!

Scented Dough (3)

Animal Bath Time

Animal Bath (4)

We were stuck inside with a late winter snow storm, so it seemed as good a time as any to get messy!

In the bathroom, I laid out several of Travis’s animal toys (definitely use ones that are plastic and washable), along with various colors of paint on a paper plate and a few paintbrushes. He seemed almost disbelieving when I said we were going to paint the animals, but then dove right in!

Animal Bath (1)

He loved choosing which colors each animal should be, including blue cows, yellow donkeys, and purple rabbits.

Animal Bath (2)

After the animals had been covered in his artwork, it was time to give them a bath! Arguable this part was even more exciting than the painting had been.

Animal Bath (5)

I had a bucket of soapy water ready to go in the tub, and Travis loved rinsing off the animals.

Animal Bath (6)

He wanted to run them under the faucet too before we declared the game all done! In sum, a super nice snow day distraction. Although on a summer’s day, you could probably play this entire game out doors with big soapy buckets!

Animal Bath (3)

Milk Carton Animals

Milk Carton (6)

With several empty Silk cartons around the house, we decided to play with them instead of relegating them immediately to the recycling bin!

This was a craft that I largely had to put together for Travis (too complicated for a two year old’s fingers!) but he was so into it, watching intently every step of the way, and mimicking making his own version with all the materials that were out.

Milk Carton (1)

First, we turned a creamer carton into a pig. I covered it with pink construction paper, which I cut to fit and taped in place (sorry, my woeful crafting skills are on display here, folks!)

Milk Carton (2)

Travis then helped glue two googly eyes into place and to tape on the curly pink pipe cleaner tale. He loved the pink cap that we turned into the nose!

Milk Carton (3)

No sooner finished than he asked if we could make a cow. We were all out of brown and black construction paper, so our cow was white with very vibrant orange spots – why not? Travis loved “helping” cut spots for the cow.

Milk Carton (4)

Once finished, he had a blast moving the animals around the living room, making them oink and moo.

Milk Carton (7)

Great imaginative props to play with!

Milk Carton (8)

Shaving Cream Polar Bear

Shaving Cream Polar Bear (6).JPG

We’ve just come through a blizzard and we were snowed in for a couple of days. So what better animal to make than a snowy white polar bear? I decided we needed sensory paint for this one, not boring old regular paint.

I wish I could tell you what ratio of shaving cream to glue we used, but to be honest I just let Travis have a blast squeezing both ingredients into a foil pie plate.

shaving-cream-polar-bear-1

My guess would be a roughly 1:1 ratio. Mix together until you have a creamy sticky paint.

shaving-cream-polar-bear-2

I didn’t even tell Travis to start painting – he just began glopping the mixture onto the paper plate that I had set out for the polar bear’s face.

shaving-cream-polar-bear-3

Travis being a toddler, it wasn’t long before he discovered how awesome the mixture felt on his hands, too!

shaving-cream-polar-bear-4

I loved how this paint made a nice imitation of fluffy polar bear. We set the plate aside to dry overnight.

shaving-cream-polar-bear-5

In the meantime, I cut one cup from a recycled egg carton and we painted it black for the nose. Set that aside to dry, too.

Travis had sort of lost interest in the polar bear by the next morning, so I was a solo act to glue on two googly eyes, white cotton pads for ears, and our black nose.

shaving-cream-polar-bear-7

Once he saw the face, though, he loved the new friendly polar bear in our house, and carried him around for quite some time. He also loved that it smelled like his dad’s shaving cream!

Be careful, that black nose will be hard for toddlers to resist pulling off…

Safari Tracks

koala-safari-20

We tacked on one final craft after having fun with our recent Safari crate from Koala Crate – animal stamp foot prints!

To make the stamps, you’ll need sticky foam sheets from a craft store. Draw footprints on the sheets to look like various animals – pads with toes for lion’s paws, a hoof for a zebra, a webbed foot for a crocodile, and so on.

koala-safari-15

Travis loved playing with the sticky foam while I drew the shapes, but wasn’t interested in drawing animal prints of his own.

Help your child cut out the shapes, and attach each print to cardboard squares. Voila! You have a stamp!

koala-safari-16

Paint over the stamps with a foam brush, and press onto paper for animal tracks.

koala-safari-18

Travis got very impish splattering the green paint to begin with, but soon loved the way the brush felt over the bumpy raised footprints.

koala-safari-21

Don’t forget the binoculars to explore which animals have made tracks in your home.

koala-safari-17

Salt-Container Bird Feeder

salt-container-3

Travis loves birds, so in hopes of attracting a few new feathered friends to our balcony, we cobbled together this very easy bird feeder. Most of the work falls to the adult, but everyone gets to enjoy the bird-watching that follows!

Clean out an old salt container (or save the salt and use for an indoor sandbox!) and cut a few additional holes with an X-acto knife. You’ll need one “door” along one side of the box, and two small holes (front and back) below the door for a perch. Remove the metal spout from the top of the salt container, and cut out a second small hole so you can hang the box.

Before hanging, invite your child to decorate with markers. We don’t use markers nearly as often as crayons, so Travis was thrilled! He made mostly abstract squiggle, of course, but preschoolers can plan out a more careful design for a bird “house” with windows or fences and flowers.

salt-container-1

Help your child insert a slim stick through the two holes below the door, for birds to perch on, and then thread wire or twine through the two holes on the top.

salt-container-2

Hang over a balcony or tree, or other outdoor perch, and sit back to wait for some winged visitors!

Tissue Paper Baby Chick

tissue-paper-chick-3

Travis saw older children at the library this past week with baby chicks from a school project. He couldn’t get over how cute the chicks were, and I love letting him learn about animals, but chick-hatching programs in schools often do more harm than good. As a humane alternative, we headed home and made our own fluffy chicky!

Cut an orange or yellow circle of construction paper, and let your child cover the surface with glue. Crumple small squares of yellow tissue paper and press onto the glue until your “chick” is covered. In full honesty, Travis was having so much fun with the glue that I did almost all of the tissue paper… we made a good team!

tissue-paper-chick-1

Once the glue dries, tape on two yellow feathers for wings and two pipe cleaners for feet. Travis was so enthralled with his chick, cheeping it all around the living room, that I didn’t even have time to add a little triangle for a beak!

tissue-paper-chick-2

Jellyfish

Jellyfish (4)

An empty Earth Balance tub needs only a little creativity (and lots of glue!) to become a whirling and twirling jellyfish. We’ve had fun recently reading Pout-Pout Fish, and Travis is intrigued by the creatures in the story, a jellyfish among them, so it seemed an opportune time to try this craft.

One caveat: making this project is a MESS. Be prepared to be very gluey, but also to have lots of fun. From experience, however, I recommend not mixing this much mess with a half-naked toddler…

Let your (preferably clothed!) toddler brush glue over the entire outside of the empty tub – Travis loved this assignment, since he becomes frustrated sometimes at class art projects where glue is “supposed” to be applied to only a small area.

Jellyish (1)

Once completely gluey, stick torn construction paper over the tub, until it is covered. Let dry.

Next up, have your child brush glue all around the inside edge of the tub. Now it’s time to add the tentacles! We tried both streamers (a success) and yarn, but alas the latter came off in clumps since I had a son who was over-eager to use his jellyfish before the glue was completely dry. But the streamers held up great!

Jellyfish (3)

As a final touch, add too big dabs of glue on the outside and press on googly eyes. In an ideal world, you’ll let the jellyfish dry before your child takes it for a “swim” around the apartment – but I confess we were not ideal today! Travis couldn’t wait to play with our creation, a sure sign of a hit.

Jellyfish (5)

What story books have inspired you to create crafts at home? Please share in the comments!

Jellyfish (6)

Frog’s Dinner

Frog's Dinner (3)

Here’s a silly and fun way to teach kids how very differently frogs eat from us – not just that they eat bugs, but that they use a long tongue to do it!

To set the scene, we gathered together all of Travis’s stuffed frogs, and said the frogs were very hungry!

Frog's Dinner (1)

Attach Velcro pieces to any plastic bugs you have (I love the Velcro strips sold with a sticky backing already, so you don’t need glue). Attach additional pieces of Velcro  to the ends of paper party blowers. Then, show your toddler how an elongated party blower latches right on to one of the bugs and slurps it up, just like a frog’s tongue!

Frog's Dinner (2)

Travis thought the game was an absolute delight. He didn’t want to try blowing a party blower himself, but loved watching mom and dad do it! I put a few pieces of Velcro directly over the stuffed frogs’ mouths so they could “slurp” up the bugs just by pressing onto the Velcro as well.

Frog's Dinner (5)

Party blowers were fascinating in and of themselves, and provided entertainment for a nice little while.

Frog's Dinner (6)