Handprint Bird

handprint-bird-4

Your child’s hand can magically turn into a baby bird’s body and wings with the help of a little paint!

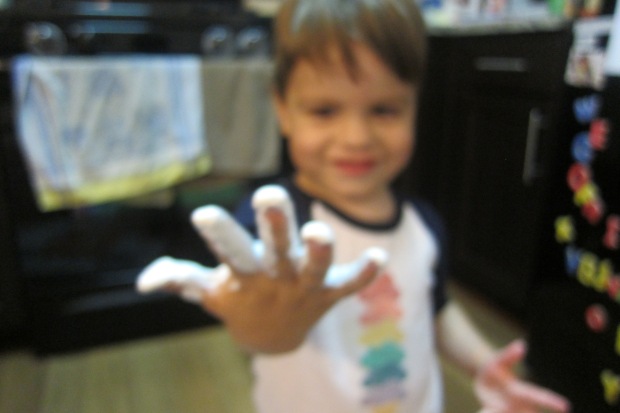
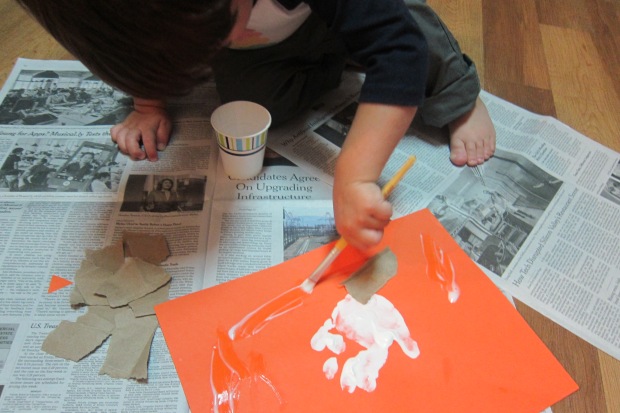
Travis’s favorite part of this craft by far was smooshing his whole hand in a plate full of white paint, and pressing it onto the paper.

handprint-bird-1

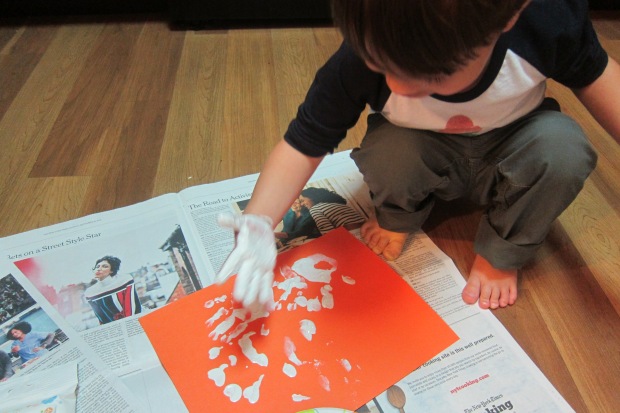
So that our craft would stay precise, I provided him with extra paper where he could make hand prints to his heart’s delight until the white paint was gone.

handprint-bird-2

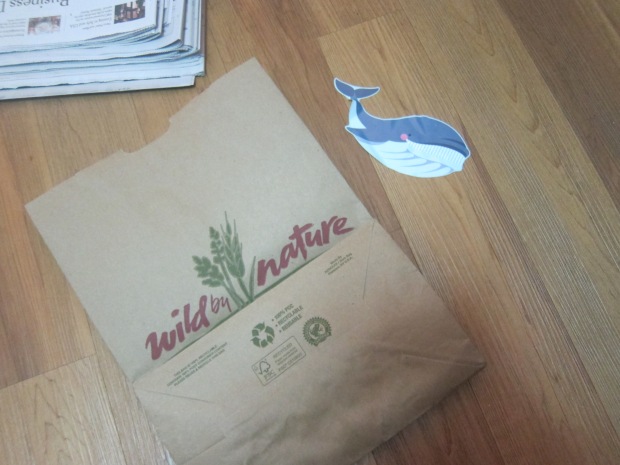
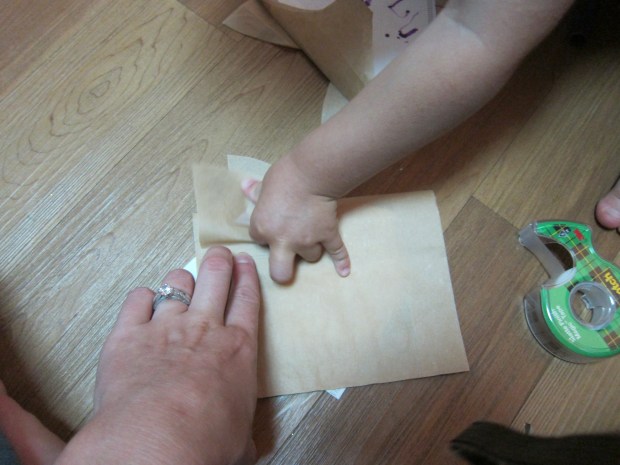
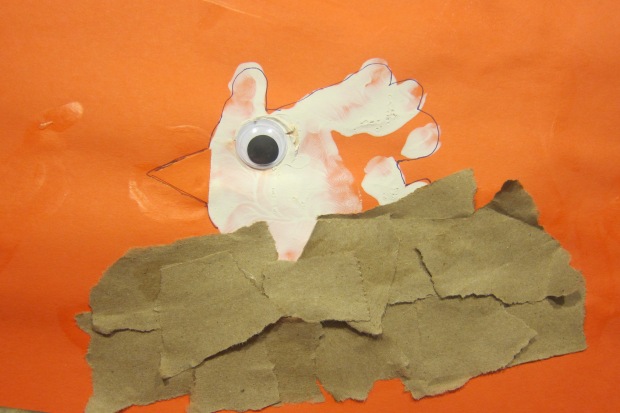
We returned to the craft itself once the paint was dry, and now it was time for glue! Have your child help you rip up a brown paper bag into pieces, and then glue in an overlapping pattern to form the bird’s nest.

handprint-bird-3

You can then add a googly eye and triangular beak (which I cut from orange construction paper) to finish your bird. Because white-on-orange wasn’t the best color choice, I outlined our bird in order for Travis to see it better.

The handprint makes this particular craft keepsake worthy – you’ll marvel some day at those tiny fingers and thumb! It might make a beautiful gift to send to grandparents or other family members!

Tissue Paper Baby Chick

tissue-paper-chick-3

Travis saw older children at the library this past week with baby chicks from a school project. He couldn’t get over how cute the chicks were, and I love letting him learn about animals, but chick-hatching programs in schools often do more harm than good. As a humane alternative, we headed home and made our own fluffy chicky!

Cut an orange or yellow circle of construction paper, and let your child cover the surface with glue. Crumple small squares of yellow tissue paper and press onto the glue until your “chick” is covered. In full honesty, Travis was having so much fun with the glue that I did almost all of the tissue paper… we made a good team!

tissue-paper-chick-1

Once the glue dries, tape on two yellow feathers for wings and two pipe cleaners for feet. Travis was so enthralled with his chick, cheeping it all around the living room, that I didn’t even have time to add a little triangle for a beak!

tissue-paper-chick-2

Yarn Sculpture and Squiggles

Yarn Sculpture (2)

Yarn is a great 3-D medium for toddlers’ art, lending itself to a variety of projects. To wit, Travis and I had fun with these two activities on a recent morning.

To make a yarn sculpture, give your child a shallow dish of glue and pieces of brightly colored yarn. Drag the yarn through the glue and arrange any which way on waxed paper. Travis wanted to use a paintbrush to apply some of the glue as well, and was very excited when his “sculpture” momentarily adhered to the brush.

Yarn Sculpture (3)

Let the glue dry completely before removing the yarn from the waxed paper. The resulting creation could make a great mobile or decoration in your child’s room!

Yarn Sculpture (4)

Less permanent but equally fun is setting up a yarn “easel”. Glue sandpaper to a sturdy piece of construction paper and let dry, then give your child short pieces of string to arrange as artwork on the surface – the sandpaper will grip the yarn to help it stay in place.

Yarn Squiggles (1)

It took a few demonstrations before Travis got excited about the idea, but then he returned to his sandpaper “easel” a few times throughout the afternoon.

Yarn Squiggles (2)

His favorite was telling me that he’d made an ant!

Yarn Squiggles (3)

What other yarn projects have you and your child made? Please share in the comments!

Lemon Ink

Lemon Ink (1)

“Painting” with lemon juice sounded like a delightful trick to show a toddler. The ink goes on nearly invisible, but appears once the juice dries and is held up to a light. Turns out Travis was way more into the lemon itself, but that still meant we had fun!

Since toddlers don’t typically eat lemons, this is a great way to introduce the fruit and its color and texture. Travis had so much fun squeezing the lemon, and watching as I collected juice in a cup.

Lemon Ink (3)

Then it was time to “paint”! We used q-tips as paintbrushes, adding another layer of novelty to the project.

Lemon Ink (2)

To be honest, Travis was only mildly interested (he was still busy squeezing another lemon half), so I made shapes and spelled his name, in addition to his squiggles, for the big reveal. He had fun holding it up to our ceiling lights…

Lemon Ink (4)

…although the effect was best in the window.

Lemon Ink (5)


Microphone Craft

Microphone Craft (5)

Encourage a budding rock star with this cute, easy craft!

To make the base of the microphone, have your child help wrap an empty toilet paper tube in foil. Travis immediately loved how shiny and crinkly our creation was.

Microphone Craft (1)

For the top of the microphone, the best bet is really a small foam craft ball. Since I didn’t have one on hand, we used a ball from an old baby toy, which I wedged into place and secured with a bed of duct tape.

Good enough for now, though I hope to buy a craft ball as a replacement! Now, is this thing on? Testing, testing, one-two-three.

Microphone Craft (3)

Travis latched right onto the idea that it was a microphone, and loved singing songs from our local music class. Wait, is that a microphone or an ice cream cone?

Microphone Craft (4)

All around, good fun. I might even make a few of these, and keep one in the car for road trip sing-alongs.

What’s your child’s favorite song to sing? Please share in the comments!

Nature Painting

Nature Painting (6)

Travis and I had a magically different afternoon. We don’t exactly live anywhere near a forest trail, but that didn’t stop us from going to our town’s Village Green and searching for “treasures.” Once back home, we turned our treasures trove into an unconventional canvas for painting!

Nature Painting (1)

I didn’t even have to explain to Travis what we were doing. He saw the paints and brushes and began eagerly painting a leaf.

Nature Painting (2)

His favorite by far was a large stick we found. First, he painted it blue, making sure he got all the way to the edges:

Nature Painting (4)

He was quite serious as he worked, and once finished with the blue, he dipped his brush in all the different paint colors and turned his stick into a “rainbow.”

Nature Painting (5)

This project was a delight, especially because painting on the various textures felt so different from flat paper – especially the bumpy pinecone! I confess I joined in just for the fun of it.

Nature Painting (3)

Rainy-Day Pictures

Rainy-Day Picture (3)

When summer thunderstorms are rolling through, this cute project can keep toddlers cheerful inside!

First, help your child draw a rainy day scene, in whatever way they like. I made a few gray clouds as a prompt, and Travis added blue swirls of rain – and later some pink and green, because why not!

Rainy-Day Picture (1)

Now it’s time to get gluey! Use a paintbrush to apply glue liberally to the paper. Fold cupcake liners in half and glue on – these will be your umbrella tops. Add glue underneath each umbrella, and press on yarn for the handles.

Rainy-Day Picture (2)

To be honest, Travis wasn’t much into this project, other than the glue (which he loved!) so I made the umbrellas. I like having the picture hang on our fridge, though, so we can talk about it when rainy days roll around again.

Paper Bag Whale

Whale (5)

On the heels of our jellyfish, Travis and I wondered what other sea creatures we could make at home. Would it be possible to turn this plain brown bag into a … great big gray-blue humpback whale?

Whale (1)

The first order of business was to stuff the bag with crumpled newspaper – a sure hit for any toddler. Leave a little room at the end of the bag so you can cinch it closed, tying it shut with string. Give the “tail” a slight rip so it looks even more like a whale’s tail.

Whale (2)

Travis didn’t quite understand what we were aiming at while stuffing the newspaper, thinking he was helping with the trash, but once I presented him with the closed bag and paint, he was so excited to discover we were making a whale. I set out one cup of white paint and one of black, and together we produced a wonderfully gray “humpback.”

Whale (3)

This was by far the largest surface Travis has ever had to cover with paint, and he loved every moment, especially seeing how the white and black interacted.

Whale (4)

I took us off to the park, knowing he’d be impatient for the whale to dry. Once we were home, Mr. Whale had quite a lot of swimming to around the apartment!

Whale (6)

Between the whale and the jellyfish, we’ve certainly had a lot of sea creatures in the house! To continue the fun, I staged a “deep sea dive,” placing blue blankets across two stools as the ocean.

Deep Sea (1)

Underneath, I set up his various bath and beach toys in the shape of sea animals – and then Travis was the scuba diver, diving in to see what treasures he came up with! He was very proud to surface with a fish:

Deep Sea (2)

And, of course, whale. This makes for a great game on summer days when you can’t make it to the actual beach!

Deep Sea (3)

Jellyfish

Jellyfish (4)

An empty Earth Balance tub needs only a little creativity (and lots of glue!) to become a whirling and twirling jellyfish. We’ve had fun recently reading Pout-Pout Fish, and Travis is intrigued by the creatures in the story, a jellyfish among them, so it seemed an opportune time to try this craft.

One caveat: making this project is a MESS. Be prepared to be very gluey, but also to have lots of fun. From experience, however, I recommend not mixing this much mess with a half-naked toddler…

Let your (preferably clothed!) toddler brush glue over the entire outside of the empty tub – Travis loved this assignment, since he becomes frustrated sometimes at class art projects where glue is “supposed” to be applied to only a small area.

Jellyish (1)

Once completely gluey, stick torn construction paper over the tub, until it is covered. Let dry.

Next up, have your child brush glue all around the inside edge of the tub. Now it’s time to add the tentacles! We tried both streamers (a success) and yarn, but alas the latter came off in clumps since I had a son who was over-eager to use his jellyfish before the glue was completely dry. But the streamers held up great!

Jellyfish (3)

As a final touch, add too big dabs of glue on the outside and press on googly eyes. In an ideal world, you’ll let the jellyfish dry before your child takes it for a “swim” around the apartment – but I confess we were not ideal today! Travis couldn’t wait to play with our creation, a sure sign of a hit.

Jellyfish (5)

What story books have inspired you to create crafts at home? Please share in the comments!

Jellyfish (6)

Snack in a Fox

Snack in a Fox (5)

You’ve heard of a Jack in the box – today we’re switching the rhyme around to a snack in a fox! I adapted this idea from our September issue of High Five, where it was intended as a lunch bag for bigger kids headed back to school. I have snack-size brown bags at home, which made our “fox” perfect to take along to the summer toddler workshop Travis and I have been attending.

The craft itself was mostly an adult project. Snip the corners from the top of the bag, and set aside (these will be the fox’s ears). Fold the top down, and tape place a cone-shaped coffee filter under the “nose.”

Snack in a Fox (1)

Tape the corner scraps to the back of the bag to make the ears, then decorate the fox’s face with markers.

Snack in a Fox (3)

I gave Travis a second set of all the materials – bag, coffee filter, markers – to play with while I made the real thing, and he loved helping out with the tape.

Snack in a Fox (4)

Then it was time to fill our fox with pretzels, resulting in one happy boy!

Snack in a Fox (6)

He also loved taking his snack to “work” at his new play desk.

Snack in a Fox (7)