Threaded Orange Garland

Orange Garland (6)

Kids will love helping thread dried slices of orange onto pretty ribbon, making this an easy Christmas decoration for the whole family to put together. Plus the oranges will make your house smell amazing while they dry out in the oven.

To start, cut thin slices from navel oranges, and place on a baking sheet in a single layer. Bake at 225 degrees F until completely dried. Depending on the thickness of your slices, you’ll need anywhere from 1 hour to 90 minutes per side.

Orange Garland (2)

Cut a small slit in each slice once cool, then string along plaid ribbon.

Orange Garland (4)

We wound the ribbon alongside a pine garland on our banister for a fantastic holiday look!

Orange Garland (5)

Snowman and Santa Wobblers

Santa Wobbler (4)

These cute holiday items from Kiwi Co. come together quickly, but make adorable stuffies that wobble back and forth thanks to a weight inside. You can opt for just a snowman, just a Santa, or both!

Either way, start the craft by adhering a metal weight into the bottom of a plastic base with a sticky foam dot. Take care in this step that the weight doesn’t fall on any toes; it’s heavy! Insert the base and weight into the provided sock.

Snowman Wobbler (1)

Stuff the socks with the provided cotton fluff. Travis loved how soft this material was!

Santa Wobbler (1)

We secured the top of each sock with a thin elastic band, then pushed a second, thicker elastic about 1/3 of the way down each. This divides the wobbly toys into a head and body.

Now decorate! There were stickers for the snowman’s face, as well as stick-on buttons and arms, and a strip of red fabric to tie on for a scarf.

Snowman Wobbler (5)

Meanwhile, Santa gets a beard that slips over the head and a little red shirt that slides on from the bottom. Stickers for facial features, belt, and hands complete the look.

Santa Wobbler (3)

Travis loved that these toys were meant to be played with, unlike some of our Christmas decor that is just display.

Snowman Wobbler (6)

The wobblers even curled up to watch a Christmas movie with him, and Santa pretty much comes everywhere with us now. That’s what I’d call Christmas magic!

Melted Candy Cane Ornaments

Candy Cane Ornaments alt

Caution: these pretty ornaments are fragile, so they might not last beyond one holiday season. But the fun of making them is worth it!

Line a baking sheet with parchment paper, and spray with cooking spray. Select which shapes you want your ornaments to be from among Christmas-themed cookie cutters and coat those with cooking spray as well before setting on the parchment.

Break mini candy canes into smaller pieces to fill the cookie cutters in an even layer. Look at my littlest kitchen elf!

Candy Cane Ornaments (1)

Bake at 350 degrees F for 6 minutes, just until the candy canes are melted.

Candy Cane Ornaments (2)

Remove from the oven and let stand for 2 minutes, then use a skewer to poke a hole near the top of each ornament.

Candy Cane Ornaments (3)

This was the trickiest part, as the candy canes need to be cooled enough not to run right back over the hole, but not so firm that cooled strands stick to the skewer. I confess we broke a few of our ornaments at this stage!

Candy Cane Ornaments (4)

Let stand an additional 5 minutes, then remove the cookie cutters.

Candy Cane Ornaments (5)

Thread twine or cord through each hole and tie into a loop before hanging from your Christmas tree.

Candy Cane Ornaments var

And yes, that’s a Darth Vader candy cane ornament you see!

Gift Your Child an Ornament Every Year

Ornament Year (2)

There are some households where the Christmas tree is color-coordinated or bears a different theme each year. Not so in our house! Our tree is a hodgepodge of homemade and heirlooms and ones we’ve randomly picked up over the years. But here is one nice thing that lends tradition to the tree: making sure to gift each child a special ornament every year.

This goes back to both my kids’ first Christmas, when they received one as a commemorative gift.

Ornament Year (3)

Moving forward, we’ve picked one up each year in relation to a holiday excursion. There’s the train from a trip to a holiday train show, for example…

Ornament Year (4)

…and this year Travis loved selecting owls from a trip to see holiday lights at a botanical garden.

Ornament Year (1)

This is definitely one of those traditions I intend to keep up, moving forward. How do your kids like to decorate the tree? Please share in the comments!


Poetry Traditions

Poetry Traditions (1)

‘Twas the night before Christmas and all through the house… we were having a quick poetry lesson before bed!

The Night Before Christmas wasn’t actually written as a book, of course, but as a poem, with a classic AABB rhyme scheme (lines 1 and 2 rhyme, and lines 3 and 4 rhyme). Thus it’s a great work for talking with kids about Christmas traditions, how Christmas has changed over the years, and for a mini poetry lesson, too.

First we read the book, and then laughed as we turned the pages along to a version sung by the University of Utah choir.

Poetry Traditions (2)

As we read, I paused over vocabulary that was old-fashioned or unfamiliar to Travis, words like sash, prancing, lustre, and stirring. He instantly pinpointed that the poem was old-fashioned, based on the drawings and the language. We discussed how this “Saint Nick” differed from the Santa Claus he’s familiar with.

Do a close reading of the poem, asking questions like: ‘who were the characters’ (“The kids, the mom, the dad, and Santa Claus!”) and ‘what happens in the middle’ (“The sleigh appears!”) etc.

Poetry Traditions (3)

Then we went through and identified some of the rhymes, like house and mouse. I gave him a word from the poem (for example ‘bed’) and challenged him to come up with his own rhymes.

Poetry Traditions (5)

Big kids can go on from here to write their own holiday poem. For my kindergartner, I simply helped Travis compose a silly line or two about our family holidays.

Poetry Traditions (4)

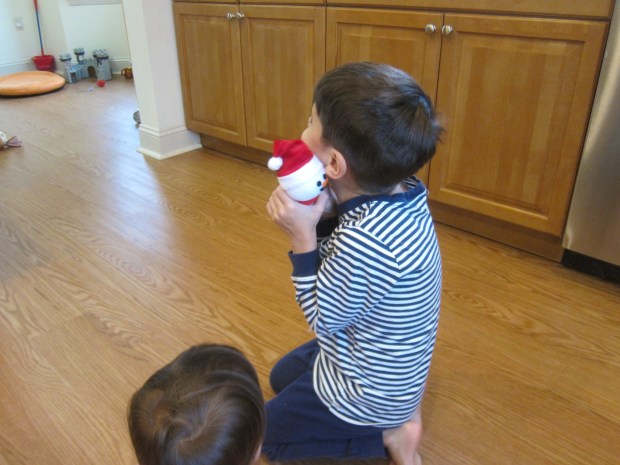
Fun extensions might include acting out the poem before bed!

Give Gifts – and Compliments!

Gifts and Compliments (4)

Well we’ve arrived at Christmas Eve, and in all honesty tomorrow is all about the receiving for Travis. I’ve done my best this Christmas to help my five-year-old understand the spirit of giving, too, and wrapping presents for his dad and little sister offered a final teachable moment.

Instead of using patterned wrapping paper, I purchased a roll of solid white paper. Travis enjoyed learning how to properly wrap, a first tutorial for him!

Gifts and Compliments (1)

Once everything was taped up, I prompted him to think of something he loved about each recipient. He proudly helped spell out the way his dad plays Star Wars games with him, and how he loves to play with his sister.

Gifts and Compliments (2)

Kids can do this for every gift they send this year, whether to a teacher, a friend, or a relative. Encourage them to add drawings or other marks on the solid paper, too, so the gift is not only the object inside the wrapping paper, but the paper itself.

Gifts and Compliments (3)

Merry Christmas!

Holiday Book Traditions

Holiday Library (1)

Christmas stories have such a special place in my heart, memories of the books that were read year after year when I was a child, and now some that have become family favorites since my own kids were born.

One tradition we’ve started is Advent Christmas Books, a tissue paper-wrapped book under the tree each night of December, whether from our own collection or on loan from the library. Our list this year included old favorites like The Polar Express, as well as new titles, like:

Fa La La

Guess Who’s Coming to Santa’s For Dinner?

Christmas Cookies: Bite-Size Life Lessons

Christmas in the Barn 

and Merry Christmas Mr. Mouse

As a new tradition, I had Travis help pick out a version of The Nutcracker from the library. A special holiday excursion like this will build anticipation for the big day!

Holiday Library (3)

Moving forward, I can’t wait to spend Christmas Eve with each family member reading a new book, perhaps the first gift of Christmas. This is apparently an Icelandic tradition, and we’re only a year or so away from having it be feasible in our home!

Holiday Library (4)

Finally, don’t forget to read the perfect Christmas Eve book as a tradition each year: The Night Before Christmas.

Holiday Library (5)

What books are a must for your family’s holiday? Please share in the comments!

Old English Crackers

Christmas Crackers (6).JPG

Every year at Christmas dinner, we pull about old-fashioned Christmas crackers. If you don’t know what these are, it’s a British holiday tradition, featuring a cardboard tube wrapped in shiny paper. When pulled apart, it makes a loud “crack!” (hence the name) and the recipient finds a joke or toy inside.

This year, Travis and I made a homemade version! I bought a few trinkets at the toy shop that could fit inside toilet paper tubes. Mini tins of putty, mood rings, and jingle bell necklaces were all perfect!

Christmas Crackers (1)

Cut a 12-inch square of holiday wrapping paper, and wrap around the empty toilet paper tube. Twist the edges and secure with pretty ribbon.

Christmas Crackers (2)

Now cut the tube in half. Travis helped place a toy inside each tube, as well as a joke from his Raddish Kids Holiday Traditions crate; you can also write your own jokes on cardstock. Tape the two halves of the tube back together.

Christmas Crackers (4)

Cut a second piece of wrapping paper, this time measuring 12 inches by 4 inches. Wrap around the tube to conceal that you’ve cut it in half. Your cracker is now ready to pop!

Christmas Crackers (5)

We repeated 6 times so everyone at Christmas dinner will receive one… But Travis already stole one mood ring because he loved it so much, which means one unlucky Christmas Goose is going to receive an empty cracker! Chances are that’s going to be mommy.

Christmas Crackers (3)

Lemon-Glazed Sugar Cookies

Lemon Sugar Cookies (3).JPG

It’s not Christmas until you’ve made cut-out sugar cookies! This recipe was more of a mommy project, not a kid recipe like some others in our kitchen this holiday season, but kids will love helping to decorate the cookies in the final step.

Ingredients:

For the cookies:

  • 2 and 3/4 cups all-purpose flour
  • 1/2 teaspoon baking powder
  • 3/4 teaspoon salt
  • 3/4 cup Earth Balance butter, softened
  • 2/3 cup sugar
  • 1 tablespoon ground flaxseed
  • 3 tablespoons water
  • 1 teaspoon vanilla extract

For the glaze:

  • 2 cups powdered sugar
  • 2 tablespoons + 2 teaspoons lemon juice
  • 1 teaspoon grated lemon zest

To decorate:

  • Chopped pistachios
  • Sprinkles
  1. To prepare the dough, combine the flour, baking powder, and salt in a bowl. Set aside.
  2. In a stand mixer, beat the butter and sugar until fluffy, about 2 minutes. Whisk the flaxseed into the water to make 1 flax egg. Add to the stand mixer, along with the vanilla, and beat until combined.
  3. Beat in the flour mixture at low speed until a dough forms.
  4. Shape the dough into a disk and roll between two sheets of parchment paper to 1/4-inch thick. Use holiday cookie cutters to cut out shapes of your choice. Transfer to 2 parchment-paper lined baking sheets.Lemon Sugar Cookies (1)
  5. Chill the cookies for 15 to 20 minutes, then bake at 350 degrees F for 11 minutes. Let cool on the baking sheets.
  6. To prepare the glaze, whisk together the powdered sugar, lemon juice, and zest. Spread over the cookies and return to the baking sheet. Immediately sprinkle with desired toppings.

Lemon Sugar Cookies (5)

Let dry completely, and then it’s time for pretty packaging! To gift the cookies, transfer them to wax paper bags and fold over the top. Add a holiday cupcake liner. Use a hole punch to punch through all the layers, then secure with a brad.

Lemon Sugar Cookies (6)

Of course don’t forget to save some for your family… And a few for Santa!

Lemon Sugar Cookies (4)


Play Tourist in Your Town

Tourist in Town (6).JPG

I love playing “tourist” in our home town with the kids, finding new ways to appreciate and discover the same place. One perfect way to do this is to head out in search of holiday decorations in December, when the same-old same-old houses suddenly look new again decked in holiday lights. Acting on a tip for the best neighborhood in town, we headed out to play tourist!

We made it special by getting everyone in pajamas first. And Travis got a candy cane!

Tourist in Town (1)

Don’t forget to set the radio to the holiday station!

Tourist in Town (2)

Travis knew we had a particular neighborhood as our destination, but that didn’t stop us from ogling every house along the way, rating the ones we liked best.

Tourist in Town (3)

The recommended neighborhood did not disappoint. There were flying Santa’s sleighs, giant penguins in doorways, sparkling candy canes, and more.

Tourist in Town (5)

Travis took it all in with wonder!

Tourist in Town (4).JPG

This was such a fun way to appreciate our town anew.