Alphabet Flower Garden

Alphabet Garden (9)

We are so ready for spring flowers around here, so decided to make them bloom in our home before the ones outside catch up. This beautiful foam sticker garden was a great way to sneak in some learning.

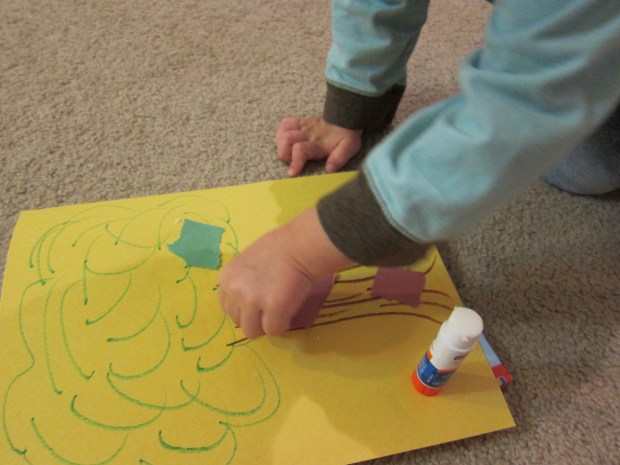
I drew flower stems and leaves on a piece of foam with a permanent marker (poster board would probably work even better), with a letter of the alphabet at the head of each stem. I then wrote the alphabet letters on foam flowers.

Alphabet Garden (2)

It was now up to Travis to add the flower to each stem, matching up letters as he went.

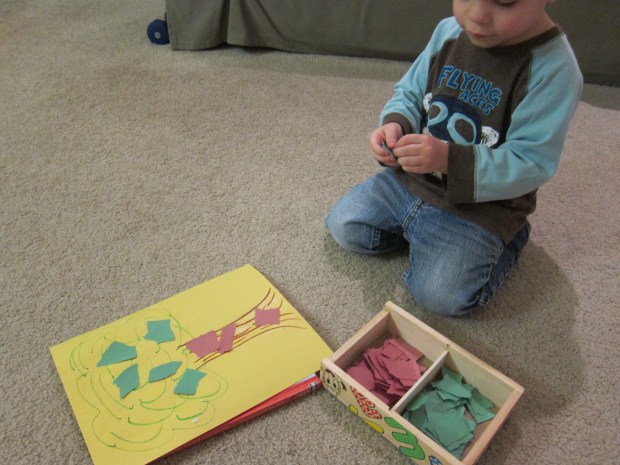
For a few minutes, he was more interested in just fooling around with the foam stickers. But once he made the connection of what I was really asking of him, he was SO excited each time he found the matching stem for his flower.

Alphabet Garden (6)

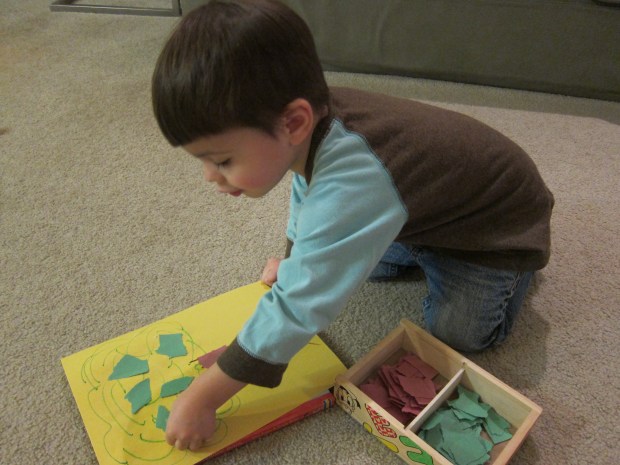
He made it about three-quarters of the way through the alphabet before losing interest, so I finished off our garden, but not before proudly surveying his work!

Alphabet Garden (5)

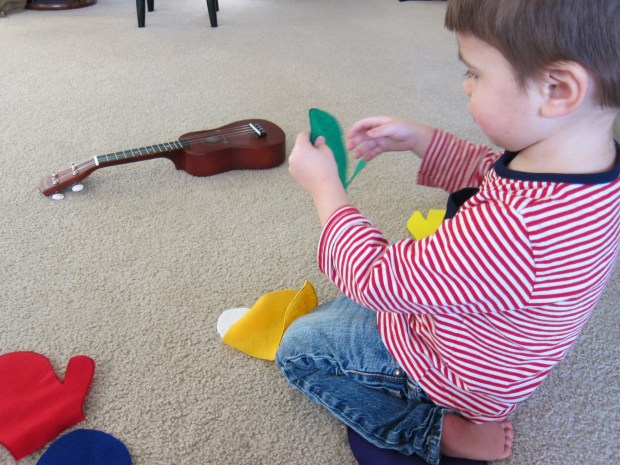
The next morning, we added additional stickers of leaves and bugs to round out the picture – a beautiful spring garden.

Alphabet Garden (8)

Color Match Caterpillar

Color Match Caterpillar (4)

The Very Hungry Caterpillar is a much-loved book around here, so after a cute read of it this week, we made our own caterpillar, and “fed” him fruit – the game involved both imagination and a nice lesson in color sorting!

Preschoolers may want to put together their own caterpillar, but I largely assembled ours for Travis, gluing down circles of different color construction paper for the body, drawing on a face, and adding pipe cleaner antennas and googly eyes.

Color Match Caterpillar (1)

Once the glue dries, set out the caterpillar along with pom poms in colors that match your circles. We had “blueberries” “strawberries” “oranges” “lemons” and “grapes” for our caterpillar to eat.

Color Match Caterpillar (2)

To be honest, Travis wasn’t that into getting the correctly colored pom poms onto the corresponding circle, but he did think our caterpillar was very cute!

Color Match Caterpillar (5)

Color Mixing Sensory Table

color-explore-1

With a little food coloring and an ice cube tray, you can start to teach your child all about how colors mix to form new ones. If you’re in a warm climate, play this game outside at a water table or empty sand table! Truth be told though, I’m glad we did it indoors since the clear glass containers we used made it easy to see the colors we created.

For my indoor winter set up, I laid out a few spoons and three glass containers on a towel in the bathroom, each filled with a little bit of water (use a towel that you don’t mind getting dirty!). I brought in the ice cubes I had frozen ahead of time, with drops of food coloring added in the 3 primary colors – blue, yellow, and red.

First, we simply dropped individual ice cubes into the containers – Travis loved seeing the water instantly turn a beautiful hue.

color-explore-2

It didn’t take long before he was mixing. Seeing yellow and blue make green was a big hit for Travis.

color-explore-3

Our red and blue made a very muddy purple, but even this was fun to stir around for a while. Whenever our containers got a bit icky in color from over-mixing, I poured them down the tub and refilled with clean water to begin again.

color-explore-4A big hit!

Matching Color Tree Art

matching-color-tree-2

This project turned out to be a little too simplistic for Travis, although I thought he’d love it since he’s very into glue sticks these days. As a result, I recommend it for younger tots just learning their colors, since Travis practically rolled his eyes at me (a hint of the teenage years to come!)

Still, I’m glad we did the project since it was simple and cute. I drew a tree on paper with brown marker for the trunk and green marker for the leaves, and set it aside.

I then enlisted Travis’s help tearing up a sheet of green and brown construction paper, which is always enjoyable of course.

matching-color-tree-1

Next it was time to smear the whole tree with a glue stick.

matching-color-tree-3

I then asked Travis which squares of torn paper should go where, green or brown for the trunk, and green or brown for the leaves?


matching-color-tree-4

Cue the above-mentioned eye rolling, but Travis did dutifully glue down the torn strips where they were supposed to go.

matching-color-tree-5

He liked the end result of the project, so we hung it on the fridge. But again, this one is probably better for tots just learning their colors.

matching-color-tree-6

Mitten Mania

mitten-matchup-6

We played two games this week with mittens as the theme – perfect for this time of year when you can’t walk out the door without mittens on your hands! Both are very easy to D.I.Y with a few materials.

For the first, you’ll need felt in multiple colors. I traced a mitten template and then cut one mitten from each color of the rainbow. Finally, cut a circle from white felt to be your snowball.

hidden-snowball-1

Place all of the mittens on the floor and have your child close his or her eyes. Hide the snowball under one mitten, and now it’s time to guess which color is hiding the snowball!

hidden-snowball-2

Travis loved the feel of the felt, so it was a delight to lift each mitten and see if the snowball was hidden there. We talked about the colors as we played, and did a few rounds before Travis got bored.

hidden-snowball-3

The second game came to us in February’s High 5 magazine, and is an introduction to the classic game of Memory. I cut mittens from fancy sheets of patterned paper (although you could also use plain construction paper in multiple colors).

mitten-matchup-1

Travis was a big help using the glue stick to attach each pair of mittens to black construction paper, which I had previously cut into squares.

mitten-matchup-2

Arrange all of the squares, mitten side down, on the floor, and take turns selecting two cards. If you get a match, keep them! Otherwise, turn them back to black and it’s the next person’s turn. Whoever gets the most matches wins.

mitten-matchup-3

Travis is still a little young to entirely grasp the concept of turn-taking and game rules, but he loved finding a “match” or a “mis-match” as he reached among the cards, and played with the mittens for quite some time after while I was busy making lunch.

mitten-matchup-4

This is definitely a game we’ll return to as he gets older and grasps it more each time.

mitten-matchup-5


Fishing for Letters

fishing-for-letters-5

When I considered whether or not to play this game, I thought it might be too simple for Travis at this stage… but he adored it!

To set up, I put all of our magnetic alphabets in a bowl. You could also use foam puzzle letters. He instantly wanted to know what I was doing, and followed me around the apartment while I gathered the rest of the supplies – a towel to cover the floor, a second bowl, and a slotted spoon.

fishing-for-letters-1

I added water to the bowl with the magnets, and this bowl and the empty bowl in front of Travis and asked him if he could transfer the letters with the slotted spoon. He didn’t hesitate a moment.

fishing-for-letters-3

At first, he was simply so excited with the mechanics of the slotted spoon (i.e. that the water trickled out but the alphabet letters stayed on) that he couldn’t concentrate on the letters at all. The letters went back and forth several times this way.

fishing-for-letters-7

Then he wanted to move the letters with his hands (have a dry shirt ready and waiting for when the game is done, because sleeves are likely to get wet!).

fishing-for-letters-8

Eventually, the initial excitement wore off and he began transferring the letters more deliberately and slowly, telling me which one he was holding, which had been my ultimate goal for this project.

Perhaps because of our Letter of the Week play, I haven’t concentrated on the full alphabet in a long time, so this was a great refresher course to make sure Travis remembers all his letters, whether in order or out of order. I was ultimately so glad I selected this as a project for our morning.

Once he tired of transferring letters, Travis asked if he could have the buckets without water, so we drained what was left, and he proudly carried his bucket of letters into the living room and continued to play with them for some time, making alphabet soup and telling me he was setting up a bakery.

fishing-for-letters-9

In sum, this was a great morning game that involved almost no forethought or special equipment, provided both tactile and educational learning, and couldn’t be easier to set up or clean up.

fishing-for-letters-6

A is for Alligator

a-for-alligator-2

Letter-shaped animals are a cute way to bring letters to life for your little one. The letter A lends itself perfectly to the big jaws of an alligator!

I cut a letter A from green construction paper, and several triangles from white paper to be the teeth. Attach the teeth to the sides of the A with glue.

a-for-alligator-1

Travis’s favorite part of the craft was applying the glue so we could add buttons as “scales,” a task he took very seriously! We used green buttons for the scales and 2 blue buttons for eyes.

a-for-alligator-3

Voila, A is for Alligator… Watch out or he might eat extra buttons!

a-for-alligator-4

What other letter and animal pairs can you think of? Please share in the comments!


Christmas Tree Alphabet

christmas-alph-1

Why not sneak in a little learning with your holiday decorating? If you don’t celebrate Christmas, you could try this idea on a drawing of a dreidel or menorah instead – or any time of year with the appropriate seasonal picture!

Draw the outline of a Christmas tree on poster board, and fill in with the letters of the alphabet, in random order.

Next, write out all the letters on blank stickers, and present your toddler with both.

christmas-alph-2

Now it’s time to match the letters to the tree!

christmas-alph-4

Travis loved the activity, especially the find-and-seek aspect of it.

christmas-alph-3

Preschoolers may have the attention span to get through the whole alphabet in one sitting, but Travis lost patience and instead returned to the game over the course of a few days.

christmas-alph-5

It’s a fantastic way to test recognition of the alphabet without going through the letters in rote order.

Marshmallow Straw Buildings

marshmallow-2

What better way to introduce engineering and building design than with marshmallows? We use the large marshmallows from vegan brand Dandies, for great gooey fun.

Simply provide your toddler with marshmallows and straws cut in half, and let the building begin! I didn’t even need to show Travis what to do before he speared the first straw into a marshmallow base.

marshmallow-1

Young toddlers will likely need to connect flat constructions, but older kids can aim for 3-D structures, making their straws and marshmallow several layers tall.

marshmallow-3

I demonstrated a tall version for Travis which he loved…

marshmallow-5

…especially when our marshmallows sagged over and crashed!

marshmallow-4

Don’t be surprised if the game ends with a request for an ooey gooey marshmallow snack.

marshmallow-6

Thanks for the idea, Parents magazine!

Magic Sun Prints

sun-prints-3

I have to say, this little project was cool even for the adult in the room! All you need is a sunny day and dark construction page to make magic happen.

Arrange several items on a sheet of construction paper, preferably with interesting silhouettes. Travis helped me select a key, button, block, and CD case.

sun-prints-4

Now leave the paper out in the sun for at least a few hours. When you’re ready, remove the items and voila! The sun will have faded the paper, leaving darker shadows wherever your items were on top.

sun-prints-5

A neat little way to show the power of the sun…