Farm Land

Farm Land (7)

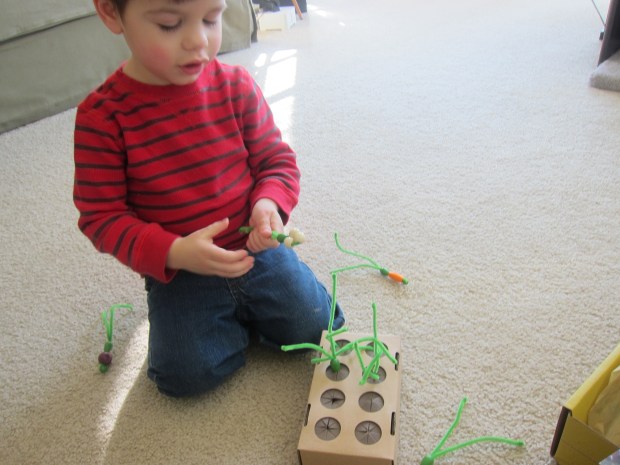
Farming is naturally on our minds this time of year, with local farmstands around us beginning to brim with late spring and early summer produce. This project is a neat visual if you are doing a unit at home about farming, about where food comes from, and about different landscapes children might see on a farm.

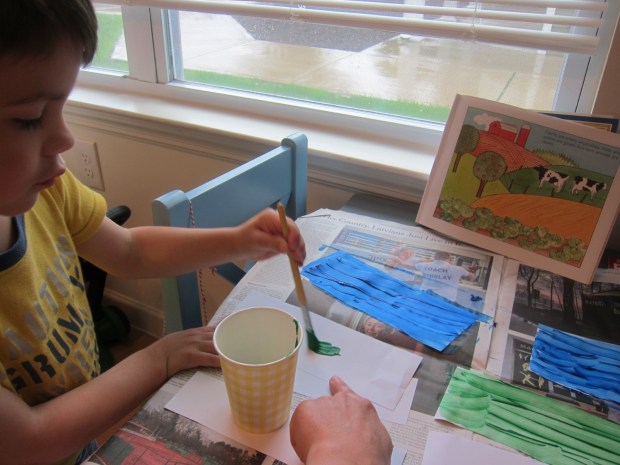
To get the most out of the craft, I recommend first looking at a book with a good visual of farmland, or finding a few pictures online. Although not very vegan-friendly, my son loves the description of farm life year-round in Gail Gibbon’s Farming.

Farm Land (1)

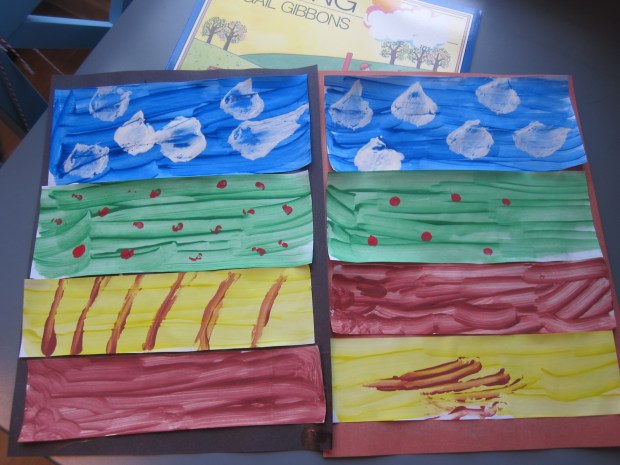
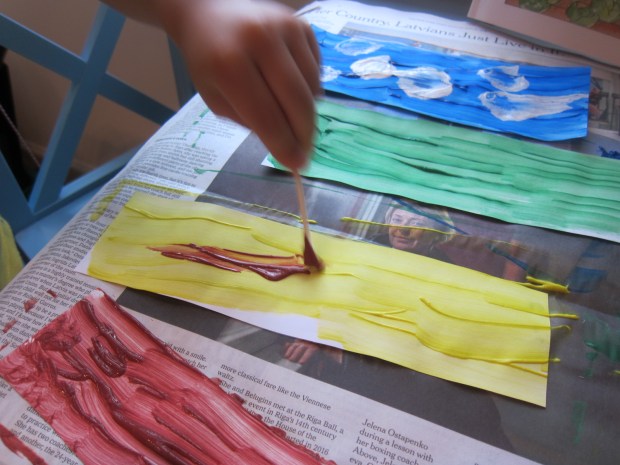
We talked about the different portions of land he saw in the picture, starting with what was up top – sky – and what was on the bottom – garden dirt.

Next I cut paper into 4 pieces, and we took turns painting them in color blocks just like in the picture: blue for sky, green for grass, yellow for hay or wheat, and brown for the vegetable patch.

Farm Land (2)

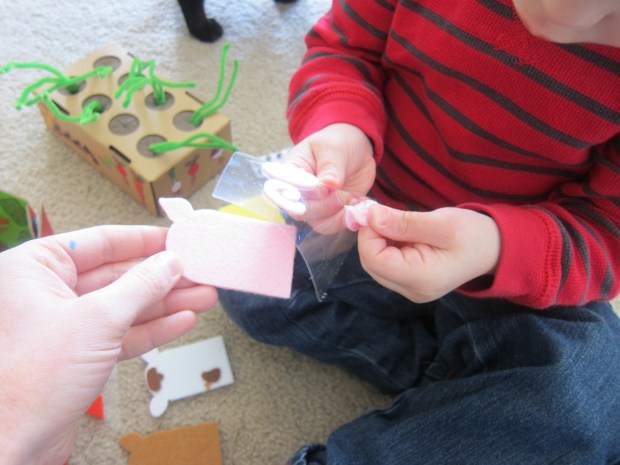
Let your colors dry, then come back to add details. For added fun, we raided mommy’s bathroom cabinet and used cotton balls for clouds:

Farm Land (4)

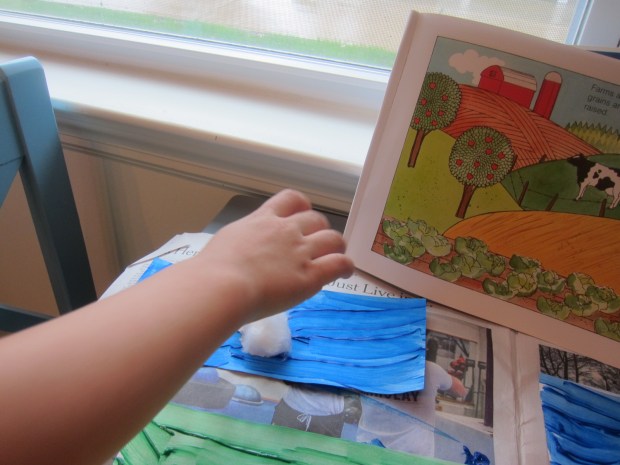
… and q-tips to paint details like flowers in the meadow and brown wheat in the yellow section. Let dry again.

Farm Land (5)

The final step was to use a glue stick to put it all back together again on a large piece of construction paper. This is neat because it will be almost like a puzzle for the kids. Don’t worry if a few sections get mixed up along the way.

Farm Land (6)

If you can, cap things off with a trip to a local farm; lots of places have pick-your-own veggies and berries getting underway now that we’re almost to June!


Plantable Paper

Plantable Paper (9).JPG

There’s a little bit of magic to this craft, the idea that flowers can sprout from paper. It’s a multi-day project, but you only need a little time each day to make the magic bloom.

The instructions I had found online for making the paper mush were a bit vague, but worked just fine, so here’s all you do: Fill a blender about halfway with torn newspaper and scrap paper (we used pink construction paper scraps, which gave our final product a nice pink hue). Cover the paper mixture with hot water, then process until you have a mush. Travis loved the novelty of paper in a blender instead of food!

Plantable Paper (1)

Caution: Make sure to remove the center piece of your blender’s lid and cover with a paper towel while blending so steam can escape, otherwise you’ll end up with hot water splatters. Let the mixture stand for about 15 minutes.

Plantable Paper (2)

The next step is messy, so cover your work surface (I used a large shopping bag). Place two pieces of felt on top of the bag. Scoop the mush onto the felt, and have your child help you smoosh it into a very thin layer.

Plantable Paper (3)

Then it was time to sprinkle on our flower seeds! We had two very different kinds – cosmos which looked almost like large cumin seeds, and larkspur, which looked more like hard black poppy seeds. I don’t do much gardening, so examining the seeds was fun for Travis and me both!

Plantable Paper (4)

Leave the mixture to dry on the felt. After the first day, I carefully flipped each piece over, then left them to dry some more. By now I could consolidate onto one piece of felt.

After two days, the mushy paper will be completely dry. Remove it from the felt and cut into shapes if desired – hearts felt just right!

Plantable Paper (8)

We headed outside with pots and soil, and planted our paper. Travis loved watering them!

Plantable Paper (12)

Now we just need to sit back and wait for the flowers to grow.

Plantable Paper (11)

Update: It worked! Here are some beautiful shoots at day 5.

Plantable Paper (12)

Here is the growth after a couple of weeks:

Plantable Paper alt.JPG


Garden Crate

Koala garden (11)

We received our Garden-themed box from Koala Crate this month – perfect for summertime! This kit was very much about Travis playing with the items in his own way, not necessarily as “intended”, but there’s nothing wrong with a crate that simply prompts ideas and play!

As always, Travis was eager to lift the lid and see what was inside this time around. The first project, a Gardening Apron to decorate, was a huge hit – not so much to decorate, but to try on and to put the gardening tools inside of.

Koala garden (2)

The kit came with string and felt flowers/leaves to decorate the apron, but he preferred to scoop the felt items and pretend he was planting them (cupcake liners made great “flower pots”!).

Koala garden (5)

I finally coaxed him into helping decorate the apron as intended, which was good lacing practice, before I finished it for him. You’ll notice that he adorned the apron with pencil scribbles as the finishing touch, in the photo at the top of this post!

Koala garden (4)

Travis also did things his own way when it came to building the Growing Plant; he loved squeezing drops of the provided glue, meant to glue on tissue paper flower buds, but instead he wanted to stick the cardboard leaves together.

Koala garden (7)

I let him have fun his own way while I pressed on the “flowers” so he could see the final, intended result.

Koala garden (6)

Once the glue dried and it was time to slot the cardboard leaves and stems of the plant together, he decided we should “drill” it together!

Koala garden (8)

The final “project” this month was a bit of a disappointment – a book to read along with the growing plant, rather than another craft, which I felt could have been included in Imagine magazine.

Koala garden.JPG

However, the story is a nice vocab builder, and touched off discussion about plants and gardening.

Koala garden (9)

The biggest hit by far? The provided recipe to make your own, homemade lemonade!

Clay Flower Pots

Clay Pots (6)

This project couldn’t be simpler, but kids will love playing with the clay and watching their decorations take shape! A great summer craft, especially if you’re teaching your little ones about gardening.

Use any small terracotta pot as the base. I ended up wishing that I had several on hand, because Travis covered his first with clay designs so quickly; consider picking up a few at a craft store ahead of time!

Clay Pots (1)

For the clay, we used Model Magic – it’s easy to work with, mess free, and will air-dry in a few days.

Clay Pots (3)

Travis loved just smooshing on big designs, but older kids can be more deliberate in their art, creating flowers or mini clay gardens. I added a few details as examples.

One cool result of Travis smooshing all the clay onto the pots was a swirled, marbled effect.

Clay Pots (4)

These pots would make a great summer gift for anyone who loves to garden!

Farm Crate

koala-farm-15

Our latest kit from Koala Crate was all about the farm – not just animals, but also the  vegetable growing element of farming, which I loved since it’s not as common to find toys in this category. Overall, the kit was fantastic for play – not as much of a crafting one – which suited Travis just fine. In short, he loved this one!

The first project was to create pipe cleaner-and-bead vegetables, which could then be planted in the provided vegetable patch (a cardboard base with form “dirt” cut outs).

koala-farm-2

The materials were great for Travis to practice bead threading in any order he liked; when he tired of that, I then assembled the veggies “correctly” so the beads wouldn’t get lost.

koala-farm-3

From there, he couldn’t get enough of the game! He loved poking his fingers through the dirt, planting the veggies, pulling them up and seeing if he had a “match” or a “mis-match,” and then starting all over again.

koala-farm-8

As we planted our veggies, he so eagerly asked, “When will they grow up?” I loved how he understood the concept of veggies growing in the earth.

koala-farm-7

The kit also had stickers to decorate the base of the garden, including cute ants and worms, so we talked about how these itty bitty helpers help a garden grow!

koala-farm-9

I put together the barn that came in the kit – a cardboard frame with adhesive Velcro dots – only because misaligned Velcro wouldn’t have held the barn together; however, preschoolers should be able to tackle this step on their own no problem!

koala-farm-10

Finally, it was time to assemble our felt animal finger puppets, and I was impressed with Travis’s craftsmanship on these (already an imdprovement over the stickers he placed willy-nilly on last month’s Safari crate animals!).

koala-farm-14

Ok, not all of our animals looked exactly “right”, but he really thought about where everything should go before adhering – eyes up top compared to noses etc. When I gave him the pig’s curly tail, he even said told me it should go on his back, using both sides of the puppet.

koala-farm-13

Later in the week, we continued the gardening fun with a final, at-home project. I cut up a bunch of celery, a bell pepper, an apple, and mushrooms, and laid them under a blanket (brown for “dirt” of course), and let Travis loose in his own “vegetable garden”! He loved unearthing the real veggies.

vegetable-prints-3

To get crafty with it, I laid out plates of paint, and Travis dipped the cut sides of the veggies into the colors.

vegetable-prints-6
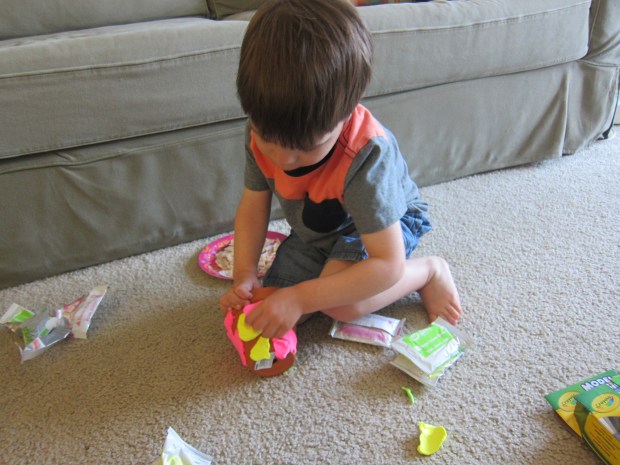
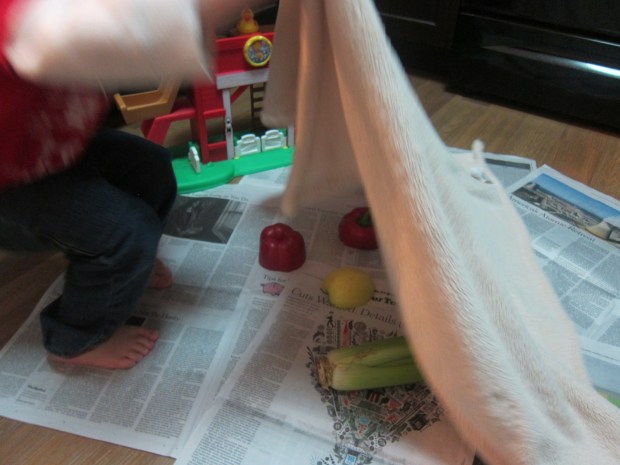
His own creation turned into a very smooshy painting…

vegetable-prints-7
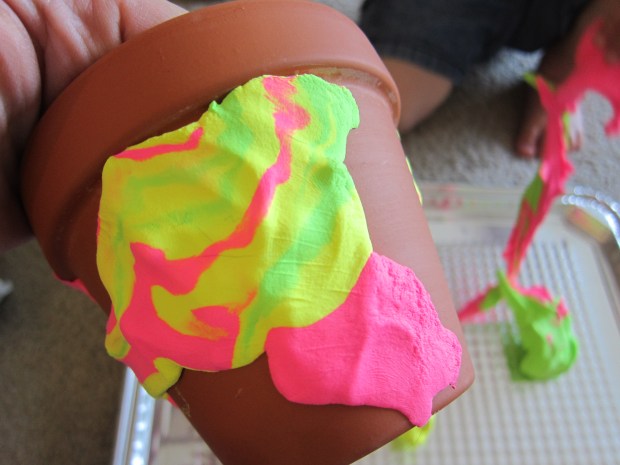
…so I also made a print of my own to show him the different patterns that each fruit or veggie could create. The celery almost looks like a rose!

vegetable-prints-9In sum, we adored this crate. Thanks Koala!

koala-farm-11

Hairy Head

hairy-head-6

Here’s an adorable gardening project that can be done indoors in the winter. We only just planted our grass-haired man today, so I’ll update this post when and if the “hair” appears.

First, draw a face on a Styrofoam cup using markers. Travis made great eyes, as well as lots of squiggles, and I drew a complete face on one side as well.

hairy-head-2

Travis’s favorite part of the activity by far was shoveling in the dirt. He happily would have kept doing so all day except our cups were filled.

hairy-head-4

Sprinkle grass seed near the top (we used catgrass, which means hopefully our cat can enjoy the final product as well), and cover with a little more soil.

hairy-head-5

We watered the soil and then set the cups aside – hoping to see grass sprout in a few days!

G week (11).JPG

Update: Not only did our man sprout a hairy head of grass, the grass grew so fast we could hardly believe our eyes. Here are the sprouts after a couple of days:

Hairy Head.JPG

And here is our man sporting a full head of hair!

hairy-head-alt

Travis loved running his hands through the grass blades.

hairy-head-var


Planting Flowers

peppa-flowers-2

I have no green thumb – so bad in fact that I often joke I have a brown thumb; plants tend to wither under my care.

But Travis received a cute set of flower seeds embedded in paper flowers in a goodie bag recently. Hoping to start him off with a better knack for gardening than I have, I decided we’d give the project a try!

First, the paper flowers needed to soak overnight in water. Travis was intrigued already, even having no idea what came next!

peppa-flowers-1

Next we needed dirt, so I filled three containers on our balcony. Travis had great fun ripping up the paper flowers and planting them under a thin layer of soil, wondering where the colors had disappeared to.

peppa-flowers-3

Every morning thereafter, we diligently headed outside with a watering can, and we were rewarded with small shoots within a week!

peppa-flowers-6

Although we still have no flowers, just green stems and leaves, Travis loves taking care of his plants each morning. “I can look at them a little longer?” he’ll ask, even once the watering is done for the day. I do hope we see colorful blossoms eventually!

peppa-final