Squishy Art Play

Squishy Art (6).JPG

Today was Veronika’s first art project!

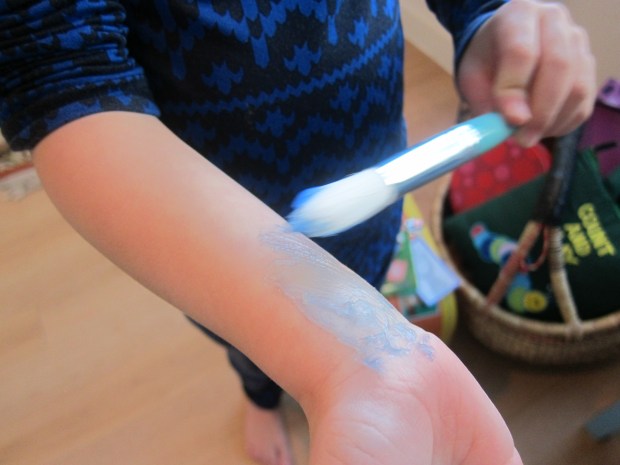
What’s the safest art for a seven month old? Covered up! Because Veronika puts everything in her mouth, there is currently no way to safely give her markers, crayons, or paint – even all-natural or non-toxic stuff – unless it is safely sealed up. But art inside a plastic bag is the solution you’re looking for.

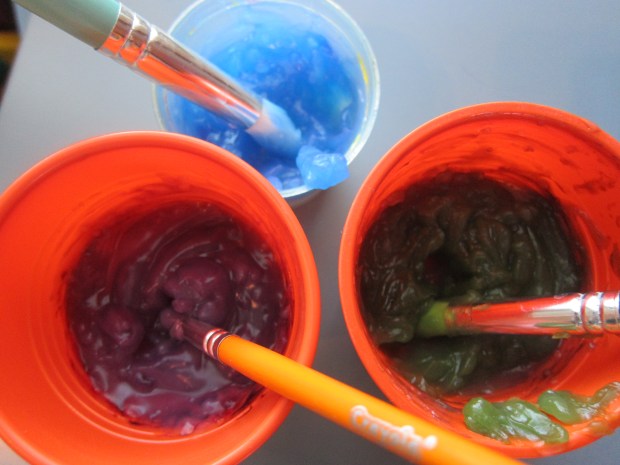
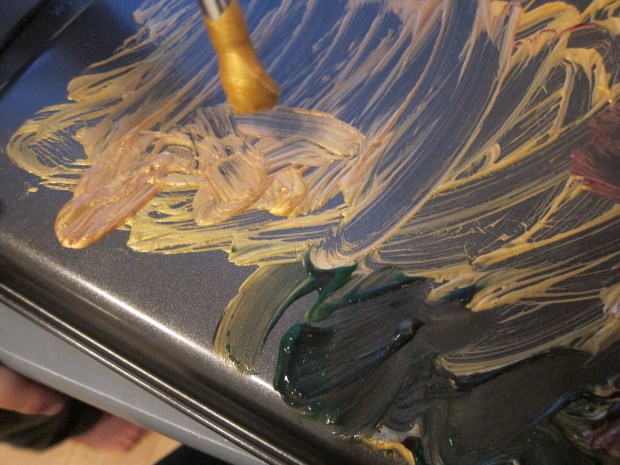
Place a piece of thick paper (like watercolor paper) inside a gallon zip-top bag; for the best fit, I folded our paper in half. Add a few splotches of color, and seal tightly.

Squishy Art (1)

I placed this bag on Veronika’s high chair tray, and encouraged her to squish it around.

Squishy Art (2)

She was a little confused at first, and more so when she realized she couldn’t actually the paint on her fingers, as she can with food on her tray. I talked about the squishy blobs she was feeling, and helped her press her hands into the piles of paint under the plastic.

Squishy Art (3)

Soon she had the idea!

Squishy Art (4)

Truth be told, she was a little frustrated that she couldn’t lift the whole art project up and try it for dinner. But she still had fun exploring!

Squishy Art (5)

When she tired of the game, I removed the paper – her first work of art!

Squishy Art (7)
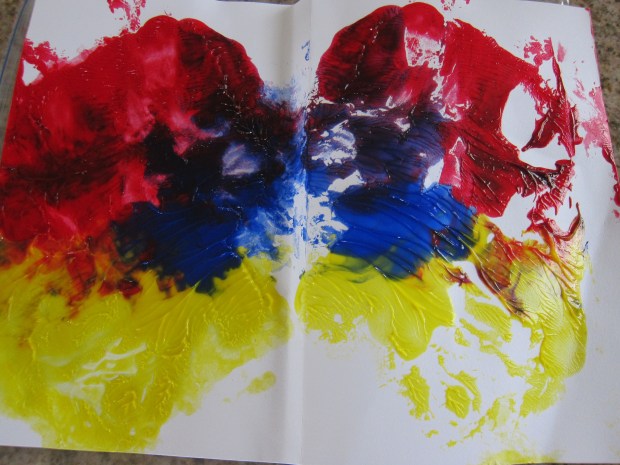
Because the fingerpaint was smeared on quite thick, I folded it over the other (blank) half of the paper, resulting in a cool symmetrical painting.

Squishy Art (8)

Overall, this was a great first art project for a baby, and it encapsulated all that I love about watching kids make art: that the process is a lot more important than the final product; that our role as grown-ups is to facilitate and make sure a little one is using materials safely, but to let them be the “artist”; and that after serving as a model or guide, the most fun can be had when you step back and watch your child create!

Collagraph Prints

Collagraph Prints (11)

Collagraphy (not to be confused with calligraphy!) is a print-making technique that uses textured elements applied to a rigid surface to make a picture. It’s a fun art process that will engage your preschooler with texture in new ways.

Before school, Travis and I glued various items from our craft bin onto a piece of cardboard. Sponges can be cut into smaller sizes and applied.

Collagraph Prints (2)

We also added craft sticks, foam pieces, and buttons.

Collagraph Prints (1)

Corrugated cardboard works especially well; try using the reverse side of a coffee cup sleeve for this!

Collagraph Prints (5)

I asked Travis what kind of scene we should make, and he decided a spring garden. We glued down all our elements to make flowers, a tree, a fence, and “pebbles” on the ground (these were the buttons).

Collagraph Prints (3)

By the time he was home from school, the glue was dry and it was time to paint! I set out cups with different colors. For the first round, we stayed true to nature: a yellow sun, green flower stems, red blossoms, etc.

Collagraph Prints (6)

Press a piece of white paper over the print, making sure to press down hard on all your 3-D elements.

Collagraph Prints (7)

We lifted up the paper for the big reveal. Travis was astonished and loved it!

Collagraph Prints (8)

He immediately wanted to make a second version, but with different colors to see how it turned out.

Collagraph Prints (9)

We’d run out of yellow for the sun and sky, so instead painted these parts black. As we lifted off the paper, I said it looked like a black rain cloud. But Travis said, “It’s a turtle with a smile!” Talk about glass half-full, what a wonderful answer!

Collagraph Prints (12)

Then he decided it would be silly to make an all-black print, very Rorschach test of him.

Collagraph Prints (10)

In sum, this was a a fantastic art project and we would definitely do it again.


Homemade Body Paint

Body Paint (6)

Some kids love face paint the moment they see it, but it took Travis a long time to warm to the idea of having his face painted. A recent fascination with all things superhero and supervillain has gotten him past the hesitation, and I was so proud of him when he dared to have character paint at a recent party. To continue the fun, I suggested we make this  DIY paint at home to amplify his superhero play!

Cooking the paint is half the fun. First, we scooped 1 cup cornstarch into a pot.

Body Paint (1)

We added 4 cups water, 6 tablespoons sugar, and 1 teaspoon salt.

Body Paint (2)

I cooked the mixture over medium heat, whisking frequently, until just before boiling – it will look like pudding. Travis loved watching from a little distance away.

Make sure you let the paint cool completely, at this point!

When it was cool, we divided among cups and added about 4 drops of food coloring to each cup. Travis new exactly which colors he needed for his game.

Body Paint (3)

He didn’t hesitate one whit before painting all up and down his arm. Is that a blue Spiderman I see?

Body Paint (4)

Mommy got to be Green Goblin.

Body Paint (5)

Travis was a bit disappointed that the paint didn’t dry, meaning he couldn’t keep it on an extended time period, but this was still great fun. Next time I think we’d do it right before bath, to fully enjoy a mess before a cleanup. The paint would also be great outside in warm summer weather!

Cookie Sheet Prints

Cookie SHeet (10)

This is an old idea from Parents magazine that I’ve waited to trot out forever. It turns out there was so much for Travis to love about it, including the first fact that your art canvas will be a cookie sheet.

To set up, set out cups of tempera paint and a cup of water for your child, along with paintbrushes. Dip the brush in the water, followed by the paint, then apply to the back of the cookie sheet.

Cookie Sheet (1)

Travis couldn’t believe he was able to paint on one of mommy’s dishes, a fact which got him over initial skepticism about the project. Pretty soon he was eagerly smearing gold paint all over, and adding highlights of other colors.

Cookie Sheet (3)

Your child can just scribble, or make deliberate designs like circles or other shapes. When Travis was satisfied with his work, we pressed a piece of thick paper down (watercolor paper works well), and pressed firmly.

Cookie Sheet (5)

Now for the big reveal! Travis loved peeling back the paper all by himself.

Cookie Sheet (4)

You can make the resulting prints even neater by drawing deliberate lines in them, either with the back of the paintbrush, or with fingertips.

I showed Travis an example, writing in his requested word (in reference to the shiny gold paint).

Cookie Sheet (7)

But he had way more fun just smearing everywhere with his fingertips. “Now whole hands!” I loved watching him.

Cookie Sheet (8)

Needless to say, we needed to make lots of prints before he tired of the project. A great crafty idea for a cold winter’s day.

Cookie SHeet (9)

Swirly Ornaments Crate

Swirly Ornament (8).JPG

Kiwi Company occasionally puts out special holiday-themed crates, and we’ve been holding on to this one since last December! Reading the title on the box, I imagined the final product would be ornaments with beautiful swirls. Little did we know the method to make the ornaments was swirly, too!

Travis was so excited seeing the three plastic globe ornaments, since we had just set up our tree. Add two of the provided watercolors (in primary colors) to each globe for a quick lesson in color mixing. You’ll be able to make one orange, one green, and one purple ornament. Next squirt in a drop of the glittery silver paint.

Swirly Ornament (1)

Add a marble, and get swirling! As you swirl, the marble will help the paint coat the entire globe.

Swirly Ornament (3)

As a parental aside, this was very precarious proposition with a four-year-old. Of all the Koala projects we’ve ever done, this was by far the messiest! It was quite hard for Travis to swirl enough to coat the inside of the ornament without also spilling paint, so step in if you need to.

He loved the drying method that came next though; upend the ornament over a provided paper cup. The marble and any excess paint will fall out.

Swirly Ornament (2)

We set ours aside to dry for about an hour.

Swirly Ornament (4)

Ideally, flip the ornaments at this point and allow to dry on the inside, too, overnight. Travis was too impatient though and wanted to pop in the provided corks and seal them up!

Swirly Ornament (5)

To finish each ornament, we wrapped a sparkly pipe cleaner around the neck.

Swirly Ornament (6)

Add a silver ribbon (a great chance to practice tying a bow), then thread a provided bell onto the pipe cleaner. Hook the end.

Swirly Ornament (7)

Now it’s ready to hang on your tree!

Swirly Ornament (9)

The kit also suggested gifting the ornaments (just slip on a gift tag and it’s ready to go)…

Swirly Ornament var

…or attaching one to your stocking as a sparkly decoration.

Swirly Ornament alt

Let the holiday season begin!

Swirly Ornament (10)


Paper Bag City

Paper Bag City (7).JPG

Following our fun with Koala’s city-themed crate, we constructed our own city at home, using nothing but extra paper lunch bags!

First, paint the bags to resemble buildings, with one color on the bottom, and black (or another second color) on top for the roof. This turned out to be more of a puzzle for Travis than I imagined, since he just wanted to paint the bags any which way. Providing a guiding line for him helped…

Paper Bag City (4)

…But the point is never perfection!

Paper Bag City (1)

I let him decorate a few houses to his own taste, and made a few others to add to our city. Let the paint dry completely.

Paper Bag City (2)

If your child wants to paint on features (doors, windows), they can do so. Instead, I added those later with permanent marker.

Paper Bag CIty (8)

To finish your town, fill each bag with about 1 cup dried beans to weight it down. Fold the top edge over and tape into place.

Paper Bag City (5)

You can set the buildings up on a car playmat, or just on the floor. Bonus points for toy vehicles in your city!

Paper Bag City (10)

Since this particular city belonged to a four-year old boy, soon we had villains knocking down the houses… He sure does come up with games I never would imagine!

Paper Bag City (11)

What buildings will be in your town? Please share in the comments!

Apple Prints

Apple Prints (1)

It’s officially fall, and that means it’s time for apple picking! Apple prints are an activity that never grows old, whether you’ve plucked your apples fresh from the tree or pick them up at the farmers’ market on a crisp autumn morning.

That’s exactly where Travis and I headed today. We set aside most of our bounty to eat, but saved an apple or two for artwork, thanks to the prompt in our latest Ranger Rick Jr.

Cut one apple in half, to make large prints. Cut a second apple into wedges. Dab the cut sides of the apples dry with a paper towel.

Apple Prints (2)

Squirt paints onto a paper plate (or a piece of foil works, in a pinch). Dip the apples in paint, and press down on construction paper or watercolor paper.

Apple Prints (4)

We didn’t make a flower like the magazine suggested, but it was fun to have two different shapes to work with. Travis said his picture was footprints – perhaps a dinosaur?

Apple Prints (5)

We decided mommy’s print looked like some sort of buzzing insect.

Apple Prints (6)

What will you make with your apple art? Happy fall!

Cardboard Tube Coiled Snakes

Cardboard Snakes (8)

This is a fun craft to put together, and the adorable final product can be used either to play with or to occupy a cute space in your garden!

First, paint toilet paper tubes with paint on the insides and out. We liked selecting fun bright colors for this project!

Cardboard Snakes (1)

If you intend to set the snakes outside in the garden, be sure to use acrylic paint. Painting the inside was a bit tricky for Travis, so I did that part and neatened up the outside of his blue one. Let dry completely.

Cardboard Snakes (2)

Cut each tube into a coil shape. I confess that I found this step tricky, so our snakes only have about 4 loops each. I saw others online that were cut into very thin little spirals – by all means go ahead if it doesn’t hurt your wrists as it hurt mine!

Cardboard Snakes (4)

Coil your snakes around a longer tube (like an old paper towel roll) to hold them steady and add colorful dots using the handle of a paintbrush rather than the bristles – a novelty!

Cardboard Snakes (5)

Let one side dry completely before you flip the tubes and dot the other side.

Cardboard Snakes (6)

For a final touch, we glued on triangle “tongues” made from red paper and two googly eyes.

Cardboard Snakes (7)

Travis was so excited by the way the snakes stretched out! Great for imaginative games.

Cardboard Snakes (9)

When it’s time to find your snake a place in the rainforest (er, I mean garden), choose a cozy spot and nestle them in.

Farm Land

Farm Land (7)

Farming is naturally on our minds this time of year, with local farmstands around us beginning to brim with late spring and early summer produce. This project is a neat visual if you are doing a unit at home about farming, about where food comes from, and about different landscapes children might see on a farm.

To get the most out of the craft, I recommend first looking at a book with a good visual of farmland, or finding a few pictures online. Although not very vegan-friendly, my son loves the description of farm life year-round in Gail Gibbon’s Farming.

Farm Land (1)

We talked about the different portions of land he saw in the picture, starting with what was up top – sky – and what was on the bottom – garden dirt.

Next I cut paper into 4 pieces, and we took turns painting them in color blocks just like in the picture: blue for sky, green for grass, yellow for hay or wheat, and brown for the vegetable patch.

Farm Land (2)

Let your colors dry, then come back to add details. For added fun, we raided mommy’s bathroom cabinet and used cotton balls for clouds:

Farm Land (4)

… and q-tips to paint details like flowers in the meadow and brown wheat in the yellow section. Let dry again.

Farm Land (5)

The final step was to use a glue stick to put it all back together again on a large piece of construction paper. This is neat because it will be almost like a puzzle for the kids. Don’t worry if a few sections get mixed up along the way.

Farm Land (6)

If you can, cap things off with a trip to a local farm; lots of places have pick-your-own veggies and berries getting underway now that we’re almost to June!


Textured Paint Collage

Texture Paint (11)

This easy painting method is a neat way to add textures to your child’s next art creation… and all you need to do so is an old cereal box!

Cut portions of the cereal box so they are like combs that can be raked across a painting; I made Travis two version, one with boxy points and one more pointed like shark’s teeth.

Texture Paint (1)

But first we needed to make artwork with really thick paint! Travis was delighted when I told him the thicker the better for this particular project.

Texture Paint (7)

Once he’d covered the surface of his paper, he tried out the combs to see what kinds of lines or designs they made.

Texture Paint (5)

At not quite four years old, Travis’s artwork is still very abstract. Big kids can be more purposeful in their painting – think of textures like the bark of a tree, the waves of the ocean, blades of grass etc. I made a picture with an ocean, sun, and sky for Travis as an example, as well as some abstract shapes.

Texture Paint (6)

He filled two pages with color and shapes, which we left to dry overnight.

Texture Paint (8)

The next morning, we cut one picture into smaller pieces and used a glue stick to add them to the intact picture – this added still more texture to the final product!

Texture Paint (10)