Art of the Color Wheel

Color Wheel (9)

A gray day seemed like the perfect chance to bring color inside. To combat all the dark rain clouds, Travis and I explored different ways we could make a color wheel. This project was part lesson, part craft – and all fun!

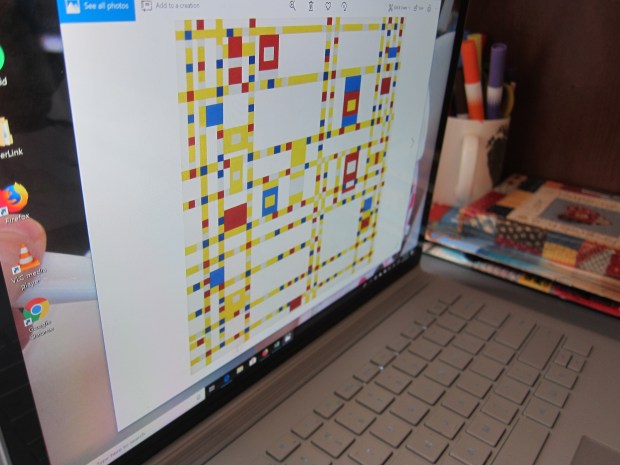
First, we did a quick review: I showed him paintings that use yellow, red, and blue as the dominant colors, including Piet Mondrian’s Broadway Boogie Woogie and Mark Rothko’s Untitled (Yellow, Red, and Blue).

Color Wheel (1)

Take the time to ask your child what he or she thinks the pictures are about, or how they make him or her feel. He told me Rothko’s made him “happy happy sad.” When I asked him to explain, he said the red and yellow were happy, but the blue was sad. Then remind your child these are the three primary colors.

Color Wheel (2)

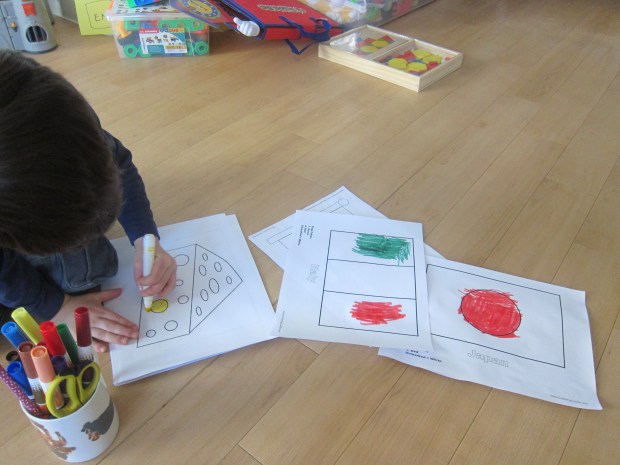
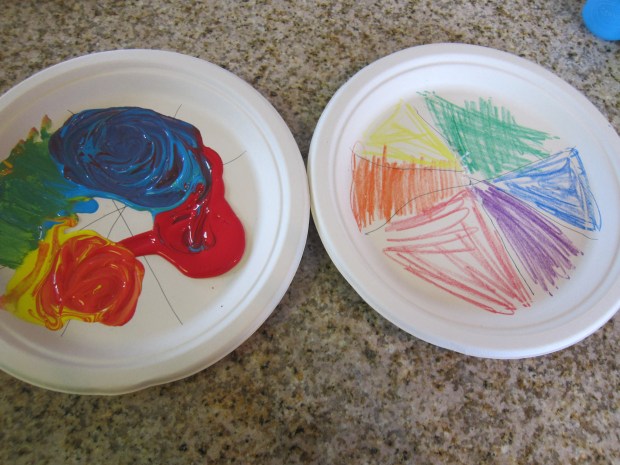
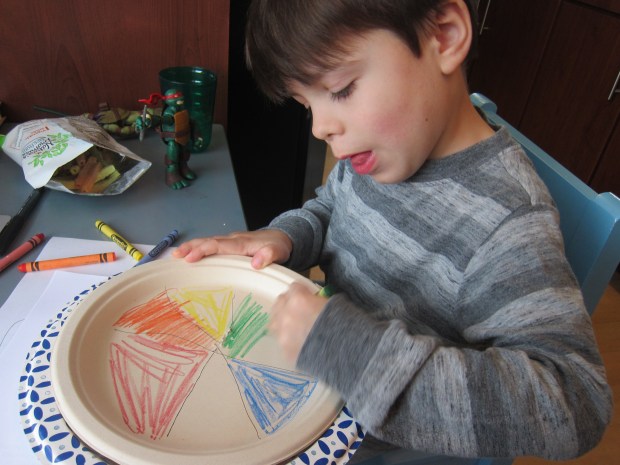
Now it was time to make color wheels! We started with the most basic version using crayons. I filled in yellow, red, and blue on a paper plate divided into 6 portions. His job was to figure out which secondary color went where.

Color Wheel (3)

The next version was a little messier. We made three blobs of paint in the primary colors, and he used a paintbrush to drag these together. Soon we had a color wheel!

Color Wheel (4)

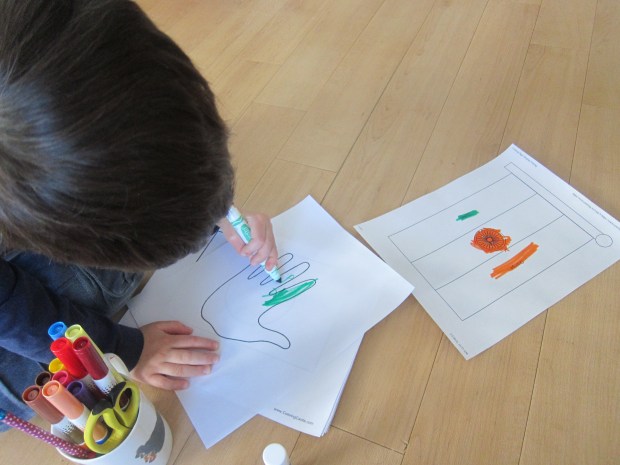
I encouraged him to make a version with hand prints, but he didn’t want to get that messy. Using my hand and fingerpaint, I  showed him an example, pressing together yellow and blue prints. Your kids might want to have goopy fun with this and make a full handprint color wheel!

Color Wheel (6)

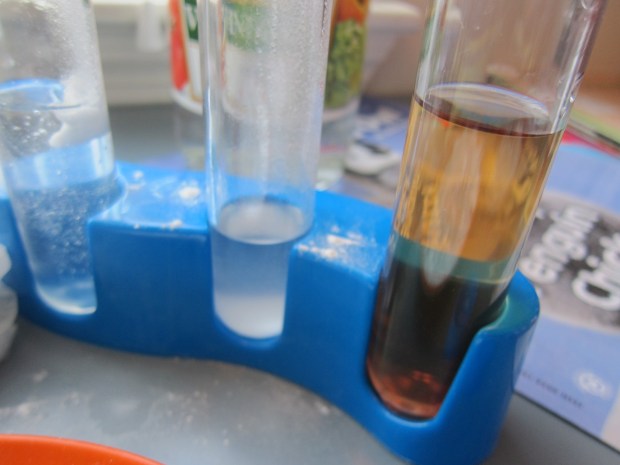
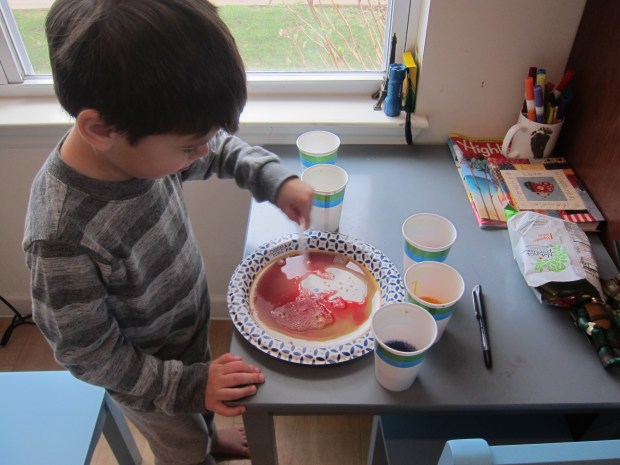
Finally, it was water mixing time! We filled three cups with water, and added our primary colors (now in the familiar red, yellow, and blue) with food coloring.

Color Wheel (7)

Use a pipette (which means you’re sneaking in fine motor skills, too!) to make a few drops of each color on a plate. Then mix and match to form the secondary colors.

Color Wheel (8)

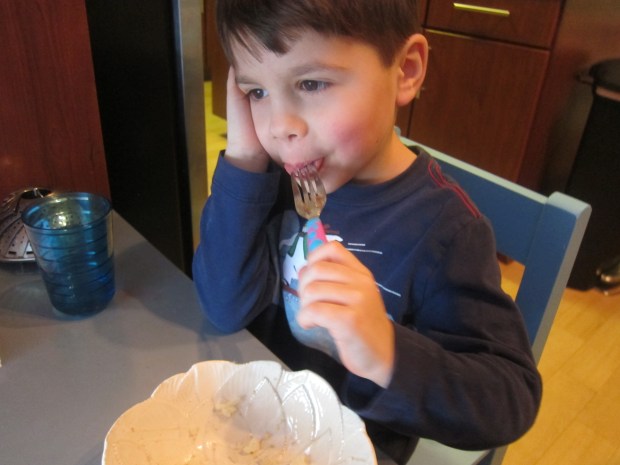
Travis enjoyed this version the most, and soon was experimenting with making a big plate of brown.

Color Wheel (10)

All of this was prompted by a Raddish Kids lesson, so we also watched some of the recommended videos to further our exploration. There’s lots more you can do to go further in depth with older kids: check out fine art books at the library, or head to a gallery for a primary and secondary color scavenger hunt!

Food as Medicine

Garlic Bread (8).JPG

Travis was very frustrated by a late winter cold, and wanted to know how best to feel better. It was a great way to talk about certain foods and their medicinal qualities!

First, I asked him how he was feeling – finally better! But he thought back to how he had felt in the past, and about a time he’d had a tummy bug – no fun.

Garlic Medicine (1)

I asked him what foods he’d craved at the time, and he recalled wanting watermelon. I then gave him a little background on how past civilizations have used food as medicine, including Ancient Greece, China, and India. I thought all this info might be too dry, but he loved reading the numbers of how long ago these civilizations existed. 2000 years ago? 4000 years ago? Whoa.

Garlic Medicine (2)

Now it was time to see if there was any truth to the claims that some foods are medicinal. We picked garlic for our research. Could it really help? Online sources seemed to back up the claim.

We tested it out with a garlic tonic: Mince 2 tablespoons garlic. Combine the garlic in a mug with hot water, a little lemon juice, and agave syrup to taste.

Garlic Medicine (5)

Then we set out to cure his cold with a garlic bread recipe (our Bonus Bite in this month’s Raddish Kids).

Ingredients:

  • 2 garlic cloves
  • 4 tablespoons Earth Balance butter
  • 2 tablespoons olive oil
  • 1/2 loaf French bread baguette
  • 1/2 teaspoon dried parsley
  • 1/4 teaspoon salt
  • 1 tablespoon vegan Parmesan sprinkles
  1. Smash two garlic cloves; remove the papery skins and mince.Garlic Bread (3)
  2. Transfer the garlic to a bowl, along with the butter and olive oil. Microwave for about 45 seconds, or until the butter is melted.
  3. Meanwhile, slice the baguette into thick slices and arrange in a single layer on a baking sheet.Garlic Bread (4)
  4. Brush evenly with the butter mixture. Sprinkle evenly with the parsley, salt, and Parmesan.Garlic Bread (5)Note: this gets a bit messy! Next time I’d line the baking sheet with foil.Garlic Bread (6)
  5. Bake at 425 degrees F for 6 minutes.

Did we feel better after eating the garlic bread slices? Hard to say they actually made his sniffles less, but his face sure had a big smile!

Garlic Bread (7)

Finally, we have relatives who have also felt unwell most of the winter, and decided to send along a care package of flu fighter cookies. Even better, if you have a nearby friend or neighbor who has been unwell, perhaps you can visit them with a cold-busting superfood.

Garlic Medicine (6)

What do your kids crave when they’re sick? Please share in the comments!

Garlic Medicine (3)

Etiquette Around the World

Etiquette (4)

Travis and I have been working on table manners lately; he’s old enough now that his behavior matters more when we go out to dinner, or even just dine as a family. No elbows on the table and staying in your seat are big rules in our house!

But I wanted to stop feeling like a broken record reminding him of these manners, so we did some investigation into etiquette around the world to make things more fun! This overlapped nicely with a home-school lesson to go with our Eggplant Parmesan from Raddish Kids.

Start off with some giggles, with a recitation of ‘The Goops.’ I remember this poem from my own childhood!

The Goops they lick their fingers.

The Goops they lick their knives.

They spill their broth on the tablecloth,

Oh they lead disgusting lives.

The Goops they talk while eating,

And loud and fast they chew; 

And that’s why I’m glad that I 

Am not a Goop – are you?

You can plainly see the giggles this elicited!

Etiquette (2)

I asked Travis what the poem was about, and he caught on right away that it was about manners.

Next we watched a clip of strange etiquette rules around the world. Travis was more interested than I would have guessed. “Mom, in one part of the world you can’t eat with your left hand,” he came rushing up to tell me, for example.

Etiquette (1)

Because he’s only 4, we parsed the video closely so it made more sense. I printed flags from 7 of the 12 countries (the full 12 seemed overwhelming) and printed pictures depicting the bad manner to go along with each. We colored them in (a nice geography lesson, too!) and then glued each flag to the appropriate etiquette picture.

Etiquette (3)

For some final silly fun, we read ‘The Goops’ again, and this time Travis got a kick out of acting out some of the bad manners – elbows on the table and fork licking!

Etiquette (5)

Big kids can make this into a proper skit, and delight their family or friends with their bad manners. What’s a big no-no in your house? Please share in the comments!


Foodie Family Dice Games & Game Design

Game Design (10)

In conjunction with our latest Raddish Kids recipes, tonight was family “date night”! The activity: board games, charades, dice games, and a game of our very own creation!

Game Design (2)

First, we did a little investigating; Travis and I talked about games in general, and the way they teach concepts of fairness, taking turns, and following the rules. More specifically, I then showed him a clip about the history of dice in this suggested video (Note: There are some bleeped out curse words, but they went right over Travis’s head). If you want to skip the video, just share some fun facts, like how dice have been around for 5,000 years (wow!).

Next, we cut out and folded up the two foodie dice provided in this month’s crate and played a round of “No Tomato.”

Game Design (3)

The rules are simple: roll the dice and rack up a point for every food tossed except… if you roll a tomato you lose your points for that round!

Game Design (4)

Travis loved taking a risk and giving one more toss on his turn, daring to inch his score closer to the 12 points needed to win.

Game Design (5)

The game was also a great lesson in score-keeping. He loved being in charge of our tally sheet, and erasing when someone lost their points.

Game Design (6)

Now it was time to design our own game! We settled on a few basics, using the helpfully provided Game Checklist as a guide. The theme of our game was Travis’s much-loved Spiderman. The goal was to reach the end of the path first. As he happily colored in decorations for the board, I drew the path and set up pitfalls.

Game Design (7)

Oh no, Spiderman’s enemies could make you lose a turn or get stuck until you rolled a certain number.

Game Design (9)

Lego men were our playing pieces, and we used a dice to move players around the board.

Game Design (11)

We played so many fun family rounds!

Game Design (12)

We followed up with another game using the Raddish dice, “Rad Yatzy”, a take on regular Yahtzee only using the foodie dice instead of pips.

Game Design alt.JPG

Cap off your family “date” with any other board games your kids love, or a round of charades.

Game Design (1)

Update: We had to wait until we had a large enough group of family members (6 people or more!), and then we could play a final foodie dice game: Catch the Radish!

Raddish Dice var

Two people opposite each other toss the dice, but must pass it to the next player if they roll a radish. The first person to have both dice at the same time wins!

Design Your Own Palace

Verseilles (7)

Here’s to another clever lesson plan from Raddish Kids, one that I originally feared would be too advanced for a four-year-old, but which led to great fun and games.

The idea is to start with the Palace of Versailles specifically, and move on to what a palace is more generally. All in connection with the yummy Nicoise salad we cooked, of course.

I introduced Travis to Versailles through a few of the lesson plan’s suggested resources, such as quick videos and online books.

Versailles (1)

Now that he had a sense of the place, I asked him what a palace was. We settled on a definition of a “grand residence” that housed a king or queen. (Note: Big kids can be more exact with this definition).

He seemed only mildly interested by the Versailles information, so I was delighted when he immediately stood from the table and said, “Let’s build one!” His preferred medium was magnatiles, and I was thrilled watching his design come together.

Verseilles (3)

He even added “rooms” inside his palace, since we’d rattled off fascinating facts about Versailles (700 rooms, 60 staircases, and 10,000 residents, oh my!).

Verseilles (4)

Now we needed to furnish our palace, and we followed Raddish’s suggestion for the youngest kids to make a collage. We went through a home decor magazine and I asked Travis what his palace needed.

He had very definite ideas, everything from a Corinthian column to a kitchen. “We need a fancy kitchen. And we don’t have a fancy stove yet,” he reminded me as we selected photos to cut out.

Versailles (2)

We then pasted these down into a collage, which he loved so much we cut out more pictures and covered three sheets of construction paper!

Verseilles (8)

Finally, it was time for a royal gala. Travis dressed up in a cape and crown (mommy might have donned a second set…) to parade about our royal residence. (Note: Here’s where big kids can do this more as a presentation, and explain their palace to siblings or friends).

Versaille (9).JPG

What royal fun!

Verseilles (5)

What is a Landmark?

Landmark (15)

We’re only in our second month of a subscription to Raddish Kids, but I continue to be impressed with the company’s thorough lesson plans to accompany each recipe. I mentioned last month that the lessons are meant for everyone from preschoolers through big kids, so you’ll need to adapt and adjust accordingly. To wit, I worried Travis wouldn’t get much out of a lesson on French landmarks (to go along with the French dessert we baked), but boy was I wrong!

The idea is to learn about the Eiffel Tower specifically, and then follow-up with a discussion of landmarks in general. So we started with a video clip about the Tower.

Landmark (1)

Travis had so many questions right away: Could you really go to the top? What was the tower made of? How did they light it up at night? He was even more amazed when I pulled out a few old photos from my own trip up to the top!

Next, we looked at pictures of other landmarks. I selected some from a travel magazine, and showed him a mix of man-made (the Great Wall of China) and natural (the White Cliffs of Dover). Now it was time to ask him to define a landmark based on what he saw.

Landmark (2)

This was a tricky question for a preschooler, but he decided it was something you built. I pointed back to the cliffs again, and we settled on this definition: anything that can be easily recognized, that marks a specific location.

We explored further with a fantastic STEM activity, encouraging kids to build replicas of famous landmarks. Duplo was a natural medium for my preschooler, and he loved the challenge.

Landmark (4)

Here is our little Eiffel Tower, replete with a tourist on top!

Landmark (5)

We also tackled London Bridge, the Parthenon, and the Leaning Tower of Pisa.

Landmark (6)

Big kids can get super creative with these, in a wide variety of materials, and aim to be much more exact.

Landmark (8)

From here, older children can go on to make a brochure, travel blog, or model of any landmark they choose. But Raddish’s suggestion for young kids was to keep things closer to home. I’ll be honest: If I didn’t have a three-month-old, I would have taken Travis to a world-famous landmark in nearby New York City, like the State of Liberty or the Empire State Building.

Landmark (13)

But since that was out of the cards, I asked Travis if he could think of a landmark in our little town, and was so proud when he remembered the bell we pass ever day en route to school, part of a Soldiers and Sailors Memorial Building.

So off we went on a frigid morning for a few pics!

Landmark (9)

Travis loves using our instant camera, so was a happy participant despite temps in the teens.

Landmark (10)

We came home and wove it all together by making a brochure. I showed him a few examples, and soon he was gluing pictures down proudly.

Landmark (14)

In sum, this was definitely an advanced social studies lesson for a preschooler, but I’m glad we accepted the challenge to tackle it. Travis learned so much, and we had a blast in the process.

Landmark (12)

French Flash Cards

Flash Cards (9).JPG

Our bonus activity this month from Raddish Kids was French flash cards to color and play with. The cards lend themselves nicely to all ages; big kids who can read may get a bit more out of them than my preschooler did, but Travis has the advantage of being at that age where his brain is like a sponge for language.

To start, we needed to color them in. As we drew, I told Travis each cards word in English and then in French.

flash cards (2)

To make things accessible to my non-reader, I set up his table as a little French cafe!

flash cards (4)

The set up, including a proper cup (verre) to drink his water (eau), which made it feel special.

flash cards (6)

We practiced our French pleases and thank yous, and introduced ourselves. Enchante!

flash cards (5)

Although it was hard for Travis to remember the French phrases, being given so many so fast, he did a good job of echoing each one back to me. We even drew up a menu (carte) to place his order. Cookies s’il vous plait!

flash cards (7)

Bigger kids will likely take to the memory game right away, placing all the flash cards on the table and remembering the French word on the back. For Travis, we went through them a few times, but I knew it was a lot of words to send his way at once.

flash cards (3)

Hopefully if we practice, he’ll start to pick up this beautiful language. Thanks for the bonus, Raddish!

Grocery Store Scavenger Hunt

grocery hunt (1)

As an expansion to our French-themed Raddish Kit, Travis and I headed off with a scavenger hunt card to discover some of the most common ingredients in French cooking.

On the way there, I gave Travis a quick lesson on French food shopping. Having spent time in the country, I eagerly told Travis how different types of ingredients were sold in different markets. So although we were headed to a big grocery store, we still shopped department by department!

grocery hunt (3)

First up was the produce, or what might be found in a village marche (farmers’ market). Travis was very proud finding mushrooms, the first item on our list.

grocery hunt (2)

We also picked up a number of spices, including fresh tarragon, rosemary, and thyme. Take the time to savor the smell of these!

Bread would have been purchased at the boulangerie of course, and Travis loved pulling a long baguette from the bread counter. And although we didn’t buy it, he had fun stopping by the cheese counter (fromagerie), since we’ve never paused to look at such a display together.

grocery hunt (5)

He was so proud holding up our list once everything had been checked off!

grocery hunt (6)

Discovering Fire

Discovering Fire  (7).JPG

I had doubts that Travis would be interested in the final lesson plan to accompany our Fireside Feast Raddish Kit, specifically to accompany the Rosemary Focaccia recipe. But he proved me wrong, and it was a reminder we never know what our kids will love until we try an activity out!

The topic at hand seemed a bit advanced: learning about cavemen’s discovery of fire, and then role playing the discovery. There is a wonderfully detailed lesson plan to accompany this, if you are working with big kids!

For Travis, I knew we’d need to watch a video clip, first, or none of it would make any sense to him. He started out scared, since we’ve only ever talked about fire in safety contexts! But this, I explained to him, was finding good fire. We brainstormed what it might be good for. Light in the home, heat for food, safety from big animals, warmth in the winter. And my favorite suggestion of his: for marshmallows, obviously!

discovering fire (2)

Next we talked about other key inventions in human history. This was big thinking for a four year old. I was so proud of him when he came up with trains. Yes, wheels and transportation, I explained. We also settled on bags and containers, for transporting things like water and food; and tools.

He loved it so much that we explored further with an additional (somewhat silly) video.

Raddish’s lesson plan then encourages students to act out the discovery of fire with grunts and gestures. We tried grunting, but Travis quickly told me it hurt his throat, so our cavemen spoke English.

To make it concrete for him, we rolled up paper logs for a campfire.

discovering fire (4)

Next we scattered about tissue paper flames. I challenged him to discover the fire, and see how he would bring it back to his campsite! Here’s my little caveman at work:


He did it!

discovering fire (5)

We could also put tissue paper inside one of the newspaper tubes as a torch.

discovering fire (6)

Overall, this touched off a fantastic morning of learning and play – thanks for the unexpected delight, Raddish!

discovering fire (1)

Baking Powder vs. Baking Soda

baking powder (9)

Today Travis and I made potions!

The impetus for this little experiment came from Raddish Kid’s lesson plan attached to our Hot Cocoa Cupcakes. Kids can delve further into the world of leaveners and what makes baked goods rise. I knew some of the science was too advanced for Travis, but I culled out bits of the lesson that were appropriate to a preschooler.

baking powder (1)

First, I set out a dish of baking soda and baking powder, and invited Travis to explore them. We ran through the five senses: touch, taste, smell, sight, and sound. Could we hear the powders? We giggled at that, then moved on to the others.

baking powder (2)

He noticed that the baking soda was smoother and finer than the baking powder, although they felt similar. He declined the offer to taste, but in this case, it’s perfectly safe to do so!

A quick science lesson followed: baking soda is basically ground up rock, and it’s a base, which means it needs an acid to react.

Baking powder contains a base and two acids, and it will react in a recipe two times. Travis liked this idea, and that it means fluffier pancakes or cupcakes.

To start out experiment, I put out two test tubes of water. We added baking soda to one and baking powder to the other. Aha, only the baking powder reacted, so water was not an acid!

baking powder (3)

Now we tested each in four other liquids: vinegar, liquid soap, rubbing alcohol, and juice. The baking soda only reacted in the vinegar and juice – we found our two acids!

baking powder (5)

Baking powder, on the other hand, reacted in everything. That said, none of baking powder’s reactions were quite as spectacular as the classic baking soda/vinegar pairing.

baking powder (7)

Travis’s favorite? Baking soda in the vinegar of course; we had to do that a few times. The juice was quite fun too, bubbling up wildly to the top of the test tube.

baking powder (8)

In sum,this is a neat way for your kids to understand why baked goods are rising in the oven; you can really see that bubbling and rising action at work.

baking powder (6)

Another oldie but goodie? Show your kids that you can blow up a balloon with yeast! This is something Travis and I did when exploring the letter Y, back when he was only 2 years old, but it never grows old!