Sticky Sheep

Sticky Sheep (5)

In like a lion, out like a lamb, or so the saying goes, and this adage of March has certainly been true this year. Needless to say we’re looking forward to the docile lamb weather to come. While we wait, Veronika and I decided to make our own woolly lamb inside! This activity combines farm animal play with tactile play in a very cute way. First, I printed out the face and leg templates for a sheep found at No Time for Flash Cards.

Next, I cut out almost a cloud shape from a large piece of contact paper, then attached this to the wall with clear tape and peeled off the backing. If you have white paper that is large enough, you could place the contact paper on the white paper such that you’re left with a white rim.

Sticky Sheep (1)

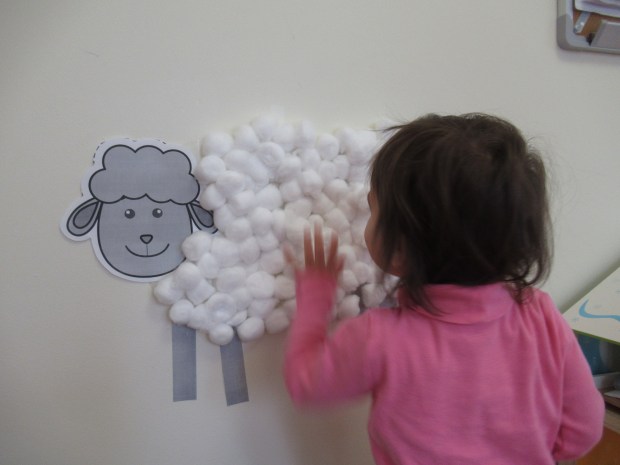
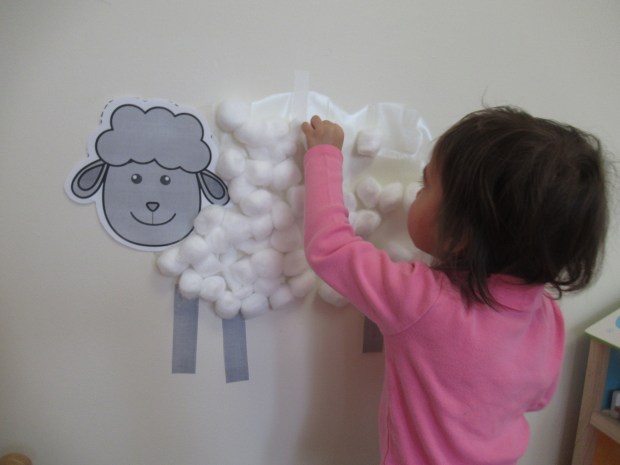
Attach the head and legs, and your sheep is ready. I brought Veronika over and immediately she said “baa baa” to the sheep. I invited her to touch the contact paper, so she would realize it was sticky.

Sticky Sheep (2)

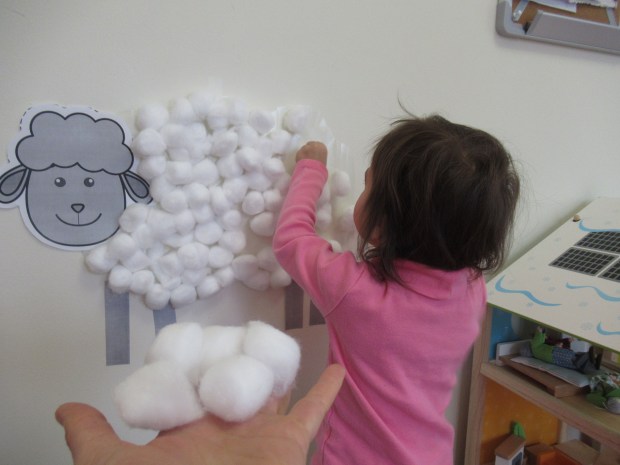
Now, I told her that the sheep was cold and we needed to help him find his wool! I set out a tray of cotton balls, and she immediately got to work. She was so proud that she could help the sheep: “We’re making him so woolly!” she exclaimed.

Sticky Sheep (3)

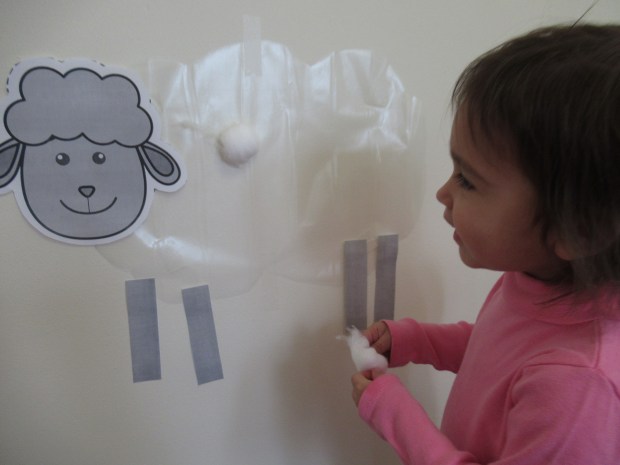
Once or twice she tried to stick a cotton ball on the wall where there was no contact paper and was so surprised when the cotton fell to the floor. This was a very teachable moment, and she realized she needed to stay within the lines of the contact paper.

Sticky Sheep (4)

She proved remarkably adept at finding even tiny holes that needed to be filled with cotton until we had one very woolly sheep. “It’s like stickers!” she said with delight at the way that the cotton balls stayed on.

Sticky Sheep (6)

When your toddler is done, you’ll have an adorable (and tactile!) piece of artwork on the wall. We plan to keep this up until March goes out like a lamb.

Sticky Sheep (9)

Birdseed Indoor Sandbox

Birdseed Sandbox ($)

I was looking for a good material for an indoor sandbox this morning, and remembered we had a bulk bag of birdseed. What perfect timing for the first day of spring! For a touch of spring whimsy, I added little speckled Easter eggs, a wind-up bird toy, child-sized gardening tools, and a “flower pot”.

Birdseed Sandbox (1)

Of course Veronika might not have picked up on these details, but she sure loved coming over to explore!

Birdseed Sandbox (2)

First she tested out the birdseed with a lot of scooping and pouring, enjoying both the spade and the cup.

Birdseed Sandbox (3)

The little bird had her momentarily intrigued.

Birdseed Sandbox (5)

Then while big brother was doing his home school lessons nearby, this happened:

Birdseed Sandbox (6)

But that’s okay! The birdseed sweeps up like a dream, and she was so delighted at her own antics.

Fruity Cereal Activities

Rainbow Cereal Sensory (5)

A favorite snack around here is the Rainbow O’s cereal from Cascadian Farm. So today Veronika played with the cereal in three different activities! You could also do any of these activities with Fruit Loops or Fruity Cheerios, but I like the all natural ingredients in the Rainbow O’s.

First up was a simple sensory tub. I filled a round cake pan with some of the cereal and added brightly colored measuring cups for scooping.

Rainbow Cereal Sensory (1)

Veronika was a lot more interested in tasting and snacking at first…

Rainbow Cereal Sensory (2)

…but eventually scooping was fun, too.

Rainbow Cereal Sensory (4)

Next up, we made some art! I had her scribble on a yellow plate with crayon to make the center of a flower.

Rainbow Cereal Sensory (6)

I glued the plate onto blue cardstock and outlined petal shapes around it. Drip glue over the petal lines, and then cover the glue with the cereal. If your child is in preschool, he or she can definitely help with this step, which will be great for exercising little fingers. Veronika, on the other hand, was quite alarmed to learn she was not allowed to eat the cereal that had glue on it, so much so she burst into tears! So this might have been a little ambitious with a toddler.

Rainbow Cereal Sensory (7)

Finally, it was time to take some cereal on the go! With visions of spring dancing in our heads, I turned her snack bag into a butterfly: Fill a zip-top bag with some of the cereal, then seal and divide in two with a finger.

Rainbow Cereal Sensory (8)

Secure with a craft lace.

Rainbow Cereal Sensory (9)

When you reach your destination, make a necklace! Undo the craft lace and thread some of the cereal onto it, then secure about your child’s neck loosely.

Fruity Necklace (1)

Now a bite is literally at hand the moment the urge to snack hits.

Fruity Necklace (2)

Spring Flower Arrangements

Spring Flower (7)

We’re only one week away from the end of spring and the spring flowers are fading, making room for summer counterparts. It’s the perfect time to put together a floral arrangement for someone special – perhaps a graduate in your life, or a dad you’re celebrating this weekend!

Travis wanted to put together this bouquet for dad; we skipped the store-bought stuff, and opted instead for a wildflower hunt! (Okay, maybe a hunt around our apartment complex).

Spring Flower (1)

Travis loved gathering an assortment of greenery and different colored blossoms, as we took care to take only one flower from each bush.

Spring Flower (2)

Once home, we laid out the flowers and a pretty vase. Fill the vase 2/3 of the way with water – a good little fraction lesson!

Spring Flower (3)

To help our flowers stay healthy and strong, we added 1/2 teaspoon sugar and 1 tablespoon cider vinegar.

Spring Flower (4)

Travis was then in charge of arranging our blooms. Any that were too long, he seriously and carefully snipped shorter.

Spring Flower (5)

Teach your child to hold the stem of each flower on the outside of the vase to assess if it is too long or too short.

Spring Flower (6)

Tada! A beautiful spring bouquet.

Spring Flower (8)

For more flower fun, check out our recent ikebana craft. And for garden recipes to go with these garden blooms, check out our strawberry shortcakes!

Bird-Nest Salad

Bird-Nest Salad (1)

Tweet your way into spring with this cute little salad!

Ingredients:

  • 4 lettuce leaves
  • 1/4 cup shredded carrots
  • 2 tablespoons bean sprouts
  • 3 yellow tomatoes
  • Salad dressing of choice
  1. Arrange the lettuce leaves on a plate.
  2. Arrange the carrots and sprouts in the middle of the plate, so they look like a nest shape.
  3. Nest the tomatoes in the carrot bed as little eggs, and drizzle with your favorite dressing. We like this with a simple balsamic vinaigrette!

Happy spring!

Bird-Nest Salad (2)