Pudding Painting

Pudding Paint (6)

Veronika is almost old enough to start making her first works of art, but there’s one problem with this girl: everything goes in her mouth! The solution, if your baby is the same, is edible paint.

Pudding Paint (1)

Today, I whipped up a batch of vanilla pudding (Whole Foods 365 is vegan). Let the pudding chill in the fridge, then add food coloring for “paint” colors.

Pudding Paint (2)

I gave Veronika a paint brush, which instantly made her look so proud; she’s seen big brother paint, and now it was her turn.

Pudding Paint (4)

Turn a little of the pudding paint out onto a highchair tray (or tape down paper, if you prefer) and let your little artist go to town.

Pudding Paint (5)

First she just made a few smears. Then she wanted to focus more on the paintbrush. Once the tip of it got in her mouth and she discovered the pudding was yummy…

Pudding Paint (7)

…her smile was priceless. Then she really got her hands into the mix.

Pudding Paint (11)

I showed her how to make circles and squares, plus a few letters.

Pudding Paint (8)

Soon we had green, where or blue and yellow “paints” had mixed.

Pudding Paint (10)

This was a fantastic foray into the world of art, as she nears 10 months old!


Pudding Paint (9)

Share a Special Snack

Special Snack (3)

Veronika is old enough that she doesn’t need “baby food” anymore, and the best way to develop a love of healthy foods in your little one is to savor them together. I love making recipes that my two kids (and the grown-ups!) can share together now. To wit, this kid-friendly version of guacamole is a hit with everyone at the table.

Scoop the flesh from two avocados and transfer to a bowl; mash.

Special Snack (1)

Stir in 2 teaspoons fresh-squeezed lemon juice and 1 chopped tomato.

I served the guac with cucumber sticks and bell pepper sticks, as well as toasted pita bread. You could also add toasted bread slices or roasted carrot sticks.

Special Snack (2)

Travis and Veronika had a blast sharing this afternoon pause together!

Special Snack (4)

Sunshine Granola

Sunshine Granola (4).JPG

Add sunflower seeds to the kids morning granola to make the perfect sunshine-y batch – just right for the final days of summer! Whip up a batch now and the first few breakfasts during hectic back-to-school will be a cinch.

Sunshine Granola (2)

Ingredients:

  • 2 cups oats
  • 1/4 cup sunflower seeds
  • 2 tablespoons melted Earth Balance butter
  • 2 tablespoons maple syrup
  • 1/2 teaspoon salt
  1. Arrange the oats and sunflower seeds on a baking sheet.
  2. In a small bowl, whisk together the butter and maple syrup. Drizzle over the oat mixture and sprinkle with the salt.
  3. Bake at 300 degrees F for 15 minutes. Stir and return to the oven for an additional 15 minutes. Let cool completely before storing in an air-tight container.

We love this stirred into non-dairy yogurt!

Sunshine Granola (3)

Baby Led Weaning: 9 Months

Veronika is on the brink of eating “real” recipes, which I’ll likely post as separate blog entries. So here is a final round-up of the Baby Led Weaning foods she’s enjoyed in the past month.

Roasted Sweet Potato and Carrots

Sweet Potato Carrot

Peel 1 sweet potato and 2 carrots and cut into 2-inch strips. Place on a baking sheet and drizzle with 1 tablespoon olive oil. Bake at 400 degrees F for about 25 minutes, stirring halfway through.

Tofu and Mango Dinner

Crumble 1/8 package firm tofu into a bowl. Stir in 1/4 cup to 1/2 cup mango puree.

Tofu Mango Dinner.JPGThis makes the slightly dry tofu easier for Veronika to swallow, and she loves scooping up the mixture by the handful!

Apple and Plum Compote

Apple Plum Compote.JPG

Veronika loves this so much more than regular applesauce! Peel and chop 1 apple and 2 plums. Cover with water and bring to a boil; reduce heat and simmer for 10 minutes. Drain and mash with a potato masher until chunky, then stir in 1/8 teaspoon cinnamon.

Chick’n, Banana & Coconut

This was her first Gardein meal! Cook 3 Gardein chick’n strips, and mince until about the texture of crumbled tofu or lentils. Combine the chick’n in a bowl with 1 small mashed banana and 1 teaspoon coconut milk.

Chicken Banana (1)

A fast favorite!

Chick’n, Carrot & Sweet Onion

For a more ambitious chick’n dinner, toss 4 Gardein chick’n strips, 1 peeled and julienne-cut carrot, and 1/8 cup thinly sliced sweet onion with 2 teaspoons olive oil. Bake at 400 degrees F for 20 minutes. Serve as finger foods, or finely chop into little pieces on the tray.

Chicken Carrot Onion

Butternut Squash Sticks

Cut butternut squash into 2-inch sticks. Cover with water and bring to a boil; continue to cook for 10 minutes, until very soft.

Butternut Apple

Dip these into a homemade or store-bought purees. Veronika likes them dipped in apple, pear, or carrot! Sometimes she prefers me to mash up the squash and stir the puree into it instead, which she can pick up by the handful.

Butternut Pear

Poached Tempeh

Slice 1 (8-ounce) package tempeh and cook in boiling water for 10 minutes. Transfer to a food processor and process until finally chopped. Heat 1 tablespoon olive oil in a skillet over medium heat and cook the tempeh for about 10 minutes, until golden.

Stir in applesauce to taste so the mixture isn’t too dry. I use about 1/2 cup applesauce per 4 ounces tempeh.

Tempeh with Applesauce.JPG

This also works with canned pumpkin puree in place of the applesauce!

Tempeh Pumpkin

Farmers’ Market Corn and Peach Salad

Farmers Market Corn (9)

This salad is the direct result of a trip to the farmer’s market. I hesitate to give an exact recipe, since the hope is that you tailor your family’s meal after what you find at your market! So consider the recipe below as a guideline only.

We set out with the intention of making a Corn, Nectarine, and Blueberry Salad that I’d spotted in a magazine, and I printed Travis a picture of each ingredient we hoped to find. This turned it into a neat scavenger hunt.

Farmers Market Corn (1)

Any similar hunt will be a great way to engage kids with the market and the sellers! If you don’t have exact ingredients in mind, then challenge your kids to find things you spot along the way: “Find me a root vegetable” or “Find me something red!” you can say.

Don’t forget to check out the other fun that a farmers’ market has to offer while you’re there.

Farmers Market Corn (8)

Travis got to sample fresh lemonade, pick out a toy made from organic catnip for our cat, check out homemade crafts, and more. Nibbling a bite of fresh basil was a must!

Farmers Market Corn (4)

Babies love the scents and sounds of a farmers’ market, too, so consider adding this to your summer hit-list of baby field trips!

Farmers Market Corn (6)

As it turns out, we couldn’t locate everything on our scavenger hunt ingredient list, but we did find perfect corn, and the biggest scallions we’d ever seen!

Farmers Market Corn (7)

So when we got home, we improvised the salad. We had beautiful local peaches in place of the nectarines, and no blueberries (but the salad was just fine without them!), and added lots more basil and scallions than called for since we had a big bounty. I present to you, our Farmers Market Corn and Peach Salad.

Farmers Market Corn (2)

Ingredients:

  • 3 ears fresh corn
  • 2 peeled and chopped ripe peaches
  • 1/4 cup chopped scallions
  • 1/4 cup chopped fresh basil
  • 1/4 teaspoon salt
  • 1/8 teaspoon black pepper
  • 2 tablespoons olive oil
  • 1 tablespoon fresh-squeezed lime juice
  1. Cut the kernels from the corn cobs and place in a large bowl.
  2. Add the remaining ingredients and stir to combine.

Faces of the Moon

Face of Moon (10)

If you’re looking for the most delicious way under the sun (er, moon!) to teach your kid the names for all the moon’s different phases, this quick lesson plan from Raddish Kids has you covered. Hint: It involves Oreo cookies.

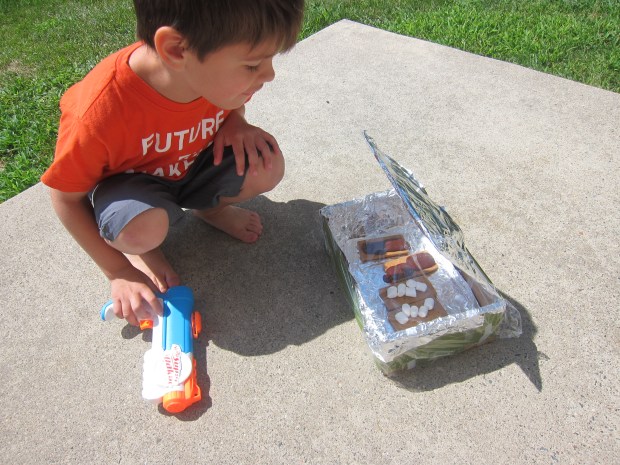
But before I let Travis eat cookies, we focused on a little moon information. I asked Travis what he pictured when he thought about the sky; he came up with ‘blue’ and ‘clouds’. Two great daytime picks! But what about focusing on the nighttime sky, I asked him.

Face of Moon (1)

We watched two quick background videos on moon phases and I also made him a chart (which earned a “thanks Mom!”). This was his first introduction to some great science words, like waxing, waning, and gibbous.

Face of Moon (2)

Now it was time to show him the moon phases with three neat projects.

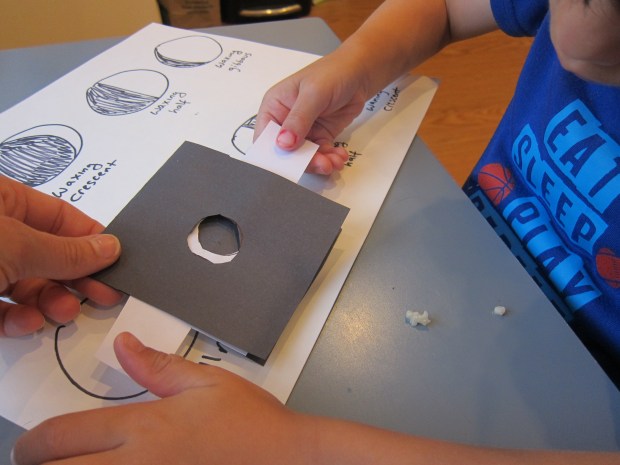
To make the first, a moon phase viewer, cut a black rectangle from construction paper. Fold the paper in half and open back up again. Cut a white square from white construction paper that fits in the folded black rectangle, leaving a long tab on either end so you can pull the white paper side to side.

Trace a coin on the black paper, pressing firmly so the imprint is visible on the white paper below as well. Cut out both circles.

Face of Moon (3)

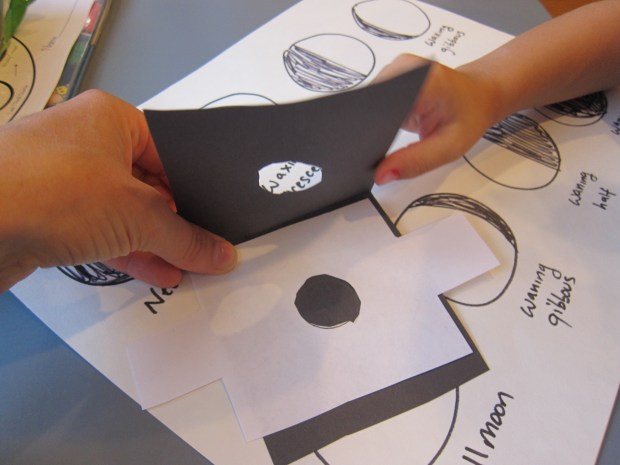
Now line up your viewer and slide the white paper to see it change from gibbous to half to crescent to new and back again!

Face of Moon (4)

For the second moon viewer, you’ll need two plastic cups. Glue or tape a yellow circle onto black construction paper and insert into one plastic cup; tape into place.

Face of Moon (6)

On the second cup, label a place for full, waning half, new, and waxing half moons. Now rotate your yellow circle and color over it with black sharpie as appropriate to form each moon phase, leaving the full moon with no sharpie. Travis loved spinning this one!

Face of Moon (5)

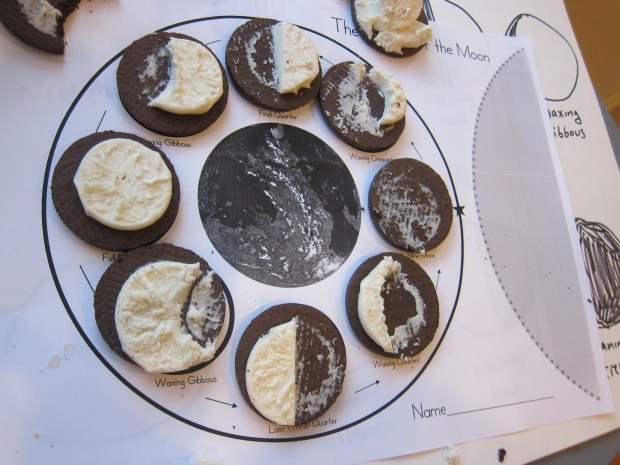
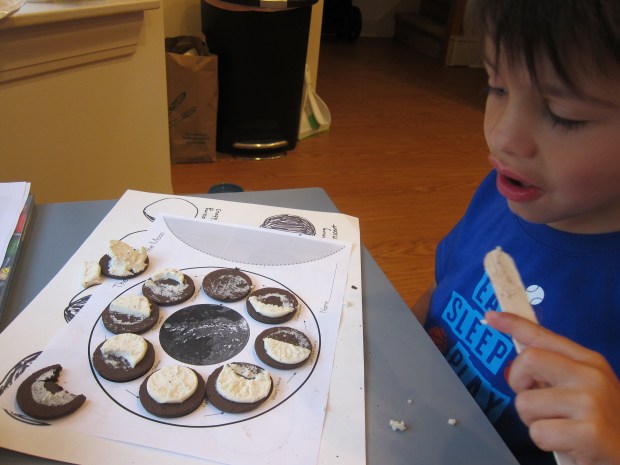
The third version is where he had the real fun! I set out eight cookies (we like Newman O’s) on a diagram and it was Travis’s job to scrape the right amount of frosting off each to form the eight phases.

Face of Moon (7)

Needless to say, there was much nibbling along with the scraping!

Face of Moon (9)

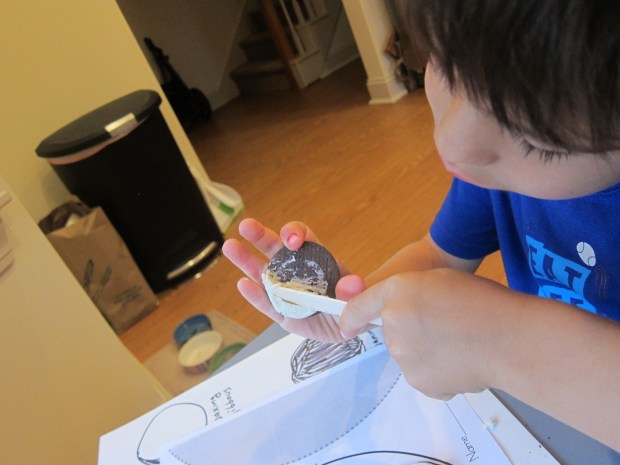
I had to help him with some of the trickier ones (gibbous, crescents), but he was a pro at half and new moon.

Face of Moon (8)

We finished off with a read of The Moon Book by Gail Gibbons.

Face of Moon (12)

Consider making craters in a clay moon if your kids want to continue the fun!
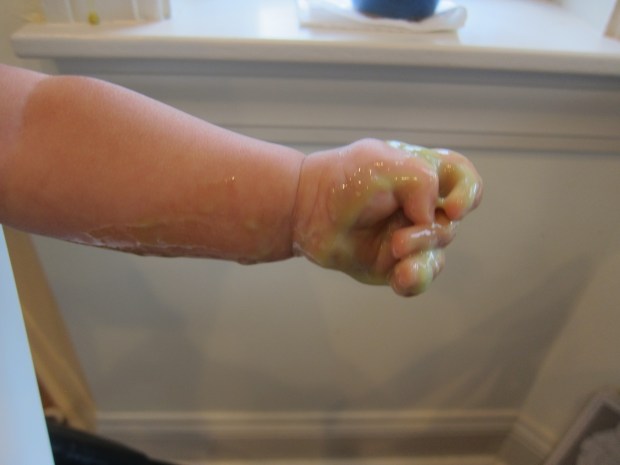
Face of Moon (11)


Eat the Alphabet

Eat Alph main.JPG

What better way to conclude an almost-kindergartner’s summer alphabet lessons than to eat your way through it? Each day for 26 days at snack time, I gave Travis a food starting with a letter, in alphabetical order. He had to make that letter first, then – yum – gobble it up! Without further ado, Travis nibbled his way through:

A for apples

Eat Alph A

B for banana slices

Eat Alph B

C for cereal

Eat Alph C

D for dates

Eat Alph D

E for eggplant

Eat Alph E.JPG

F for Fritos

Eat Alph F

G for grapes

Eat Alph G.JPG

H for Hippies (chickpea puffs)

Eat Alph H.JPG

I for ice cream cone

Eat Alph I

J for jelly

Eat Alph J.JPG

K for kiwi

Eat Alph K.JPG

L for licorice

Eat Alph L

M for marshmallows

Eat Alph M

N for nuts

Eat Alph N

O for Oreo cookies

Eat Alph O.JPG

P for pretzels

Eat Alph P

Q for quesadilla

Eat Alph Q

R for raspberries

Eat Alph R

S for Sour Patch kids

Eat Alph S.JPG

T for Twizzlers

Eat Alph T.JPG

U for Utz chips

Eat Alph U.JPG

V for veggie stix

Eat Alph V

W for watermelon

Eat Alph W

X for two x-ed bell pepper stix

Eat Alph X

Y for yams

Eat Alph Y

and Z for zucchini!

Eat Alph Z

Quick Make & Play Edible Sensory Bottle

Edible Bottle (4)

This fantastically easy sensory bottle is quite possibly my new favorite thing in the world…and Veronika’s, too!

To set up the bottle, save any clear plastic juice bottle with a wide mouth and a lid you can screw on tightly.

I gave Veronika the bottle (which of course is a toy all by itself!) and set out a few easy-to-hold snacks in front of her, including Plum Organics super puffs and Earth’s Best letter of the day cookies (both vegan!).

Edible Bottle (1)

I showed her how to drop some of the snacks into the bottle, making a nice plink sound each time. She soon was following suit, with the added fun that she could nibble as she worked.

Edible Bottle (2)

Once she paused to enjoy the puffs, I filled the bottle a little further and put on the cap.

Edible Bottle (3)

Now it was a sensory bottle to shake!

Edible Bottle (5)

The real beauty of this sensory bottle became apparent as soon as we were on the go. At the grocery store, first Veronika could just enjoy playing with it, shaking it or chewing at the cap.

Edible Bottle (8).jpg

But when she got a little fussy, I unscrewed the cap and surprised her: a snack!

Edible Bottle (9)

She kept handing me the bottle over and over, asking for little puffs with sounds and gestures. I loved watching her enjoy the toy in multiple ways during our shopping trip and I may very well always keep one of these on hand from now on.

Edible Bottle (6)

Snack Math


Snack Math (6)

Summer is winding to a close and I’m sneaking in a few final math games before the start of (!) Kindergarten. Today Travis did a quick math review  at snack time. Ideal foods for this game are small snacks your child eats a lot of: Annie’s bunny grahams, cereal pieces, pretzel sticks, etc. We played with Earth Balance vegan cheddar squares!

Write out the numbers 1 through 10 on post-its or index cards. Before eating, Travis had to place the correct number of cheddar squares on each post-it.

I had him start with 10 knowing that working up to larger numbers would be more daunting. Instead, it got easier as he went along.

Snack Math (2)

Unexpectedly, he loved the game! He tried to make each pile into vertical stacks, and thought it was hilarious when they toppled over.

Snack Math (3)

This was a great way to keep a math lesson light.

Snack Math (4)

He also thought it was hilarious to eat any broken cheddar squares he found, a quick lesson on fractions and halves even if he didn’t know it!

Snack Math (5)

And then at the end, he got to knock down all the towers and gobble them up.

Snack Math (7)


Solar Oven S’mores

Solar Smores (9).JPG

Happy National S’mores Day! Travis and I celebrated with a STEM take on this classic summer treat: s’mores cooked in a solar-powered oven made from one of his recycled Kiwi Crates!

To start, cut the flaps off the top of the Kiwi box (or an old shoebox). Line the entire inside with aluminum foil, and secure with clear tape.

Solar Smores (1)

Place 4 graham crackers on the bottom; we love the vegan and gluten-free grahams from Kinnikinnick.

Solar Smores (2)

Top two of the graham cracker pieces with dark chocolate squares and the other two pieces with Dandies marshmallows.

Solar Smores (3)

Cover the top of the “oven” with plastic wrap and tape down; you don’t want any bugs in there! We placed our oven on the patio in hot sunshine.

Solar Smores (4)

82 degrees ought to do it!

Solar Smores (5)

After 20 minutes, we took a peek. Our chocolate was so hot and melty and perfect.

Solar Smores (8)

The Dandies had softened up, although they didn’t melt all the way down. But these made fantastic s’mores!

Solar Smores (7)