Hang a Mobile

hang mobile (5)

I’ve been meaning to hang an old mobile above Veronika’s crib for quite some time, but in full disclosure…we haven’t even bought a mattress for the crib yet, since she’s so comfy in her bassinet!

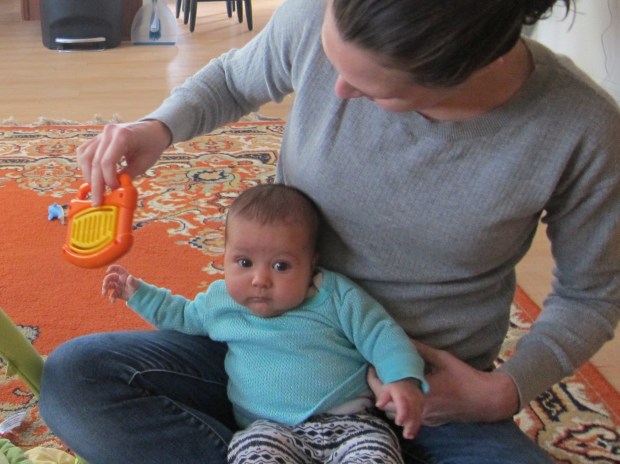
But I didn’t want to lose that small window of time for a mobile; by the time babies are grabbing things down around 6 months old, they become a hazard, so two or three months of age is really the sweet spot. We’ve had items temporarily dangling over her, but I wanted something more permanent for her to enjoy.

hang mobile (1)

So today, I screwed a small wall hook above her diaper table, and put the mobile there. Now it’s the perfect visual during our daily diaper changes, since she spends a lot of time looking up from here!

hang mobile (3)

The screw gives me flexibility as well; to keep things interesting, I can also hang our Cricket Crate mobile there on occasion.

hang mobile (4)

For a fun DIY “mobile” idea, you can also attach small felt animals or toys to the spokes of a bright umbrella. First I tied strings onto the umbrella’s spokes.

hang mobile (6)

We affixed felt finger puppets to the end of each string – a nice reuse of this project!

hang mobile (7)

Rather than secure the umbrella from the ceiling and risk it falling, I simply held it over Veronika and spun it around, to her great delight.

hang mobile (8)

What’s hanging from your baby’s mobile? Please share in the comments!

hang mobile (9)

Tower of Blocks

tower blocks (3)

Today was time for Veronika’s first engineering lesson!

Ok, not really, but soft blocks are a great toy for babies, and the first step towards all the stacking and building to come. For now, the fun is simply in the bright colors, and of course, the knocking down!

Use any soft foam or fabric blocks for this game; save the wooden ones with sharp corners for later.

I built a small tower of four blocks next to Veronika, and first let her just enjoy looking at it.

tower blocks (2)

Then I knocked it down, whee!

tower blocks (4)

The next time, I built it up and encouraged her to knock it down. Boom!

tower blocks (1)

She loved the back and forth of this, and we built quite a few little towers. You can talk about the colors, shapes, and more as you build.

tower blocks (9)

She seemed so intrigued by the blocks that I then set them up as visual stimulation for tummy time – a nice variation that kept things fresh.

tower blocks (8)

How do you and your little one play with blocks? Please share in the comments!

First Instrument

first instrument (4)

We’ve played several games focused on hearing for Veronika lately, and today I made her her first “instrument”. Essentially a maraca, this easy little project had Veronika fascinated!

First, I showed her the two things we would need to make it: an empty plastic water bottle and dried lentils. Be sure to use a small water bottle, so that it fits in your little one’s hands.

first instrument (2)

I carefully spooned in the lentils, letting Veronika watch wide-eyed, until the bottle was about one-quarter full. Replace the cap, and shake shake shake!

first instrument (3)

First I just demonstrated shaking, but then we shook it rhythmically and sang some of her favorite songs like Twinkle, Twinkle Little Star and Row, Row, Row Your Boat.

Wheels on the Bus was fun because I could move the bottle along with the words of the song – up and town for the windows, around and around the town, etc.

first instrument (6)

Next, let your child try to hold the bottle and shake along with you, so they can feel the rhythm. He or she probably won’t be able to grasp it solo, but let them feel the rhythmic motion and associate it with the visual of the lentils.

first instrument (5)

In sum, this toy makes a great musical intro.

Join a Local Parent and Baby Group

local group (2)

Life with a newborn can feel terribly isolating, especially for first time parents who aren’t being dragged about on an older sibling’s agenda. But even veterans might find it jarring to find themselves at home once more with a preverbal little person, and a full day to fill!

One great suggestion is to join a local group. Look to your town’s library for this, or perhaps a local rec center, or mommy group on social media in your area. One of these will surely point you in the right direction.

So today, Veronika and I headed off to meet our group! Full disclosure: We went to the first class last week, but she slept right through it:

local group (1)

It was an adorable “share and play” time with other babies aged two months to one year, with no walkers allowed, which made it a safe space. The small age range also meant that all the parents in the group are dealing with (roughly) the same issues: sleep, teething, milestones. Consider the time as much for the parents as for the babies!

Meanwhile, Veronika loved checking out the toys during open play…

local group (5)

…followed by a story time with a huge-format book, great for little eyes.

Local Group (3).jpg

We also had a quiet reading moment together from my lap.

local group (4)

Her favorite part by far was bubbles, her first time seeing them!

local group (7)

Wherever your local group is hosted, take advantage of meeting new faces, having an adult conversation (a rarity, perhaps!), and gleaning advice from the hive mind of new parents.

French Flash Cards

Flash Cards (9).JPG

Our bonus activity this month from Raddish Kids was French flash cards to color and play with. The cards lend themselves nicely to all ages; big kids who can read may get a bit more out of them than my preschooler did, but Travis has the advantage of being at that age where his brain is like a sponge for language.

To start, we needed to color them in. As we drew, I told Travis each cards word in English and then in French.

flash cards (2)

To make things accessible to my non-reader, I set up his table as a little French cafe!

flash cards (4)

The set up, including a proper cup (verre) to drink his water (eau), which made it feel special.

flash cards (6)

We practiced our French pleases and thank yous, and introduced ourselves. Enchante!

flash cards (5)

Although it was hard for Travis to remember the French phrases, being given so many so fast, he did a good job of echoing each one back to me. We even drew up a menu (carte) to place his order. Cookies s’il vous plait!

flash cards (7)

Bigger kids will likely take to the memory game right away, placing all the flash cards on the table and remembering the French word on the back. For Travis, we went through them a few times, but I knew it was a lot of words to send his way at once.

flash cards (3)

Hopefully if we practice, he’ll start to pick up this beautiful language. Thanks for the bonus, Raddish!

New Household Sounds

New Sounds (7).JPG

Today was all about the auditory for Veronika and me! I devoted our together-time today to exposing these cute little ears to a variety of sounds – it helped that big brother was at school, and the house was quiet!

Even the most mundane sound will be new to your baby, so do a walk around the house and pause at anything that makes a noise. The kitchen was full of interesting examples, from the hum of the microwave…

new sounds (2)

…to the splash of water from the faucet.

new sounds (4)

The kitchen timer startled her a little with its beep! Perhaps she would have preferred an old-fashioned ticking timer… I get nostalgic for childhood evenings whenever I hear that noise.

new sounds (3)

Other good noises include the hum of a dishwasher or fridge. Some won’t be as obvious, but tune in to sounds like the opening of a drawer…

new sounds (5)

…or the crinkle of newspaper pages.

new sounds (8)

Even diapers make a cool noise, at changing time!

new sounds (6)

Veronika’s favorite seemed to be the ticking of Travis’s clock. We paused calmly together to listen to the second hand work its way around.

new sounds (1)

Overall, I liked taking a day to zero in on noises. I tend to be more tuned in to the visual than the auditory, but I could tel Veronika liked our emphasis today, too!

Grocery Store Scavenger Hunt

grocery hunt (1)

As an expansion to our French-themed Raddish Kit, Travis and I headed off with a scavenger hunt card to discover some of the most common ingredients in French cooking.

On the way there, I gave Travis a quick lesson on French food shopping. Having spent time in the country, I eagerly told Travis how different types of ingredients were sold in different markets. So although we were headed to a big grocery store, we still shopped department by department!

grocery hunt (3)

First up was the produce, or what might be found in a village marche (farmers’ market). Travis was very proud finding mushrooms, the first item on our list.

grocery hunt (2)

We also picked up a number of spices, including fresh tarragon, rosemary, and thyme. Take the time to savor the smell of these!

Bread would have been purchased at the boulangerie of course, and Travis loved pulling a long baguette from the bread counter. And although we didn’t buy it, he had fun stopping by the cheese counter (fromagerie), since we’ve never paused to look at such a display together.

grocery hunt (5)

He was so proud holding up our list once everything had been checked off!

grocery hunt (6)

Musical “Hide-and-Seek”

Musical Hide (8).JPG

Our games are getting a bit more sophisticated with Veronika! When she was smaller, I tested her ability to locate a voice to either side of her head. Today we made the game… musical!

Small rattles with a variety of bells or other percussion sounds are perfect for this game. I feel like everyone has this classic quartet!

musical hide (1)

First, I let Veronika see and hear the rattles, so she knew what was making the sounds.

musical hide (2)

She wanted to reach out and hold one, great for practicing her grip!

musical hide (3)

Next I sat her on my lap, and shook the rattle just out of sight. As she turned her head, I would bring it closer, so she was rewarded with a full view. Photo credit to my four year old!

musical hide (5)

I gave each of the four rattles a turn, and she particularly responded to this one:

musical hide (7)

Big brother Travis loved being the one to hold the rattles, too. She loved turning to find where he was holding the musical bells.

musical hide (6)

All in all, this was great musical fun for a simple afternoon at home.

musical hide (4)

Make a Model Lung

model lung (6)

This neat visual of how a lung and diaphragm work together can be made with just a few simple household items. It was a great dose of STEM learning on a stormy day cooped up inside.

You’ll need to start with a sturdy plastic bottle. At first I assumed larger was better, and tried a family-sized club soda bottle… but our balloon wouldn’t fit in the next step, so be aware! You really need a single-serving bottle (16 ounces), either of water or soda.

Carefully cut the bottle in half. This was definitely a grown-up step, and I cautioned Travis that the edge of the bottle was a bit jagged. Keep the top half; recycle the bottom of the bottle.

Tie a knot in an uninflated balloon, and snip off the top of it. Stretch that top over the end of the bottle, and secure with a rubber band.

model lung (1)

Your bottle might squash a bit, but that’s fine as long as no air can get in.

model lung (2)

Now slide a straw into a second balloon. Secure them together with a rubber band, making sure the balloon is attached, but not so tight that air can’t get in. Travis tested with a few huffs!

model lung (4)

Now push the balloon into the neck of the bottle, and use a little clay around the straw to hold it in place.

model lung (5)

Holding the bottle firmly, pull down on the bottom balloon. The balloon inside will inflate!

model lung (7)

Explain to kids that this movement replicates what happens when you breathe: when your diaphragm moves down with each breath in, it makes room for your lungs, which then fill with air.

Travis’s favorite part of the activity was trying to get the balloon to “hiccup”, which you can do by pulling the bottom balloon a few times quickly. The balloon in the bottle will jump, which is what happens when you get a case of the hics.

All in all, this was a great addendum to the fun we had with our My Body crate from Kiwi Co.

Simple Hand- and Footprints

Simple Handprints (7).JPG

I tried making a handprint for Veronika when she was just home from the hospital, and quickly realized why my attempt was so difficult – newborns keep those fists curled up tight!

At two months old, you should be able to capture the size of those tiny fingers, now that your little one is keeping his or her fingers open. Veronika seemed to love the process behind this, her first little art project.

You can make the prints on almost any surface you choose. I used a small canvas from the craft store and a blank tea mug. Regular watercolor paper would work just fine, too! Make sure you are set up with all your supplies before you begin. You’ll need a safe, water-based paint, a paintbrush, and a pack of wipes ready to go for cleanup!

simple handprints (1)

I started with the feet, since that would involve less mess, tickling Veronika’s toes with the brush and then pressing gently against the canvas and the mug.

simple handprints (2)

We cleaned her foot off, then applied a coat of paint to one little hand. It was still a bit difficult to press her finger flat, and do so without her moving it side to side, so the hand prints were a bit smeared.

simple handprints (4)

But we still captured the adorable tiny size of her hands and feet at this age.

simple handprints (3)

This is sure to become a precious memento. Don’t forget to add baby’s name and date!

simple handprints (5)