Mini Archery

Mini Archery (12)

After way too much fun with our medieval Koala Crate, we needed to continue our exploration of the Middle Ages. This project was too cute for words. Putting it together was mostly a grown-up task, but you’ll love watching your kids imagination go wild as they play with the final product!

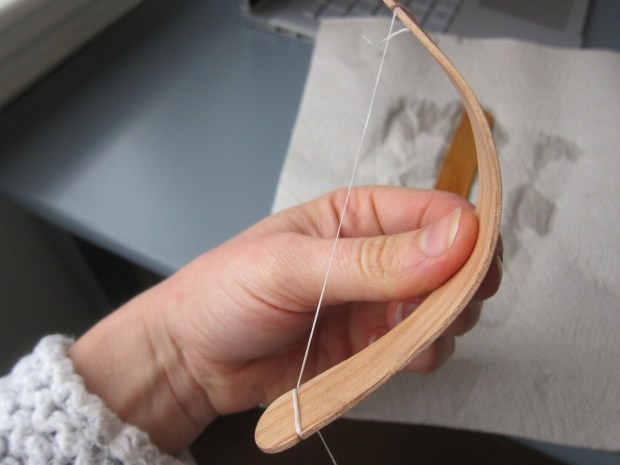
To prepare the bow, notch a craft stick on both ends, on each side, for 4 notches total. I was entirely unsure how to go about making the notches, and just slivered into the stick with scissors. This may not have been the safest or best method, but it worked!

Mini Archery (3)

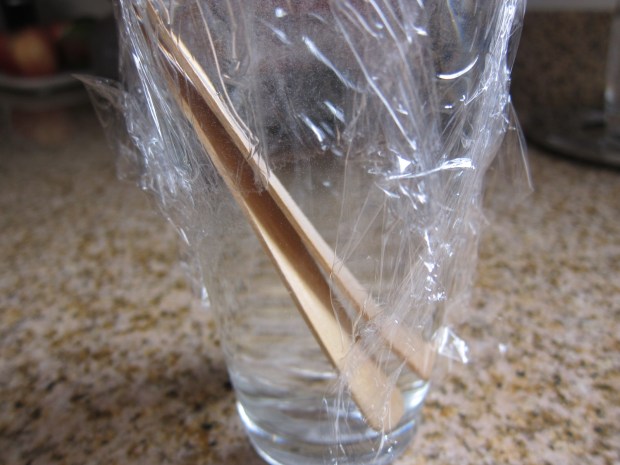
Soak the stick in water for at least one hour to soften the wood.

Mini Archery (4)

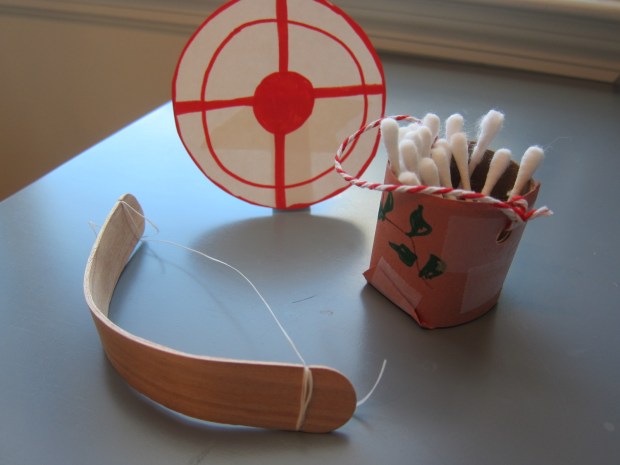
Once soft, carefully bend the stick into an arc. Wrap a piece of dental floss a few times through the notches on one end. Stretch the floss taut while curving the bow, and secure through the notches on the other end.

Mini Archery (2)

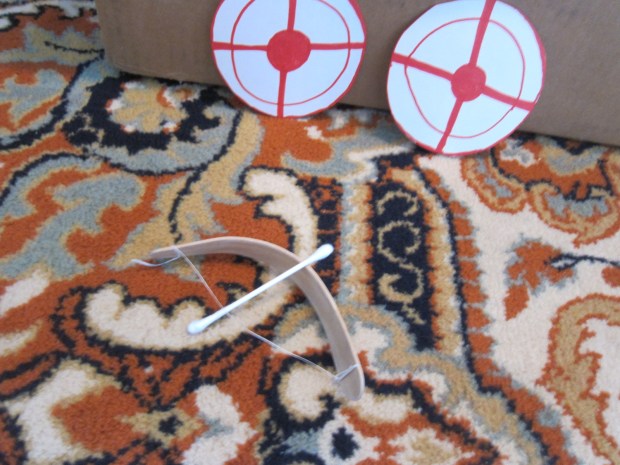
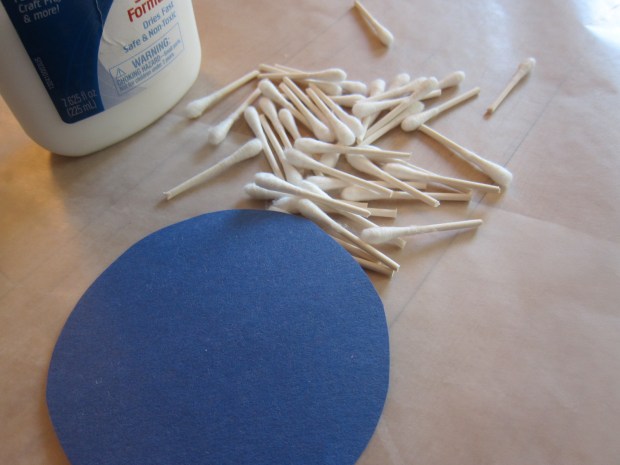
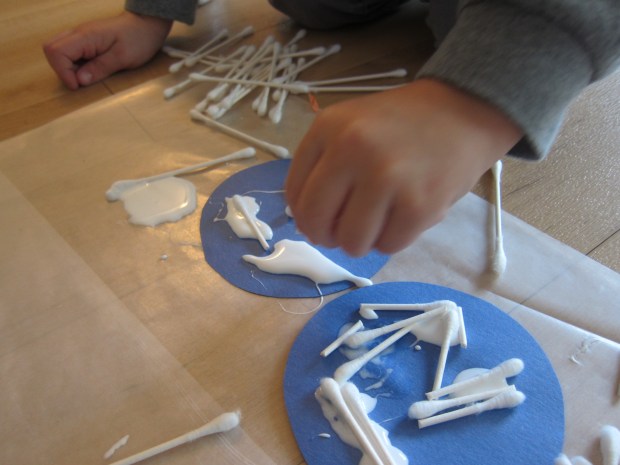
For completely safe mini arrows, simply snip one tip off of a q-tip.

Mini Archery (10)

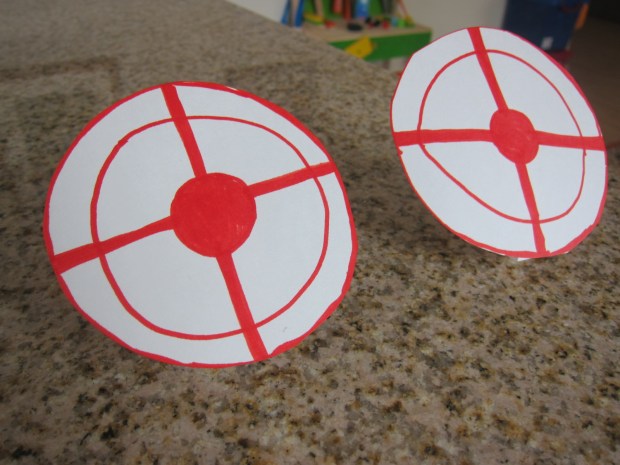
Now we needed something to aim at! We cut two circles from poster board (paper plates would work, too), and decorated with a bull’s eye marking. Little poster board strips taped to the back helped them stand upright.

Mini Archery (5)

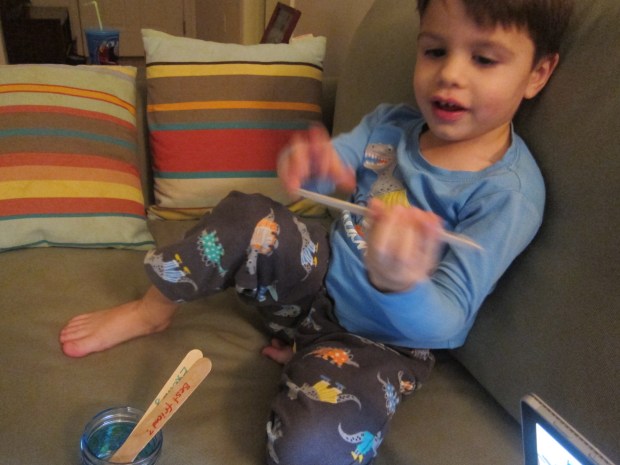
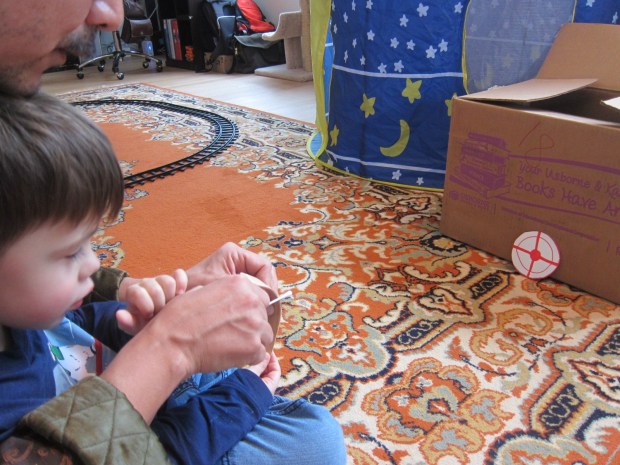
The mechanics of nocking and launching the q-tips turned out to be quite tough for Travis.

Mini Archery (6)

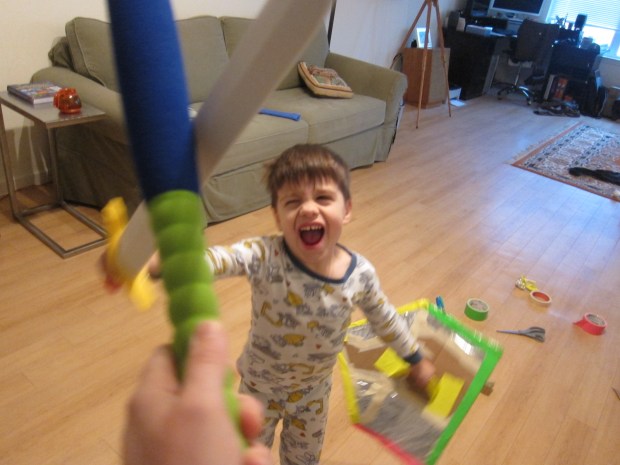
He loved watching though while we had some family time trying to hit the target. The arrows go quite far!

Mini Archery (9)

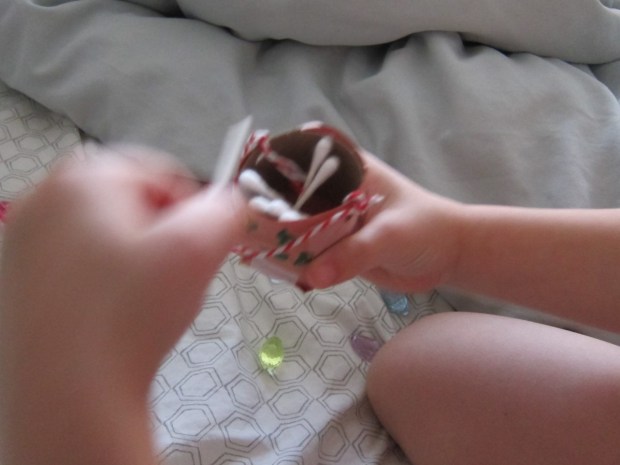
As the finishing touch, we needed a quiver for the arrows. I cut a toilet paper tube until it was only a little taller than the q-tips, then wrapped in brown construction paper to cover the bottom and sides. We added a few Sherwood Forest-y decorations, as well as a ribbon handle.

Mini Archery (11)

It turned out the quiver was Travis’s favorite element of the whole game. He loved loading it up with his “arrows” and running around with it…

Mini Archery (13)

… but in full disclosure, he also decided it would be fun to run around naked while doing so. So you’ll have to take my word for it that there was lots of enjoyment going on, but I couldn’t capture photos for the blog!

Mini Archery (7)

Valentine’s Day Tree

Vday Tree (8)

Why should Christmas have all the countdown/advent calendar fun? Consider this little tree a neat way to share the love as you mark off the days from February 1st to the 14th!

First, you’ll need to select several branches from outside, and place them in any pretty vase you have in your home.

Vday Tree (7)

Ahead of time, I traced and cut out 14 hearts from patterned paper. Pinks and reds were a natural choice for background color.

Vday Tree (1)

Next, I numbered the hearts 1 through 14. This helps add a little math element to the project, with Travis selecting the right numbered heart each day we add it to the tree.

Vday Tree (2)

Travis was so excited because to finish the set up, we needed two grown-up tools that he adores (under careful supervision of course): the stapler and the hole punch.

Vday Tree (4)

First, we stapled a strip of pink construction paper to each heart.

Vday Tree (3)

Next, we punched a hole in the top corner of each heart.

Vday Tree (5)

We added little heart stickers to each one as a finishing touch. Feel free to decorate your hearts however you like! Cute pink or red buttons glued on would also be pretty.

Vday Tree (6)

Each morning starting February 1, have your child name someone they love or care about. Write the name on the strip of paper, slip a piece of thread through the hole in the heart, and hang from the tree.

Here’s the tree about halfway completed:

Vday tree alt

And here is our finished tree on the 14th!

vday tree final.JPG


Dinner Table Conversation Jar

Dinner Jar (4)

I’ll be honest; we’re not always the model family when it comes to sitting down together for dinner, despite research about this healthy practice. Typically Travis eats early, and my husband and I eat later. So I loved the idea of this game when I came across it, as a reminder to all sit and be present together. But honestly, the game works whether you’re gathered around a dinner table or if you make it a part of your bedtime routine. One way or another, it’s a great way to get kids talking!

First, I invited Travis to help me decorate the glass jar that would hold our topics.

DInner Jar (1)

The thrill of scribbling all over a glass surface with permanent marker was pretty grand in and of itself! Travis made a vibrant purple…

Dinner Jar (2)

…and I also colored in a jar we could use, in case the first was ever too full.

Dinner Jar (3)

To make your conversation starters, write out simple questions on popsicle sticks.

Dinner Jar (5)

Our initial list of questions included:

Favorite teacher? Why?

Exciting news to share…?

What are you proud of?

Best friend?

3 Words to describe your day?

Favorite part of recess?

Favorite movie? Why?

Favorite song? Why?

The intention is to add sticks as time goes on, so the game keeps evolving with our family!

I loved how much Travis loved this game.

Dinner Jar (7)

My initial thought was to have each family member draw one question, but he was having so much fun that he made us go through every stick! His answers were charming and enlightening; some that I was sure I knew the answer to, he surprised me, and he thought really hard about some of the more open-ended ones.

Dinner Jar (8)

We can’t wait to play this for many nights to come.

Dinner Jar (6)

Cotton Swab Snowflake Craft

Cotton Snowflake (9)

I’ve never been a fan of cut-paper snowflakes as a craft. Quite frankly, I’m no good at it, and mine end up looking like circles with a few holes in them, instead of lacy flakes! But with pretty sparkling snowflakes outside our window, we wanted some indoor craft to bring the snow inside, and this cotton swab version was much easier to pull off.

To be honest, Travis was a little young for it. Older kids may be much more into shaping and designing their six-pointed flakes, and can really get creative with the process. As to Travis, he still had lots of fun, just in his own preschool way…

…starting with ferrying the cotton swabs over to me by “forklift.” Shipment received.

Cotton Snowflake (1)

He thought it was fascinating to watch me clip the cotton swabs in half (which, fyi, is not easy to do, the stems are tough; adults may want to help even older children with this step).

Cotton Snowflake (2)

Next I showed him how to arrange the cotton swabs into six-pointed shapes like snowflakes.

Cotton Snowflake (3)

We adhered ours to circles cut from blue constructions paper, but if you prefer, glue them together over wax paper and lift them off the wax paper once the glue has dried.

Cotton Snowflake (5)

Travis set about adding lots of glue and cotton swabs to his “snowflakes.” I loved watching his creative process, including smearing on the glue with a cotton swab at one point.

Cotton Snowflake (8)

As mentioned, older kids may want to create increasingly complex designs, and can cut the swabs into even tinier components.

Cotton Snowflake (7)

After the glue dried, we hung the snowflakes in the window.

Cotton Snowflake (10)

What beautiful flakes falling down!

Cotton Snowflake (11)


Kitchen Sink Cookies

Kitchen Sink Cookies (3).JPG

This recipe is exactly what the title says it is: a way to use up everything in your pantry except the kitchen sink! Never before have I found a recipe that so perfectly uses up all the bits and bobs of baking ingredients I have lying about. You can prepare the dough now, freeze it in four separate batches, and enjoy cookies for ages to come. The stir-ins below are just a template: add up to 2 cups of whatever you have on hand: shredded coconut, chopped nuts, baking chips, raisins. Anything, in sum, except the real kitchen sink.

Ingredients:

For the cookies:

  • Cooking spray
  • 2 cups flour
  • 1 and 1/2 teaspoons salt
  • 1 and 1/2 teaspoons baking soda
  • 1/2 cup melted Earth Balance butter
  • 1 and 1/2 cups brown sugar
  • 3/4 cup sugar
  • 1 cup canola oil
  • 2 tablespoons Ener-G egg powder
  • 1 tbsp. vanilla
  • 4 cups rolled oats

For the stir-ins:

  • 3/4 cup shredded coconut
  • 3/4 cup mini non-dairy chocolate chips (such as Enjoy Life)
  1. Line a 13×9-in baking dish with parchment paper and coat the parchment with cooking spray; set aside.
  2. In a large bowl, combine the flour, salt, and baking soda. Set aside.
  3. In a second bowl, whisk together the butter, brown sugar, sugar, and canola oil.
  4. Separately, whisk the Ener-G egg powder with 5 tablespoons warm water until well combined. Add to the butter mixture, along with the vanilla.
  5. Add the oats, along with the stir-ins of your choice. Press the batter evenly into the prepared pan, and cut into quarters with a knife, cutting all the way down to the parchment. Lightly score each quarter into 12 squares, cutting only halfway into the dough. Freeze for 1 hour.
  6. Transfer each quarter of the dough to a zip-top plastic bag, and store in the freezer until ready to use.
  7. To bake the cookies, remove from the freezer and separate along the 12 squares. Bake at 350 degrees F for 16 minutes. The cookies will be soft coming out of the oven but will harden as they cool. Cool on a wire rack before serving.

Kitchen Sink Cookies (4)

How Much Water Is in Snow?

Water in Snow (4)

Here’s a super-simple experiment for the next time it snows. It combines a whole host of scientific ideas, from talking about liquid vs. frozen states of matter to making a hypothesis.

First, we needed to fill a clear glass jar with snow. For the best results, make sure to tamp the snow down so your jar is truly filled all the way.

Water in Snow (1)

We took the jar inside and measured the snow (15 cm) and made guesses as to how much water would be left once it melted, keeping in mind past lessons on how ice takes up more space than water.

Water in Snow (2)

Travis guessed really low, at 2 cm! I chose 5 cm to keep things interesting. I tried marking our guesses directly on the jar, but since it was still a little wet, we found that masking tape worked better.

Water in Snow (3)

Next we needed to be scientific and record our results. We took measurements at one hour intervals over the next three hours with the following results:

3.27 pm – 15 cm

4.27 pm – 12 cm

5.27 pm – 7 cm

6.27 pm – 4 cm – all water!

Water in Snow (5)

It was neat to see that it took a full 3 hours, as well. Next time, we’d make hypotheses about the timing as well, and record that at the start.

Snowy Road

Snow Road (3)

You’ll be the coolest mom or dad on the block if you give this simple twist to outdoor snow play: give your kids permission to bring their toy cars outside to join the fun! Travis was hesitant to venture into the cold, so I headed out first with a shovel and made a road in the snow. Once he saw what I was up to, he couldn’t resist.

He was very into the process of making the road itself, and started to shovel his own route next to the one I had created before he even turned his attention to the cars. Let your civil engineers take over the road building, too, if they prefer!

Snow Road (2)

We found that this game works best with bigger toy cars; little ones get bogged down in the snow.

Snow Road (6)

The best vehicle was our big dump truck, which of course had the added benefit that we could load it with snow…

Snow Road (4)

…zoom it to the dump, and then unload.

Snow Road (5)

What’s your favorite novel way to play in the snow? Let us know in the comments!

Snow Road (7)


Snow Ice Cream

Snow Ice (2)

My mother recently reminded me of this activity from my own childhood, the process of taking fresh-fallen snow and turning it into a marvelous melty cupful of snow ice cream. I couldn’t wait for the next snowy day to share it with my son!

To start, we needed to collect snow of course. Make sure you head out when it’s first tracks and the snow has just fallen glistening from the sky – otherwise you’re not going to want to eat it.

snow day

My “recipe” here is in exact, and you’ll want to vary the amounts according to taste. We took our full cup of snow inside and saturated the top with almond milk until it was a bit slushy. Next we stirred in about 1 and 1/2 teaspoons maple syrup.

Snow Ice (1)

Travis didn’t stop until he reached the bottom of the cup!

Snow Ice (3)

Expanding Snowman

Expanding Snowman (12).JPG

We’ve been waiting for a snowy day around here, because snow always lends itself to exciting winter games and science experiments. With leftover Alka-Seltzer tablets on hand, I had plans for exactly how we could use the snow this time around.

First, I drew a snowman’s face for Travis on a plastic bag. Note to self: next time use a sharpie! We had some inky orange and black hands later on…

Expanding Snowman (1)

Next we needed to collect fresh-fallen snow into our bag. Make sure you fill your bag almost to capacity with snow, or this experiment won’t work. We learned by trial and error!

Expanding Snowman (2)

Now drop in two Alka-seltzer tablets and seal the bag. You may want to place it on a towel, just in case the bag bursts…

Expanding Snowman (10)

Over the course of about an hour, we checked on the bag. The tablets slowly release gas that will make your snowman puff up more and more and more.

Expanding Snowman (11)

Here’s Travis poking a bag filled mostly with gas and leftover slush by the end.

Expanding Snowman (13)

I think the process would be even better if I had left the bag outside, so the snow didn’t melt simultaneously as the gas expanded – whoops!

The whole thing takes a while, of course, because the tablets react very slowly with freezing cold water. Because he grew impatient as we waited, I filled a second bag with hot water from the tap and we dropped in a few Alka-Seltzer.

Expanding Snowman (6)

They immediately fizzed and the bag puffed up with gas, and we talked about why the reaction happened so much faster in the heat.

Expanding Snowman (7)

Can’t wait for the next snowfall and the chance for more snowy games! What do you do with your kiddos to take advantage of a snow day? Please share in the comments!

DIY Shield & Coat of Arms

DIY Shield (11)

Inspired by our Medieval kit from Koala Crate, we had to continue the fun with more games of knights and kings! Travis has a Disney plastic broadsword, so this Medieval mama couldn’t wait to show him how to make a shield to go along with it.

Start with a piece of cardboard roughly the size of your child’s chest, and trim the bottom edge into a point to make a shield shape.

DIY Shield (1)

Next we covered the shield in foil for a shiny metal look, securing on the back with masking tape.

DIY Shield (2)

It’s starting to look like the Middle Ages around here!

DIY Shield (3)

Travis adored the next step, outlining the edges of his shield in colorful duct tape. I knew I’d need all those colorful rolls that have been taking up space in our craft bin eventually!

DIY Shield (4)

Any pretty washy tape would work great here as well, and you can tape designs on the interior of the shield as well as the edges, if your child would like.

We then talked a little about coats of arms, and how knights used them to distinguish one another in battle. Travis drew a “lion” as his sigil.

DIY Shield (5)

Older kids may want to do some online research and pull up information about real coats of arms, or learn about the symbolism in many of the designs. You can draw a more complicated coat of arms on paper, and tape that onto the shield. If drawing directly onto the foil, make sure you use sharpie markers; washable markers will rub right off.

DIY Shield (6)

For the handle, tape two pieces of colored duct tape together, leaving one longer than the other. Apply the sticky ends of the long tape to the back for the shield in an arc. Now your knight has something to hold on to.

DIY Shield (7)

Behold brave Sir Travis!

DIY Shield (8)

Then it was time for a sword fight of course. Haha, that’s me wielding a Nerf bat to battle my son.

DIY Shield (10)