Little Passports: China

LP China (18)

Travis journeyed to China with this month’s delivery from Little Passports. On the night it arrived, he affixed the country sticker to his suitcase and passport, found China on the map, and dove into the information online and in the booklet.

LP China (2)

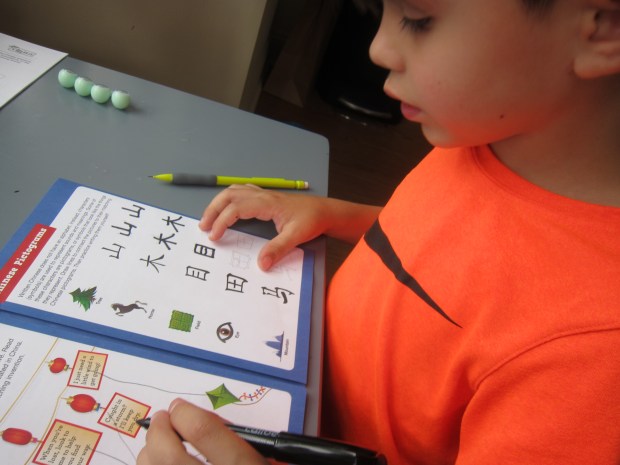
The booklet had a nice variety, including riddles to solve about Chinese inventions, calligraphy to trace that Travis really enjoyed, and a panda picture puzzle.

LP China (3)

Souvenir:

One let down this month was that the “souvenir” inside wasn’t a toy. Instead, it was his own pair of chopsticks. Since he recently received chopsticks from Raddish Kids, it wasn’t the best timing.

Further Activities:

Further activities with this kit had some hits and some misses. Travis was not a fan of a symmetry drawing of the Forbidden Palace, with 8 hidden differences for kids to spot. Admittedly, these were tough to find! We turned it into more of a lesson on what “symmetry” means, and I colored the differences in red for him.

LP China (10)

Much better though was making our own Terracotta Warriors! To prepare the clay, Travis helped mix up 3 cups flour, 1 cup salt, and 1 and 1/2 cups water.

LP China (5)

This mixes quickly into a very workable “clay”. Press onto the provided template and you’ve formed your own mini warrior.

LP China (6)

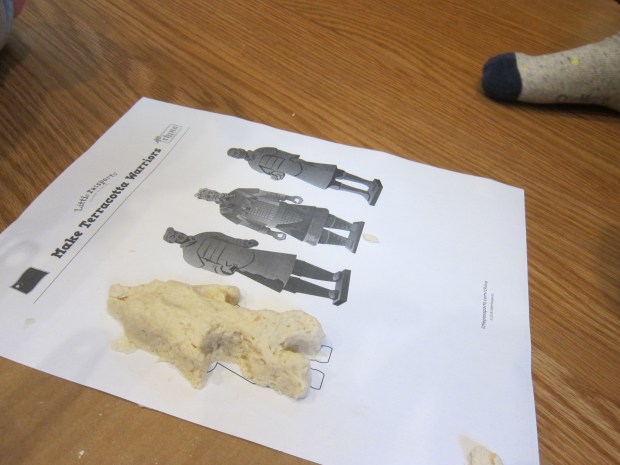
It was tough to sketch true details with a toothpick, but that hardly mattered. Travis soon had so much fun making his blobs of clay battle and jab at each other with toothpicks instead. What brave warriors!

LP China (8)

We did set aside two of our figures to truly air dry, which will take about 2 days.

LP China (7)

Meanwhile, we turned to the materials for a Chinese New Year red envelope craft. First, sew together the two pieces of provided red felt using a helpfully illustrated whip stitch. This was tricky for Travis, so I took over after a few stitches.

LP China (14)

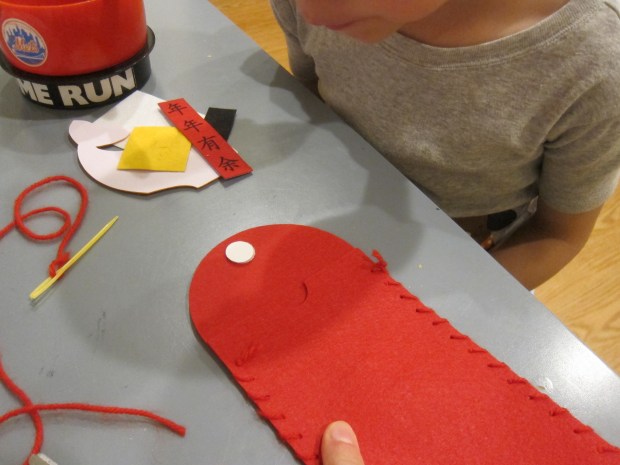
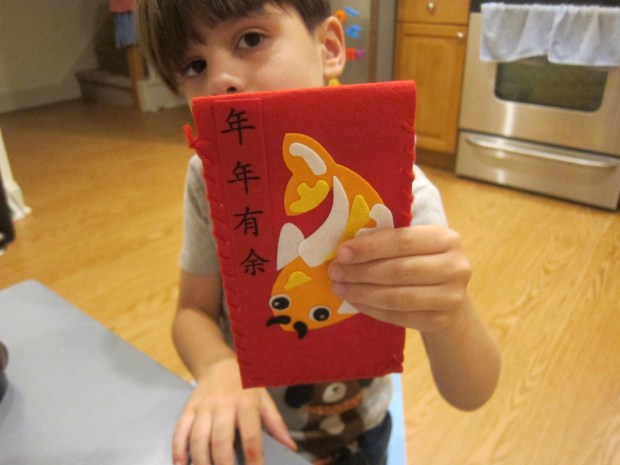
He then loved assembling the provided felt stickers in the shape of a pretty fish. Add the Velcro closure, and it’s finished.

LP China (16)

As a surprise, I filled it with a few chocolate treats while he slept!

LP China (17)

Recipe:

As always we ended with a recipe, this time for Chinese dumplings (jiaozi).

Jiaozi (4)

I’m not going to lie; this recipe was time-consuming, messy, and impractical with small kids in the house. Travis lost interest quickly, and I did my best to finish up and at least give him a taste of China.

Ingredients:

For the dough:

  • 3 cups flour
  • 1 and 1/4 cups water

For the filling:

  • 1 and 1/2 cups minced cabbage
  • 1 cup ground meatless crumbles (such as Lightlife)
  • 1/2 green onion, minced
  • 1/4 cup bamboo shoots, minced
  • 1/4 teaspoon minced fresh ginger
  • 1 minced garlic clove
  • 1 tablespoon soy sauce
  • 1 tablespoon apple cider vinegar
  • 3 tablespoons sesame oil
  1. To prepare the dough, spoon the flour into a bowl. Make a well in the center and add the water, stirring until combined. Turn onto a floured surface and knead, then roll into a ball and let rest for 30 minutes.
  2. Meanwhile, prepare the filling: combine the cabbage and remaining ingredients in a large bowl.
  3. Divide the dough into thirds. Working with one portion at a time, roll to about 1/8-inch thick on a floured surface. Use a round (2.5-inch) cookie cutter to cut out circles. Fill each with 1 tablespoon cabbage mixture, then fold over into a half-moon shape and pinch the edges. Repeat with the remaining dough and filling.
  4. Bring a pot of water to a boil. Add half of the dumplings. Stir and cook until the pot returns to a boil. Add 1/2 cup cold water; let the water return to a boil again and then the dumplings are done!
  5. Remove with a slotted spoon and repeat the cooking process for the second half of the dumplings.

Serve with extra soy sauce and sesame vinegar on the side for dipping.

Halloween Countdown Day 4: Crepe Paper Mummy Wraps

Halloween 4 Crepe Paper Mummies (6)

Here’s another classic Halloween game that your children are sure to love as much as you did as a kid! Wrapping people up in crepe paper will always elicit giggles and get everyone in the Halloween spirit (heh).

Just grab a roll of crepe paper and start wrapping. Both my kids were eager little mummies, standing still with such curiosity while I wound around them. Travis went first…

Halloween 4 Crepe Paper Mummies (1)

…and Veronika immediately needed a turn!

Halloween 4 Crepe Paper Mummies (3)

They loved trying to walk with their legs tightly bound.

Halloween 4 Crepe Paper Mummies (4)

And to break free from the grave, of course!

Halloween 4 Crepe Paper Mummies (2)

And then they thought it was hilarious to wrap up mommy, and watch me stumble about.

Halloween 4 Crepe Paper Mummies (7)

As a bonus, all that leftover crepe paper is sure to be a hit with the kids, too! No crepe paper? No problem! Grab a roll of toilet paper to do this activity instead.

Halloween 4 Crepe Paper Mummies (8)

Interpretive Pumpkin Painting

Pumpkin Art for Toddlers (8)

Veronika and I did a quick abstract art project today to help her paint her first “pumpkin”!

I love art at around age 2, because toddlers are just beginning to tell you what they’re drawing, even if you can’t always see it. So I thought it would be fun to guide Veronika through a jack o’ lantern painting. I set out watercolor paper along with orange and black paint.

Pumpkin Art for Toddlers (1)

“A pumpkin starts as an orange circle,” I told her. Of course her pumpkin was going to be “abstract”, but she loved dabbing the orange on the paper.

Pumpkin Art for Toddlers (2)

She quickly was more interested in black paint, pressing the brush firmly onto the paper, which almost made black triangles. So I showed black triangle eyes on my pumpkin!

Pumpkin Art for Toddlers (5)

As she worked on her “pumpkin”, I worked on mine. Often, I find myself jumping in with my kids’ artwork, and this project was the perfect reminder to let her take ownership of her work.

Pumpkin Art for Toddlers (6)

She told me she was drawing a black square, and we talked lots about shapes and colors as we worked.

Pumpkin Art for Toddlers (7)

In the end, we had a perfect toddler pumpkin painting, and a mommy one to boot!

Pumpkin Art for Toddlers (9)

Emotion Eggs

Emotion Eggs (6)

Here’s a cute way to talk your toddler through different facial expressions, as he or she learns the vocabulary and proper outlets for all our various emotions!

Using old plastic Easter eggs, draw mouths in several expressions on the bottom half of the eggs, and eyes and eyebrows on the top. I had one each for: happy, silly, sleepy, and angry.

Emotion Eggs (1)

We started out with the eggs in complete sets, and I helped Veronika identify each. “Angry” had turned down eyebrows with a frown, while “Silly” had winking eyes with a tongue sticking out, and “Sleepy’s” mouth was in a big O for a yawn.

Emotion Eggs (2)

I named each emotion for Veronika and she giggled at the silly ones and looked very serious for others (e.g. angry and sleep).

Emotion Eggs (4)

Next, we scrambled the eggs up! See if your toddler can mix and match to find the eyes and mouths that go together. This wasn’t always intuitive for Veronika, but she did certainly know what she wanted to find the most in our pile.

Emotion Eggs (5)

“Let’s find the angry face!” she said. As with a recent Panda crate, she’s drawn to the sad expressions, perhaps because these are the scariest for a toddler to sort through.

Needless to say, the eggs were also great fun to put together in mismatched combinations. And then of course she wanted to draw on them too. This activity made for good play and for an ever better tool in social emotional learning!

Emotion Eggs (7)

Halloween Countdown Day 3: Jack O’ Paper Plates

Halloween 3 Cute Paper Plates (4)

We kept our Halloween countdown simple with a classic today, since it was a busy Saturday. But we knew we wanted to fit in at least some Halloween fun!

So grab white paper plates and any orange coloring supplies, and turn those plates into pumpkins.

Halloween 3 Cute Paper Plates (1)

I used marker, while Veronika preferred orange crayon.

Halloween 3 Cute Paper Plates (2)

Next I cut facial features from black construction paper. Older siblings can help with the cutting and little ones will no doubt want to help glue the shapes on with a glue stick.

I kept our pumpkins friendly looking so they weren’t scary, but certainly feel free to make them spooky if your kids are older.

Halloween 3 Cute Paper Plates (3)

They look perfect over a doorway in our house. Boo!

Halloween 3 Cute Paper Plates (5)

Practical Math

Practical Math (3)

Veronika loves practicing the stairs these days, which reminded me that stairs are also the perfect place to practice… counting! While she exercises those little leg muscles, we can also exercise her brain.

As she climbs, we simply count up. Our stairs go to fifteen, which is a good stopping spot for a toddler anyway. She parrots along with me: “One, two, three.” She made me laugh when she jumped one time from seven to eleven!

Practical Math (1)

Hmm, now that we were thinking of practical ways to count around the house, what else could we easily count? I gave her a set of paper plates and cups, and we counted out place servings. One, two, three! You can do the same thing as you set the table with utensils or napkins.

Practical Math (4)

And of course don’t forget to count at snacktime. Anything like chips, cookies, nuts, or cereal pieces are perfect for counting out into piles.

Practical Math (2)

What else does your toddler like to count around the house? Doorways? Windows? Please share in the comments!

Light-as-Air Parfait

Light as Air Parfait (5)

Here’s a snack with some science behind it! Travis read that shaking dairy cream rapidly would result in whipped cream, thanks to the addition of air. Could we achieve the same with non-dairy creamer? We had to try two times before we were successful, so read on!

First, we tried a liquid non-dairy creamer, and opted for oat milk. Pour 1/2 cup into a jar with a lid, along with 2 teaspoons sugar and 1/2 teaspoon vanilla extract. Shake for a few minutes (take turns so your arms don’t get tired!) and see if it turns from liquid to solid.

Light as Air Parfait (1)

Well, it turned out that the oat milk didn’t work. For a surer bet, we next turned to full-fat coconut cream. Chill a can of coconut milk in the fridge overnight. Scoop off the solid portion of cream; stop scooping when you hit the watery liquid underneath. Repeat with the same process as the oat milk above, adding the sugar and vanilla, and then shaking.

Well, this time the creamer was firm after just moments of shaking! So the answer is yes, it does work if you choose the right non-dairy alternative.

Light as Air Parfait (6)

To enjoy the fruits of our labor, we spooned some of the coconut whipped cream into parfait glasses and topped each serving with fresh berries. The perfect reward.

Can you shake other non-dairy creamers into whipped cream? Please share in the comments if you find a successful method!

Halloween Countdown Day 2: Spider Web Stroll

Spider Web Walk (1)

Now that our kitchen is nice and spooky, it was time to continue our countdown to Halloween with a hunt for outdoor spookiness!

Veronika has a love-hate relationship with spiders; she’s clearly a little fearful of them, but also drawn to looking at them, particularly one that lives in our kitchen window.

Spider Web Walk (5)

That tension is probably why spiders are the perfect just-scary-enough Halloween decoration for little kids. There’s a fear factor, but you can also show your child that there’s nothing to really fear. To help, go on a spider web walk!

As we strolled around our neighborhood, we kept our eyes open for pretty webs. You can demystify spiders for your toddler by looking up close, and finding webs that are close to a perfect circle.

Spider Web Walk (2)

Bonus points for any you find with dew drops or a spider in it! But for all that, Veronika prefers the fake spiders strung up on our bushes, which is just fine too.

Spider Web Walk (3)

Leaf Stomp

Leaf Scrunch (4)

Here’s a fun way for a toddler to enjoy the experience of stomping through leaves without all the effort of raking a huge pile!

Head to your backyard or a local park and pick a tree with lots of leaves on the ground. Invite your child to help toss leaves into any box with tall sides, ideally about waist high on your child. We found a tree with gorgeous red ones!

Veronika preferred scrunching her feet through the leaves on the ground while I filled our box.

Leaf Scrunch (1)

Once the leaves reached about mid-way up her calf, I set her inside and it was time to stomp and crunch!

Leaf Scrunch (2)

Dump, refill, and repeat this as many times as your child wants to. It’s almost as much fun to toss leaves into the box as it is to stomp on them.

Leaf Scrunch (5)

If you add a few more leaves each time, pretty soon you will have a leaf pile, with hardly any effort!

Leaf Scrunch (3)

Chicken & Broccoli Stir-Fry

Chicken and Broccoli Stir-Fry (1)Here’s an easy weeknight meal of protein, veggies and rice. You can use frozen veggies to speed up preparation even further. Feel free to add more veggies to the mix, too, like corn, onions, or water chestnuts!

Ingredients:

  • 1 package Gardein chick’n strips
  • 2 minced garlic cloves
  • 4 tablespoons agave nectar
  • 2 tablespoons low-sodium soy sauce
  • 2 tablespoons orange juice
  • 1/2 teaspoon grated fresh ginger
  • 1/8 teaspoon salt
  • 2 cups chopped broccoli
  • 2 cups bell pepper strips
  • Cooked brown rice
  1. Cook the chick’n strips in a skillet over medium-high heat for about 6 minutes, until lightly browned.
  2. Meanwhile, whisk together the garlic, agave, soy sauce, orange juice, ginger, and salt in a small bowl.
  3. Add the garlic mixture to the skillet and continue to cook for about 2 minutes.
  4. Remove the chicken from the pan and set aside. Add the vegetables to the sauce and continue to cook for about 5 minutes.
  5. Serve the chick’n and veggies over cooked brown rice.

Chicken and Broccoli Stir-Fry (2)