Rubber Band Splatter Painting

Rubber Band (8)

Following on the heels of outdoor painting and yoga, here’s still-more fresh air fun. Technically you could do this inside, but it’s so messy you’re really going to want to be out in the grass.

To set up, you’ll need an old picture frame (or one that you don’t mind getting a little paint-splattered), ideally about 8×10. Remove the backing and glass, and attach large rubber bands at intervals around the frame.

Rubber Band (1)

Set up newspaper under your work surface, and then place construction paper (or other heavy paper) underneath the frame. Travis wanted black as the background – why not!

I set him up with a tray of paints, and showed him how to paint just along the rubber bands (drips are okay, of course). Travis liked the tricky wobbly nature of this.

Rubber Band (3)

Imagine his surprise when I showed him the next step: Snapping back a rubber band and letting the paint on it splatter onto the paper below. Boing!

Rubber Band (5)

Because the black wasn’t the best background, I suggested lighter colors like pink and yellow for our next few rounds.

Rubber Band (7)

The result is very neat, splattered paintings. Don’t forget the art smock for this one!

Om in the Outdoors

Om Outdoors (5)

Our beautiful morning sunshine is inspiring us to get outdoors these days, for everything from exercise to painting. This morning, I asked Travis if he thought it would be fun to take mommy’s yoga mat out into the grass, which was met by a super-enthusiastic “Yes!”. We’ve done mommy & me yoga together since he was a toddler, but sometimes changing up the location is all it takes to re-ignite a child’s excitement.

First we did some old favorites. Tree pose!

Om Outdoors (2)

We also like doing the blossom move: Lie flat on your back with your arms stretched above your head. Sit up slowly and bend all the way forward to reach your toes. Lie back down again and repeat.

Om Outdoors (4)

Travis then announced he wanted to make up his own poses! Most of these were inspired by the items in his immediate vision, so soon we had pinwheel pose (spinning around):

Om Outdoors (6)

…and pipe pose (standing straight with arms up above head).

Om Outdoors (3)

What poses would you and your child come up with? Head outside and enjoy the sunshine and the mindfulness! We can’t wait to hear about it in the comments.

Om Outdoors (7)

Handprint Farm

Hand Farm alt

My formerly fingerpaint-averse boy finally doesn’t mind paint on his hands, thanks to some crafts at his preschool, and I seized the opportunity to put together this adorable handprint painting. It’s a cute way to learn about animals on farm sanctuaries while capturing a palm-sized memento.

The goal was to make 3 animals: a pig, a cow, and a sheep. For the pig, paint your child’s palm completely pink. Press onto a piece of paper with the fingers pointing down as the legs. Whoops, our pig was sideways, but we just worked around the oops!

Hand Farm (1)

For the cow, dot black or brown paint onto your child’s fingertips, and make a few additional dots in the palm. These will be the cow’s hooves and spots. Press onto the paper.

Hand Farm (2)

I didn’t have yellow tempera paint at home, only dot markers, which Travis didn’t want all over his hand. So we ended up with a mommy-sized yellow chick! Press onto the paper with the fingers to the side, as the tail feathers.

Hand Farm (3)

Once the paint dries, you can draw in noses, beaks, tails, eyes, and other features to complete the picture.

Hand Farm (5)

Your kids may want to paint a farm background as well!

Hand Farm (7)

Painting on the Fence

Paint on Fence (4).JPG

The sun was streaming through our windows and onto the little patch of grass outside our patio this morning, and I just had to get us outside. To motivate Travis, I did something taboo – painting outside!

Of course plein air painting has a long tradition, but so many of our kids’ crafts nowadays are indoors at craft tables or classrooms or easels. There is something so beautiful about being outside with a paintbrush and paper.

To contain any mess, I poured a few paint colors into a foil tray and gave Travis thick brushes.

Paint on Fence (1)

Use painter’s tape to secure a large piece of craft paper to a fence. If you don’t have a fence, the outside wall of a house would probably work, just make sure you’re using washable paints!

Paint on Fence (2)

The large surface will encourage big strokes – sideways, up and down, or whatever else inspires your little artist.

Paint Fence (6)

My little artist at work.

Paint on Fence (3)

All the more beautiful in the sunshine!

Paint on Fence (5)

Make a Changing Caterpillar

Butterfly (9)

After a recent documentary on Bugs, Travis is in love with caterpillars. It was perfect timing for a story unit on caterpillars turning into butterflies in our latest Ranger Rick Jr. We downloaded the template and put together this neat felt project that illustrates metamorphosis beautifully.

A note on the project: unless your kids are at the upper age range of Ranger Rick Jr., grown-ups will likely need to assemble the caterpillar and butterfly. But then the kids can play with it!

First, use the template to cut the large butterfly shape from black felt. Cut the small butterfly shape from orange felt, and glue onto the black. (You’ll need fabric glue or a hot glue gun). Set aside.

Butterfluy (1)

To make the caterpillar, cut a rectangle from black felt. Cut a long strip from felt for the antenna (Travis wanted blue instead of black). Fold the strip into a V and glue onto the top of the black body. Add two stripes each of yellow, white, and black felt. Glue on googly eyes (Travis wanted 3 eyes, not 2, hence the odd appearance!) and then 2 eyes onto the back.

Butterfly (2)

For the final component, cut the large butterfly shape from green felt. Glue onto the back of the black butterfly; this will be your chrysalis.

To put it all together, attach 2 Velcro dots to the body of the caterpillar on the black stripes, and line up with Velcro dots on the butterfly’s body.

Butterfly (4)

Place additional Velcro dots on the left top and bottom of the black butterfly wing, and then on the opposite sides of the green “chrysalis” so you can fold it closed.

Butterfly (5)

Now it was time for Mr. Caterpillar to crawl into his butterfly wings and fold himself up into a cozy chrysalis.

Butterfly (6)

Travis loved it! Note: You can also attach a string to the green felt so the chrysalis can hang.

Butterfly (7)

Open back up again for the butterfly transformation.

Butterfly (8)

Early Explorers Insects


LP Insects (18).JPG

Our latest Early Explorers package from “Max and Mia” was all about bugs – sure to be a hit with my insect-loving boy! He didn’t waste any time finding out where some strange bugs (Goliath beetles! Army ants!) live on our world map, and dove into the booklet’s activities like matching, coloring, and patterns.

LP Insects (4)

Insects Craft:

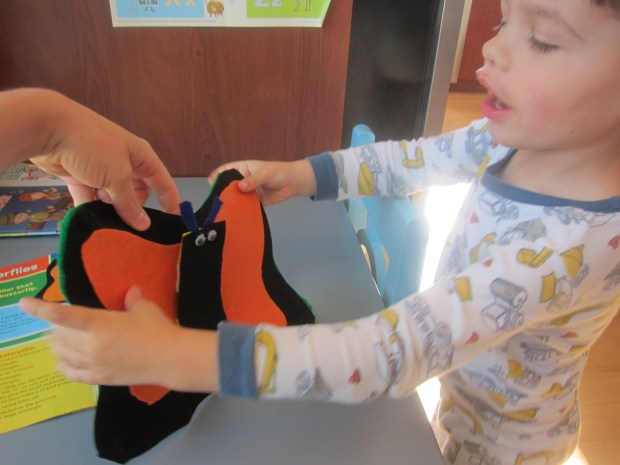
Again, there was no craft in this months booklet, so we followed a suggestion from the blog. We’ve actually made clothespin bugs before, but back then Travis wasn’t very into it and the critters ended up being more mom creations… This time, his imagination had free reign!

LP Insects (12)

For a little lesson with the art, you can point out the three parts of an insect’s body – head, thorax, and abdomen. “Ideally” each clothespin bug can have three parts glued on to replicate this, whether from buttons, gems, pom poms, or other craft supplies.

LP Insects (14)

But Travis was so eager just to create that I more enjoyed watching him make fanciful bugs. He was very proud of the buttons and beads he selected, and insisted we also make a spider (technically not an insect) with pipe cleaner legs.

LP Insects (15)

Insects Science:

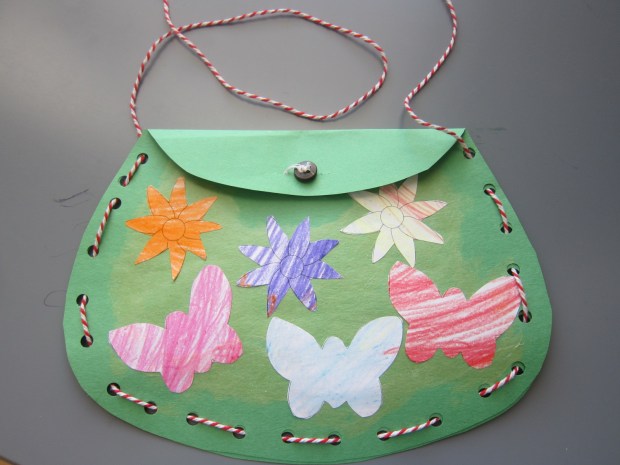
For a bug science activity, we also took a cue from the blog: a scavenger hunt using a template from Little Passport’s website.

LP Insects (6)

This was a great chance to find regular outdoorsy items like dandelions…

LP Insects (7)

… but most especially to use our new keepsake (more on that below).

LP insects (8)

Travis was so proud finding little bugs with wings and especially this worm, which he coaxed right in.

LP Insects (5)

The walk was also a great lesson on letting things from nature go, so they can stay in their habitat once you’re done observing.
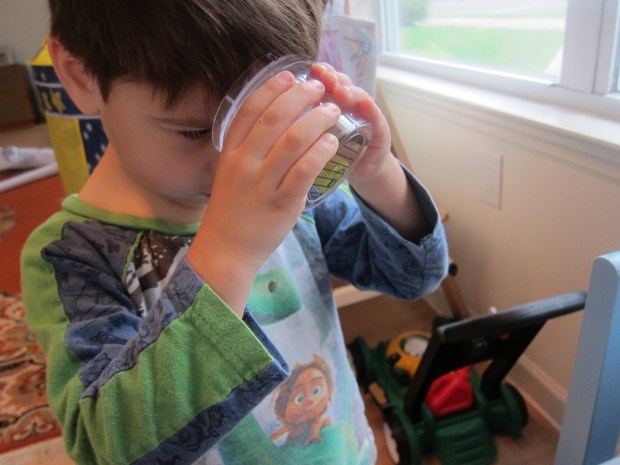
LP Insects (11)

Insects Keepsake:

As you can see from our scavenger hunt, the bug catcher/observer that came with the kit was a huge hit! In addition to bugs, try finding items around the house you can put in and magnify.

LP insects (2)

Insects Field Trip:

Chances are that even if you don’t have a dedicated bug museum near you, there’s a children’s museum or science museum with a bug section. I knew of several that we’d been to, some recently, so instead I detoured us to a children’s museum we hadn’t visited since Travis was a baby.

LP Insects (19)

We searched for this blue beetle in his terrarium in the science room, and saw models of some neat favorites, like the Hercules beetle!

LP Insects (20)

Insects Further Activities:

Rather obviously, we had to use our keepsake to catch and observe bugs. In addition, we tried out the following suggestions from our booklet.

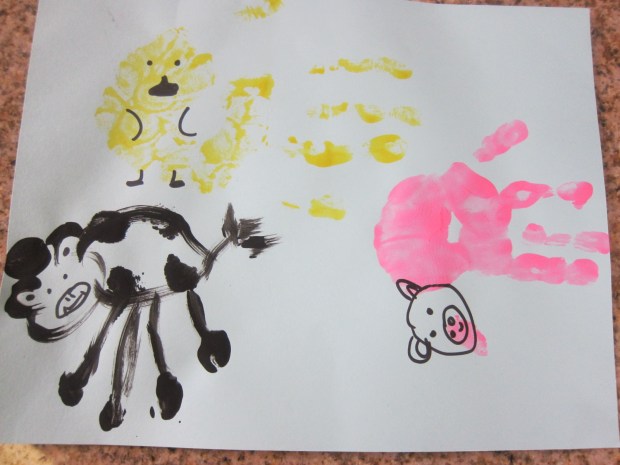
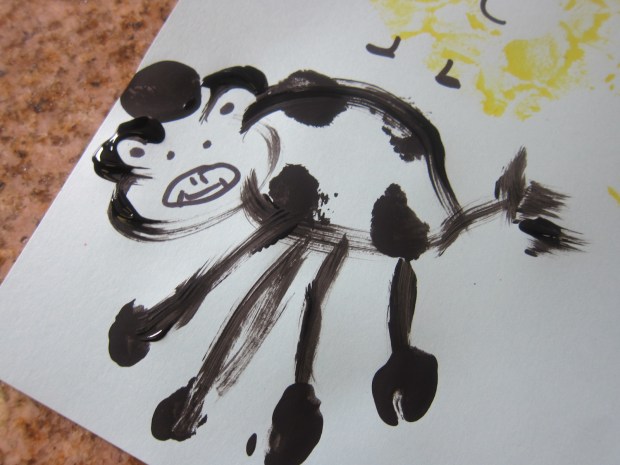
Draw pictures of your favorite bugs (or for younger kids, fill in coloring pages):

LP Insects (1)

Another nice fine motor activity was tracing the letters of the alphabet – each one for an insect that started with that letter – in the booklet.

LP Insects (17)

We headed to the library as another component of our unit. Because we already have a lot of great bug books at home (Usborne Books’ Early Beginners Bugs, the Big Book of Bugs by Yuvel Zommer, and The Grouchy Ladybug by Eric Carle, to name a few), we thought it would be more informative to check out a documentary. Travis loved Bugs (narrated by Dame Judi Dench!) on insects from the Amazon rainforest, fascinating for kids and adults alike.

LP Insects (16)

Finally, we talked about all the bugs we’d caught, read about, and discussed, and which was our favorite. Travis decided upon the scorpion.


Confetti Heart Art


Confetti Heart (8).JPG

The heart-shaped sentiment of love in this artwork makes it perfect as a card or gift to a loved one. And kids will love making it, since it involves quite a few novel steps!

I told Travis that the first thing we needed for our craft today was lots of confetti, and he eagerly grabbed a pair of safety scissors and begin snipping construction paper alongside me. You’ll need the pieces to be quite tiny for the heart to come out right, so adults and bigger kids can make sure all the pieces are small enough. Note Travis’s look of concentration!

Confetti Heart (1)

Next we put all the confetti in a brown paper lunch bag, closed it tight, and shook it up for all the colors to mix. Set the confetti aside.

Draw a heart on one piece of paper (or use a heart-shaped stencil) and tape down to a second piece of paper. I recommend a sturdy background like watercolor paper.

Confetti Heart (2)

Next, have kids smear glue all around the heart – it doesn’t matter if a little gets on the heart cut-out as well, since you’ll be lifting that off shortly.

Confetti Heart (3)

Now it’s time for an explosion! Blow into the bag a few times to inflate it, then hold over the gluey paper and have your kids smack it with both hands for a pop. Blurry photo!

Confetti Heart (4)

Travis was thrilled to see the confetti flutter down.

Confetti Heart (5)

Clean-up was half of the fun for this one!

Confetti Heart (6)

Once the glue dries, peel off the heart shape, and you’ll have a beautiful confetti-outlined heart left in the center.

Confetti Heart (7)

Green Time: Go to the Park

Go to Park (3)

Sometimes the simplest moments with our kids can be the most beautiful, and this “Green Time” suggestion from our May issue of Ranger Rick Jr. was a reminder in just that!

The task? Simply to go to the park. This might sound like something you do with your kids anyway, but this time we made things different.

I deliberately chose a park without any facilities – no playground, no swings, nothing built up. Instead, we showed up with a blanket to sit on and only a few other goodies.

Go to Park (6)

Based on Ranger Rick’s suggestions, we brought along Travis’s tricycle to ride through the grass:

Go to Park (1)

A kite for flying:

Go to Park (2)

And a mitt and soft balls to practice playing catch.

Go to Park (7)

Nothing makes the afternoon better than an iced tea snack with mama. And reading a few Ranger Rick Jr. stories of course.

Go to Park (4)

We easily spent an hour in this park, just the two of us (and a new ladybug friend!).

Go to Park (8)

What’s your favorite (non-playground) park activity with your kids? Please share in the comments!

Wooden Spoon Garden Stakes

Garden Stakes (4)

Several weeks back, we got ambitious and planted a shoebox vegetable garden. I had little hope that our garden would yield real results, without deeper soil to transplant into, but that hasn’t stopped Travis from loving the vegetable stalks and leaves that managed to sprout!

We started to forgot what was what, so decided to make these cute garden stakes to label the veggies. If you have a real vegetable garden, make as many as you need to label all your plants!

I encouraged Travis to think about what each veggie really looked like, so he proudly painted up and down with orange for carrots:

Garden Stakes (1)

And with green for zucchini.

Garden Stakes (6)

On the other side of each spoon, I painted a slightly more recognizable version of each veggie. We had no red paint, or I would have added tomatoes as well.

Garden Stakes (3)

Travis very proudly planted the stakes in our small “garden”, which we continue to water. As always, it’s great to teach kids where their food comes from!

Garden Stakes (5)


Mother’s Day Pocketbook

Pocketbook (9).JPG

Travis’s nursery school is hosting a Mother’s Day tea for the moms next week… and he couldn’t wait to make me this pocketbook to carry to it, once he spied in his latest Ranger Rick Jr.!

First we printed out the pocketbook template from online. Cutting it exactly was a bit too much for Travis, but I cut the shape from construction paper while he snipped out another “pocketbook” for fun.

Pocketbook (1)

Next we punched holes all around the edges.

Pocketbook (2)

To lace it up, use either yarn or string. Because I worried our string might fray, I created an “aglet” for Travis by taping around the end.

Pocketbook (3)

This was definitely his favorite part! He loved lacing up and down with our long piece of string until he’d completed every hole.

Pocketbook (4)

Next up was coloring the decorations, also available for print from the template.

Pocketbook (5)

Travis enjoyed selecting colors, like a light blue butterfly since I love blue.

Pocketbook (6)

I cut out the shapes and we glued them to the front of the purse.

Pocketbook (7)

As the final step, thread a 2 inch piece of string through a button, and slip through the slit in the back pocketbook template; secure with tape.

Pocketbook (8)

Now it will secure the purse shut through the slit in the front pocketbook template. I’ll have to pack it with a tea bag or two for the Mother’s Day tea. Travis was so proud to make me this, and I couldn’t be prouder to carry it!