Shoe String S

Shoelace S (3).JPG

S was a speedy letter for Travis’s tracing today. With an ‘s’ at the end of his name, he has worked hard on this one over the past year, initially tending to write it backwards but now a pro.

He polished off his tracing and then was intrigued when I pulled out a shoestring to form the letter on the ground.

Shoelace S (1)

I thought he might need some guidance with all those loops and curves but…

Shoelace S (2)

Nope!

Rock R

IMG_20190717_083314

Travis traced the letter R today and then we found three materials beginning with R to make our 3-D models.

First up was upper case R, using a ruler and rope (ok, ours was more string, but perhaps you could call it a thin rope).

He placed the ruler straight, and then had to ponder how the rope could twist in such a way that he ended up with R. He remembered that first you make a loop so it looks like a P…

Rock R (1).JPG

…then just needed to angle the final bit of rope out.

Rock R (3)

For lower case r, we headed outside to the driveway and found a few small rocks.

IMG_20190717_083253

“I can do this!” Travis said with confidence, since r is in his name. In no time, our rocks were in an r.

Picnic-Perfect Basket

Picnic Perfect (7).JPG

This fun basket is a great way to involve kids in the planning for a summer picnic. It’s perfect for holding utensils and napkins: a mini basket to put in the big basket!

To assemble, Travis helped cover an empty snack box with brown cardstock. We trimmed it to fit and glued on, then let dry.

Picnic Perfect (1)

Meanwhile, I showed him how to weave a few additional strips of brown cardstock together.The weaving was a little beyond his ability but he helped use a glue stick at each intersection I showed him to complete the weave.

Picnic Perfect (4)

Leave one strip extra long to be your handle and glue that down on the other side of the “picnic basket.” Meanwhile, glue an empty toilet paper tube into the box. Once dry, add plastic utensils!

Picnic Perfect (3)

We colored in a watermelon slice on pink cardstock for a touch of whimsy. I colored in a green rind and Travis added black seeds with crayon. Glue to the side of the basket.

Picnic Perfect (5)

Finally, we colored in a piece of white cardstock as the “blanket.” Travis’s choice of gray and black seemed a littler, er, dark, so I added a few pink stripes! To make it sturdy, glue this cardstock onto corrugated cardboard, and then glue the basket onto the “blanket.”

Picnic Perfect (8)

For the final touch, we tucked in some paper napkins. This craft makes a great caddy for kids to use all summer long, easily able to reach utensils and napkins when the family dines al fresco. Or bring it along to the next true picnic! You could even tuck in salt and pepper or a few other light items.

Picnic Perfect (6)

Spiderweb Snacks

Spider Web Snack (7).JPG

Travis is so into spiders lately: finding them in our new home; discovering their webs in the garage; you name it. So no better way to foster his interest than to make a spider-themed snack! We actually tried to do this craft once before, but lacked a good vegan white chocolate at the time. This time turned out so much better. As a bonus, the webs are an example of circular symmetry, something we’e been studying lately in our play.

First, arrange 5 or 6 pretzels as the spokes of the web on wax paper.

Spider Web Snack (4)

Meanwhile, place vegan white chocolate and non-dairy chocolate chips in zip-top bags and place in glass jars.

Spider Web Snack (1)

Fill the jars with hot water (a grown-up step). Travis loved watching the chocolate turn from solid to melted in this method.

Spider Web Snack (3)

Remove the bags from the water and snip a small hole in the bottom corner. We piped a big circle of chocolate in the center, and added a few raisin “flies” as victims. Oh no!

Spider Web Snack (5)

Pipe additional circles of white chocolate to form each web.

Spider Web Snack (6)

Then each web got a big melted chocolate spider. They were tarantulas, Travis decided. We ran out of white chocolate, so made one dark chocolate web as well. Transfer the wax paper to the fridge to cool.

Spider Web Snack alt

The webs will set quite quickly, at which point you can peel them off the wax paper for a neat reveal. It turned out that the dark chocolate web peeled off more easily, but they all were fantastically creepy and fun!

Spider Web Snack var

Frosty Bites

Frosty Bites (6).JPG

It’s been 90 degrees all week and Travis had fun experimenting with which frozen snacks were his favorite, an idea out of his latest Highlights magazine..

First up, we tried a few different kinds of fruit. Frozen watermelon was hard to bite into, but almost like a watermelon popsicle! That got a big thumbs up.

Frosty Bites (3)

Frozen banana got big smiles, too…

Frosty Bites (11)

…but not so much frozen grapes.

Frosty Bites (7)

Frozen non-dairy yogurt and frozen pudding were too hard straight from the freezer, harder than ice cream, and needed time to thaw before he could dig in. Neither was declared a winner.

Frosty Bites (1)

Frozen applesauce got laughs because as it thawed enough to come out of the tube at the top, it kept squirting us!

His favorites? Frozen chocolate bars…

Frosty Bites (9)

…and frozen Dandies mini marshmallows – these he could eat like sweet little frozen chips out of the bag!

Frosty Bites (alt

What does your child like to eat as a frozen snack on a hot summer afternoon? Please share in the comments!

Frosty Bites (8)

Quarter Q


Quarter Q (5).JPG

Travis is back to tracing a latter of the day after a brief hiatus, and today he tackled Q.

After tracing, I dumped out a big pile of quarters. I was impressed with how readily he could see how to form both the upper and lower case versions of the letter.

Quarter Q (1)

A big circle for Q got an extra line at the bottom.

Quarter Q (2)

A little circle for q had a line that arched down, and then he correctly identified which direction it needed to hook at the bottom – a key skill to avoid mixing up q and g!

Quarter Q (4)

Quite well done!

Quarter Q (3)

Backyard Bean Bags

Bean Bag Games (4)

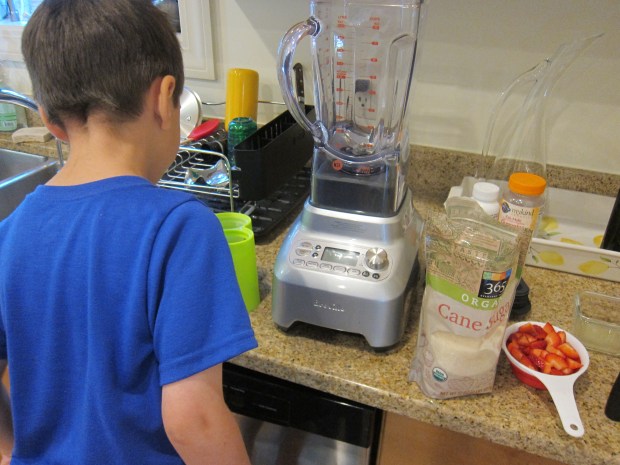
Travis and I made these adorable homemade bean bags this morning before his first day of camp; I wanted to send him off in high spirits after quality mom and son time!

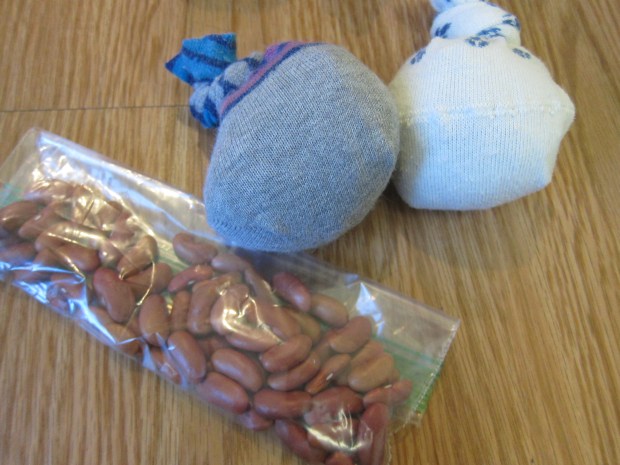
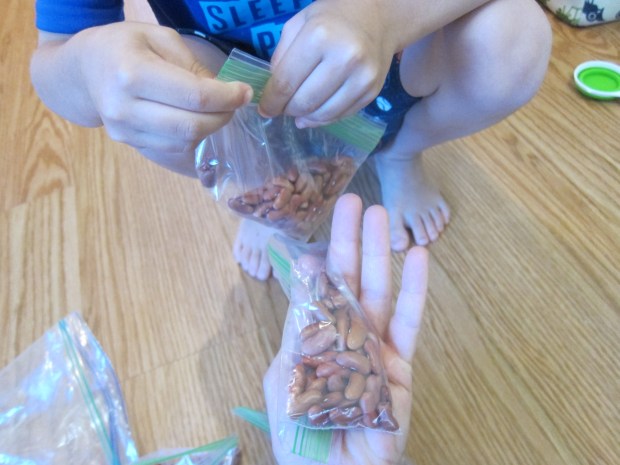
To prepare the bean bags, spoon about 1/2 cup dried beans into small zip-top bags.

Bean Bag Games (1)

Squeeze out the air and seal tightly.

Bean Bag Games (2)

Insert each bag into the toe of a small sock (or an old, longer sock that you’ve cut just above the ankle). Twist the top of the sock into a knot to tie.

Bean Bag Games (5)

These were so cute (Travis loved that they were circular instead of square like ones from the store) and have great heft. Already they were fun to play with, just tossing or juggling!

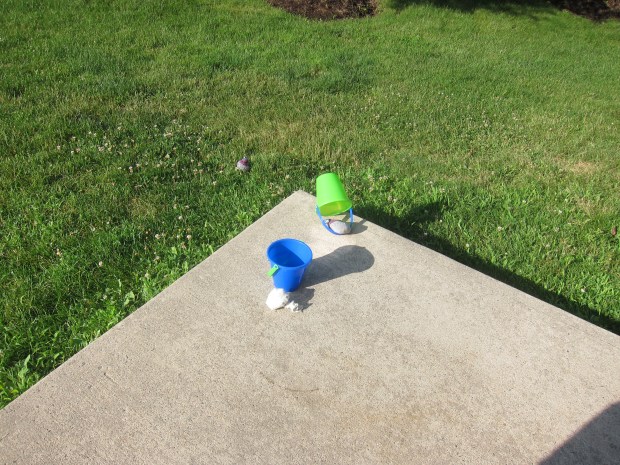
But now we needed to play with them! First we set up a classic Bean Bag Toss with buckets.

Bean Bag Games (6)

It was mommy versus Travis for a few rounds to see who could get it in!

Bean Bag Games (7)

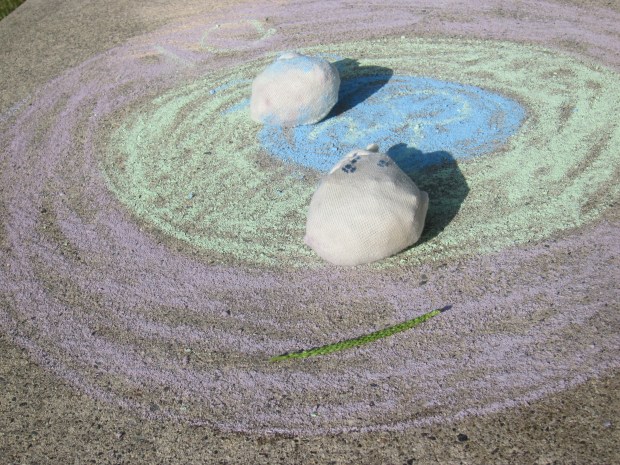
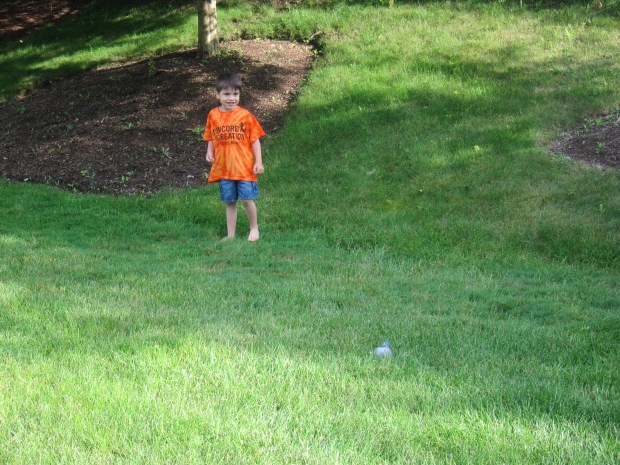
Next up: Target Practice! I drew three different colored circles of different sizes and labeled them as worth 10, 20, and 30 points.

Bean Bag Games (9)

Travis not only loved it, but made up a new rule. If you hit this blade of grass, you were instantly out.

Bean Bag Games (10)

In the evening, we found a few more ways to play with the beanbags. First, a round of Stuck in the Mud. With this game, you run with a bean bag on your head. If it falls, you freeze in place until another person returns the bean bag to your head.

Bean Bag Games (14)

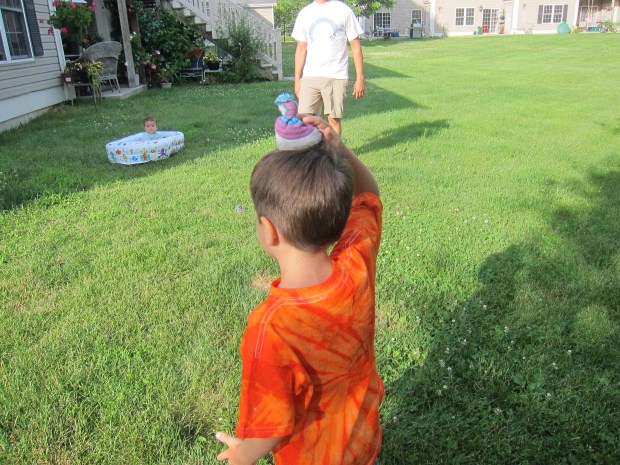
This was a highlight of our day, getting the whole family out running around in the new yard! But keeping the bean bag on our heads proved very tough, so Travis changed the rules: you simply had to pelt another player with a bean bag to make him or her It.

Bean Bag Games (15)

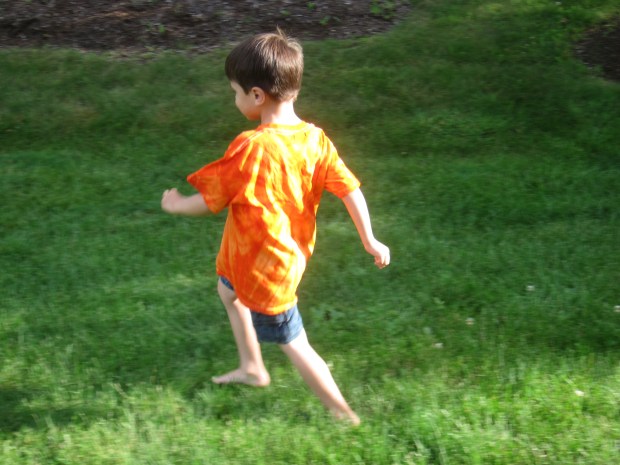
Luckily the bean bags are the perfect soft item for a game like this.

Bean Bag Games (17)

Soon we were all silly and rolling around in the grass.

Bean Bag Games (16)

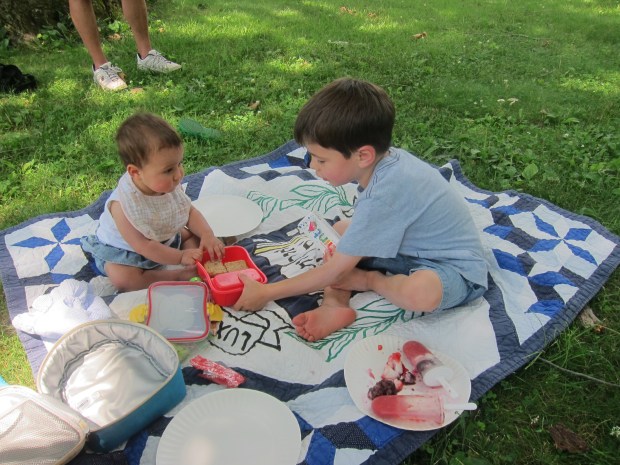
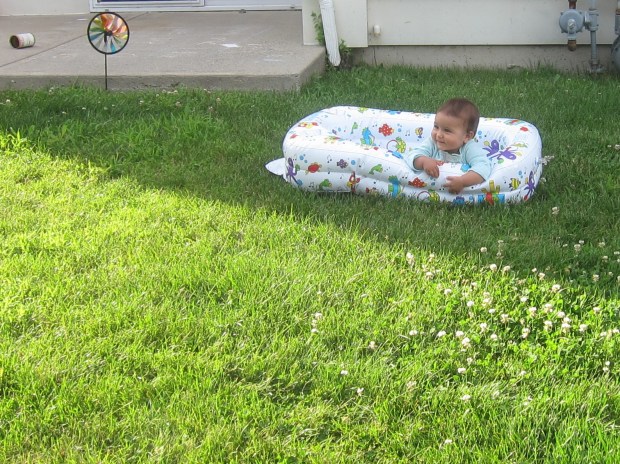
Baby sister loved just watching!

backyard baby.JPG

As a final game, we played Tower Toppling, a riff on a classic carnival game. We only had one rinsed and empty can to play with, but will be repeating this game with a whole tower for sure!

Bean Bag Games (11)

For our game, the goal was to see who could knock over the can first.

Bean Bag Games (12)

If you have a full tower, see who can knock down all the cans with the fewest throws to declare the winner.

Bean Bag Games (13)

Any and all of these games would be fantastic with a crowd; consider them your next summer gathering, whether a barbecue, block party, or family get-together.

Update: After collecting a few bean cans, we could truly play topple the tower.

Bean Bags alt.JPG

Travis loved getting out his energy with a round of this before dinner!

Bean Bags var.JPG

Balancing Act

Balancing Act (4).JPG

Instead of tracing numbers today, Travis did a math project that was a little more hands-on, constructing a simple balance scale and testing it in various ways.

Balancing Act (1)

Punch three holes in each of two plastic cups. Add three strands of string or yarn to attach each cup to a hanger. By accident, our lengths of string were cut too short, so I ended up taping them on to the hanger.

Balancing Act (2)

The hanger should start out even. I gave Travis a bag of dried beans and had him start adding them to the cups any way he wanted. First the whole apparatus tilted one way…

Balancing Act (3)…then he quickly began adding beans to the other cup to even things out. After achieving a middle balance, he poured all the beans into the other cup, so things tilted the other way!

Balancing Act (5)

Your child may have fun playing around with different variations on this for quite some time. To mix things up, take out the beans and weigh toys or other objects, and see how many balanced combinations you can come up with!

Homemade Rocket Pops and Picnic Celebration

Rocket Pop (4)

Travis and I originally intended to make these homemade rocket pops for the 4th of July, but we were short a couple of ingredients. But there’s no better time than a summer afternoon to declare a random family celebration. Prepare these fun popsicles, set up a picnic, and celebrate… whether it’s a true holiday, or just a hot afternoon! That’s precisely what we did today. Read on for the recipe… and a fantastic chance to win $1,000!

First up: Making the rocket pops:

In a blender, combine 1 cup strawberries, 1 tablespoon sugar, and 1 tablespoon water; blend until smooth. Pour into the bottoms of popsicle molds or small paper cups. We tried it both ways since I had a hunch our molds would work better and our 9 oz cups seemed too large. Small (5 oz) dixie cups would have been ideal!

Rocket Pop (1)

Let the strawberry layer freeze for 30 minutes. Travis was quite intrigued about this layered method of preparation.

Meanwhile, make the blueberry layer; puree 1 cup blueberries, 1 tablespoon lime juice, and 1 tablespoon sugar. Set aside.

Rocket Pop (2)

Spoon 2 tablespoons vanilla non-dairy yogurt over each layer of strawberry mixture. Add 2 tablespoons blueberry mixture to the top of each pop. Insert the handles (or, if using cups, cover with foil and insert a popsicle stick). Return to the freezer for at least 6 hours.

Rocket Pop (3)

Now it was time for the picnic! We headed to a local national park, laid down a blanket and enjoyed our pops. Okay, so they got a bit melty on a 90 degree day, but that only added to the amusement.

Rocket Pop (5)

We decided ours were Bastille Day pops, since our picnic coincided with France’s day to celebrate red white and blue instead of America’s.

Rocket Pop (6)

Whatever the reason to celebrate, your child will love being involved in the picnic from start to finish, first by preparing a special recipe and then by helping to clean up at the end!

Rocket Pop (7)

I love projects like this that inspire kids to learn without even realizing it; they use their own creative process and enjoy tangible results. How does your child love learning while having fun? I’m so excited to announce the Limitless Learners Contest through Education.com, where your child can win $500 toward college, $1,000 for a school library, and a lifetime free membership to Education.com by explaining just that!

Children must be entering kindergarten through grade 5 and will think creatively about what education means to them. Using art or writing (depending on age), entrants describe a time they had so much fun they didn’t realize they were learning. A winner will be chosen from each grade level.

I hope my readers will tap into this amazing opportunity. Entries must be received by October 31, 2019. Further details are available at https://www.education.com/contests/

Sight Word Bean Bag Toss

Sight Word Bingo (6)

Travis is struggling a bit with the 40 sight words we’re working on over the summer, and grows impatient just sitting and looking at flashcards. So I switched things up! For this game, I used just 12 very basic words and then moved us outside and turned the sight words into a sport: beanbag toss, that is!

Sight Word Bingo (2)

I made a 3 x 4 rectangular grid out of chalk on the patio and wrote in the 12 words.

Sight Word Bingo (1)

I handed Travis a beanbag and told him that the goal was to toss it into a square. For each one he landed in, he had to shout out the word.

Sight Word Bingo (3)

It was helpful for him that I took turns, too. He could hear me reiterate any word that he might have already landed on, making it ever more familiar. Or sometimes I aimed for ones I knew were particular tricky for him, like ‘the’.

Sight Word Bingo (5)

By the end, he was quick with some he has struggled over previously, like ‘up’ and the ‘in/is/it’ trio. We’ll be playing this one again!

Sight Word Bingo (4)