Egg Carton Penguins

Egg Penguin (6)

We don’t buy eggs, but I do confess that egg cartons from my in-laws’ house make for fantastic up-cycled crafts. We got the idea to make these cute figures after a feature on penguins in our first issue of Ranger Rick Jr. We quickly decided we needed some adorable toy penguins around the house!

Egg Penguin (1)

Cut an egg carton into indiviaul compartments and paint with black tempera paint. Since the carton was originally pink Styrofoam, it took two coats of paint before we hid the color underneath.

Egg Penguin (2)

Next we made sure to gave them white bellies!

Egg Penguin (5)

I cut out orange hearts to be the feet and orange triangles to be the beaks from a sheet of orange felt, and Travis helped glue these on.

Egg Penguin (4)

Googly eyes were the finishing touch!

Egg Penguin 8)

Now we have adorable penguins to march around and bring our magazine story about the animals to life!

Egg Penguin (3)

Pinecone Snow Owl

Pinecone Owl (8).JPG

These cute owls were the perfect craft to put together on a day with two-foot-high snow drifts outside our window!

Our inspiration came from the picture of this adorable little guy.

Pinecone Owl (1)

All we needed were pinecones and cotton balls to recreate him indoors, and luckily I had both on hand.

Tearing apart cotton balls always feels so fluffy and fun!

Pinecone Owl (3)

Travis helped push the cotton into the pinecone, until we had mostly filled it in with white.

Pinecone Owl (4)

As an alternative, we tried using a white feather boa for an even fluffier look, winding it in between pinecone sections.

Pinecone Owl (2)

These owls turned out so fluffy though that they looked more like snow gerbils!

Pinecone Owl (5)

To finish our owls, we added googly eyes and little beaks cut from brown felt.

Pinecone Owl (6)

They’re nice and warm inside and away from the snow!


Missing-Mitten Puppets

Mitten Puppets (7)

We loved this suggestion from our December issue of High Five magazine! What parent of small children doesn’t have an odd mitten or two lying around? Kids always seem to be losing just one of a pair. To prolong the fun, I also purchased a cheap three pack of gloves, so our imaginations could run wild with puppet making. Although mittens would have been ideal, gloves worked just as well for our new puppet friends.

First, we followed the two suggestions from High Five. An old yellow glove received orange thread as a mane, which Travis loved gluing to the fingertips.

Mitten Puppets (1)

We added googly eyes and felt pieces for the nose and mouth. Black thread was perfect for little whiskers.

Mitten Puppets (2)

Felt ears (in pink and blue), a blue felt nose, more googly eyes, and more black thread as whiskers turned an odd blue glove into a mouse. Squeak!

From there, I left Travis’s imagination take over. We had a very abstract elephant covered in orange thread and yellow felt, shown here in the foreground:

Mitten Puppets (9)

He next asked to make a porcupine, so I got out “quills” from brown felt and Travis added a pom pom nose.

Mitten Puppets (5)

Then he decided we needed a black cat, with pink felt ears and facial features. Travis insisted that the cat needed a sparkly pom pom, too.

Mitten Puppets (6)

Then of course it’s time for a puppet show!

Mitten Puppets (11)

What color mittens do you have on hand to turn into animals? Please share ideas in the comments!

Mitten Puppets (8)

Recycled Bird Feeders

Recycled Bird Feeder (7).JPG

After our recent pine cone bird feeders didn’t get much nibbling from neighborhood birds, we wanted to give our feathered friends more of a perch to stand on while having a late autumn snack! This project from Barefoot Books is a great way to recycle juice or non-dairy milk cartons.

Adults, cut a rectangular opening in one side of a clean, empty carton, making sure it’s about 2 inches from the bottom of the carton.

Recycled Bird Feeder (1)

Now give your child carte blanche to decorate however they please. We wanted to make our carton bright and vibrant for the birds, so added colorful buttons and pom poms.

Recycled Bird Feeder (2)

And then Travis decided we needed glitter… lots of glitter!

Recycled Bird Feeder (3)

At this point we left the carton to dry overnight. The next day, poke two holes in the bottom of the carton. Select a stick from outside to be the perch; insert through the holes.

Recycled Bird Feeder (4)

Use a hole punch to make a hole in the top of the carton, and thread with string. My milk carton was so thick that I ended up hot gluing the string instead, which worked in a pinch.

Recycled Bird Feeder (5)

Now find a beautiful place to hang it, and fill with  birdseed!

Recycled Bird Feeder (6)

To continue the fun, consider purchasing a kid-friendly field guide to birds, and check off the visitors you receive over the winter.


Bird-Beak Buffet

Bird Buffet (7)

Some recent fun with a homemade bird feeder has us talking about birds, the various things they eat, and why some birds’ beaks look very different from others. It was the perfect opportunity to pull out this cute game from our Barefoot Books’ Kids Garden kit!

I recommend gathering all your materials ahead of time so you can lay all of the following items in front of your child at once. Otherwise, there is bound to be some curious exploration and possible trouble! First, you’ll need 4 beaks:

  • 1 pair of chopsticks (“Heron Beak”)
  • 1 eyedropper (“Hummingbird Beak”)
  • 1 slotted spoon (“Pelican Beak”)
  • 1 pair of tweezers (“Sparrow Beak”)

BIrd Buffet (1)

Then set out 4 bowls of bird “food:

  • 1 plate of unshelled nuts as pretend field mice for the Heron
  • 1 tall bottle with a narrow top filled with water as flower nectar for the Hummingbird
  • 1 bowl of ping pong balls floating in water as fish in water for the Pelican
  • 1 bowl of sesame seeds and grass clippings as seeds in the grass for the Sparrow

Bird Buffet (2)

I recommend having a towel under your play area, since two of these bird meals involve water! Now let your child experiment with which “beak” is best suited for each food. The ladle and ping pong balls were an easy first guess, and Travis had fun pretending to be the pelican.

Bird Buffet (3)

The most enjoyable challenge was using the tweezers to grip the grass clippings and sesame. He was very focused on it, and so proud each time he could move some grass or a sesame seed.

Bird Buffet (4)

The eyedropper was a delight of course, and we talked about the hummingbird’s long narrow beak being well suited to dip inside a flower.

Bird Buffet (5)

The one that gave us consternation was picking up nuts with the chopsticks. We decided we wouldn’t want to be herons!

Bird Buffet (6)

From there, Travis had fun mixing and matching his birds. He used the eyedropper in the “pelican’s” big bowl of water, and loved using the slotted spoon to move unshelled nuts from the dry bowl into the bowl of water, then fishing them out with a utensil or his hands.

BIrd Buffet (10)

He also mixed water into his sesame seeds, and found other ways to have fun with the eyedropper (as a spoon etc.), resulting in lots of enjoyment even after the stated purpose of the game was done.

Bird Buffet (8)

We hope to follow up with some bird watching outside once the weather warms up, paying close attention to the birds’ beaks!

Jeweled Turtle

Jeweled Turtle (9).JPG

We seem to be on a bit of a reptile kick lately, and this jeweled turtle helped fill a lazy morning at home. Travis loves to play with clay and aluminum foil, so what a bonus to find a craft that combined the two!

To make your turtle shells, crumple aluminum foil into a ball, and then flatten slightly until you achieve the desired shape.

Jeweled Turtle (1)

Next we rolled little bits of air-dry clay to be the head, arms, legs, and tail of the turtle. Press slightly into the underside of the foil to adhere.

Jeweled Turtle (2)

We pulled out a few sparkly odds and ends from our craft bin to decorate the shell of our turtle, including sequins and glitter glue.

Jeweled Turtle (3)

Once our first turtle was finished (admittedly with lots of adult help), Travis immediately began making a second, and this time I sat back and just watched his imagination go wild!

Jeweled Turtle (7)

The turtle had several heads, bits of clay stuck on top of the shell, eyes in several places that didn’t necessarily make “sense”, and star beads pressed into arms and feet.

Jeweled Turtle (5)

I didn’t lift a finger for this second version, and absolutely loved seeing Travis make his own creation.

Jeweled Turtle (6)

What will your child’s turtle end up looking like? Please describe or post a picture in the comments; we can’t wait to see!

Jeweled Turtle (8)

Paper Tube Snake

Paper Tube Snake (8)

We had good fun with a snake straw puppet a few days ago, and soon decided we needed another slithery friend around the house. Travis enjoyed this method of making a snake even more!

To start, paint cardboard tubes to be the snake’s body. I had one empty paper towel tube and one empty toilet paper tube, which dictated how long our final snake would be. Save lots of tubes and you can make your snake even longer!

Paper Tube Snake (1)

We painted the snake with glitter paint, giving it a very reptilian shimmer, then set it aside to dry.

Paper Tube Snake (2)

Once the paint dries, cut the tubes into pieces (about 3 pieces for a toilet paper roll, and 6 or 7 from a paper towel roll).

Paper Tube Snake (3)

Your child can decorate the snake further by making dots, squiggles, or other designs with more paint or with markers. But Travis decided he liked the glitter plain, and was super excited for the next step because it involved…

The hole punch! He loves practicing with the hole punch on paper, and was very curious to see if he could punch all the way through cardboard. The verdict is that he needed a little extra oomph from mommy’s hands, but he loved the process of punching two holes into each segment of cardboard.

Paper Tube Snake (4)

Next up was lacing. We used a long red string with an eyelet at the end, making it easier to poke through the holes without fraying, but regular yarn would work too. Travis was so proud of his ability to thread up and down through the holes as we attached our snake segments together, declaring at one point, “I love lacing!”

Paper Tube Snake (5)

Once all of your pieces are threaded on the string, tape the back and front end of the string to the cardboard. We left a little extra string at the front so Travis could tug the snake around the room.

Paper Tube Snake (6)

A little glue helped us add googly eyes and a red felt tongue as the finishing touches.

Paper Tube Snake (10)

Pardon the blurry picture, but the snake was wiggling too fast once in Travis’s hands for me to capture a clear image – a sure sign of an enjoyable snake!

Pine Cone Bird Feeder

Pinecone Feeder (6)

With daylight savings officially upon us and darker, colder days here to stay, we’re thinking about the winter to come… and in particular, helping out our feathered friends.

On our latest nature walk, we selected three large pinecones for the project. Travis was very curious to see how we would turn them into bird feeders!

First we needed to smear them with peanut butter, a gooey and fun step.

Pinecone Feeder (1)

To cover the pine cones with bird seed, we filled the bottom of a paper bag with the seeds, added our pine cones, and then shook the bag.

Pinecone Feeder (2)

The shaking was arguably the best part of the project!

Pinecone Feeder (5)

And of course, leftover seeds are fun to play with.

Pinecone Feeder (4)

Ideally, we’d have a tree or bush to hang the feeders from, but the best I could do was to hang them from the bicycle handles on our patio. We can’t wait to see if any feathered friends visit for a nibble!

Pinecone Feeder (7)


Folded Paper Animals

Folded Animals (7)

This rather random activity turned out to be a delight on multiple levels. Your child will learn about animals, exercise their creativity, and enhance their fine motor skills.

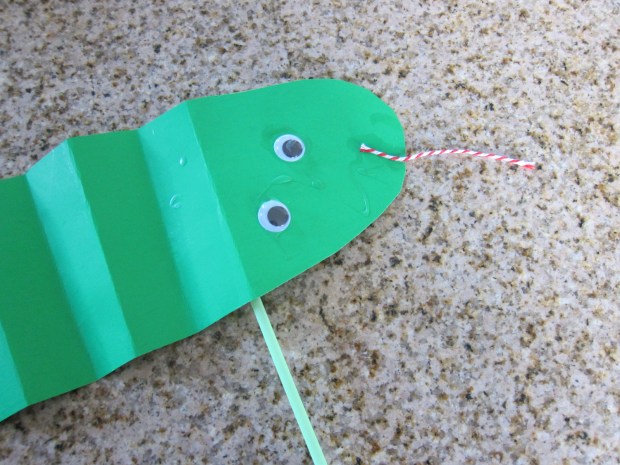
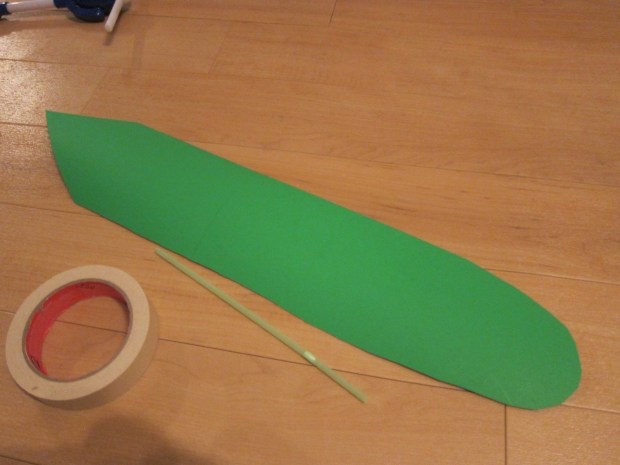
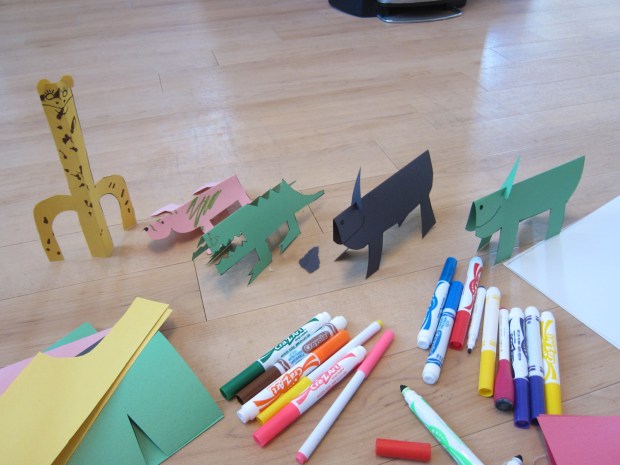
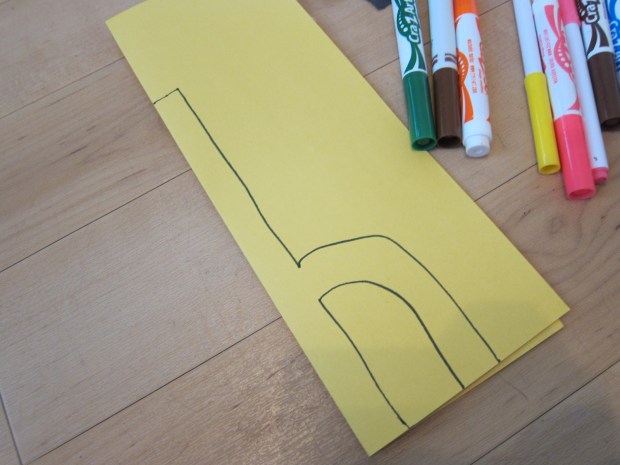
When I asked Travis this morning if he wanted to make safari animals, he eagerly trotted over to see what the project was all about. To make your animals, fold construction paper in half. Draw the outline of an animal in profile, then cut out with scissors and your folded creature will stand on its own two (or four) feet.

Folded Animals (2)

I’m no artist, so I relied heavily on online pictures to get my outlines correct. A giraffe in the shape of an H was the easiest, and one that even kids can try to draw.

Folded Animals (1)

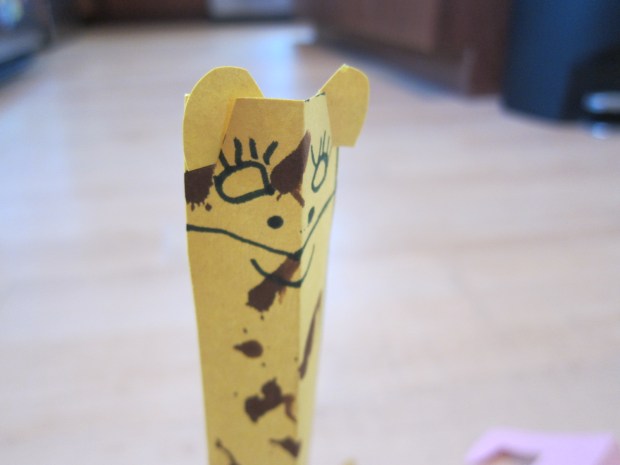
Travis was practically shaking with excitement as I started cutting the giraffe out, and the animal was revealed along the folded line. He decorated the giraffe with brown spots…

Folded Animals (3)

…And then we added slits at the top to insert little yellow ears.

Folded Animals (6)

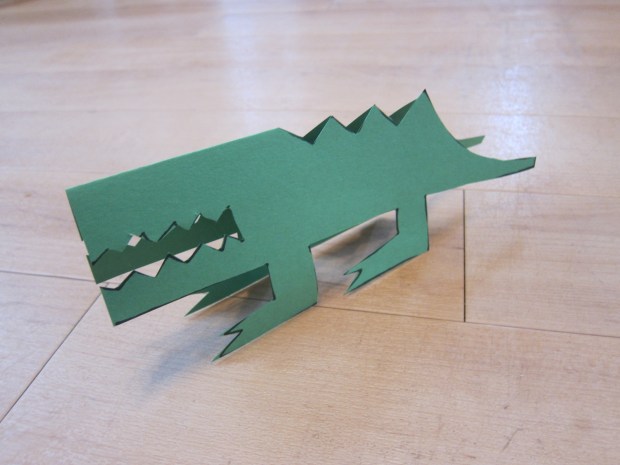
I asked him which animal we should make next, and the only limit was the scope of his imagination! Soon we had a crocodile, a pink polar bear (“Normally they’re white, but let’s make ours pink!” he suggested), a black rhino, and a green rhino. The rhinos are fun because you can add a slit at the top for a horn.

Folded Animals (5)

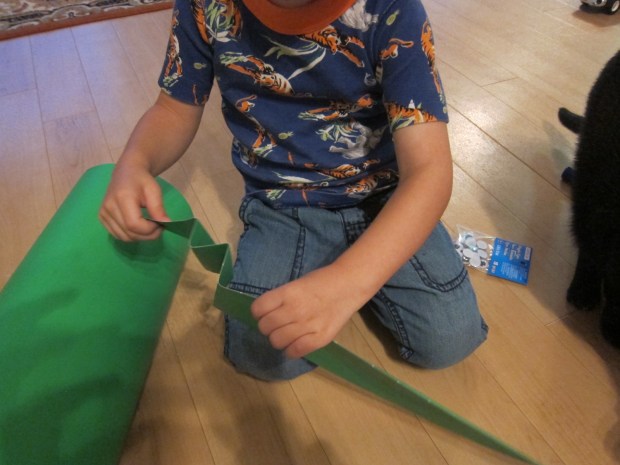
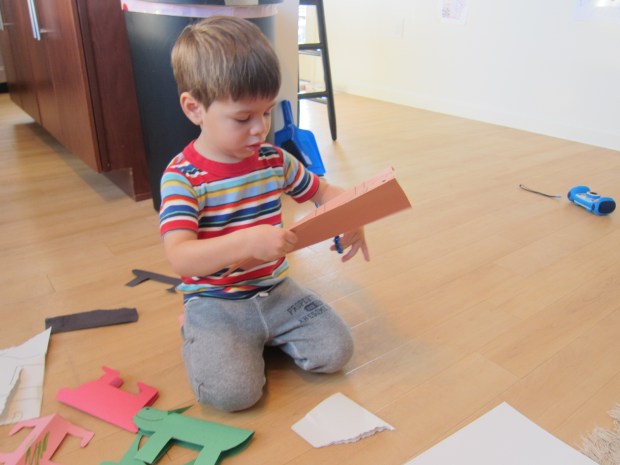
After that Travis was eager to try his own hand at making animals. I drew him a few outlines and he practiced cutting along a line, something we haven’t done much of.

Folded Animals (10)

He asked for a few animals that surprised me – a sheep – and a few that I wasn’t quite able to do – an elephant. I’m really not sure what this red creature below was meant to be, but Travis had fun decorating it!

Folded Animals (8)

He had so much fun playing with the animals while I turned to other tasks around the house, narrating games in the background. And then he decided that we should glue all our animals into one big pile. Not exactly what I’d had planned, but a delight to watch his enjoyment.

What animals would you and your little one like to make? Please share in the comments!

Folded Animals (11)

Snake Straw Puppet

Snake Puppet (5)

Puppet play is always fun, and this one holds particular appeal since kids can easily grasp the straws to wiggle and manoeuver their reptile friend. Honestly, the craft felt a little simple and plain after some of the complicated things we’ve been up to lately, but it’s a cinch to make, and fun to play with, so a win-win!

To make the snake, cut a long rectangle from green paper – poster board or cardstock work better than a flimsier material like construction paper, which could tear easily. Adults, trim one end of the paper into a triangle as the snake’s tail, and make the other end rounded for its head.

Snake Puppet (1)

Show your child how to make accordion pleats along the length of the paper. Travis had a bit of a hard time with this, but I gave him a separate piece of paper to practice on while I folded up our snake.

Snake Puppet (2)

On the contrary though, Travis completely took over when it came to the face, deciding where the glue should go for two googly eyes and a piece of string cut for the tongue. Not bad!

Snake Puppet (3)

Once the glue dries, attach your snake to two straws with masking tape, and slither him around.

Snake Puppet (6)

Travis decided it looked more like a crocodile, since the straws almost look like legs. Crocodile or snake, have fun puppet playing!

Snake Puppet alt